Create Packages
You can create the following installable packages:
- Base Platform: Deploys settings relevant only to Endpoint Privilege Management for Mac.
- EPM: Deploys configuration settings for the EPM (on-premises or EPM) management platform. You can also optionally include Base Platform settings in the same package.
- BeyondInsight: Deploys configuration settings for the BeyondInsight management platform. You can also optionally include Base Platform settings in the same package.
Start the Rapid Deployment Tool
The Rapid Deployment Tool is created and distributed in a DMG file.
- Once the tool is mounted, a dialog box opens. Drag and drop the application into /Applications/. Alternatively, use an install rule using Endpoint Privilege Management for Mac.
Create a Package with Base Settings
Create a package to deploy Endpoint Privilege Management for Mac settings to your macOS computers.
The Base Platform includes settings that are different than Endpoint Privilege Management for Mac policy settings.
At any time when configuring settings on a platform page, click the Home icon to return to the main Rapid Deployment Tool page. Be sure to save any settings changes.
- Start the Rapid Deployment Tool, and then select Privilege Management for Mac Base Platform.
- On the General tab, configure the following:
- Prompt users to copy applications into the applications folder: Also known as the MountAssist feature. Select to inspect any mounted DMG volumes the user downloads and opens for applications that are allowed by the policy. If any are found, the user is automatically prompted to choose whether they want to copy the application to the /Applications location.
- Anonymous Logging: Prevents user/machine identity from being written to audit data. Organizations may need to select this option for legal or other security requirements compliance. This anonymous logging setting is independent of the anonymous logging options residing in the policy.
- Sudo Management Control: When selected, EPM-M ensures that sudo commands consult the endpoint policy. If no match is found in the policy, then the default sudoers behavior is applied.
- Show badge icons for all applications: EPM-M allows users to install and remove applications to the /Applications location by use of a context menu in Finder. When this option is selected, users will see a badge icon indicating this option is available to them.
- Allow biometric authentication in place of password authentication: Select to permit users to authenticate using TouchID authentication rather than a password.
- Do not allow standard users to modify or remove Privilege Management for Mac: Select to prevent Standard Users from tampering with the EPM-M client, all platform adapters, policies, and settings files.
- Enable policy rule caching: EPM-M caching detects and stores user actions that have been repeated recently. This improves performance during user actions which require many execution events within a short period of time (for example, compiling software).
- Enable LegacyUI: Toggle between the new modern UI and the old one. The default state is set to show the new UI. Select Legacy UI to disable the new user interface and revert to the legacy view.
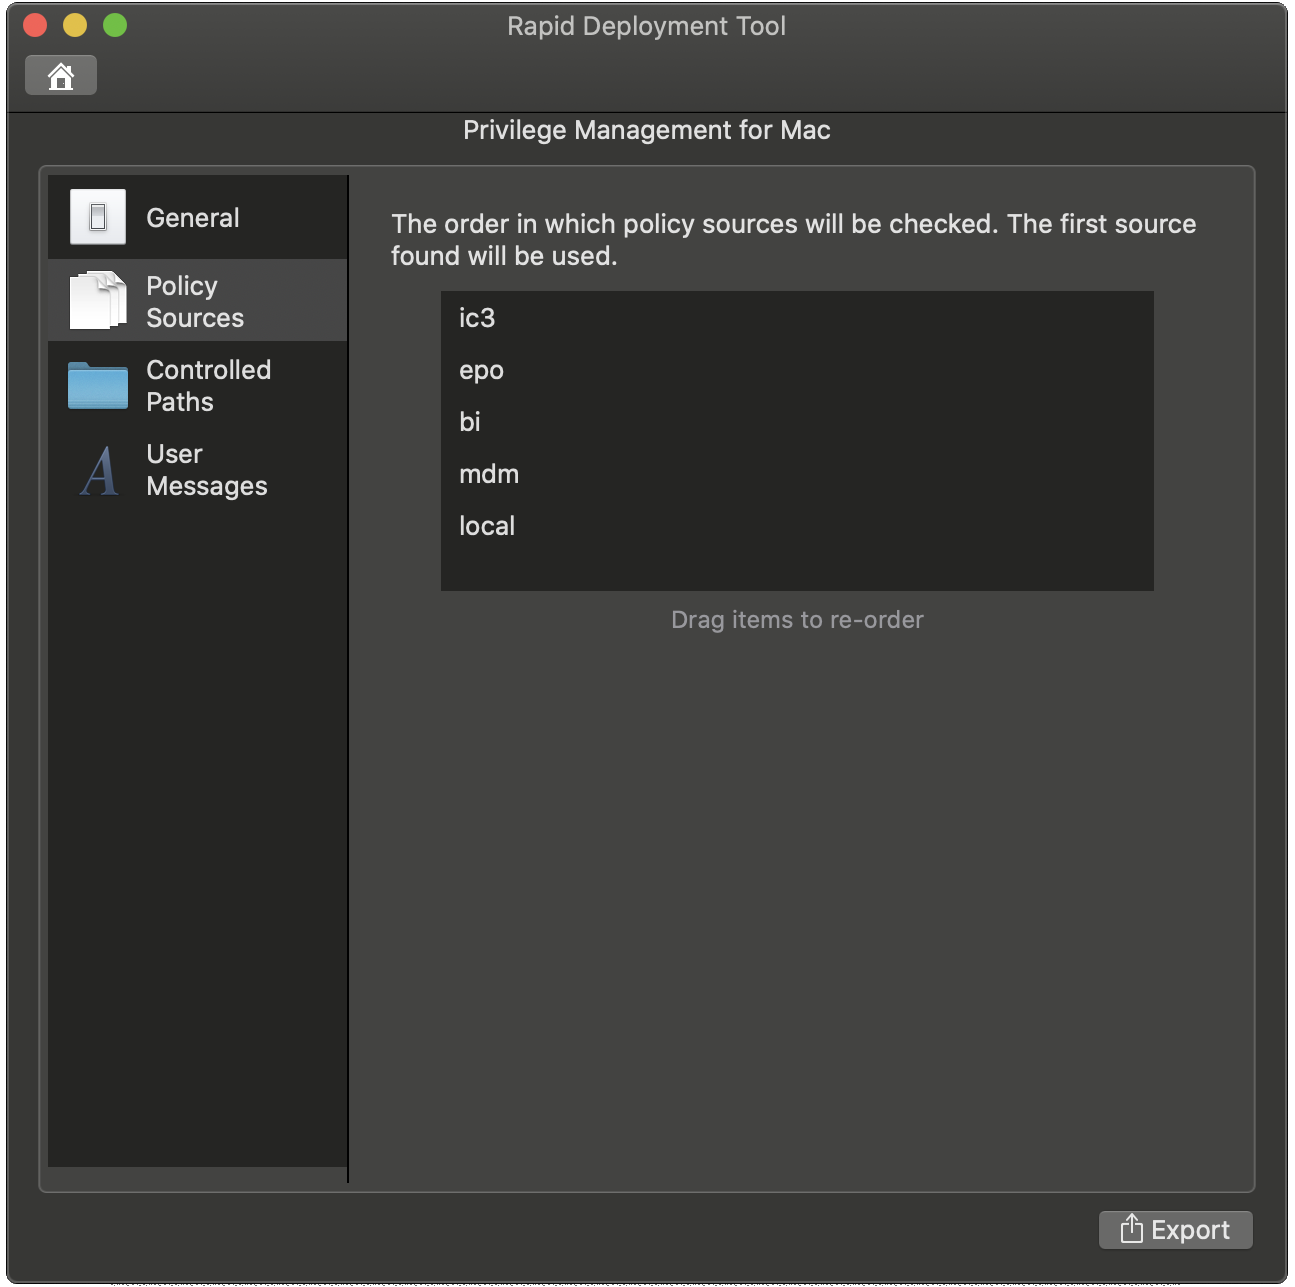
- On the Policy Sources tab, move the policy source you are using to the top of the list.
EPM-M can receive policy from multiple sources. The ordered list is the priority order for loading configurations. The first policy provider found is chosen as the active policy source. No other policy sources will be used.
For example, in the image iC3 is a higher priority than ePO. If an endpoint has policies from both providers (not recommended) then only the iC3 policy applies to the endpoint.
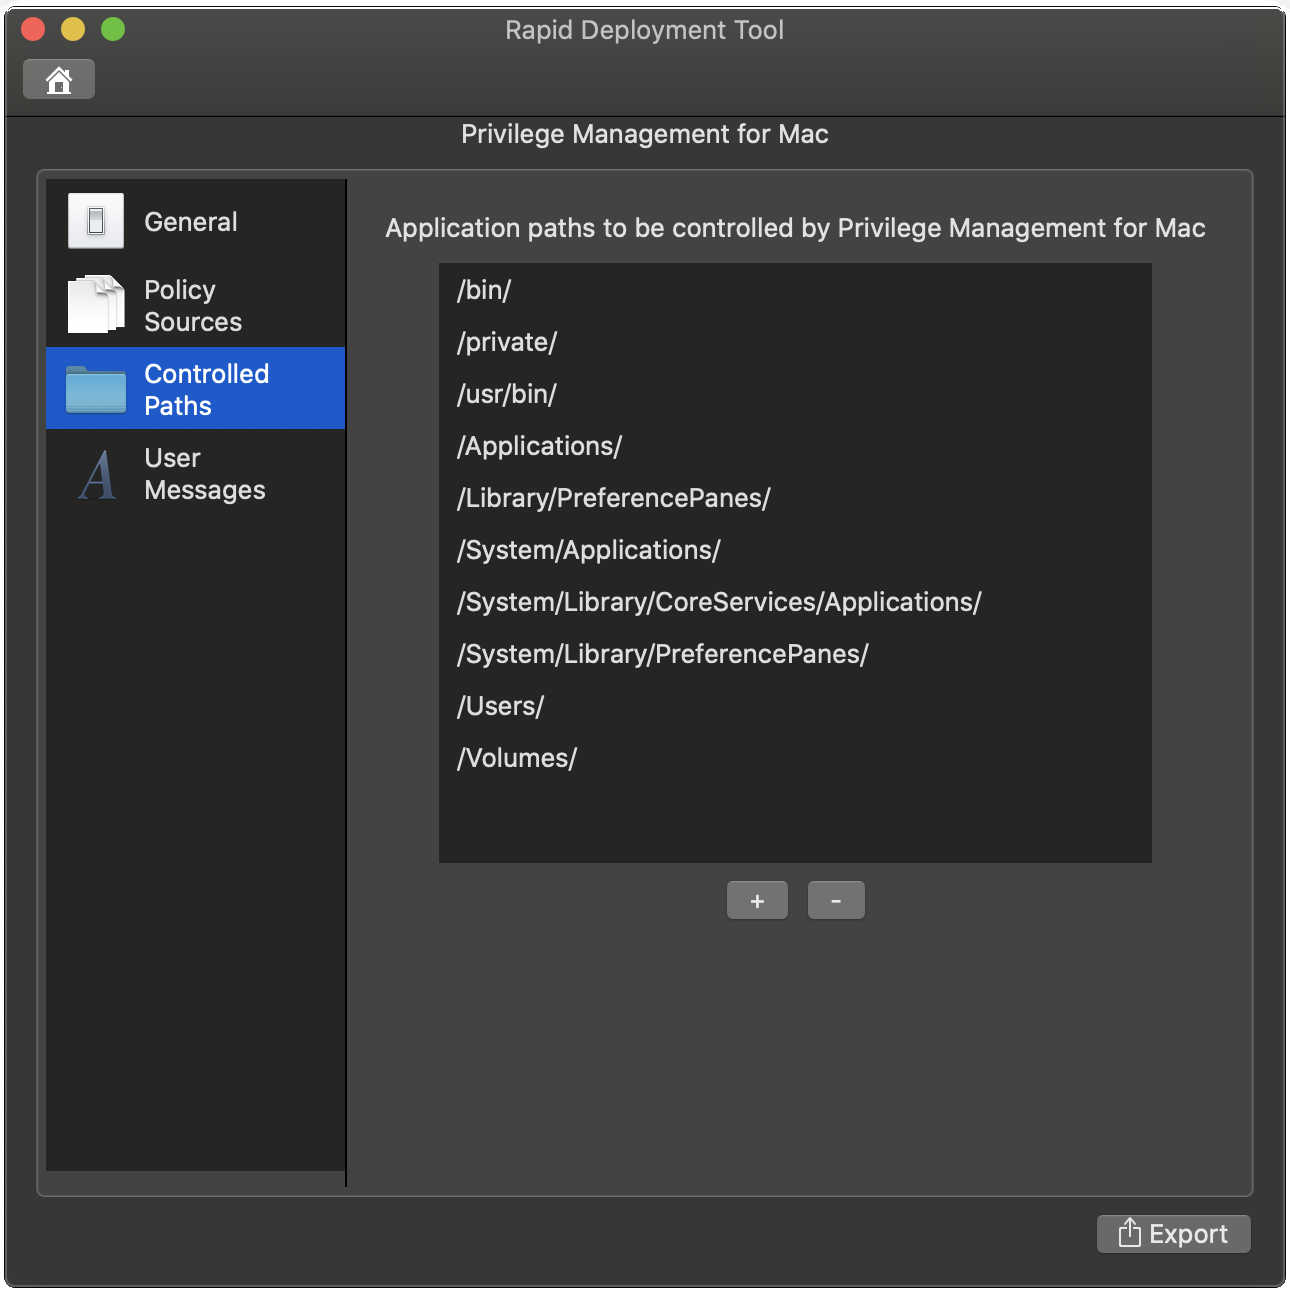
- On the Controlled Paths tab, add or remove application paths to be controlled by EPM-M. The locations listed are subject to Application Control rule processing. If an application is launched from a location which is not in this list, then it will not be subject to Application Control.
- On the User Messages tab, customize the messages presented to the user by the MountAssist feature. You can use the following placeholders for the message format: [APP_NAME] and [MOUNT_NAME].
- After you select options, click Export. Select to save the settings to a file or export to Jamf.
- Select a folder for the output file. The name of the file generated is always the same. If you select a folder that already contains a file of the same name, you cannot continue.
- On user messages for DMGs, see Manage Disk Mounted Images in the Endpoint Privilege Management for Mac Guide
- On Jamf integration, see Export a Package to Jamf
Create a Package for EPM
Create a package that provides the configuration settings for macOS computers to communicate to the EPM instance. A package can be created for EPM on-premises or EPM platforms.
Optionally, configure the settings at the same time as the platform. Settings for both can then be included in the same package.
At any time when configuring settings on a platform page, click the Home icon to return to the main Rapid Deployment Tool page. Be sure to save any settings changes.
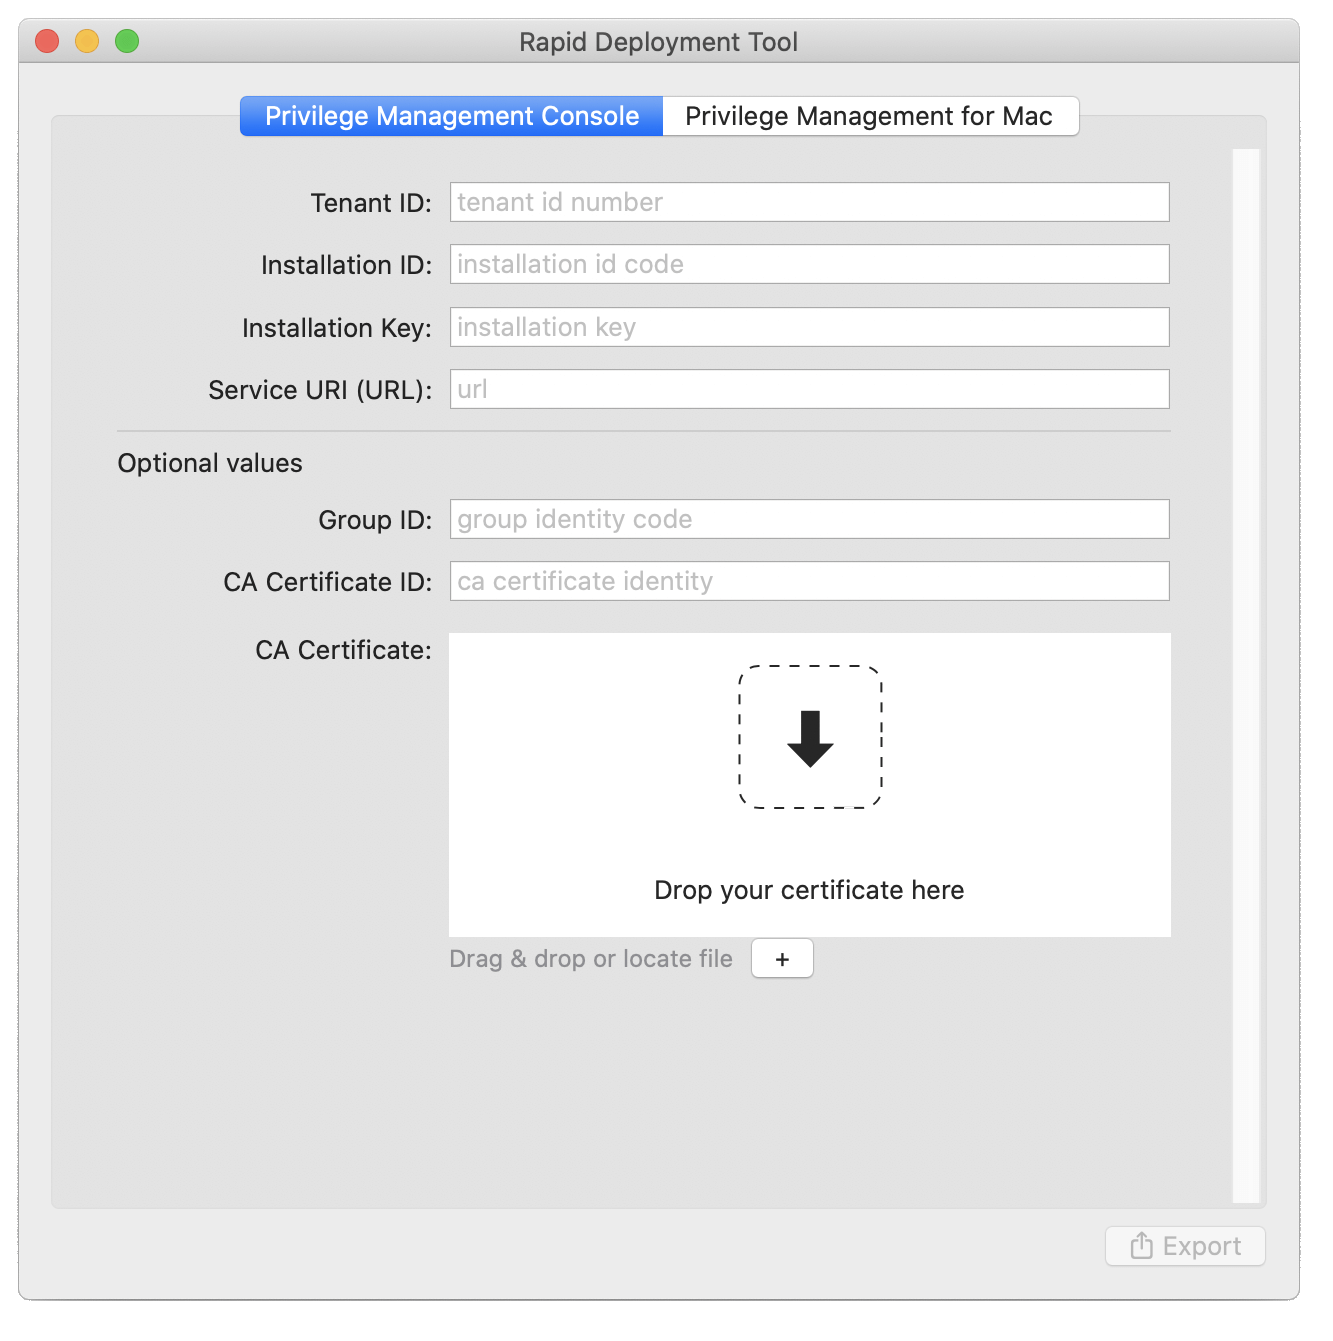
- Start the Rapid Deployment Tool, and then select the Privilege Management Console platform.
- Configure the following settings:
- Tenant ID: GUID found on the EPM portal (environment to connect to).
- Installation ID: GUID found on the EPM portal (environment to connect to).
- Installation Key: GUID found on the EPM portal (environment to connect to) .
- Service URI: The URL for your EPM instance. Usually in the format of https://pmcqa.epm.beyondtrustcloud.com. The URL is provided by the EPM system administrator.
- Group ID: Optional. GUID. If defined, the endpoint will be automatically assigned to that specific group.
- CA Certificate ID: Optional. The SHA-1 of a root Certificate Authority (CA) certificate or not specified when using a globally signed certificate.
- CA Certificate: Optional. If the webserver certificate is not signed by a globally trusted CA, the CA certificate must be distributed to the endpoints so that the system accepts the SSL negotiation. We do not recommend using self-signed certificates. At a minimum, use a privately managed CA.
- Select the settings to export: management platform, the base platform, or both.
- Click Export, and then select Package or Jamf.
- Save the file.
For more information, see:
- About Jamf integration, see Export a Package to Jamf.
- For EPM, see Install the Windows Adapter and Install the Mac Adapter in the Endpoint Privilege Management Administration Guide
- For EPM on-prem configuration for macOS, see Endpoint Privilege Management QuickStart.
- For EPM on-prem configuration for Windows, Endpoint Privilege Management QuickStart.
Create a Package for BeyondInsight
Create a package that provides the configuration settings for macOS computers to communicate to the BeyondInsight instance.
Optionally, configure the Privilege Management for Mac settings at the same time as the platform. Settings for both can then be included in the same package.
At any time when configuring settings on a platform page, click the Home icon to return to the main Rapid Deployment Tool page. Be sure to save any settings changes.
- Start the Rapid Deployment Tool, and then select the BeyondInsight platform.

- Configure the following settings for the BeyondInsight platform:
- URL: The URL to the BeyondInsight server that is used for Central Policy management.
- Cert Name: The name of the BeyondInsight client certificate used to communicate with BeyondInsight. The certificate file name is eEyeEMSClient.
- Workgroup: The name of the Workgroup that is sent to BeyondInsight to assist when grouping assets.
- Heartbeat Interval: The frequency interval, in minutes, to send a heartbeat to BeyondInsight. The heartbeat check ensures the endpoint can communicate to BeyondInsight.
- Policy Interval: The frequency interval, in minutes, to poll for new policies.
- Policy Interval Variance: The upper limit of random number of minutes to add on to the policy interval to prevent overloading the server.
- Add client certificate: The name of the BeyondInsight client certificate used to communicate with BeyondInsight. The certificate file name is eEyeEMSClient. You can use a partial certificate name that enable connections to an endpoint. Use wildcards to set a partial certificate name, for example, Hostname.EyeEmsClient, can be matched with *.EyeEmsClient or *.?yeEmsClient.
- Select the settings to export: management platform, the base platform, or both.
- Click Export, and then select Package or Jamf.
- Save the file.
For more information about Jamf integration, see Export a Package to Jamf.
Digitally Sign a Package
Packages are not digitally signed.
If you distribute PKG files to end users to run directly, then they must be aware that packages must be signed using their Apple development program certificate. Otherwise, the OS might prevent an end user from running an unsigned package.