Discover and Import Accounts, Services, and Endpoints Using BeyondTrust Vault
With the BeyondTrust Vault add-on, you can discover Active Directory accounts, local accounts, Windows service accounts, and endpoints. Jumpoints are used to scan endpoints and discover the accounts associated with those endpoints.
BeyondTrust Vault provides a built-in discovery tool to automatically find these accounts, endpoints, and services. Once discovered, results can be imported into your Vault for use.
For more information on Jumpoints, please see the BeyondTrust Privileged Remote Access Jumpoint Guide.
Initiate a Discovery Job for a New Domain
- From the /login interface, navigate to Vault > Discovery.
- Click New Discovery Job.
- Leave the default Windows Domain option selected, and then click Continue.
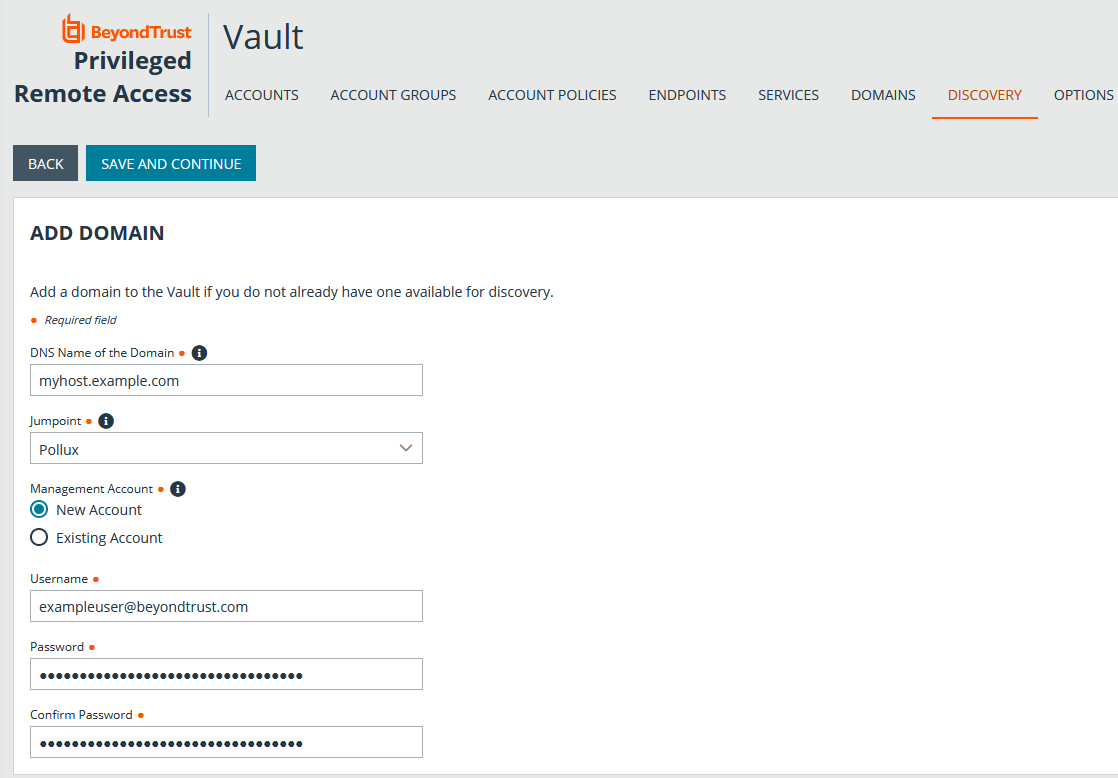
- If a domain doesn't exist in Vault, you are presented with the Add Domain form to add one. If a domain does exist in Vault, you are presented with the option to select a new or existing domain to discover. Select the New Domain option.
- Enter a valid fully qualified DNS address for the domain you are performing the discovery action on.
- Choose an existing Jumpoint located in the environment where you wish to discover accounts.
The Jumpoint field is required for discovery. Enter the DNS name of a domain controller within the environment you wish to scan. Discovery is currently supported on Windows Jumpoints only.
- Select the Management Account needed to initiate the discovery job. Using a new account requires a Username, Password, and Password Confirmation.You may also use an existing account.
This account is used to connect and perform the discovery of accounts and endpoints in the specified domain. Enter a functional account that has permissions to change and reset passwords.
- Click Save and Continue.
Define the Discovery Scope
-
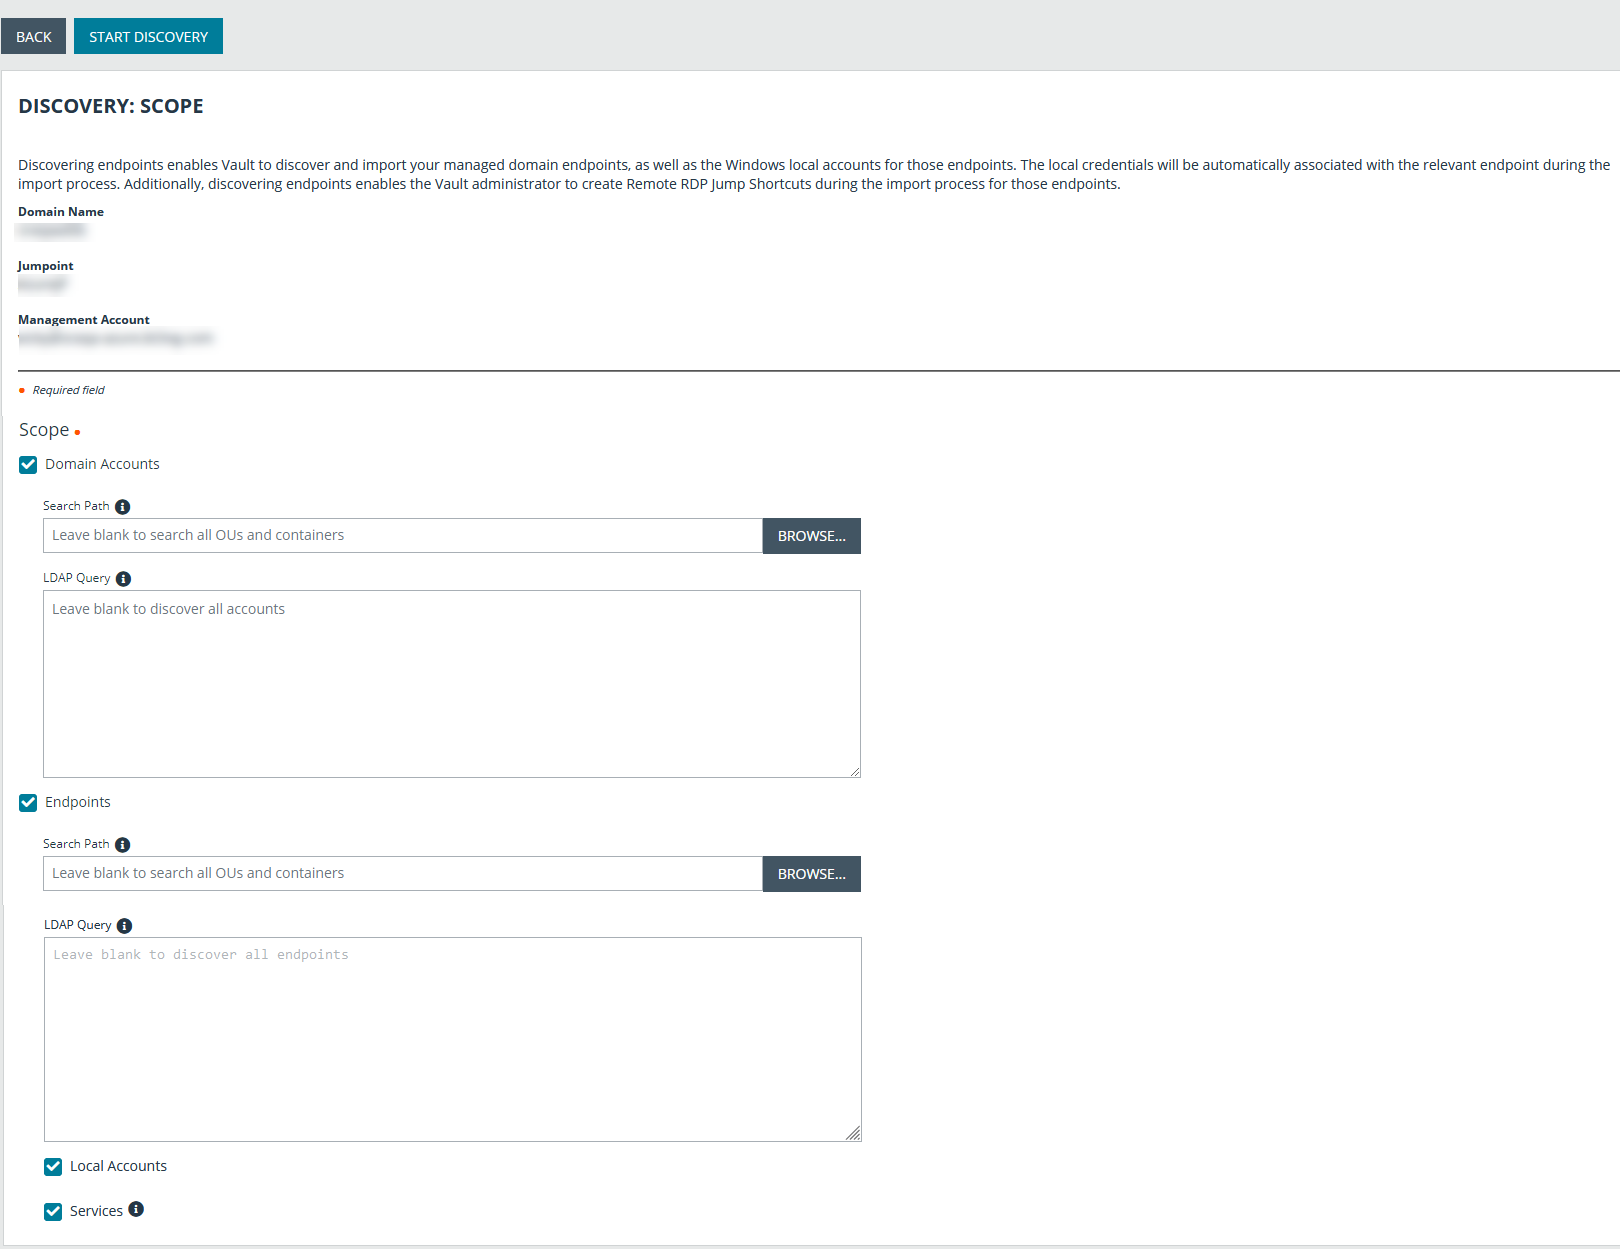
Select the types of objects you wish Vault to discover:
- Domain Accounts
- Endpoints
- Local Accounts
- Services
Discovery of Services is available only if Domain Accounts, Endpoints, and Local Accounts are selected; only Windows service accounts are discovered.
- Enter a Search Path, or leave it blank to search all OUs and containers.
- Click Browse to refine your search by specifying which OUs to target.
- Use the LDAP Query field to narrow the scope of user accounts and endpoints searched.
- Once the scope is defined, click Start Discovery.
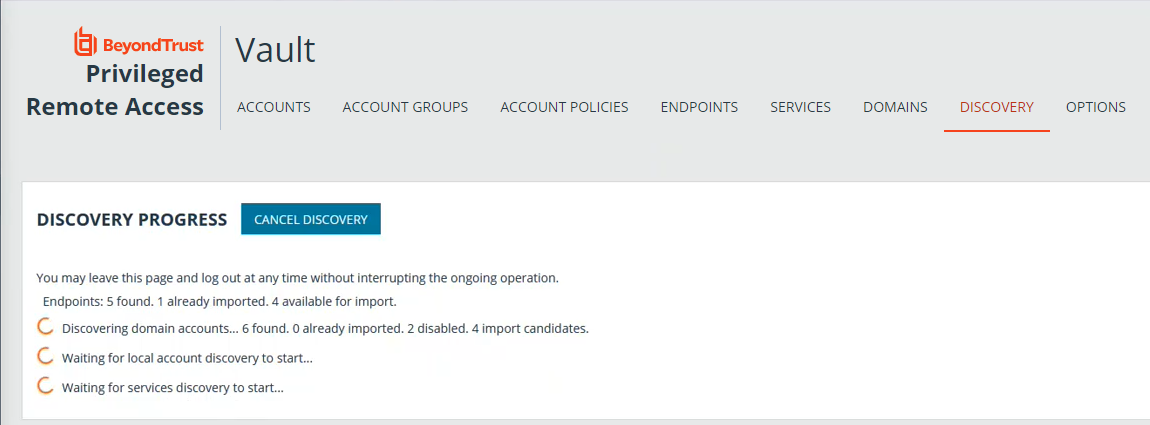
The discovery process can take some time. While discovery is under way, the Discovery Progress screen appears and tracks the number of accounts and endpoints discovered.
Import Discovered Endpoints Accounts and Services
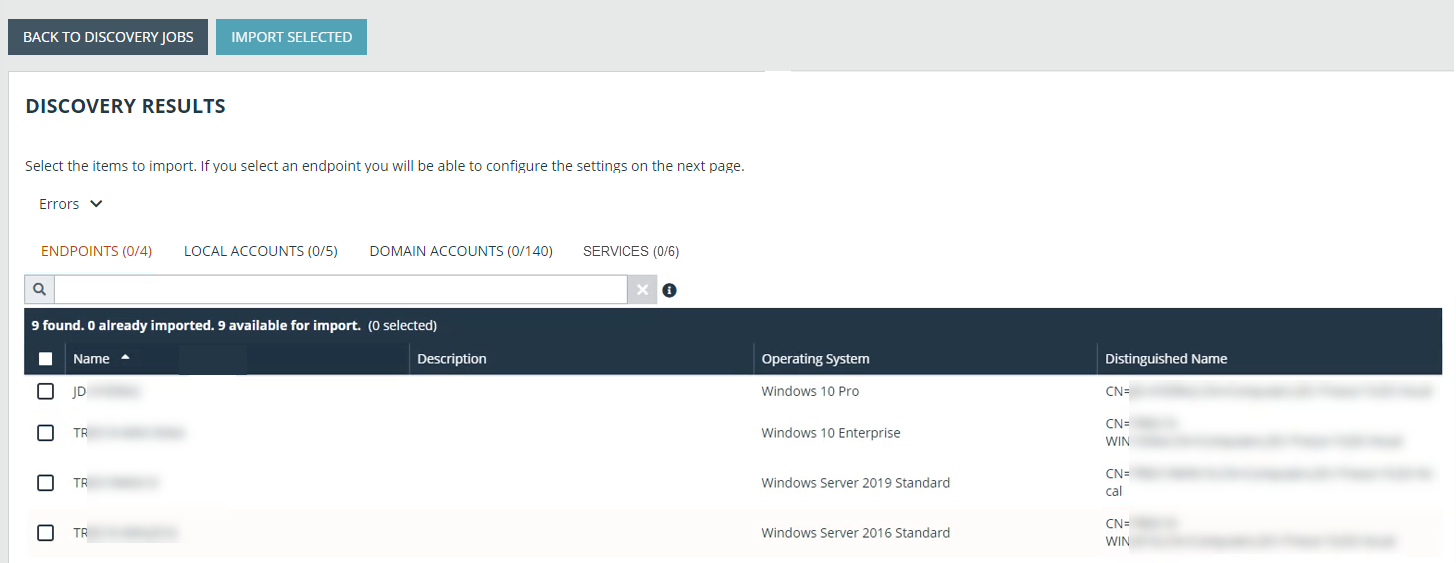
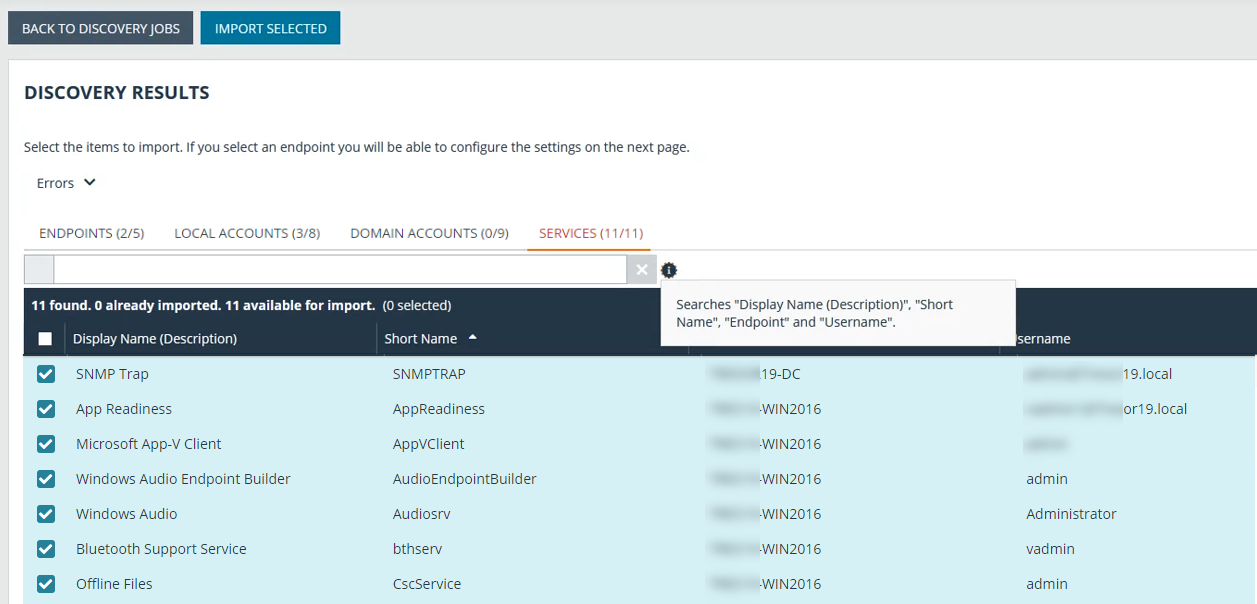
Once the discovery job is complete, a Discovery Results page appears. You can switch between the Endpoints, Local Accounts, Domain Accounts, and Services tabs to view the discovered items and import them. Importing items saves them for later use in your Vault.
- Endpoints: Shows the Name and Description of the endpoints discovered, as well as their Operating System and Distinguished Name.
- Local Accounts: Shows the Username, Endpoint (system associated with account), Description, Last Login Date, Password Age, and Status for all discovered local accounts.
- Domain Accounts: Shows the Username, Distinguished Name, Description, Last Login Date, Password Age, and Status for all discovered domain accounts.
- Services: Shows the Display Name (Description) (name displayed in Services snap-in), Short Name (name used by Service Controller command line tool, Endpoint (system where service is used) , and Username (account used to run the service) for all discovered service accounts.
The user must have permission to use Remote RDP Jump Technology in order to import discovered endpoints.
- Choose any of the tabs: Endpoints, Local Accounts, Domain Accounts, or Services.
- Select the items you wish to import, and then click Import Selected.
You can filter the list of items based on their attributes using the filter box above the grid. For each tab, click the i next to the filter box to see which attributes can be searched.
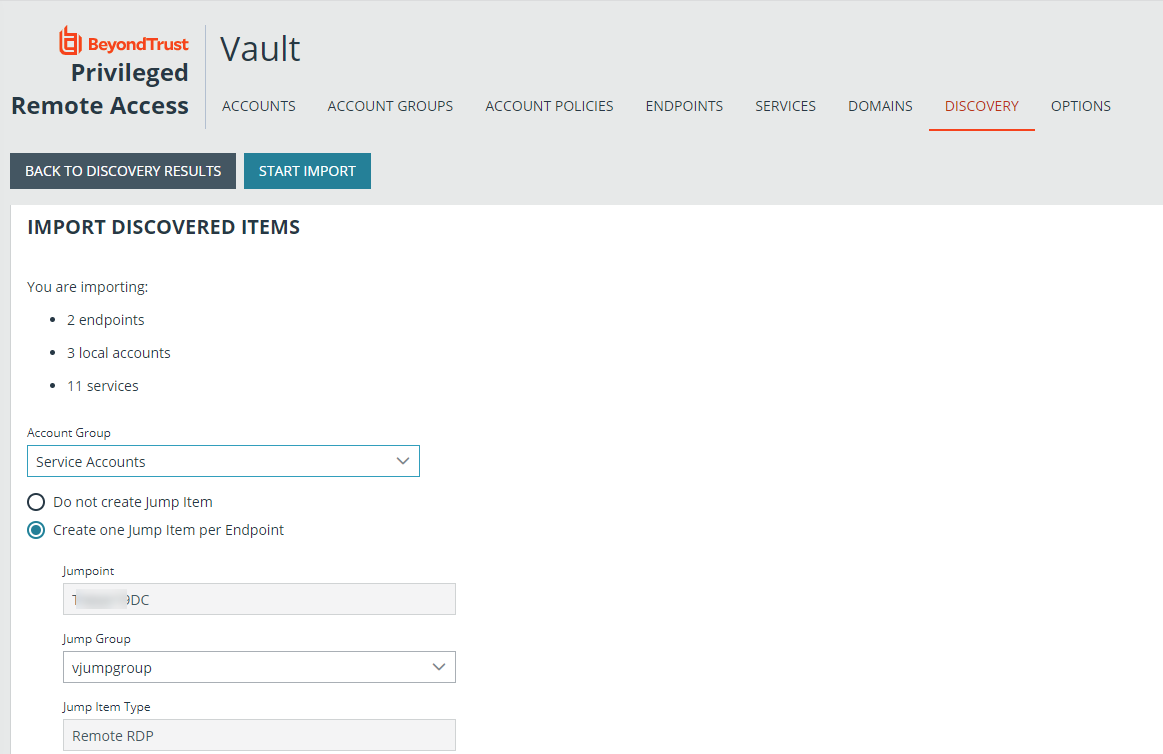
- The Import Discovered Items page appears, listing the number of endpoints, accounts, and services selected for import. If importing endpoints and services, select a Jump Group from the list or select the Do not create Jump Item option. If importing accounts, select an Account Group from the list.
- Click Start Import.
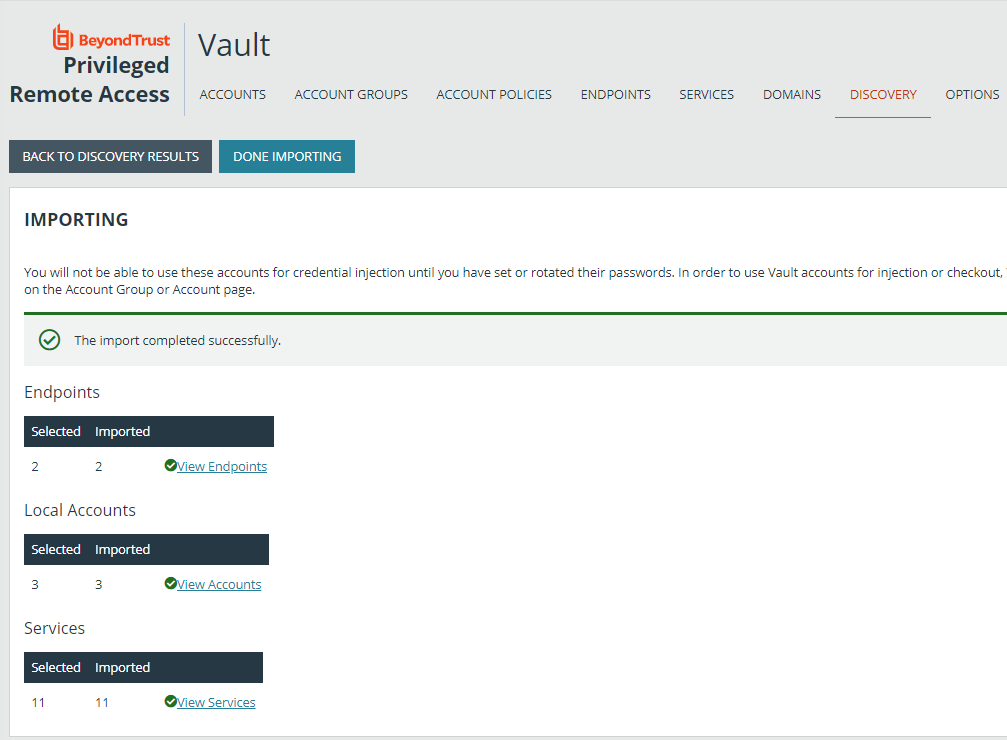
- A status page appears, indicating the import completed successfully, and lists the number of endpoints, accounts, and services imported. You can click the links to view the specific items that were imported. Click Done Importing to close the status page.
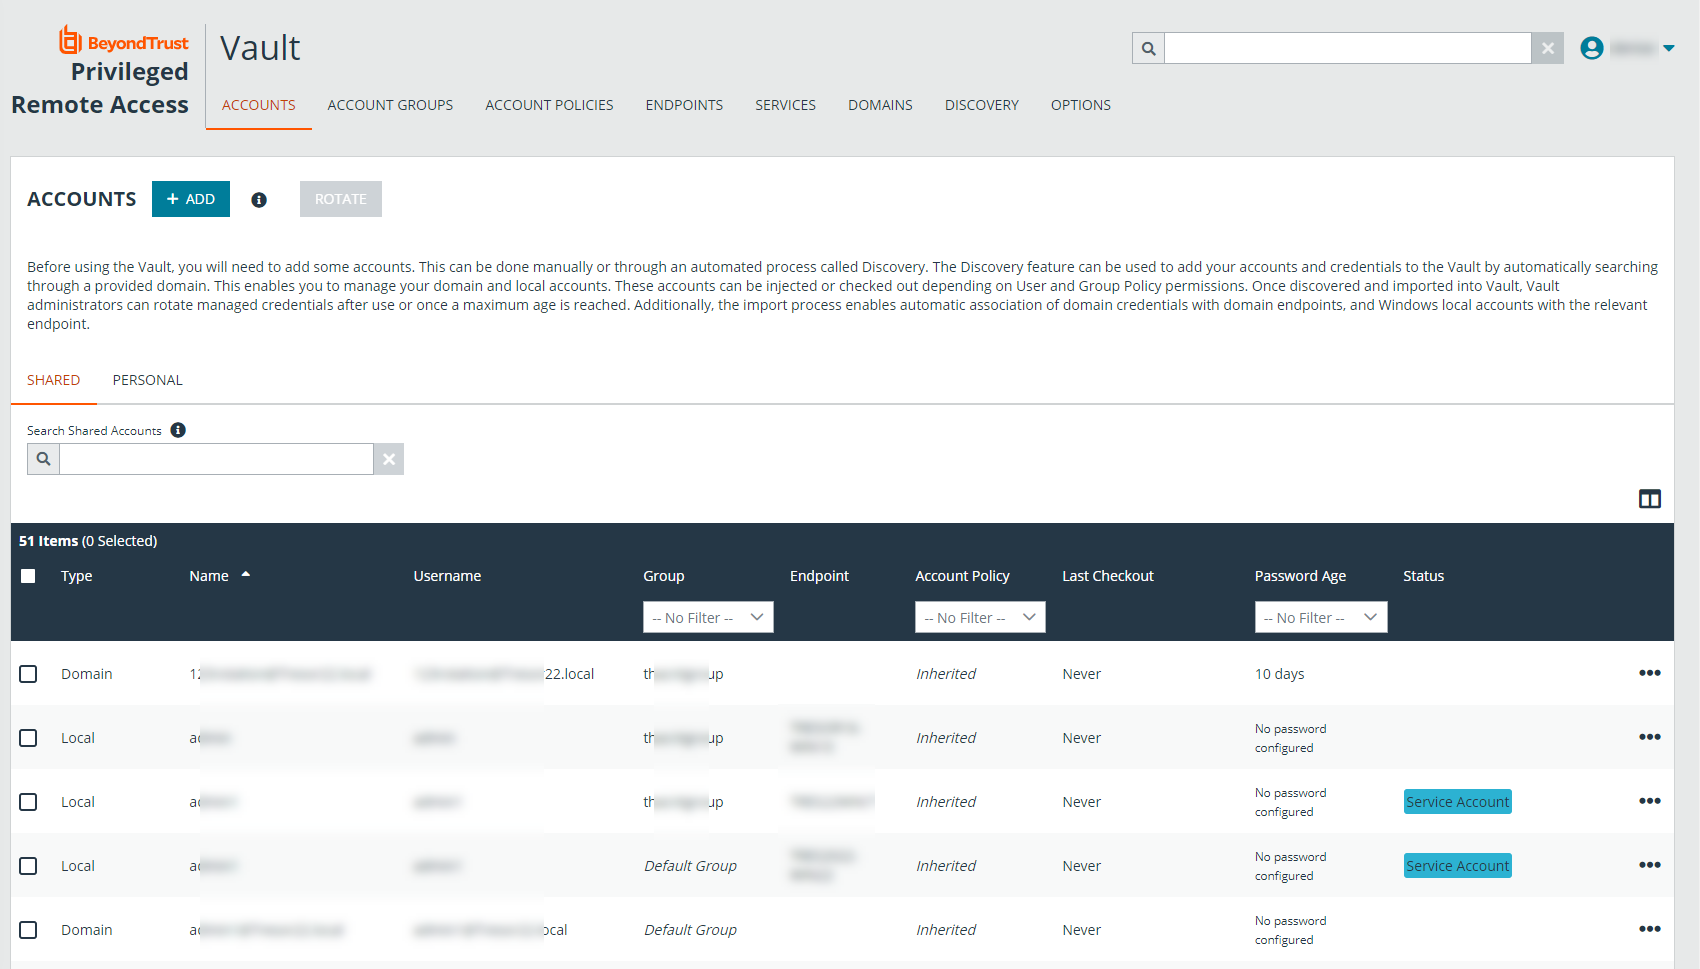
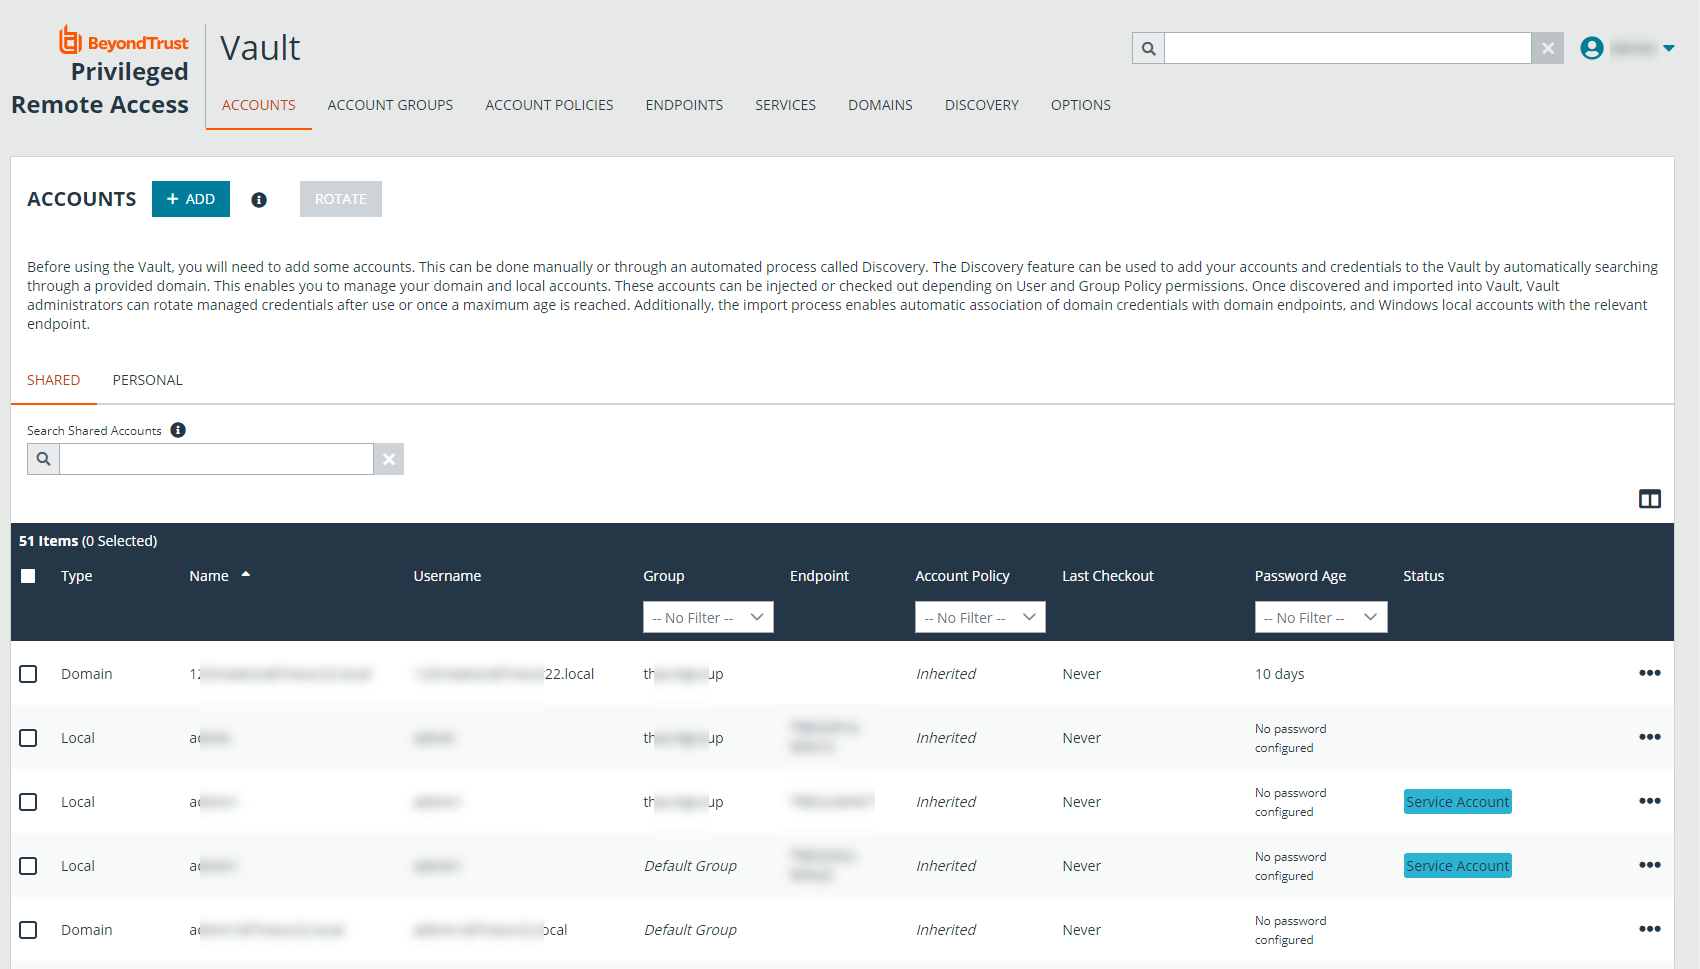
Upon successful import, the accounts, endpoints, and services are listed in the grids on the Accounts, Endpoints, and Services pages in /login > Vault.
On the Accounts page, the endpoints associated with the shared accounts are indicated for each account, and if the account is used to run a Windows service, this is indicated in the Status column.
On the Endpoints page, the number of accounts, Jump Items, and services associated with each endpoint is indicated. You can view the specific associated accounts, Jump Items, and services by clicking the links.
For imported endpoints, RDP Jump shortcuts are created with an automatic association to local accounts.
Click the Select visible columns button above the grid to customize the columns displayed in the grid.
Non-domain linked endpoints can be associated with RDP items for improved security and user experience. To create the association, click Jump Items on the Endpoints screen. Then click Add and select Add Remote RDP Jump Shortcut or Associate Existing RDP Jump Shortcuts.
If associating an existing shortcut, click the shortcut(s) to add, and then click Associate Selected.
On the Services page, the endpoints and accounts associated with each service are indicated, as well as the last status of the service. Also, from the Services page, you have the option to restart the service upon rotation of the service account by checking the Restart box for the service.
Initiate a Discovery Job for an Existing Domain
Discovery jobs can be initiated on domains that have already been added or imported to BeyondTrust Vault. From /login, you can initiate a discovery job from the Vault > Domains page and also from the Vault > Discovery page. Both methods are documented below.
From Vault > Domains Page
- Click the Discover button for the domain.
- Define the scope of the discovery, and then click Start Discovery.
- Select the items to import from the discovery results and start the import.
From Vault > Discovery Page
- Click New Discovery Job.
- Leave the default Windows Domain option selected, and then click Continue.
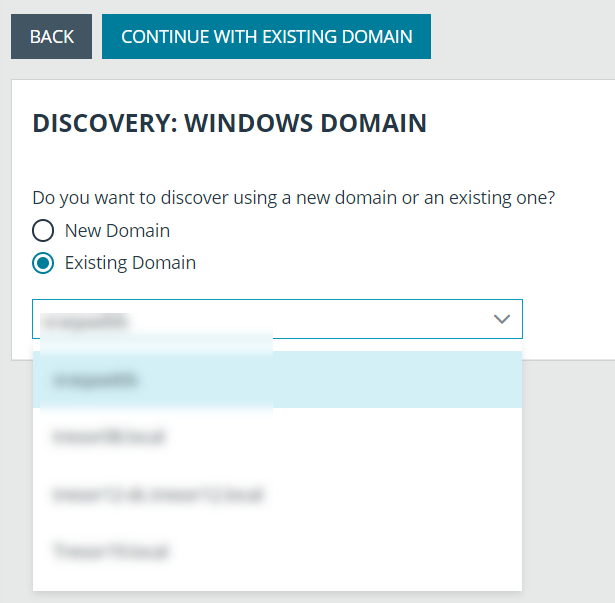
- Select Existing Domain.
- Select the domain from the dropdown list.
- Click Continue with Existing Domain.
- Define the scope of the discovery, and then click Start Discovery.
- Select the items to import from the discovery results and start the import.
Discovery and Rotation of Vault Accounts — Port Requirements
Active Directory:
- Port 389
- Port 636
Local Account Management:
-
Port 445
Schedule Discovery Jobs
Schedule Discovery Job for a New Domain
- From the /login interface, navigate to Vault > Domains.
- Click Add.
- Follow the same steps as detailed above for initiating a discovery job for a new domain, but also set the Scheduled Domain Discovery settings.
- Click Save. The discovery job runs on the days and time you specify.
- To import items discovered from scheduled jobs:
- Navigate to Vault > Discovery.
- Locate the completed scheduled job. (Scheduled jobs are indicated as being performed by System.)
- Click View Results for the completed job.
- Import selected items.
Schedule a Discovery Job for an Existing Domain
- From the /login interface, navigate to Vault > Domains.
- Click the Edit button (pencil icon) for a listed domain.
- Scroll down to the Scheduled Domain Discovery section and check Enable Schedule Delivery.
- Select the days and time for the schedule.
- Define the Discovery Scope, and then click Save.
For more information, please see the following:
