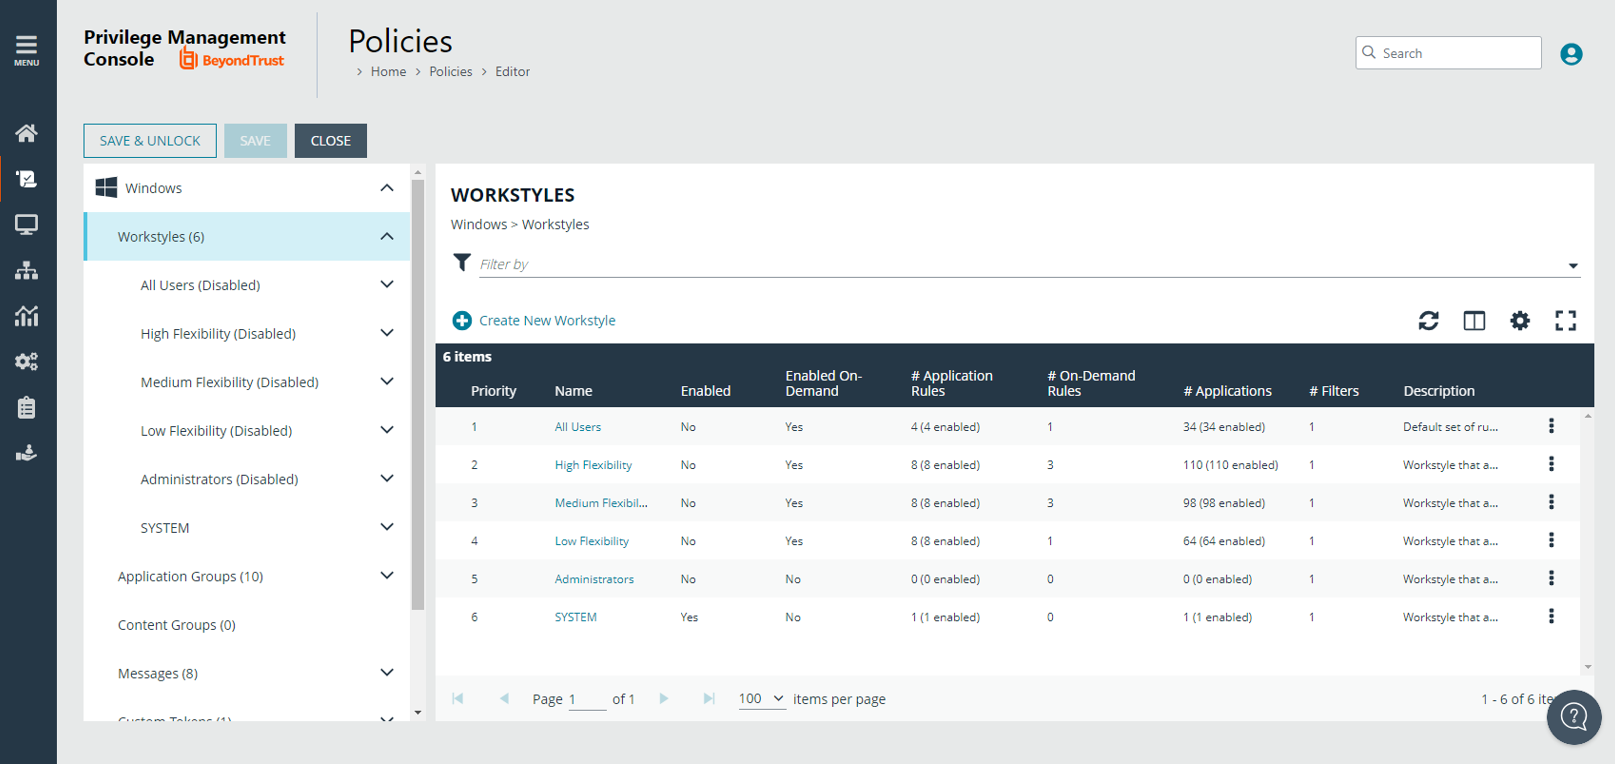
Workstyles

A Workstyle is a container for the rules that will be applied to the computers receiving the policy. If you are using a Windows or macOS Quickstart template, the Workstyles include predefined rule configurations.

If creating policy from a blank template, there is no predefined configuration.

Workstyles page in Endpoint Privilege Management.

  • Add and change the properties for a rule
  • Enable Trusted Application Protection (optional)
  • Add monitoring and logging
  • Change the ordering of Workstyle processing
  • Enable the Workstyle


For more information about QuickStart templates, please see Use Quickstart Templates.

Set up Logging for Privileged Applications and Processes

Privilege monitoring logs all privileged actions run by the application or process that would fail under a standard user account. These include file operations, registry operations, and any interactions with other components such as Windows services.

Applications included in privilege monitoring:

  • Applications running under a privileged account, such as an administrator or power user.
  • An application added to an Application Rule or On-Demand Application Rule that is set up to run with elevated privileges.

Add logging and monitoring to a Workstyle in EPM

Configure privilege monitoring when you create or edit a Workstyle.

Privilege monitoring logs are recorded on each endpoint.

Privilege monitoring is available only on Windows.


For more information about privilege monitoring, contact your BeyondTrust consultant.

Privilege Monitoring Events

  • Log Event to Application Event Log: Logs an event to the Application event log the first time an application performs a privileged operation.
  • Log Cancel Events (message cancelled ): Raises an event when a user cancels an end user message, either by clicking the Cancel button, by clicking the Email button, or by clicking a Hyperlink. You can configure the user action using policy parameter [PG_ACTION], which can be used by the script to perform different audit actions based on the user interaction. To log Cancel Events, enable Raise an Event for the rule that has been matched.

Privilege Monitoring Log Files

The following privilege monitoring options are available:

  • Log Application Activity to Log Files: Check the box to turn on logging.
  • Application Summary and Activity: Select to log information about the application and unique privileged activity (Default option).
  • Application Summary and Detailed Activity: Select to log information about the application and all privileged activity.
  • Maximum Activity Records Per Process: Set the maximum number of records logged per process (Default 100).
  • Keep Application Activity Logs for (Days): Set how long activity logs are kept before they are purged (Default 14 days).

Enable a Workstyle

By default, a Workstyle is disabled when initially created. Enable a Workstyle when configuration is complete and ready for the production environment.

Disable the Workstyle whenever you need to change the configuration.

  1. Go to the Policy Editor, and then navigate to Workstyles.
  2. Select a Workstyle, and then select Enable from the menu.

Set the Order for Workstyle Processing

Workstyles are evaluated in the order they are listed. When an application matches on a Workstyle, no further Workstyles are processed for that application.

Ensure the order of the Workstyles is correct because it is possible for an application to match more than one Workstyle.

To change the order:

Workstyle precedence in the web EPM Policy Editor

  1. Select a Workstyle in the list to change the order.
  2. Use the buttons to move the rule to the preferred location.

    Changes are automatically saved.


Search a Policy

Search policy configuration in Endpoint Privilege Management for Windows and Mac

The search feature facilitates ease-of-use searching when trying to find specific details about policy configuration.

  • Finds all search results for workstyles in the policy.
  • Displays the exact location in the policy.
  • Provides linked text to go to that area of the policy and edit the policy, if necessary.
  • If you are viewing the policy in read-only mode, you can click the link to drill down, but you cannot edit the policy setting.

  • Searches on Windows and macOS policies, and includes:
    • Application Groups
    • Applications (including application matchers)
    • Application Rules
    • On-Demand Rules
    • Account Filters
    • Computer Filters
  • Saves the 5 most recent searches.
  • Displays up to a maximum of 500 matches to ensure optimal performance.

Application Rules

Application Rules can be used to enforce allow listing, monitoring, and assigning privileges to groups of applications. They are a set of rules that apply to the applications listed in the Application Group.

Create an Application Rule

  1. On the Policy Editor page, expand Windows.
  2. Expand the Workstyles node, and then expand a Workstyle.
  3. Click Application Rules, and then click Create New.
  4. Set the following:
    • Target Application Group: Select an Application Group.
    • Action: Select Allow, Allow as Password Safe User, Block, or Request. The action that occurs if the application in the targeted Application Group is launched by the end user.
    • Password Safe Account Name: Enter the Managed Account name configured in Password Safe for the computer.
    • Run Rule Script: Assign a rule script that runs before the Application Rule triggers. Select a rule script from the list.
    • End User Message: Select a message from the list.
    • Access Token: Select the type of token to pass to the Target Application Group. You can select from:
      • Passive (No Change: No changes are made to the token. This is essentially an audit feature.
      • Enforce User's Default Rights: Removes all rights and uses the user's default token. Windows UAC always tries to add administration rights to the token being used so if the user clicked on an application that triggers UAC, the user cannot progress past the UAC prompt.
      • Drop Admin Rights: Removes administration rights from the user's token.
      • Add Full Admin (Required for installers): Standard Windows Admin token containing all Admin privileges. Use the full admin token in scenarios where your users require privileges SeDebugPrivilege or SeLoadDriverPrivilege. An example use case is MSI files running in a client/server mode where SeDebugPrivilege is required to interact with the server component which runs as SYSTEM. This only applies to cases where the standard user needs to run the MSI directly.
      • Add Basic Admin Rights: Permits elevation of most applications and tasks. We recommend using this token as the default elevation token. This access token is essentially full admin but excludes the following privileges: SeDebugPrivilege and SeLoadDriverPrivilege. If users need to debug applications or access drivers, then use the full admin token.
      • Privilege Management Support Token: Applies Add Full Admin privileges with tamper protection removed.
      • Keep Privileges - Enhanced: This token behaves similar to the Passive (no change) token in that there is no change to privilege, elevation, or integrity level. Uses the same privileges of the original process token and adds some additional context to it: the token is added to the anti-tamper group and will be tracked by the advanced parent tracking feature. This access token can only be used with application rules.
    • Raise An Event: Off, On, Anonymous. Select if an event is raised if this Application Rule is triggered. When on, an event is sent to the local event log file. Anonymous removes user and host name from events so the user / host are not identifiable.
    • Run an Audit Script: Select an audit script from the list.
    • Privilege Monitoring: Off, On, Anonymous. Select On to raise a privileged monitoring event.
    • Reporting Events: On by default, click to turn off. When the setting is on, events are raised for viewing in EPM Reporting.
  5. Click Create Application Rule.

Set the Order for Rules Processing

If you add more than one Application Rule to a Workstyle, entries higher in the list have precedence. When an application matches an Application Rule, no further rules or Workstyles are processed. If an application could match more than one Workstyle or rule, then it is important that you order both your Workstyles and rules correctly.

Select an Application Rule in the list to change the order. Changes are automatically saved.

Create On-Demand Application Rules

Create an on-demand rule to start an application with specific privileges (usually admin rights) from a Windows right-click context menu. The on-demand application rule triggers when the context menu item is selected.

On-demand integration settings in EPM.

Before creating an on-demand rule, you can set the behaviour for the right-click context menu on the On-Demand Integration Settings page. In the Policy Editor, go to Windows > Workstyles > <workstyle name> > On-Demand Application Rules.

  • Apply the on-demand application rules to the "Run as administrator" option: Select to override the Run as administrator right-click context menu. The labeling of the menu does not change in this instance. This setting applies to all versions of Windows that have the Run as administrator context menu.
  • Add a custom on-demand option to the Classic Shell context menu (this won't affect the "Run as administrator" option): Select to add a new option to the right-click context menu. Select a language and the option text. You can add text like Run with Endpoint Privilege Management for Windows. This setting applies to the Classic Windows Shell only.
  • Hide "Run as" and "Run as administrator" commands in the Classic Shell context menu: Select to hide these menu items, where present, from the right-click context menu. This setting applies to the Classic Windows Shell only.

To create an On-Demand Application Rule:

  1. Expand Workstyles, and then expand a Workstyle.
  2. Select On Demand Application Rules.
  3. Click Create New.
  4. Set the following:
    • Raise An Event: Off, On, Anonymous. Select if an event is raised if this Application Rule is triggered. When on, an event is sent to the local event log file. Anonymous removes user and host name from events so the user / host are not identifiable.
    • Click Create On-Demand Rule.
    • Target Application Group: Select an Application Group.
    • Action: Select Allow, Allow as Password Safe User, Block, or Request. The action that occurs if the application in the targeted Application Group is launched by the end user.
    • Password Safe Account Name: Enter the Managed Account name configured in Password Safe for the computer.
    • Run Rule Script: Assign a rule script that is run before the Application Rule triggers. Select a rule script from the list.
    • End User Message: Select a message from the list.
    • Access Token: Select the type of token to pass to the Target Application Group. You can select from:
      • Passive (no change): Doesn't make any change to the user's token. This is essentially an audit feature.
      • Enforce User's default rights: Removes all rights and uses the user's default token. Windows UAC always tries to add administration rights to the token being used so if the user clicked on an application that triggers UAC, the user cannot progress past the UAC prompt.
      • Drop Admin Rights: Removes administration rights from the user's token.
      • Add Full Admin (Required for installers): Standard Windows Admin token containing all Admin privileges. Use the full admin token in scenarios where your users require privileges SeDebugPrivilege or SeLoadDriverPrivilege. An example use case is MSI files running in a client/server mode where SeDebugPrivilege is required to interact with the server component which runs as SYSTEM. This only applies to cases where the standard user needs to run the MSI directly.
      • Add Basic Admin Rights: Permits elevation of most applications and tasks. We recommend using this token as the default elevation token. This access token is essentially full admin but excludes the following privileges: SeDebugPrivilege and SeLoadDriverPrivilege. If users need to debug applications or access drivers, then use the full admin token.
      • Privilege Management Support Token: Applies Add Full Admin privileges with tamper protection removed.
    • Raise An Event: Off, On, Anonymous. Select if an event is raised if this Application Rule is triggered. When on, an event is sent to the local event log file. Anonymous removes user and host name from events so the user / host are not identifiable.
    • Run an Audit Script: Select an audit script from the list.
    • Privilege Monitoring: Off, On, Anonymous. Select On to raise a privileged monitoring event.
    • Reporting Events: On by default, click to turn off. When the setting is on, events are raised for viewing in EPM Reporting.

Integrate BeyondTrust Password Safe

Password Safe users can be included in an Application Rule or On-Demand Application Rule to help manage access to applications.

Password Safe must already be installed and configured.

For more information, please see the Password Safe Integration Guide.

Use the following procedure to set up the integration to Password Safe. After this initial setup is complete, you can edit the Application Rule or On-Demand Application Rule to allow Password Safe users.

  1. On the Policy Editor page, expand Windows.
  2. Expand the Workstyles node, and then expand a Workstyle.
  3. Select Application Rules or On Demand Application Rules, and then click Integration Settings.
  4. From the Activation list, select one of the following: Not Configured, Enabled, or Disabled.
  5. Set a heartbeat interval. This is the time span the computer polls Password Safe unless the time is determined by Password Safe. For most subsequent messages, the poll time is driven by Password Safe in the messages it sends to Endpoint Privilege Management for Windows. This is because Password Safe knows when the next scheduled action must be performed.
  6. Click Update Settings.

Configure Local Account Discovery

Configure a discovery scan to detect unmanaged accounts on an endpoint. The scan results are sent to Password Safe.

  1. On the Policy Editor page, expand Windows.
  2. Expand the Workstyles node, and then expand a Workstyle.
  3. Select Application Rules or On Demand Application Rules, and then click Integration Settings.
  4. From the Activation list, select Enabled.
  5. Set an account discovery interval.
  6. Click Update Settings.

Trusted Application Protection Rules

Use Trusted Application Protection (TAP) rules to dynamically evaluate DLLs for trusted applications for each Workstyle.

Unless a DLL has a trusted publisher and a trusted owner, it is not allowed to run within the TAP application.

  • Trusted Publisher: A trusted publisher must be signed. In addition, the publisher certificate must be valid, in date, and not revoked.
  • Trusted Owner: A trusted owner is any owner that is in the default Windows groups Administrators, SystemUser or TrustedInstaller.

TAP rules affect the following applications:

  • Microsoft Word, Microsoft Excel, Microsoft PowerPoint, Microsoft Publisher, Adobe Reader 11 and earlier, Adobe Reader DC, Microsoft Outlook, Google Chrome, Mozilla Firefox, Microsoft Internet Explorer, Microsoft Edge

You can turn on monitoring for TAP applications in any Workstyle.

To create a TAP rule:

  1. Expand Workstyles, and then expand a Workstyle.
  2. Select Trusted Application Protection.
  3. In the Rule section, set the following:
    • Trusted Application Protection: From the list select Enabled, Disabled, or Not Configured. The first Workstyle evaluated that has TAP set to Enabled or Disabled is matched by Endpoint Privilege Management for Windows, meaning subsequent Workstyles are not evaluated by Endpoint Privilege Management for Windows.
    • Action: Select from Passive (No Change) or Block. The selected action is applied when the DLL in the TAP application tries to run.
    • End User Message: Select if a message is displayed to the user when the DLL tries to run (regardless of if it is allowed to run). We recommend using messages if you are blocking a DLL from running, so the end user has some feedback.
  4. In the Auditing section, select On or Anonymous. This setting determines if an event is raised when the TAP application tries to run a DLL. When auditing is on, the event is sent to the local event log file. Anonymous removes user and host name from events so the user and host details are not identifiable.
  5. In the Reporting Options sections, select Reporting Events to capture events.
  6. Click the Configure Exclusions link to add DLLs to exclude from the TAP applications rule. These are DLLs that have either an untrusted owner or an untrusted publisher, but you still want to be allowed to run with TAP enabled in the Workstyle. This list of DLLs is not validated. If the DLL name listed is not matched by the client, then nothing is excluded.

Block Loading of Trusted DLLs

A number of the DLLs from Microsoft's Recommended Blocklist can easily be blocked to prevent potential attacks from threat actors.

  1. Go to the Security Enhancements tab for the workstyle where you want to enable DLL control.
  2. Click the toggle to turn on blocking.

While Microsoft recommends blocking these DLLs, there are legitimate use cases. If required, you can change the setting to allow loading.

Unblock DLL in a EPM Workstyle to allow loading the DLL.

  1. Select the DLL to unblock, and then click Allow Loading.
  2. To reverse the action and block the DLL, select the DLL and click Block Loading.

    Some of the DLLs are allowed by default. Please see the next section to see why and if you need to adjust any options.


Windows Version Specific DLLs

A number of the recommended DLLs to block are specific to certain versions on certain Windows 10 versions. For example, it is advised to block the DLLs if you are running Windows 10 1607 or Windows 10 1809. These are identified in the list with the either RS1 Windows 1607 or RS5 Windows 1809 labels.

Additionally, Windows creates some cached versions of DLLs that have different names and properties. Ensure DLLs with a Native Image version are set to blocked, when required. You can identify these in the list with the Native image label.

For more information, please see Microsoft recommended block rules.

General Rules

To view or edit the general rules of a Workstyle, select Windows > Workstyles > 'Workstyle Name' > General Rules.

The general rules include the following:

  • Collect User Information: When enabled, raises an audit event each time a user logs on to the client machine.
  • Collect Host Information: When enabled, raises an audit event on computer start-up or when the Endpoint Privilege Management for Windows service is started.
  • Prohibit Privileged Account Management: When enabled, blocks users from modifying local privileged group memberships. This prevents real administrators, or applications which have been granted administrative rights through Endpoint Privilege Management for Windows, from adding, removing, or modifying a privileged account.

    The local privileged groups that cannot be changed when this rule is enabled:

    • Built-in administrators
    • Power users
    • Account operators
    • Server operators
    • Printer operators
    • Backup operators
    • RAS servers group
    • Network configuration operators
  • Enable Windows Remote Management Connections: When enabled, authorizes standard users who match the Workstyle to connect to a computer remotely using WinRM, which would normally require local administrator rights. This general rule supports remote PowerShell command management and must be enabled to allow a standard user to execute PowerShell scripts or commands.

To allow remote network connections, you may be required to enable the Windows Group Policy setting to access this computer from the network.

For more information, please see the following:

Filters

A Workstyle filter refines when a Workstyle is applied. Workstyle filters apply to Windows and macOS systems.

By default, a Workstyle applies to all users and computers who receive it. However, you can add one or more filters that restrict the application of the Workstyle:

  • Account Filter: Restrict the Workstyle to specific users or groups of users.
  • Computer Filter: Restrict the Workstyle to specific computers (names or IP addresses), or Remote Desktop clients.
  • WMI (Windows Management information) Filter: Restrict the Workstyle based on the success or failure of a WMI query.

The following conditions can be applied to a filter:

  • ALL filters must match: The Workstyle is applied only if all filters match.
  • ANY filter can match: The Workstyle is applied when any filter matches.

Account Filters

An account filter restricts a Workstyle to specific users or groups of users. Account filters can be created for Windows and macOS Workstyles.

There are two ways to add groups:

  • Add local Active Directory domain groups and users
  • Set up a connector that populates group information from your local Active Directory domains or your Microsoft Entra ID instance.

For more information about AD connectors, see Configure Active Directory Connectors.

To create an account filter:

  1. Expand a Workstyle, and then select Filters.
  2. Select the Account Filters tab, and then select Create New Account Filter.
  3. Select the new filter in the list, and then select Go To from the menu.
  4. Select one of the following:
    • Add Account (Windows): Add an account name and SID details. Click Add Account.
    • Add Account from Search (Windows): Select a connector from the list. Go to step 5.
    • Add Account: (macOS). Add the account or group details. User IDs on macOS must be values greater than 500. A value less than that might be used by a system process.

Add an AD connector in Account Filters workstyle in EPM Policy Editor.

  1. If you select Add Account from Search, select a connector on the Add From AD Connectors page. The default connector is Built-In. Enter search criteria in the Account Name box to find a specific account.
  2. Select the account name, and then select Add.


Computer Filters

A computer filter can be used to target specific computers and remote desktop clients. You can add a computer using either its host or DNS name, or by an IP address.

Computer filters can be configured on Windows and macOS computers.

To restrict the Workstyle to specific computers by IP address:

  1. Expand a Workstyle, and then select Filters.
  2. Click Create New Filter, and then select Computer Filter.
  3. Enter the IP address manually, in the format 123.123.123.123. Optionally, use asterisk wildcard (*) and - for range, as shown: 127.*.0.0-99.
  4. (Windows only) Select Match the remote desktop (instead of the local computer) if the computer filter is intended to match the IP address of remote computers using remote desktop sessions.
  5. Click Add.

To restrict the Workstyle to specific computers by host name:

  1. Expand a Workstyle, and then select Filters.
  2. Click Create New Filter, and then select Computer Filter.
  3. Enter one or more host names, separated by semicolons. You can use the * and ? wildcard characters in host names.
  4. (Windows only) Select Match the remote desktop (instead of the local computer) if the computer filter is intended to match the IP address of remote computers using remote desktop sessions.
  5. Click Add.

WMI filters

A WMI filter is applied to a Workstyle based on the outcome of a WMI query.

When a WMI query runs, the client checks whether any rows of data are returned. If any data is returned, then the WMI query is successful. If no data is returned or an error is detected, the WMI query is unsuccessful.

WMI queries are always run as the Windows SYSTEM account, and cannot be executed against remote computers or network resources. WMI filters do not support impersonation levels, and can only be used with SELECT queries.

To create a WMI filter:

  1. Expand a Workstyle, and then select Filters.
  2. Click Create New Filter, and then select WMI Filter.
  3. Click the WMI Filter link in the list. Alternatively, select Go To from the menu for that filter.
  4. Click Create New Query.
  5. Enter the following details:
    • Description: Free text to describe the WMI query.
    • Namespace: Set the namespace that the query runs against. By default, this is root\CIMV2.
    • Query: The WMI Query Language (WQL) statement to execute.
    • Timeout: The time (in seconds) the client waits for a response before terminating the query. By default, no timeout is set. Long running WMI queries result in delayed application launches. Therefore, we recommend setting a timeout to ensure that queries are terminated in a timely manner.
  6. Click Add Query.

For more information, please see WMI (Windows Management information) Filters.