Configure Password Safe access policies
An access policy defines the time frame and frequency that users can request passwords, remote access sessions, or access applications under Password Safe management.
An access policy is selected when you are configuring the Requester role.
Create an access policy
- Go to Configuration > Privileged Access Management Policies > Access Policies.
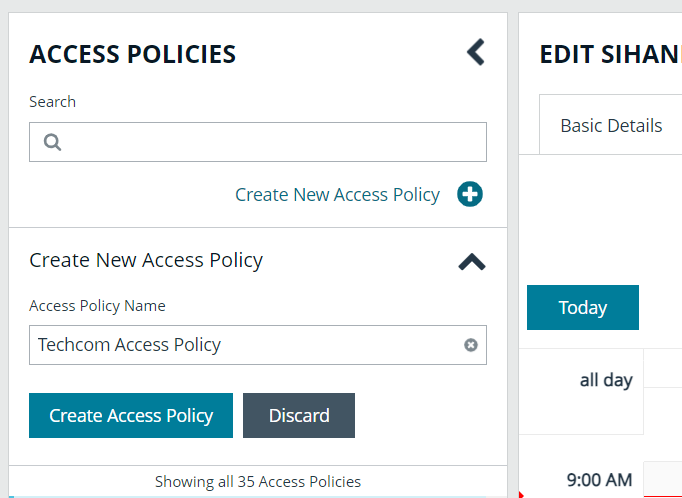
- In the Access Policies pane, click Create New Access Policy.
- Enter a name for the policy, and then click Create Access Policy.
- On the Basic Details tab:
- Enter a description for the policy.
- Optionally, enable the Email Notifications option to send emails when a request is received for the policy.
Recipients may receive a large number of email notifications. Selective use of this option is strongly advised. Multiple addresses cannot be added at once. Each email address must be added one at time by clicking Add Another Email.
- Select the Schedule tab, and then click Create Schedule.
- Configure the recurrence, time, and date settings for the policy. If you select a daily recurrence, you can optionally select Allow multi-day check-outs of accounts. This option allows the user continuous access to a granted request over a span of days.
- Optionally, enable the Enable Location Restrictions option, and then select a location from the list.
- If applicable, select an address from the X-Forwarded-For list. This field is an allowed value of X-Forwarded-For header, which was added by an F5 load balancer or proxy. It uses address groups to verify if the IP address is to be in that list. The URL and named host will be ignored. If the X-Forwarded-For field has a value of Any, then no X-Forwarded-For header is required or verified. In the case where it is configured, the X-Forwarded-For header is required and its value should be in the list of IPs in the address group.
CheckLocationAllowed: XForwardedForHeaderValue 1.1.1.1 is not registered/trusted. Add this XForwardedForHeaderValue to the TestGroupName Address group
- Select the type of access to permit: View Password, RDP, SSH, or Application.
- For each type of access selected, configure the parameters as required. Descriptions for each parameter are as follows:
| Approvers | Select the number of approvers required to permit access. Check Auto Approve if the requests do not require any approvers. |
| Allow API Rotation Override |
Check this option for View Password access, to allow API callers such as Password Safe Cache to override the Change Password After Any Release managed account setting for view-type requests. |
| Record | Check the box to record the session. |
| Keystroke Logging |
Keystrokes can be logged during RDP, SSH, and application sessions. Uncheck the boxes for each policy type to disable keystroke logging for that type. |
| Enhanced Session Auditing | Enhanced session auditing applies to RDP and application sessions and is on by default. Click the toggle to turn off enhanced session auditing. |
| Concurrent | Set the number of sessions permitted at a time. Check Unlimited to permit the user any number of connections to occur at the same time. |
| Log off on Disconnect |
Check this box to automatically log off the user when the connection to the session disconnects or the session window closes. This option applies only to RDP and RDP application sessions, and is active only when Enhanced Session Auditing is enabled. If the session has been terminated by an Active Sessions reviewer, the logoff on disconnect occurs regardless of the access policy setting. |
| Force Termination |
Check this box to close the session when the time period expires. When Log off on Disconnect is also selected, the user is logged off the session. This check box applies to RDP, SSH, and application sessions. When the Requested Duration (as entered by the user on the Requests page in the web portal) is exceeded, the session ends if the Force Termination box is checked for the access policy. The default and maximum release durations are configured on the Managed Accounts page and Managed System Settings page. |
| RDP Admin Console |
Select this option to show the RDP Admin Console check box on RDP-based requests. This option allows administration of a Remote Desktop Session host server in console mode (mstsc /admin). This can be useful if the number of remote sessions is maxed out on the host. Using the RDP Admin Console allows you to use a remote session without requiring other sessions to disconnect. Running a remote session using the RDP Admin Console disables certain services and functionality, such as, but not limited to:
|
| Connection Profile |
Select a profile from the list or click Manage Connection Profiles to be taken to the Connection Profiles page to create a new profile. |
- Under Policy Options:
- If you want users to provide a reason when making requests in Password Safe, click the toggle for the Reason is required for new requests option to enable it.
- If you want users to provide a ticket number for a ticketing system when making requests in Password Safe, click the toggle for the Require a ticket system and a ticket number for requests option to enable it.
- Once enabled, select the Ticket System from the dropdown. If you leave the Ticket System as User Selected, the user can select any ticket system from the list when making their request. If you select a specific ticket system for this option, the user is unable to change the ticket system when making their request.
- Click Create Schedule. If the access policy is not yet marked as available, you are prompted to activate it now.
- Assign the access policy to a user group as follows:
- Select the Assignees tab.
- Click Manage Assignees. You are taken to the User Management page.
- Click the vertical ellipsis for a group, and then select View Group Details.
- From the Group Details pane, click Smart Groups.
- Click the vertical ellipsis for a managed account Smart Group, and then select Edit Password Safe Roles.
- Check Requestor, and then select the access policy you just created from the dropdown.
- Click Save Roles.
- Confirm the group is now listed as an assignee on the Assignees tab for the access policy you just created.
- Configure keystroke logging
- Enhanced session auditing
- For configuring release durations, Add a managed system manually
- For information on how to use mstsc /admin, mstsc
- Create a connection profile
Create a connection profile
Connection profiles allow administrators to create a deny list of keywords, host names, and IP addresses. Each deny listed item can be given a separate action which is triggered when requesters type a deny listed item in an active SSH session.
Administrators can choose to have Password Safe perform the following actions when a match occurs:
- No Action: Select to be alerted only if a match occurs.
- Block: Blocks the transmission of the command to the remote machine.
- Lock: Locks the session for the requester.
- Block and Lock: Performs both a block and lock as described above.
- Terminate: Ends the remote session.
Connection policies apply to SSH and SSH application sessions.
- Go to Configuration > Privileged Access Management Policies > Connection Profiles.
- From the Connection Profiles pane, click Create New Connection Profile.
- Enter a name for the profile, and then click Create Connection Profile.
- Optionally, to send email notifications when a deny listed item is triggered, click Email Notification Settings to expand it and add an email recipient
Recipients may receive a large number of email notifications. Selective use of this option is strongly advised.
- Click Save Changes.
- Click Create Match Condition.
- To add a deny listed item, select one of the following from the Match dropdown: Keyword, Hostname, or IP Address.
- Enter the match criteria in the Value box.
- From the Session Control dropdown, select the action to take when the deny listed item is triggered.
- Click Create Condition. Each deny listed item is displayed on a separate line.
- Apply the connection profile to an access policy schedule, as follows:
- Go to Configuration > Privileged Access Management Policies > Access Policies.
- Select the policy.
- From the Edit Policy pane, click the Schedule tab.
- Double-click a schedule to open it, or create a new schedule.
- Scroll down to the Connection Profile dropdown, and then select the newly created profile from the list.
Use a predefined connection profile
The following predefined connection profiles are available for an access policy: Lateral Movement and Suspicious Activity.
The profiles are configured to match on keywords that might indicate suspicious behavior occurring on your network. If a match is detected on any of the keyword values then the session is blocked.
You can add or delete keywords in the predefined connection profiles.