Configure Functional Account Requirements in Azure
Follow the steps below to set up Entra ID for use with BeyondTrustPassword Safe.
Accounts can be managed with or without multifactor authentication enabled in Azure.
Create Enterprise Application
- In Microsoft Azure, go to Enterprise Applications and select New application.
- Select Create your own application.
- Name your application, select the application type (App you're developing) and click Create.
- Update the name if necessary, select the Supported Account Types (this directory only) and click Register.
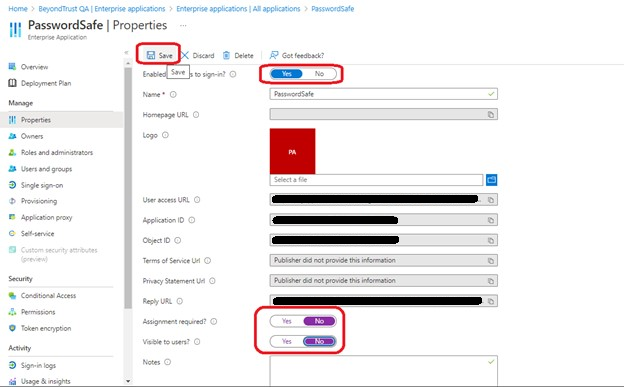
- Under Properties, disable Assignment required and Visible to users, and click Save.
Configure App Registration
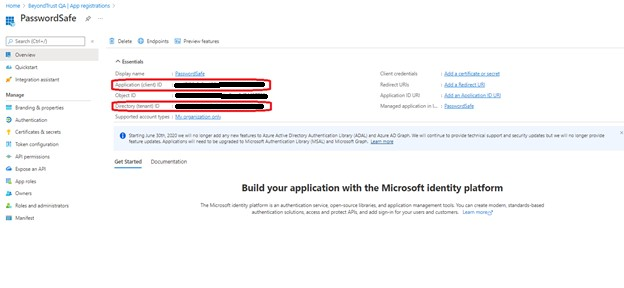
- In Overview section, copy the Application (Client) ID and Directory (Tenant) ID. These are needed later to configure the Password Safe functional account.
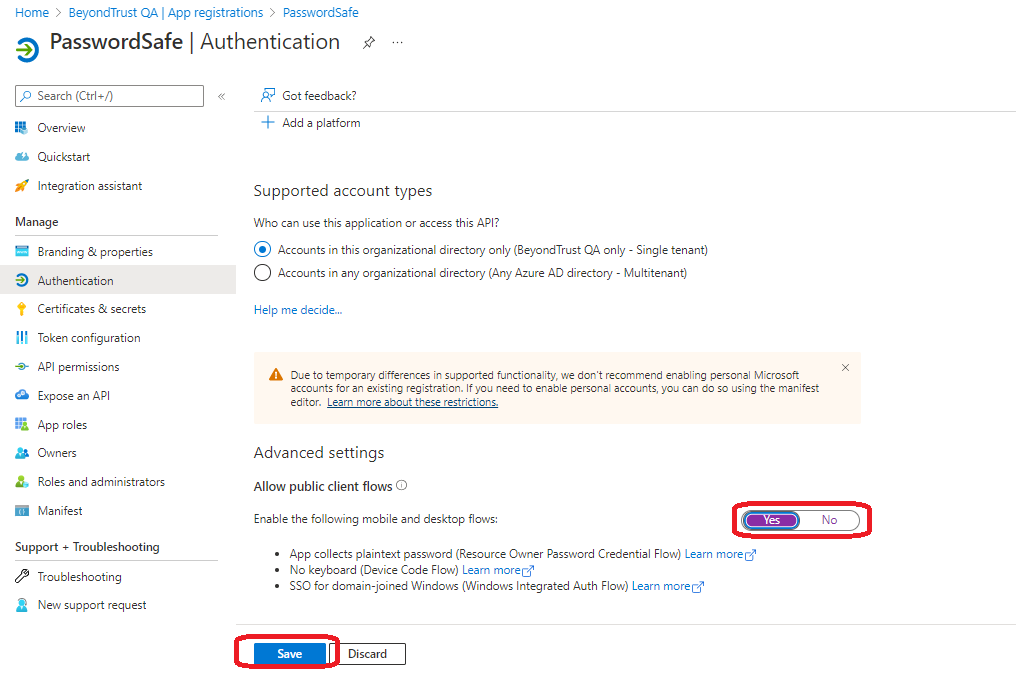
- In the Authentication section, enable Allow public client flows, and click Save.
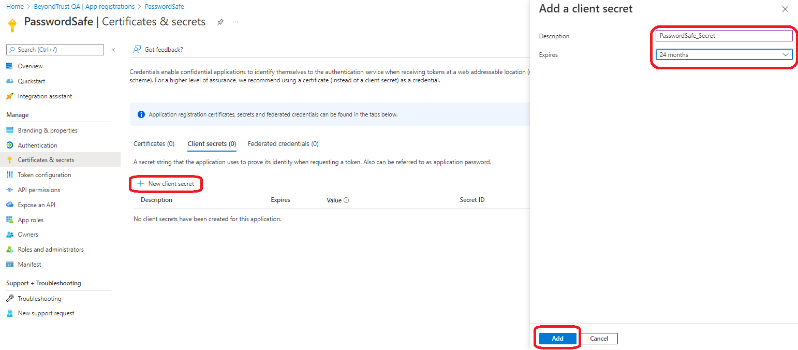
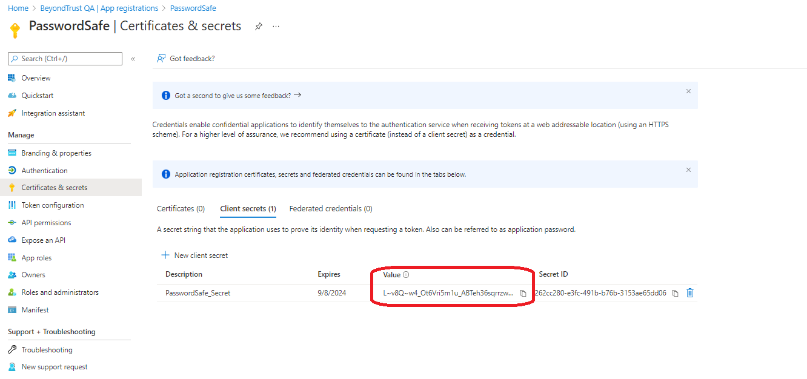
- In the Certificates and secrets section, click New client secret. Enter the Description, an expiration date, and click Add.
- Copy the secret Value. This is needed later to configure the Password Safe functional account.
The value is displayed only once, immediately after adding the new secret.
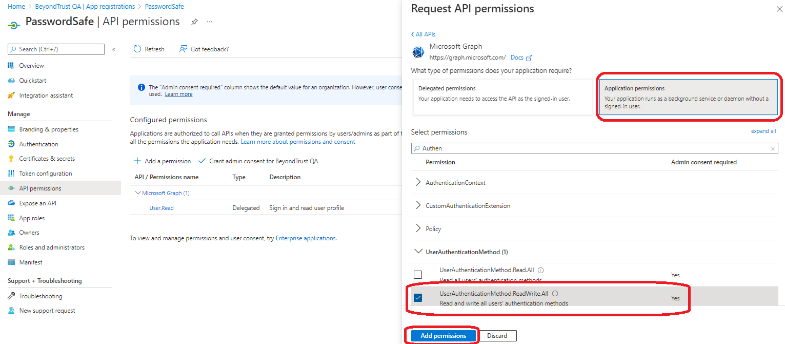
- In the API permissions section, add Microsoft Graph, and select type Application permissions.
- Add Microsoft Graph application permission UserAuthenticationMethod.ReadWrite.All, Domain.Read.All, Group.Read.All, and User.EnableDisableAccount.All.
- If User.Read is not already added, select Delegated permissions and add it.
- Click Add Permissions.
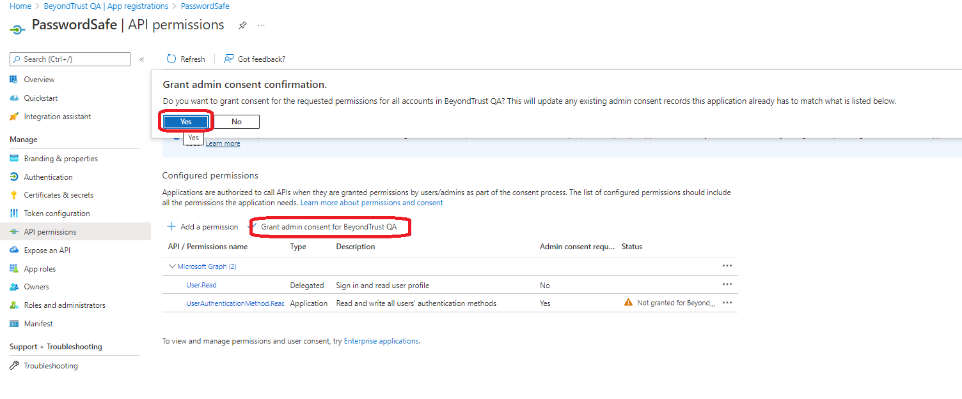
- Click Grant admin consent for for your organization, and click Yes on the confirmation message.
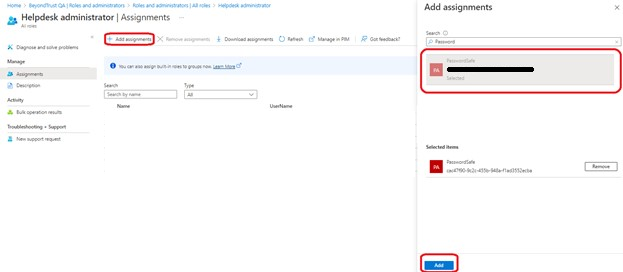
- From the main menu, select Roles and administrators, then select the Helpdesk administrator role.
- Click Add assignments, then assign the application to the Helpdesk administrator role.
This completes configuration in Microsoft Azure. The remaining steps are done in BeyondTrust Password Safe.
BeyondTrust Password Safe Configuration
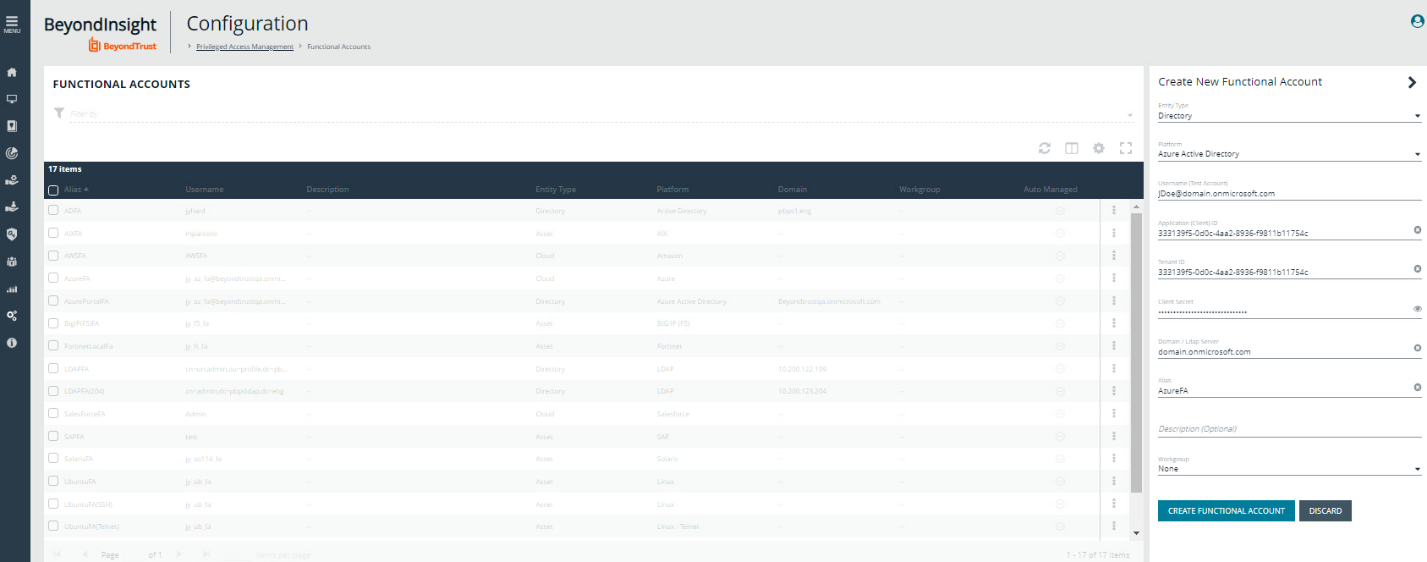
- Go to Configuration > Privileged Access Management > Functional Accounts.
- Click Create New Functional Account.
- For the Entity Type, select Directory.
- For the Platform, select Microsoft Entra ID.
- Enter the Username in UPN format.
- Enter the previously saved values for the Application (Client) ID, Tenant ID, and Client Secret.
- Set the Alias.
- Click Create Functional Account.
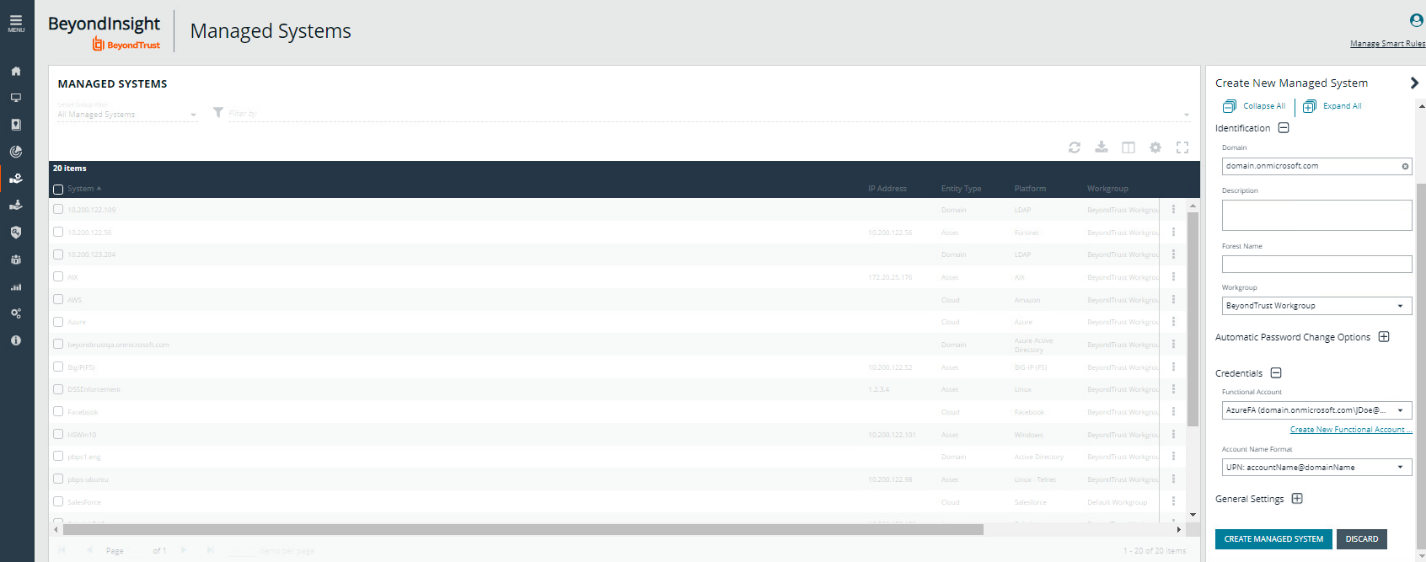
- Go to Managed Systems.
- Click Create New Managed System.
- For the Entity Type, select Directory.
- For the Platform, select Entra ID.
- Enter the Domain, select the Functional Account created above, and select the Account Name Format.
- Click Create Managed System.
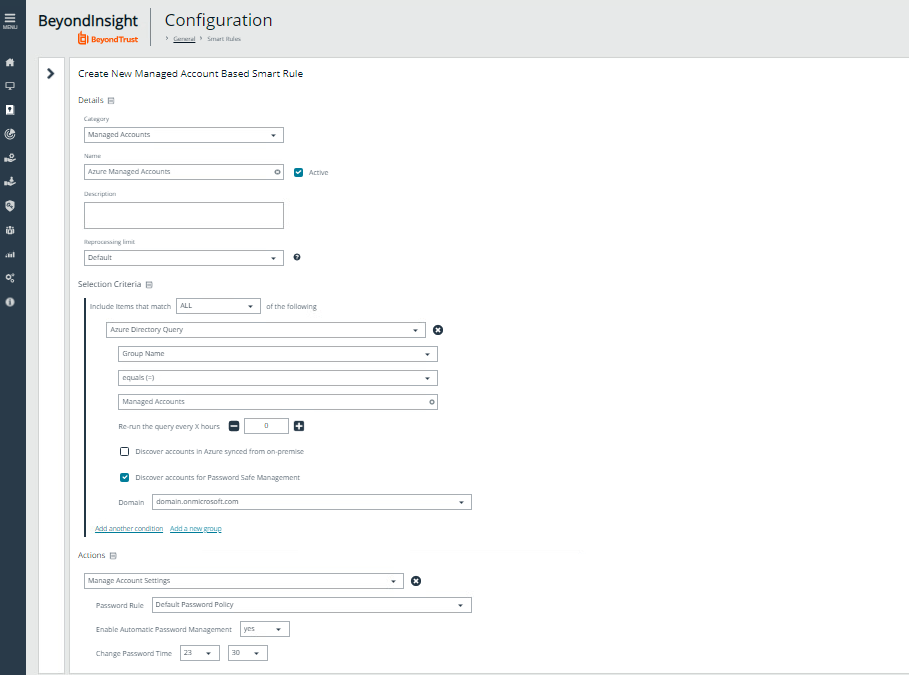
The Managed Account can be created manually or by using a Smart Rule.
- Create the Managed Account manually.
- Select the Managed System created above.
- Click the vertical ellipsis at the right end of the row.
- Select Create New Managed Account.
- Enter the Username in UPN format, and enter ObjectId for the User and UPN.
- Create the Managed Account using a Smart Rule.
- Accounts can be onboarded by using Group Name or UPN (starts with/ends with) filters.
For more information on using Smart Rules, please see Work with Smart Rules.

