Remote Support Public Portal
Configure Remote Support Public Portal for Integration with PortalGuard
Integrating BeyondTrust Remote Support with Bio-Key PortalGuard's Identity and Access Management platform provides multi-factor authentication with Identity-Bound Biometrics. Bio-key portal guard allows for biometric support including voice recognition, which provides a flexible yet very secure gate keeper in front of BeyondTrust Remote Support. At login time, it asks the user to repeat specific words or numbers, and matches the voice patterns. Implementing steps like these helps enforce stronger security and compliance.
Configuration of this integration requires obtaining a file from PortalGuard, and the following steps in BeyondTrust Remote Support and PortalGuard.
- Sign in to PortalGuard.
- Download your PortalGuard metadata by navigating to the following page: https://{YOUR-PG-SITE}.onbio-key.com/sso/metadata.ashx.
- Sign in to the BeyondTrust Remote Support site.
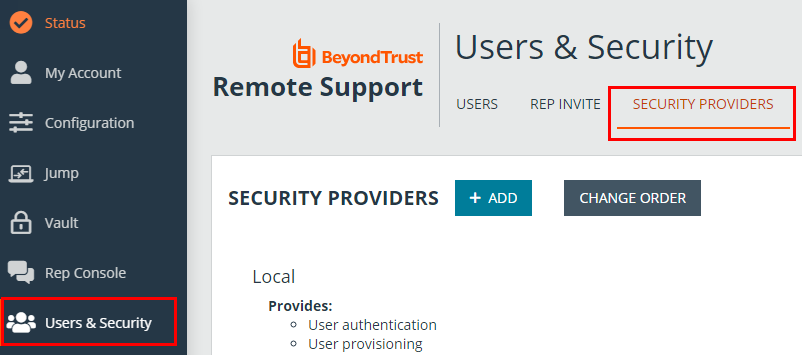
- Navigate to the Users & Security page, Security Providers tab.
- Click ADD next to Security Providers and choose SAML for Public Portals.
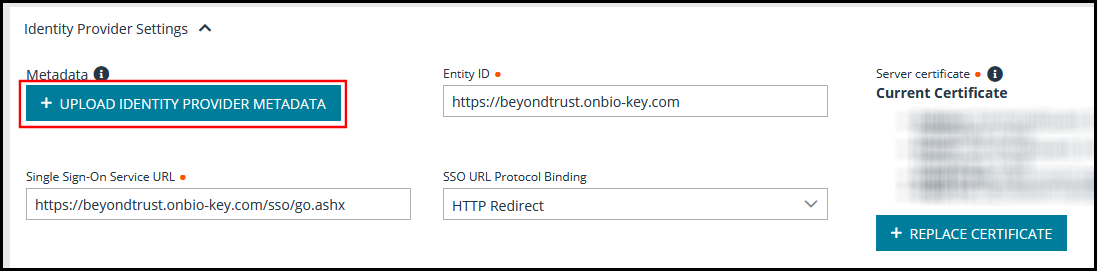
- Upload the metadata downloaded from PortalGaurd to the Remote Support site by clicking Upload Identity Provider Metadata. This auto-populates the Entity ID, Single Sign-On Service URL, SSO URL Protocol Binding, and the Current Certificate fields.
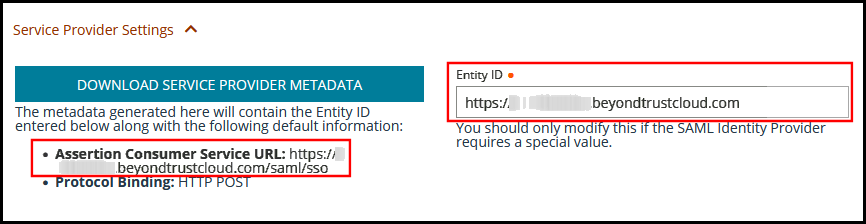
- Make note of the Entity ID and Assertion Consumer Service URL. You need these for the PortalGuard configuration.
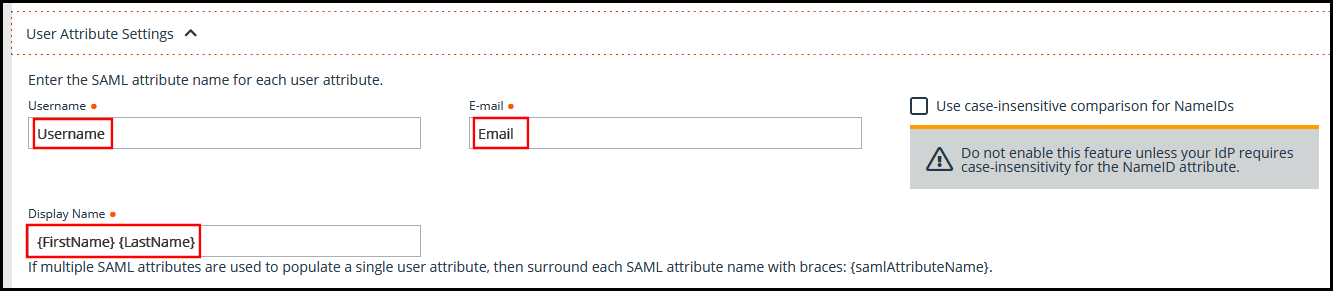
- Ensure the User Attribute Settings fields have the following values:
- Username: Username
- E-mail: Email
- Display Name: {firstName} {LastName}
- Click Save.
Configure PortalGuard for Integration with Remote Support Public Portal
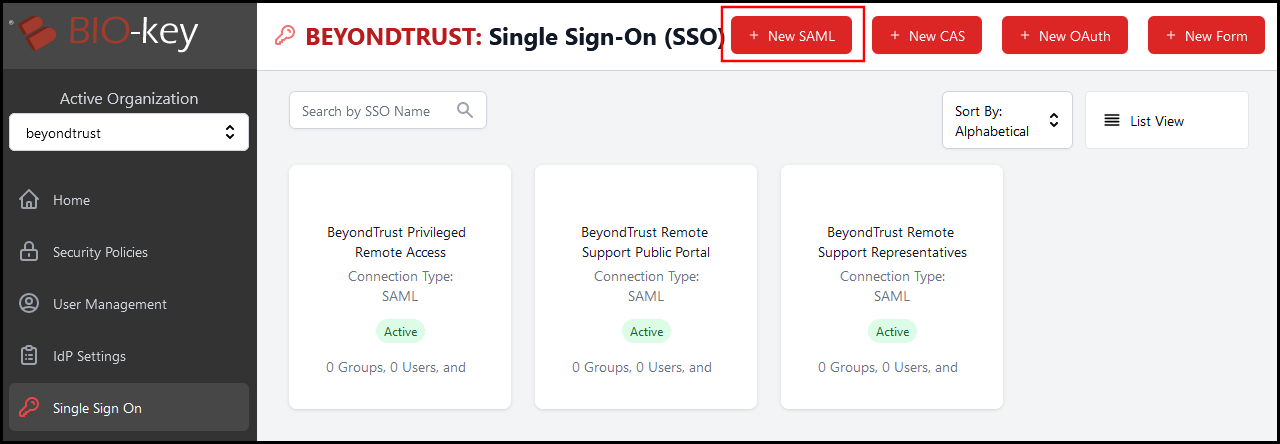
- Within the PortalGuard IDaaS Admin Panel, navigate to the Single Sign On tab within the navigation menu on the left side.
- Click New SAML on the top of the page.
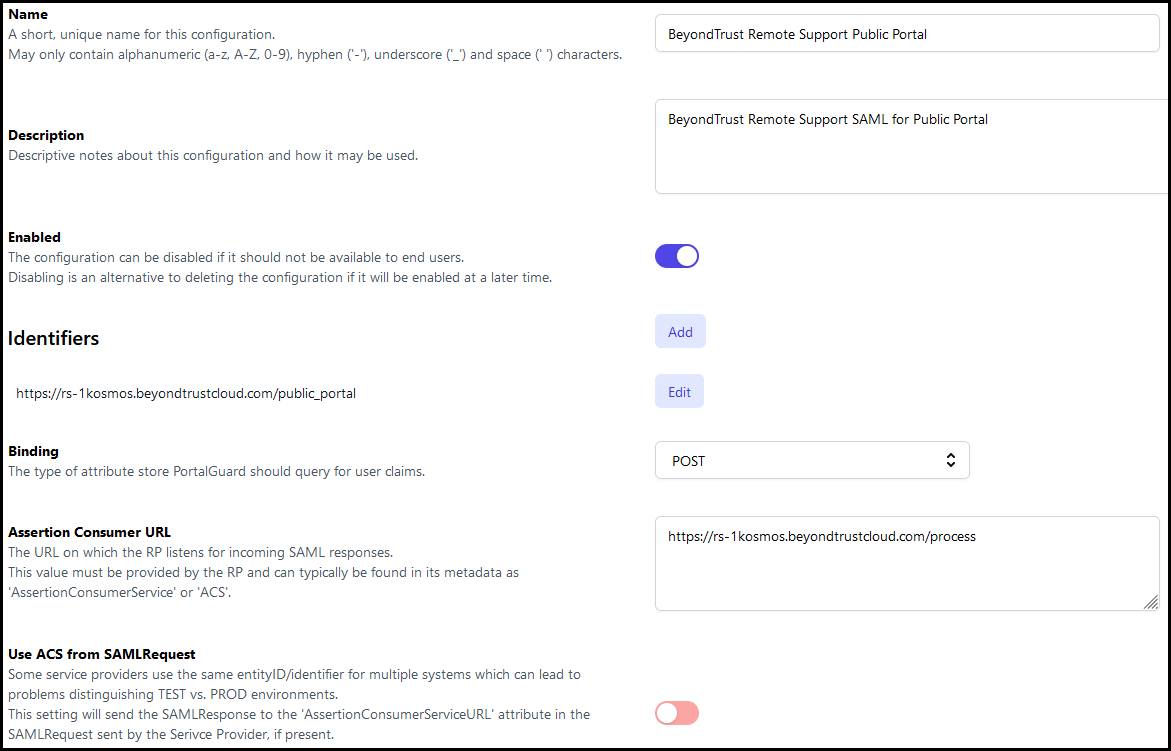
- This opens a new window showing configuration fields for the new SAML SSO connection. Enter the following information:
- Name: The name of the configuration. This field is not shown to users and is only used within the Admin Panel.
- Description: Any description info for the configuration. Again, this field is not shown to users and is only used within the Admin Panel.
- Enabled: Toggles whether the config is enabled and in use or not. You can disable it if you do not want it to be used at the moment.
- Identifiers: The Entity ID from your Remote Support site.
- Binding: Set this to POST.
- Assertion Consumer URL: The Assertion Consumer Service URL from your Remote Support site.
- Use ACS from SAMLRequest: Disabled.
- Navigate to the Identity Claims tab on the left side of the SSO configuration.
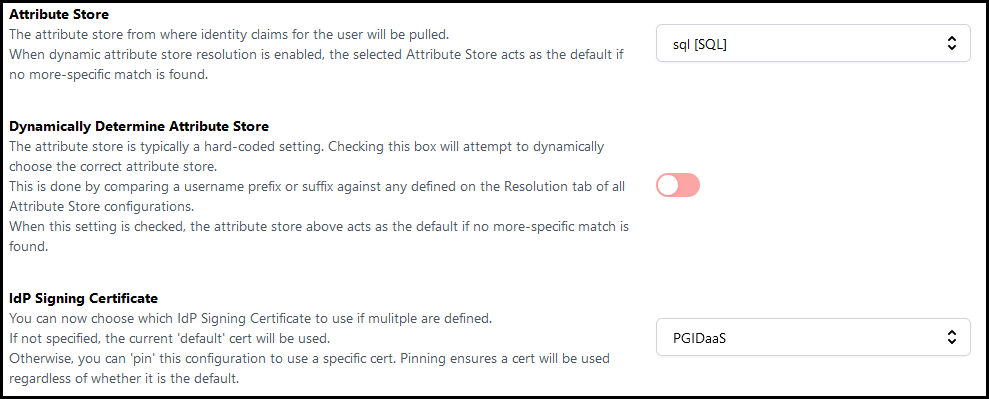
- Leave the top three settings at the default values. These are Attribute Store, Dynamically Determine Attribute Store, and IdP Signing Certificate.
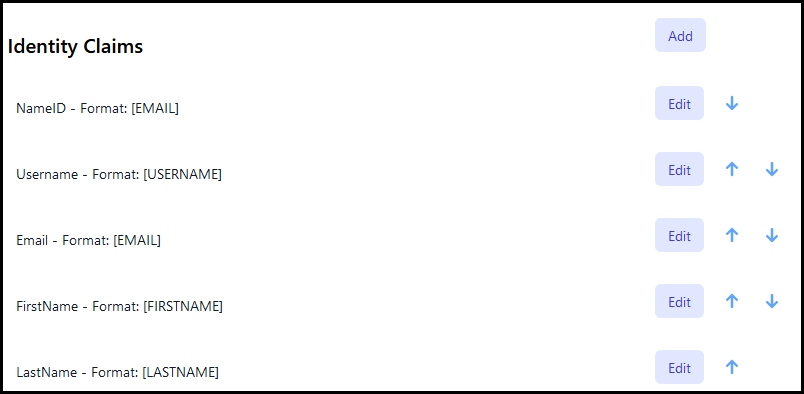
- Create five new Identity Claims with the following information:
- Name: NameID
- Check Send as NameID
- Schema Type: urn:oasis:names:tc:SAML:2.0:nameid-format:persistent
- Value Type: Formatted String
- Composite Value Format: [EMAIL]
- Name: Username
- Schema Type: Username
- Value Type: Formatted String
- Composite Value Format: [USERNAME]
- Name: Email
- Schema Type: Email
- Value Type: Formatted String
- Composite Value Format: [EMAIL]
- Name: FirstName
- Schema Type: FirstName
- Value Type: Formatted String
- Composite Value Format: [FIRSTNAME]
- Name: LastName
- Schema Type: LastName
- Value Type: Formatted String
- Composite Value Format: [LASTNAME]
- Name: NameID
- Navigate to the IdP-Initiated tab on the left side of the SSO configuration.
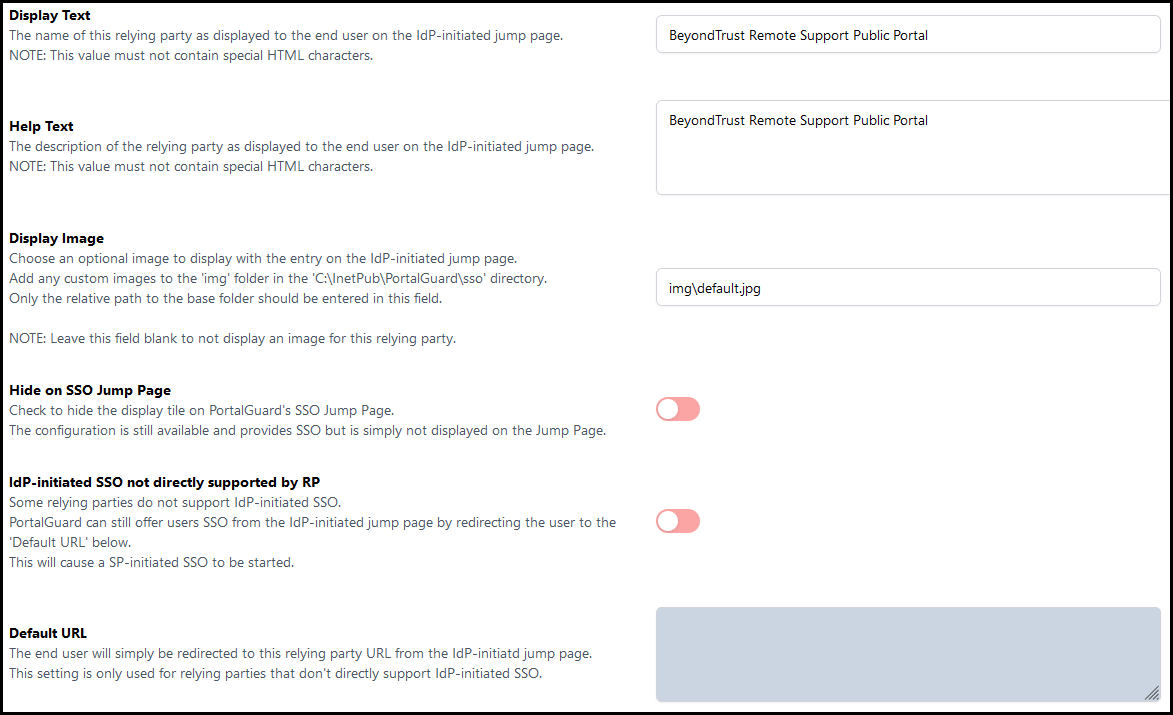
- Set the Display Text to BeyondTrust Remote Support Representatives or a similar description. This is displayed on the PortalGuard SSO Jump Page as a tile.
- Set the Help Text to BeyondTrust Remote Support Representatives or a similar description. This is displayed when a user hovers over the tile on the PortalGuard SSO Jump Page.
- Set the Display Image to img\default.jpg for the default SSO image. To add an image to your IDaaS instance to display here, please open a ticket within the PortalGuard support portal.
- Select Hide on SSO Jump Page to not show this tile on the PortalGuard SSO Jump Page.
- Make sure IdP-initiated SSO not directly supported by RP is disabled.
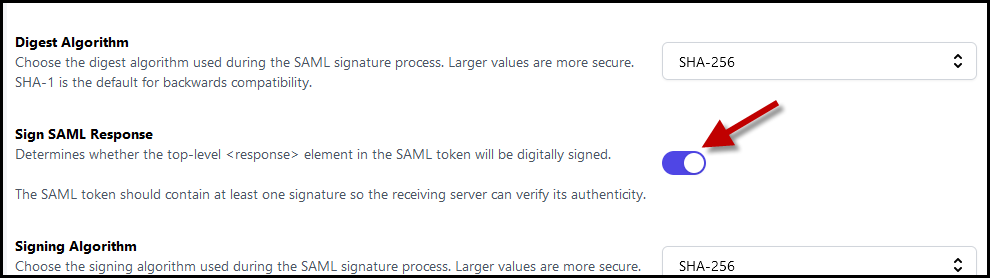
- Navigate to the Response tab on the left side of the SSO configuration. Enable Sign SAML Response.
- Navigate to the Authorization tab on the left side of the SSO Configuration. Specify the users, groups, and OUs that access this application. Leave this empty to allow all users.
- Click Save in the upper right of the page to save this configuration.
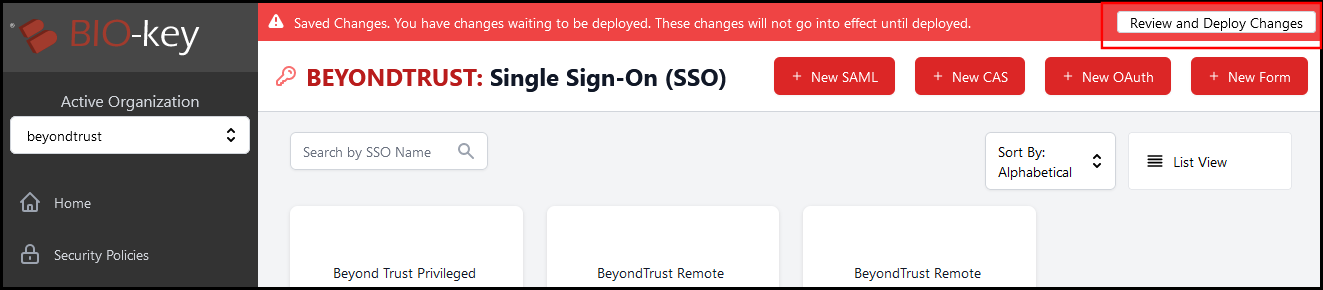
- A red bar at the top of the screen states that there are changes not yet deployed. Click Review and Deploy Changes to apply these to your running PortalGuard instance.
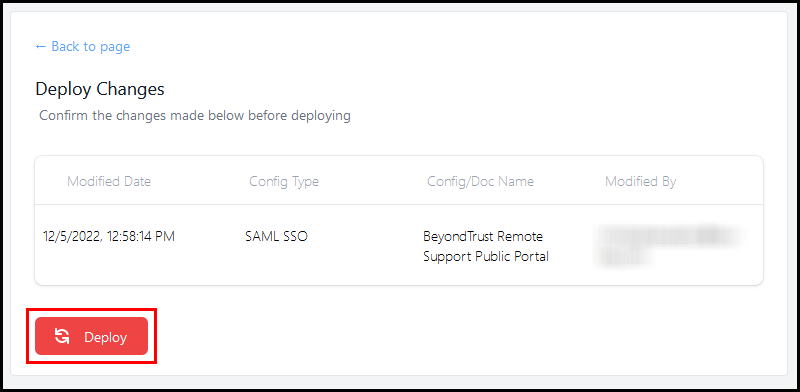
- Click Deploy.