Configure BMC Remedy for Integration with BeyondTrust Remote Support
You must purchase this integration separately for both your Remote Support software and your BMC Remedy solution. For more information, contact BeyondTrust's Sales team.
Integration between BMC Remedy and BeyondTrust Remote Support requires importing a collection of custom objects into the BMC Remedy environment. These include Filters, Active Links, Web Services, etc. The following steps outline this import and configuration process.
Initially, some manual steps must be taken before the bulk of the AR System items can be imported.
Import Forms
- Open BMC Remedy Developer Studio.
- From the main menu, select File > Import.
- Expand BMC Remedy Developer Studio.
- Select Object Definitions and click Next.
- Select the appropriate server and click Next.
- Select the bomgar_Remedy_Int_With_Incident_Vx.x.xml file from the appropriate location and click Next.
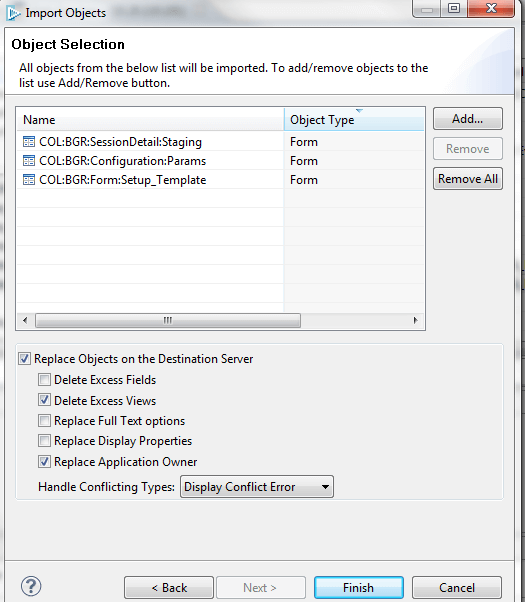
- From the XML file, add the following forms, removing all other items:
- COL:BGR:SessionDetail:Staging
- COL:BGR:Configuration:Params
- COL:BGR:Form:Setup_Template
- Select the following options:
- Replace Objects on the Destination Server
- Delete Excess Views
- Replace Application Owner
- Handle Conflicting Types: Display Conflict Error
- Click Finish.
The import process may take several minutes to complete. Upon successful completion, the above forms will have been imported into the AR System.
Update Existing Forms - HPD:Help Desk
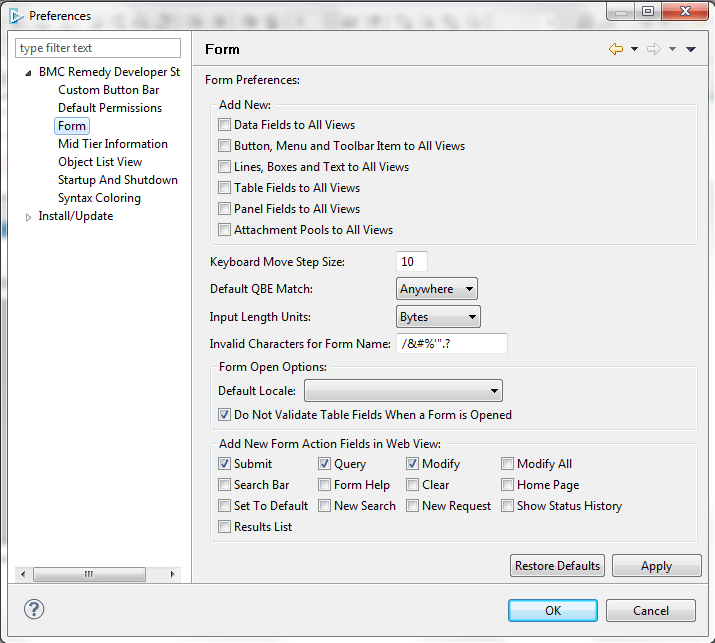
To save time, it may be a good idea to set the Remedy Administrator preferences (in the Windows > Preferences menu) so that fields are not automatically added to all views. This way, fields are added only to the views to which they are pasted. Also, make sure to back up the Incident Form.
- Open the Incident form (HPD:Help Desk) in the Best Practices view in Developer Studio.
- Also open the newly imported COL:BGR:Form:Setup_Template.
- If the Incident form does not already have an overlay, select Forms > Create View Overlay from the menu.
- Add a new Panel with the following properties:
- ID: 800000001
- Name: COL_Pnl_BeyondTrust_Sessions
- Label:BeyondTrust Sessions
- Vislble: False
- Permission: Public
- Copy and paste the following fields from the Setup_Template form to the new panel on the Incident form.
- 800000002: COL_Tbl_Session_Summary
- 800000003: COL_Col_Session_ID
- 800000004: COL_Col_Start_Time
- 800000005: COL_Col_End_Time
- 800000006: COL_Col_Duration
- 800000007: COL_Col_File_Count
- 800000008: COL_Col_Representative
- 800000009: COL_Ctrl_BeyondTrust_Logo
- 800000010: COL_Char_Support_Session_Details
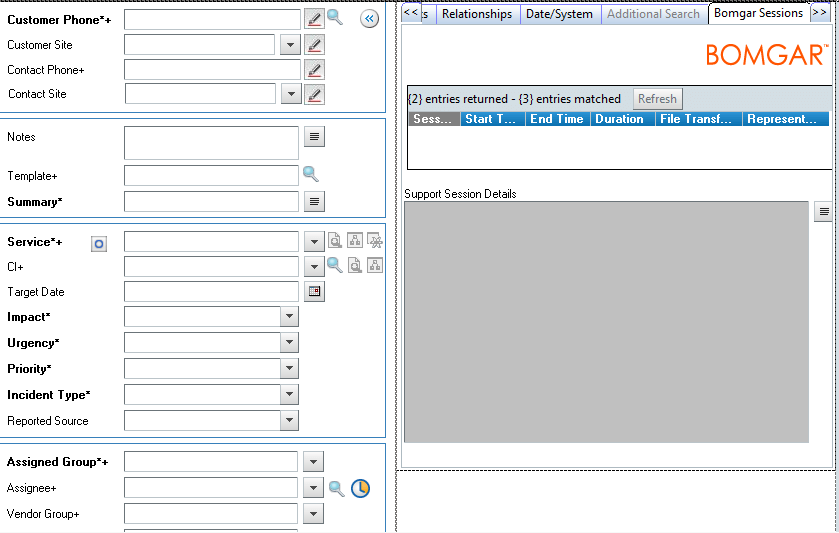
- Once complete, the BeyondTrust Sessions panel should look similar to the screen shot. Save the form.
Add "Launch BeyondTrust Session Key" Link to Left Navigation
- Add the left navigation z2NF_LeftNavigation to the overlay and save it.
- Select the left navigation from the outline window and right-click it.
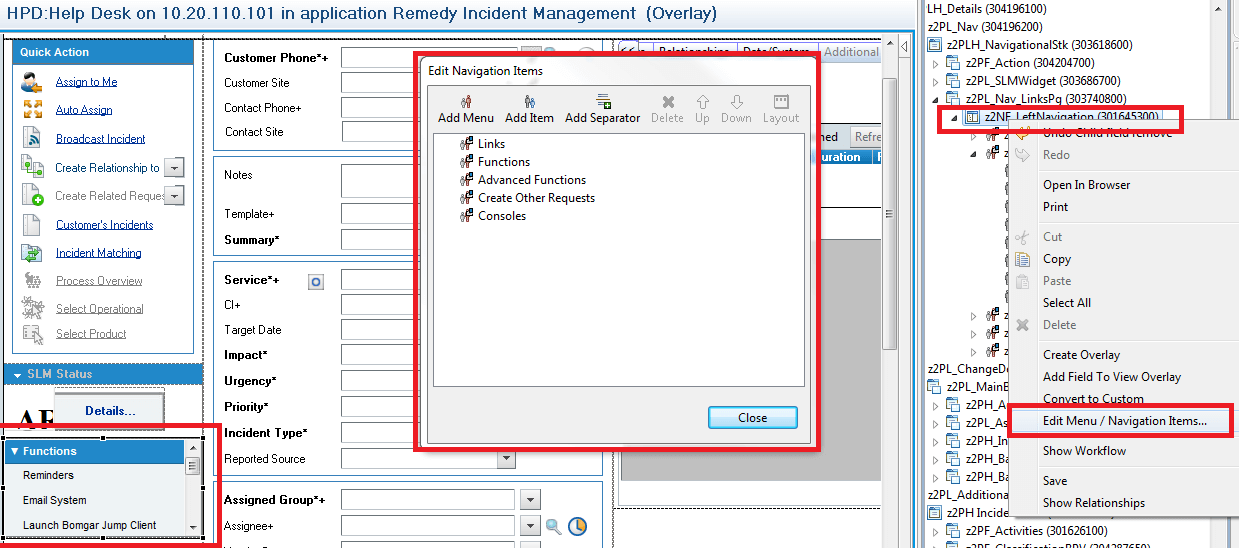
- Select Edit Menu / Navigation Items.
- In the Edit window, expand the Functions items to add a new item under this menu.
- Select the Functions menu and click Add Item.
- Once the item is added, select it and edit its properties to match the following:
- ID: 900370918
- Name: COL_z2NI_LaunchBomgarSession()
- Label: Launch BeyondTrust Session Key
- Visible: True
- Permission: Public
- Save the Incident form.
Add Display-Only Fields
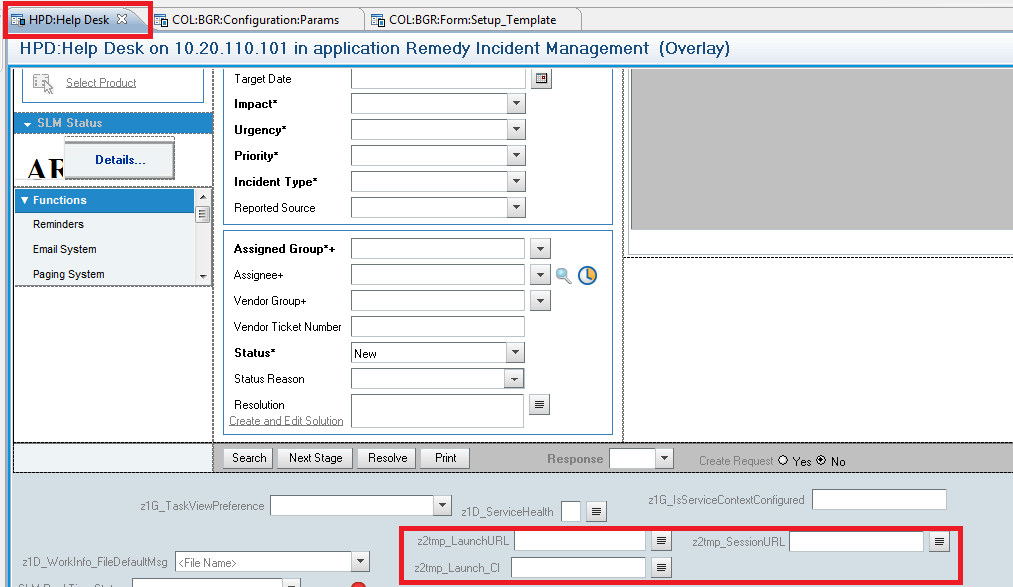
- Copy the following display-only fields from the Setup_Template form to the bottom area of the Incident form:
- 900070914: z2tmp_LaunchURL
- 900070917: z2tmp_Launch_CI
- 900270919: z2tmp_SessionURL
- Save the form.
Add "Launch BeyondTrust Jump Client" Link to Left Navigation
- Select the left navigation from the outline window and right-click it.
- Select Edit Menu / Navigation Items.
- In the Edit window, expand the Functions items to add a new item under this menu.
- Select the Functions menu and click Add Item.
- Once the item is added, select it and edit its properties to match the following:
- ID: 908970913
- Name: COL_z2NI_Launch BeyondTrust CI
- Label: Launch BeyondTrust Jump Client
- Visible: True
- Permission: Public
- Save the Incident form.
Update Existing Forms - SRS:RequestDetail
- Open the Service Request Console form (SRS:RequestDetail) in SRS User view in Developer Studio.
- Also open the newly imported COL:BGR:Form:Setup_Template (SRM-RQC View).
- If the Service Request form does not already have an overlay, select Forms > Create View Overlay from the menu.
- Copy and paste the following fields from the Setup_Template form to the new panel on the Service Request form.
- 800000600: COL_Btn_Get_Support_Now
- 800000601: COL_VF_Launch_Support_Window
- 800000602: COL_Char_Mid-Tier_URL
- 800000603: COL_Char_Incident_Number
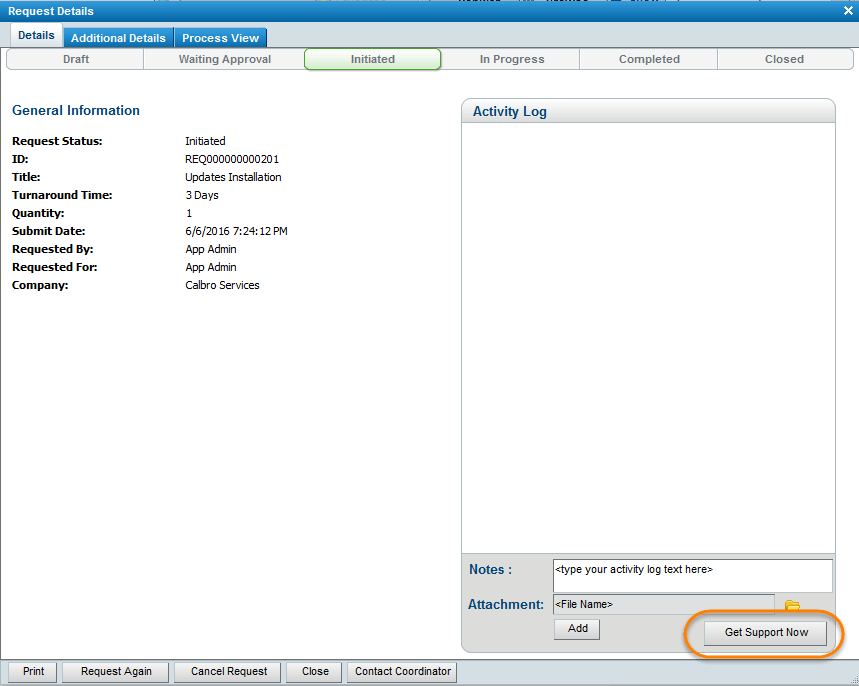
- Once complete, the request details should look similar to the screen shot. Save the form.
Import Remaining Items
Once the manual steps above have been completed, the remainder of the package can be imported.
- From the main menu, select File > Import.
- Expand BMC Remedy Developer Studio.
- Select Object Definitions and click Next.
- Select the appropriate server and click Next.
- Select the bomgar_Remedy_Int_With_Incident_Vx.x.xml file from the appropriate location and click Next.
- Import all objects, making sure to select Replace Objects on the Destination Server.
- Click Finish.
The import process may take several minutes to complete. Upon successful completion, the required forms, workflows, and web services will have been imported into the AR System.
- Flush the Mid-Tier and browser caches, located at <protocol>://<mid-tier-server>:<port>/arsys/shared/config/config.jsp.
Configure the Integration
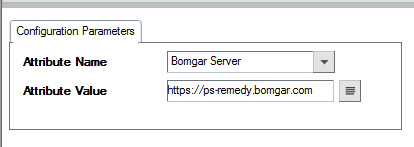
- In a browser, open the Configuration Params form (<protocol>://<mid-tier-server>:<port>/arsys/forms/<AR-server-name>/COL:BGR:Configuration:Params).
- Add attribute details for the BeyondTrust Server attribute for both the Launch Session and Launch BeyondTrust CI (Jump Client) items.
- The Attribute Value should be https://<BeyondTrust-site-hostname>.
Access to the BeyondTrust Sessions tab as well as the Session Key and Jump to CI functions are controlled by users' group memberships. Any user who should have access to these items should be added to a new Group in Remedy named "BeyondTrust Users".