Customize the Public Site Web Template
Public Site Web Template
HTML templates define the layout and appearance of one or more support portals, and you can use them to alter your public portals accordingly. HTML templates pull Cascading Style Sheets (CSS) and graphical files from the File Store. Template changes require at least a basic understanding of HTML, but this guide will explain how to get started. HTML templates use a number of macros, some of the most important being:
| %CONTENT_AREA% | This macro is used to display the main portal sections including the representative list, session key form, issue submission survey form, and content of the post-session landing pages. The options on the Public Site Configuration page are used to determine which sections are visible. This macro should not be removed. |
| %POWERED_BY% | Replaced by different links to more information about BeyondTrust, such as Appliance-based Remote Desktop Control by BeyondTrust, See how BeyondTrust works, and Cross-Platform Remote Support Software. If this macro is not defined, the image will be drawn in the bottom-right corner of the page. |
| %LANGUAGE_SELECTION% |
Replaced by a language dropdown menu when more than one language is enabled. If only one language is enabled, this macro will be replaced by the name of the enabled language. Languages are managed from the Localization tab of the /login admin web interface. |
| %HEAD_INCLUDES% | Adds the CSS files which control the layout and style of the page. This macro should not be removed. |
There are other macros included in the default HTML that can be used. Removing and/or commenting out macros is not officially supported.
Below are step-by-step instructions to perform some basic the portal customizations. For demonstration, three changes are made:
- The title is modified.
- A logo is added.
- A new content box is added.
You can use the following techniques for making modifications to customize your own portal, ensuring visitors know who owns it and from whom they are getting support.
- From the /login administrative interface, go to Public Portals > HTML Templates.
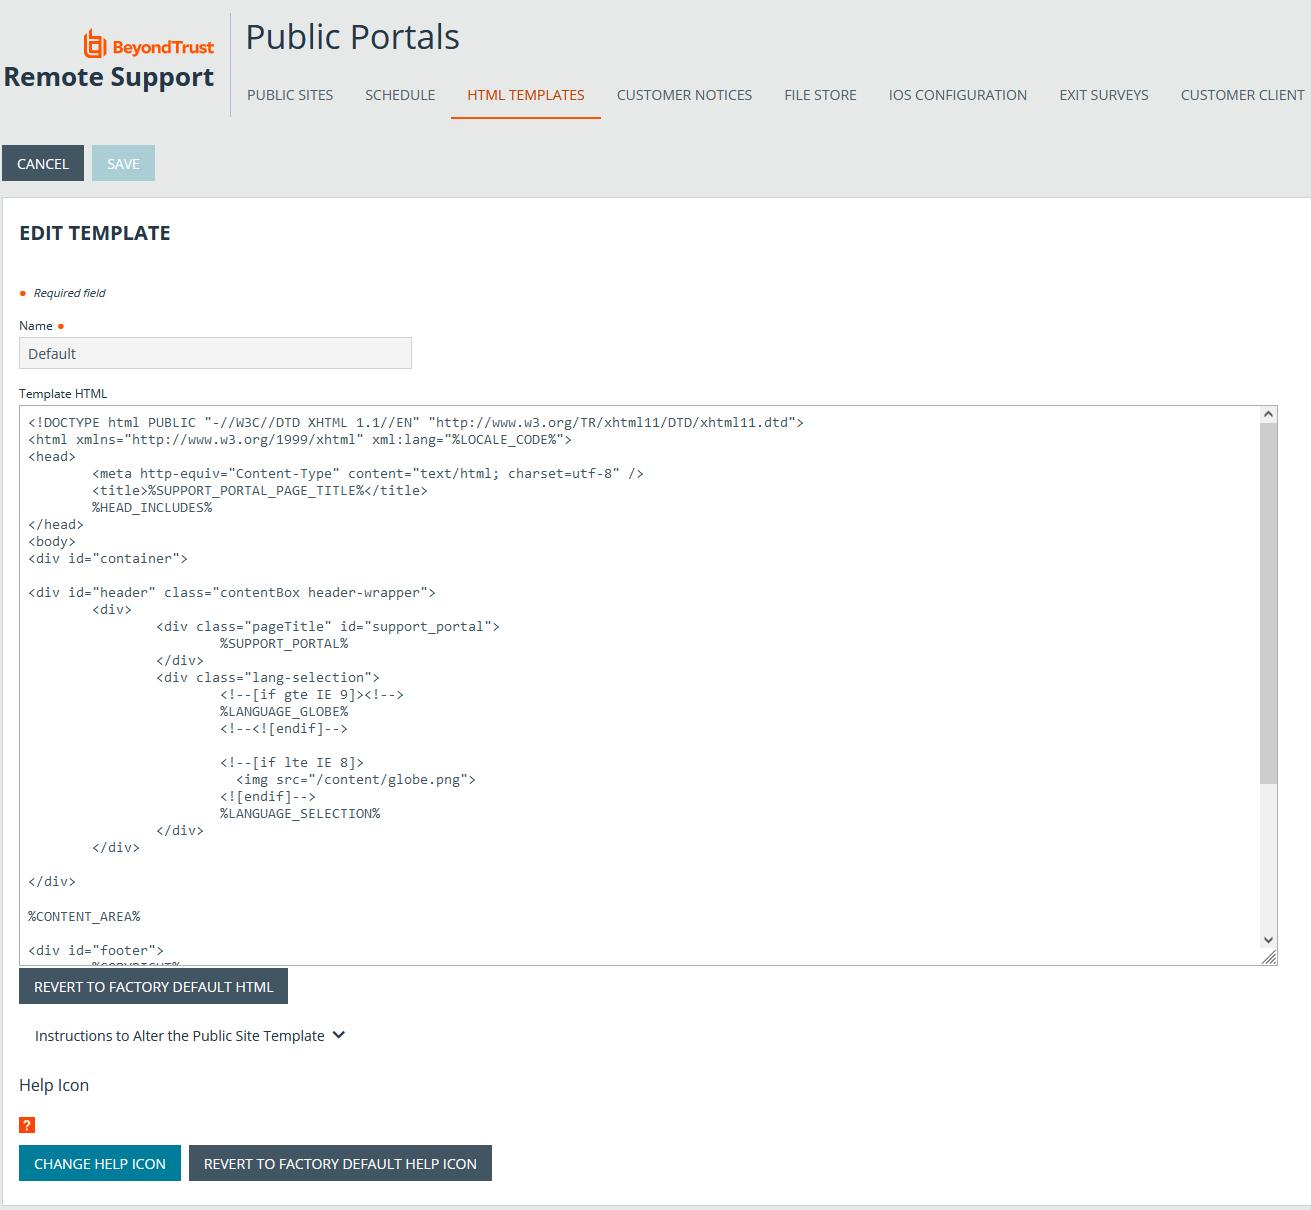
- Either create a new template, or select from one of the templates listed to edit.
- Make any necessary changes to the title text by replacing %SUPPORT_PORTAL_PAGE_TITLE% and %SUPPORT_PORTAL% with your page title.
- Next add your logo by locating <div class="pageTitle"> and adding <img height="60" style="float: right;" src="/files/logo.png"/> on a new line immediately above it.
- Then add a new content box by locating %CONTENT_AREA% and adding the following on a new line above it <div class="contentBox">helpful text</div>.
- Click Save.
- To see the changes made to your portal, navigate to Public Sites.
- Locate which site lists the template you modified and click on the associated address to load the page.
The HTML template can be reverted to the default by clicking Revert to Factory Default HTML.
Administrators who wish to prevent search engines from crawling their public sites can enable the Disable Public Site Indexing option on the /login > Management > Security page.
Help Icon
The next customized item is the help icon. The default icon is an orange box containing a question mark, and this image can be changed. Here are the step-by-step instructions.
- From the /login administrative interface, go to Public Portals > HTML Templates.
- The default template is available for editing. If you have added other templates, you also can edit those templates.
- From the Help Icon section of the HTML Templates page, click on Change Help Icon or on the existing help icon itself. Browse to the location where the new icon is stored, select it and click Open. You can resize is as needed in the Crop dialogue window.
The image size is 16×16 24-bit; any image format, such as .gif, .jpg, .bmp, or .png can be used.
- Once the file is uploaded, the existing help icon is replaced with your icon.
The help icon can be reverted to the default by clicking Revert to Factory Default Help Icon.