Modify the Customer Client Appearance
Here are the step-by-step instructions that describe how to update the agreements and the system messages your customers see while waiting for support, as well as how the customer client appears overall.
- From the /login administrative interface, go to Public Portals > Customer Client.
- You can modify the customer client for each public site. Select the public site to edit.
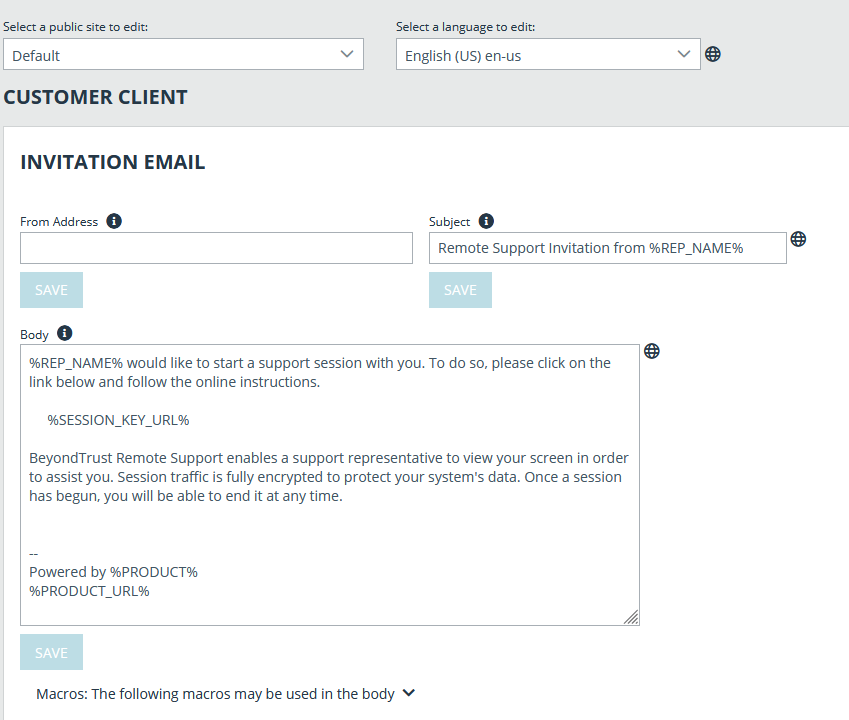
- Edit the text of the email that is sent to customers when a representative sends a session key email.
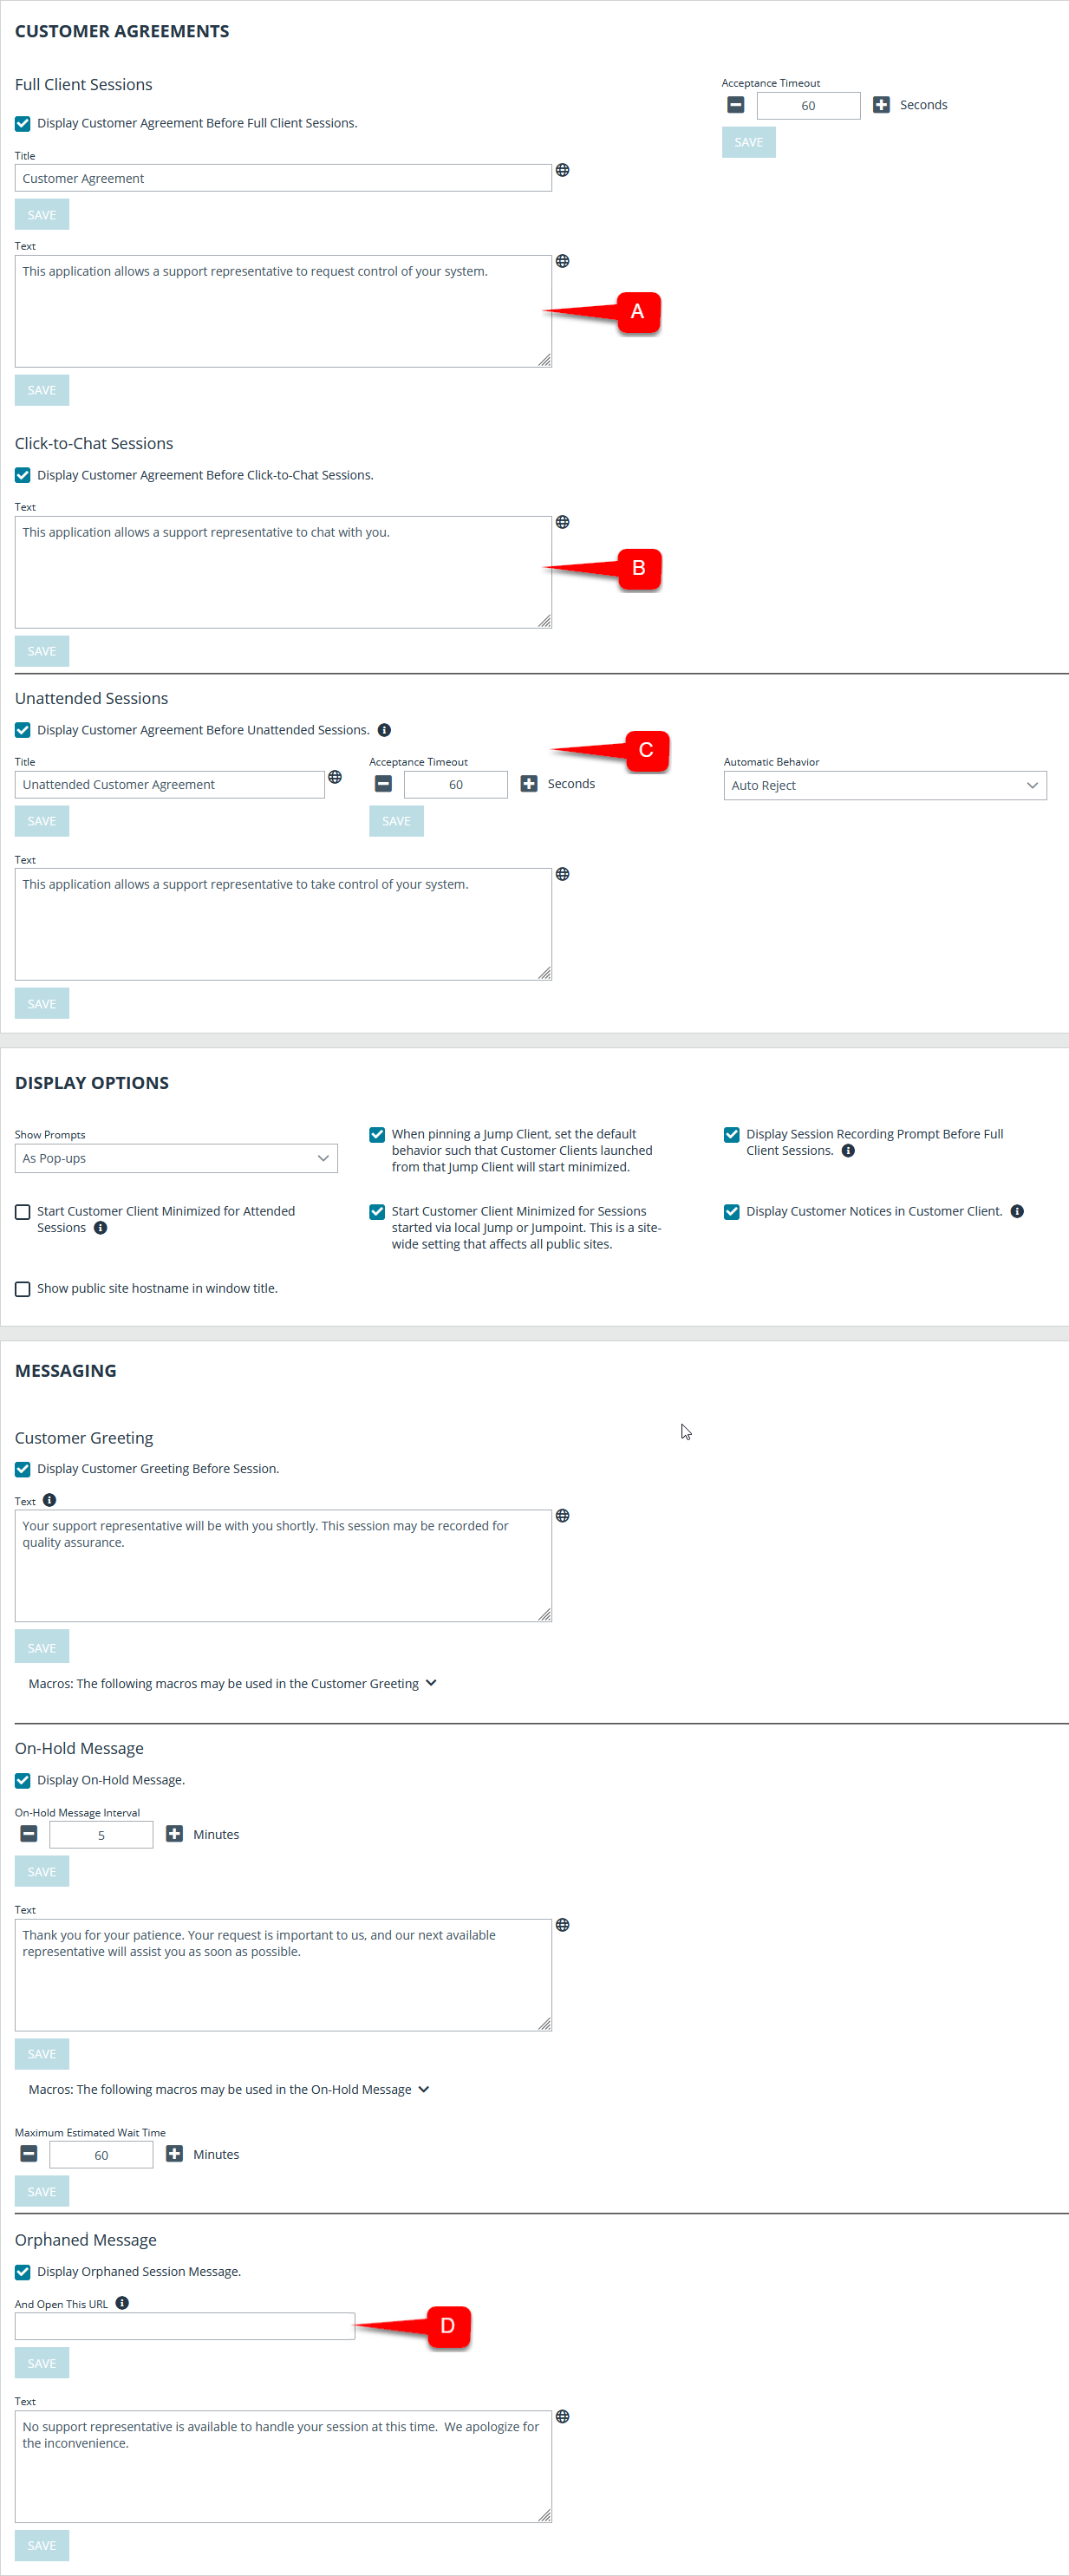
- Next, you may customize the way the customer client displays. In this example, the Customer Agreement, item A, is enabled, and the text in the agreement is modified for Technology Company.
- A separate click-to-chat agreement, item B, is also displayed and customized.
- The Acceptance Timeout, item C, sets how long the customer has to accept the agreement before the session closes; this timeout can be modified as appropriate to your needs.
- Choose if the customer should be prompted to allow or deny session recordings. Also choose if customer notices should display in the customer client.
- The Customer Greeting, On Hold Message, Click-to-Chat Elevation Prompt, and Orphaned Session Message can all be modified, as well.
- If no representatives are available, the customer can be redirected to an orphaned session URL, item D. In this example, the customer's browser will open to https://www.remote.support.com/faq.

- You may also upload a custom image file to serve as the customer client chat window banner.
- From the Chat Window Banner section of the Customer Client page, click Change Chat Banner to select and upload a new banner.
This image must be a .png or .bmp file. The recommended width is 480 pixels. The recommended height is 40 pixels.
- Once the file is uploaded, all new sessions will use that image. Currently running sessions will not be affected.
The chat window banner can be reverted to the default by clicking Revert to Default.
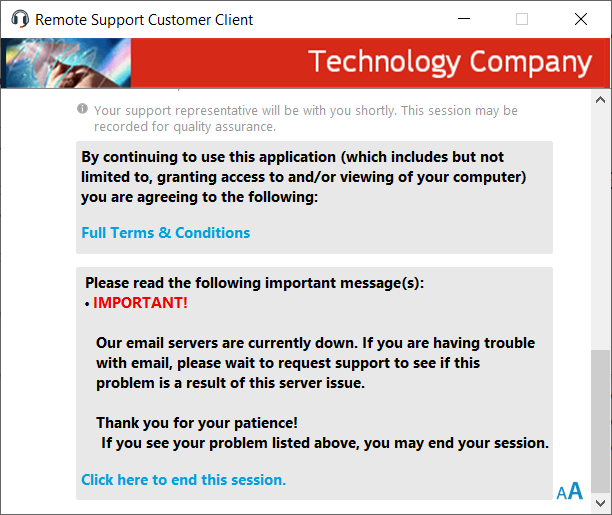
- Depicted to the right is the BeyondTrust customer client after the customizations for Technology Company. This is what customers will see when they download the customer client and allow a support representative for Technology Company to support their system.