Create and Use VNC Shortcuts
Use BeyondTrust to start a VNC session with a remote system. Because VNC sessions are converted to BeyondTrust sessions, users can share or transfer sessions, and sessions can be automatically audited and recorded as defined by your administrator for your site.
To use Local VNC through BeyondTrust, you must be on the same network segment as the target system and must have the user account permission Allowed Jump Methods: Local VNC.
To use Remote VNC through BeyondTrust, you must have access to a Jumpoint and must have the user account permission Allowed Jump Methods: Remote VNC.
Use BeyondTrust to start a VNC session with a remote system. Because VNC sessions are converted to BeyondTrust sessions, users can share or transfer sessions, and sessions can be automatically audited and recorded as defined by your administrator for your site.
To use Local VNC through BeyondTrust, you must be on the same network segment as the target system and must have the user account permission Allowed Jump Methods: Local VNC.
To use Remote VNC through BeyondTrust, you must have access to a Jumpoint and have the user account permission Allowed Jump Methods: Remote VNC.
Create a Local VNC Shortcut
To create a Local VNC shortcut, click the Create button in the Jump interface. From the dropdown, select Local VNC. VNC shortcuts appear in the Jump interface along with Jump Clients and other types of Jump Item shortcuts.
Organize and manage existing Jump Items by selecting one or more Jump Items and clicking Properties.
To view the properties of multiple Jump Items, the items selected must be the same type (e.g., all Jump Clients, all Remote Jumps, etc.).
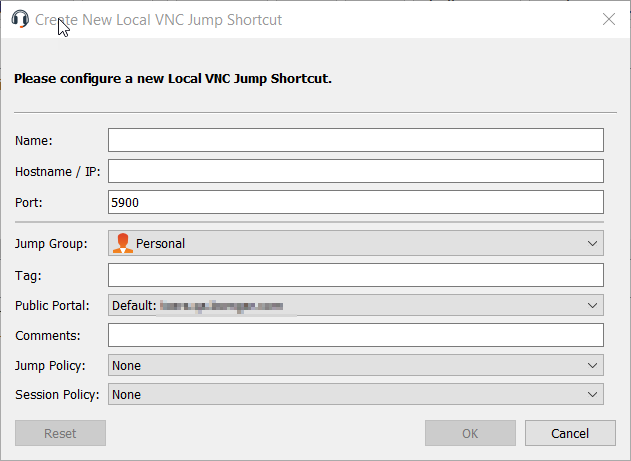
Enter a Name for the Jump Item. This name identifies the item in the session tabs. This string has a maximum of 128 characters.
Enter the Hostname / IP of the system you wish to access.
By default, the VNC server listens on port 5900, which is, therefore, the default port BeyondTrust attempts. If the remote VNC server is configured to use a different port, enter it in the Port field.
Move Jump Items from one Jump Group to another using the Jump Group dropdown. The ability to move Jump Items to or from different Jump Groups depends upon your account permissions.
Further organize Jump Items by entering the name of a new or existing Tag. Even though the selected Jump Items are grouped together under the tag, they are still listed under the Jump Group in which each is pinned. To move a Jump Item back into its top-level Jump Group, leave this field blank.
Select the Public Portal through which this Jump Item should connect. If a session policy is assigned to this public portal, that policy may affect the permissions allowed in sessions started through this Jump Item. The ability to set the public portal depends on your account permissions.
Jump Items include a Comments field for a name or description, which makes sorting, searching, and identifying Jump Items faster and easier.
To set when users are allowed to access this Jump Item, choose a Jump Policy. These policies are configured by your administrator in the /login interface.
Choose a Session Policy to assign to this Jump Item. The session policy assigned to this Jump Item has the highest priority when setting session permissions. The ability to set a session policy depends on your account permissions.
Create a Remote VNC Shortcut
To create a Remote VNC shortcut, click the Create button in the Jump interface. From the dropdown, select Remote VNC. VNC shortcuts appear in the Jump interface along with Jump Clients and other types of Jump Item shortcuts.
Organize and manage existing Jump Items by selecting one or more Jump Items and clicking Properties.
To view the properties of multiple Jump Items, the items selected must be the same type (e.g., all Jump Clients, all Remote Jumps, etc.).
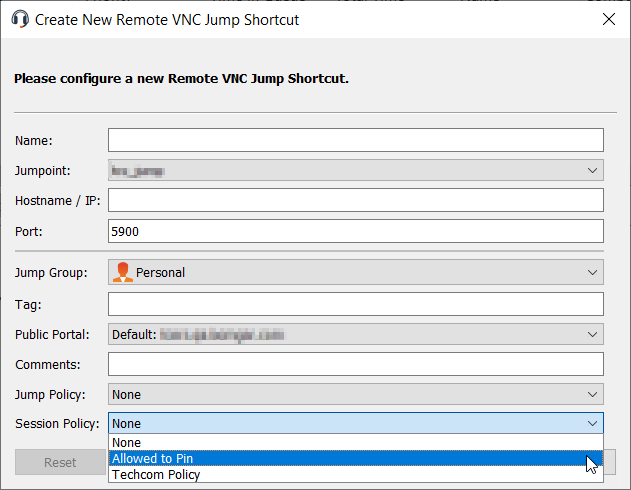
Enter a Name for the Jump Item. This name identifies the item in the session tabs. This string has a maximum of 128 characters.
From the Jumpoint dropdown, select the network that hosts the computer you wish to access. The representative console remembers your Jumpoint choice the next time you create this type of Jump Item. Enter the Hostname / IP of system you wish to access.
By default, the VNC server listens on port 5900, which is, therefore, the default port BeyondTrust attempts. If the remote VNC server is configured to use a different port, enter it in the Port field.
Move Jump Items from one Jump Group to another using the Jump Group dropdown. The ability to move Jump Items to or from different Jump Groups depends upon your account permissions.
Further organize Jump Items by entering the name of a new or existing Tag. Even though the selected Jump Items are grouped together under the tag, they are still listed under the Jump Group in which each is pinned. To move a Jump Item back into its top-level Jump Group, leave this field blank.
Select the Public Portal through which this Jump Item should connect. If a session policy is assigned to this public portal, that policy may affect the permissions allowed in sessions started through this Jump Item. The ability to set the public portal depends on your account permissions.
Jump Items include a Comments field for a name or description, which makes sorting, searching, and identifying Jump Items faster and easier.
To set when users are allowed to access this Jump Item, choose a Jump Policy. These policies are configured by your administrator in the /login interface.
Choose a Session Policy to assign to this Jump Item. The session policy assigned to this Jump Item has the highest priority when setting session permissions. The ability to set a session policy depends on your account permissions.
Use a VNC Shortcut
To use a Jump shortcut to start a session, select the shortcut from the Jump interface and click the Jump button.
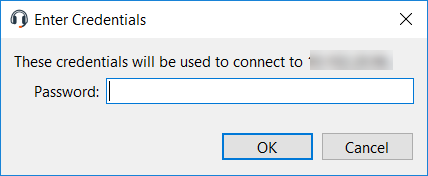
When establishing the connection to the VNC server, the system prompts you to enter the user name and password.
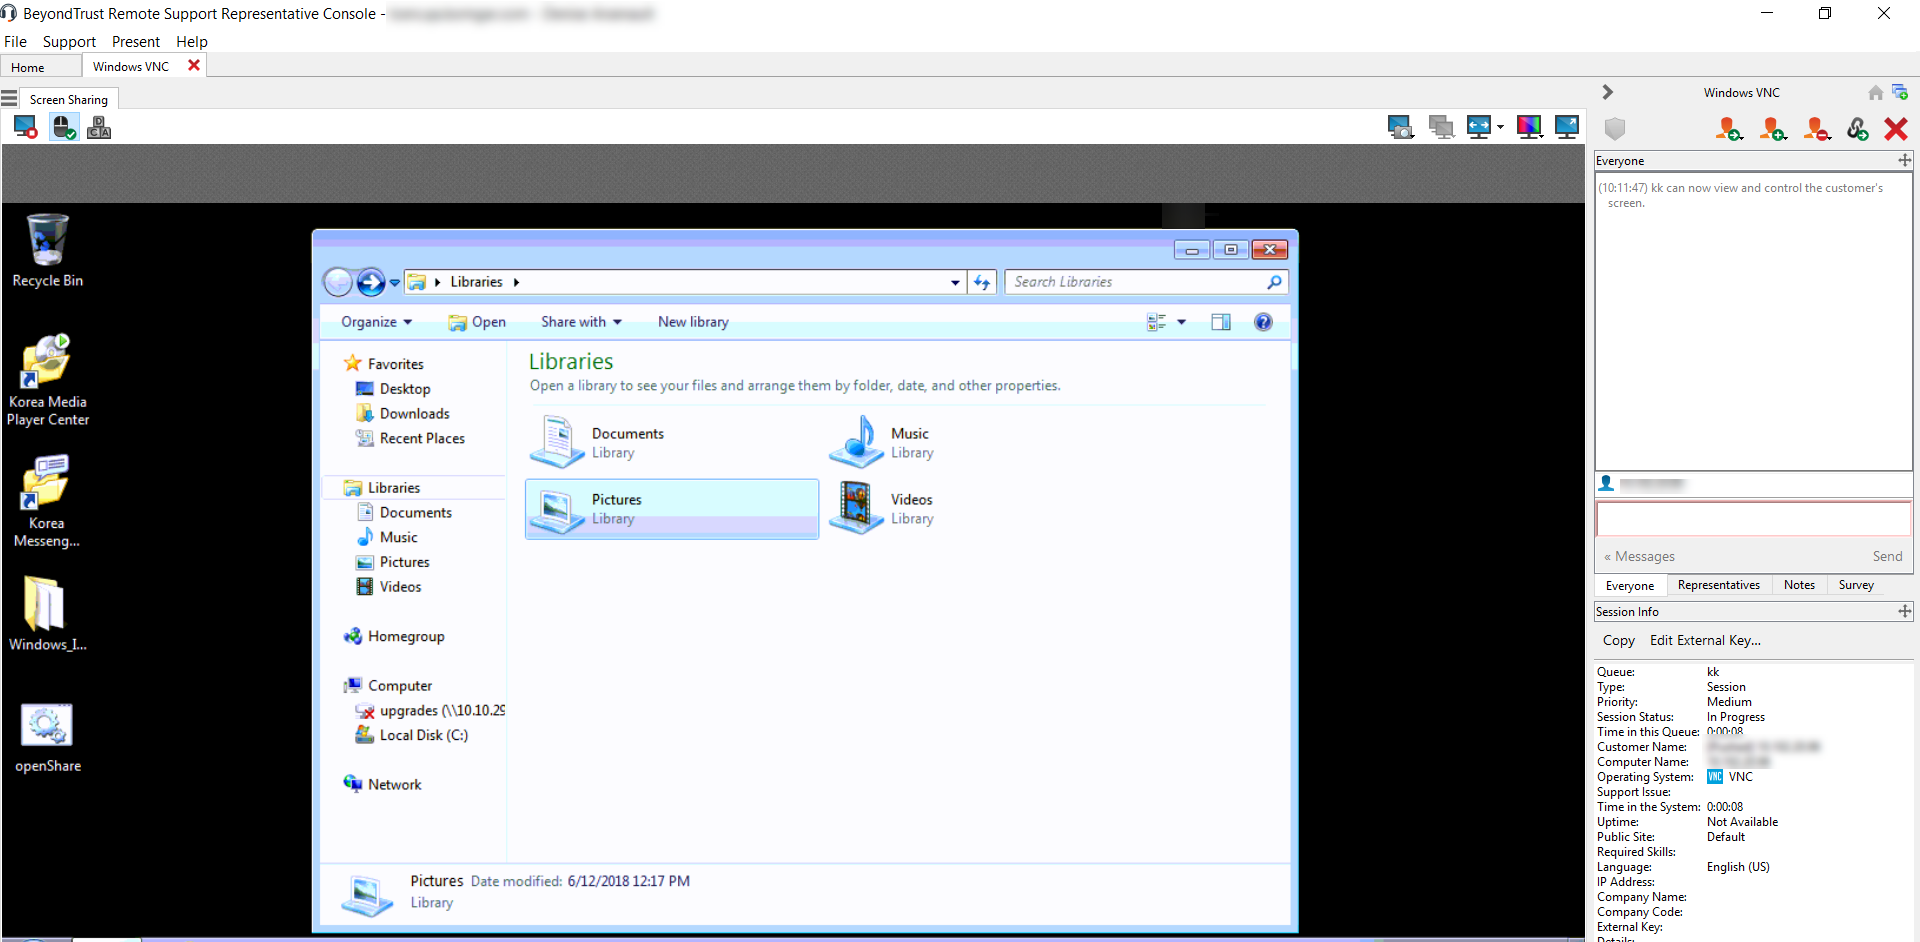
Your VNC session now begins. Begin screen sharing to view the remote desktop. You can send the Ctrl-Alt-Del command, capture a screenshot of the remote desktop, and share clipboard text contents. You also can share, transfer, or record the VNC session, following the normal rules of your user account settings.
Jump Items can be set to allow multiple users to simultaneously access the same Jump Item. If set to Join Existing Session, other users are able to join a session already underway. The original owner of the session receives a note indicating another user has joined the session, but is not allowed to deny them access.
For more information on simultaneous Jumps, please see Jump Item Settings.