Give a Presentation to Remote Attendees
The presentation feature is deprecated as of Remote Support 22.1 and is not included in new site deployments. For upgrades, it is turned ON, but you can opt to turn it OFF. If you have a new site deployment and you need to run presentations, please contact Support or your site administrator.

A representative with permissions to give presentations, or alternatively a representative with only presentation permission, can share their screen with one or more remote attendees. Start a presentation from:
- The Present menu of the representative console
- The Present quick start button at the top of your representative console
- The Presentation-Only interface selection window (representatives without permission to provide remote support)
If you choose to start a presentation immediately by clicking either the Present button or by selecting Start Presentation... within the representative console, the Presentation interface opens.
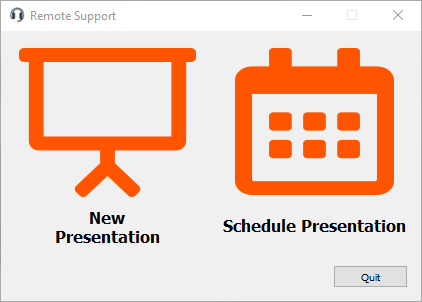
If you have presentation-only permissions, click New Presentation in the Presentation-Only selection window to begin a new presentation now.
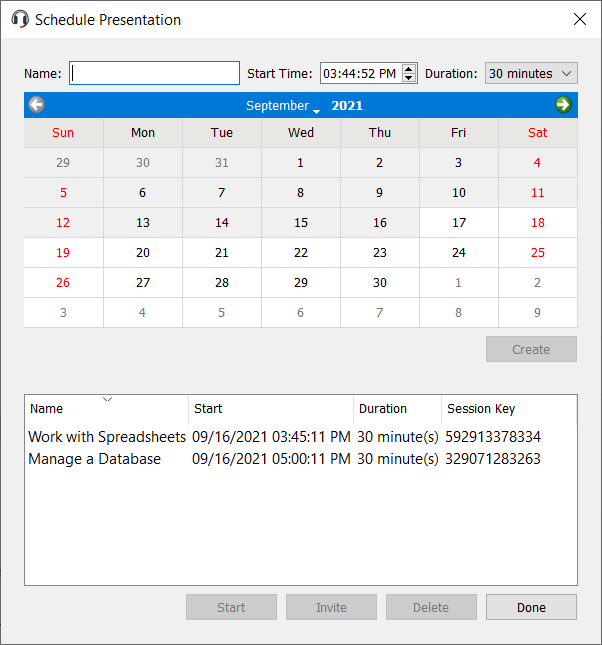
Alternatively, schedule a presentation for a later date. A scheduler prompts you to enter a name for your presentation, a start time and date, and the expected duration of the event. Once you have entered this information, click Create. Your presentation appears in a list of your upcoming presentations. Presentation times cannot overlap. If you delete a presentation prior to its scheduled time, any invitations you have sent will be invalid, and attendees will not be able to connect. When you are ready to begin a scheduled presentation, select the presentation from the list and then click Start to open the presentation interface.
From the scheduler, you can send attendees an email invitation containing a unique URL and any audio conference details for your presentation, or you can direct your attendees to visit your public site and enter the unique session key. You can also send an email invitation from the presentation interface.
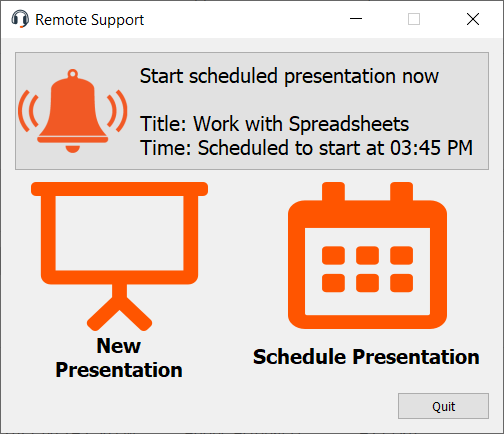
If a presentation is scheduled to start soon, a button at the top of the Presentation-Only selection window allows you to begin the presentation directly. You can also start a scheduled presentation from the schedule window.
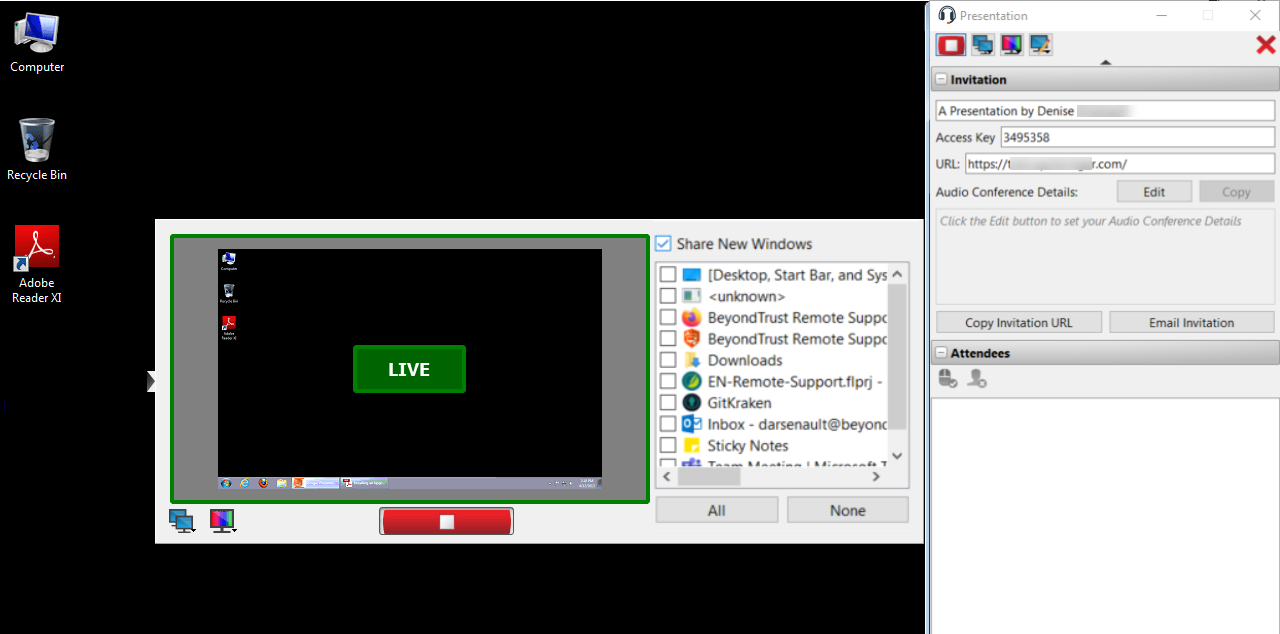
The presentation interface consists of an unobtrusive vertical sidebar with three collapsible sections: Invitation, Attendees, and Chat. A sliding, horizontal side panel contains a previewing window that displays a status indicator which changes when you click the start/stop button to indicate that you are presenting live. An application selector, display selector, and resolution selector, described below, are also available.
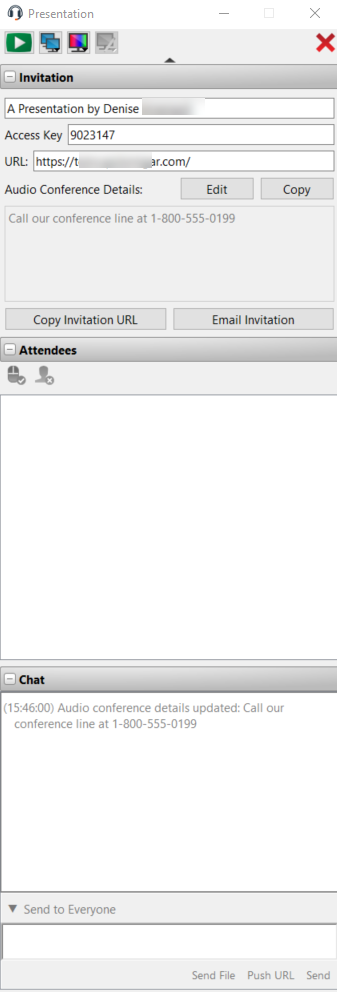
In the Invitation section you may enter a name for your presentation if you wish, or you may use the default generic entry including the representative's name. Enabled fields for the presentation's Access Key and URL are displayed, and you may choose to enter and save audio conference details, which are retained from one presentation to the next, and are logged in the chat window. This information is sent to all attendees when they connect and is redistributed any time you update the information during a presentation. If your public site has the presentation list enabled, you can select Showing on Public List to display a link attendees can click to join your presentation. Buttons are provided to quickly and efficiently Copy Invitation URL and also to Email Invitation.
If the Invite button is missing in the presentation schedule dialogue, confirm that client side emails have been configured and enabled on your instance. For more information, please see Email Configuration: Configure the Software to Send Emails
The Attendees section lists those attendees who have joined your presentation. A button allows you to grant or discontinue an attendee's control of your mouse and keyboard, if permitted. Also, you may choose to remove attendees from your presentation by clicking the button to remove attendees.
When your attendee has control of your mouse and keyboard, the attendee will see a red bar across the bottom of the attendee window. If the attendee is in actual size or full screen mode, attendee will drop out of those modes when taking control from you. An attendee using a mobile device cannot take control.
The Chat section of the presentation interface logs your actions in the interface as well as messages you send to all attendees or to selected attendees. Your attendees may chat with you alone or with everyone.
Clicking the arrow above the presentation interface sections minimizes the interface to mini-mode containing only the presentation controls themselves.
When previewing the presentation or presenting, you can open or close the Preview/Live pane by clicking the handle at its left. From this pane, select which applications to share. You can choose whether to present new windows automatically or not.If you have more than one display for your computer, click the monitors icon to select which monitor to present. The primary monitor is designated by a P. You may also choose to present all of your displays.
You can also choose the presentation color depth - low bandwidth, best performance, performance and quality, or best quality.

The start, stop, monitors, and color depth buttons are available whether or not you have the Preview or Live pane open, or whether or not you have collapsed the BeyondTrust Presentation interface to its minimal screen presence, or mini-mode. The annotations button is also available when you are presenting.
Presentation Tools
|
|
Begin presenting. A live presentation will be reflected in the presentation interface pull-out panel with a translucent green LIVE indicator. |
|
|
Stop presenting. The presentation interface pull-out panel will display a translucent red PREVIEW indicator. |
|
|
Select the display monitor for your presentation session. The primary monitor will be designated by a P. |
|
|
Present the screen in 2-bit gray scale for the lowest bandwidth consumption, 8-bit color for fast performance, 16-bit for a medium quality of image and performance, or 32-bit for the highest image resolution. |
|
|
Begin using annotations in your live presentation. |
|
|
If permitted, grant control of your mouse and keyboard to an attendee. Only one attendee at a time can have control of your computer. You always maintain overriding control, and you can cancel the attendee’s control at any time. An attendee using a mobile device cannot take control. You cannot transfer a presentation to another presenter. |
|
|
Remove attendees from the presentation without ending the presentation. |
|
|
End the presentation altogether and close the presentation interface. |


Annotations

If you have permission to use Annotations, this tool is also available during presentations, allowing you to highlight areas of the screen and draw attention to specific areas and items.
Once you have started using annotations, right-click anywhere in your presentation to select from the annotation tools. To turn off Annotations, select No Tool from the dropdown menu, or click Esc.
Tools available include free drawing, rectangle and circle shapes, erase, undo, delete, color (red/black/white) and line thickness (thin/medium/thick).