Jump interface
Use Jump items to support remote systems
BeyondTrust Jump Technology enables privileged users to connect to an unattended remote system to start a session without end-user assistance. Dependent upon your permissions, you may Jump to any computer on your LAN/VPN or on a network with a Jumpoint agent. You can save Jump Shortcuts for frequently accessed machines. To Jump to a non-Windows computer or a system which is not on a network, you can install a Jump Client.
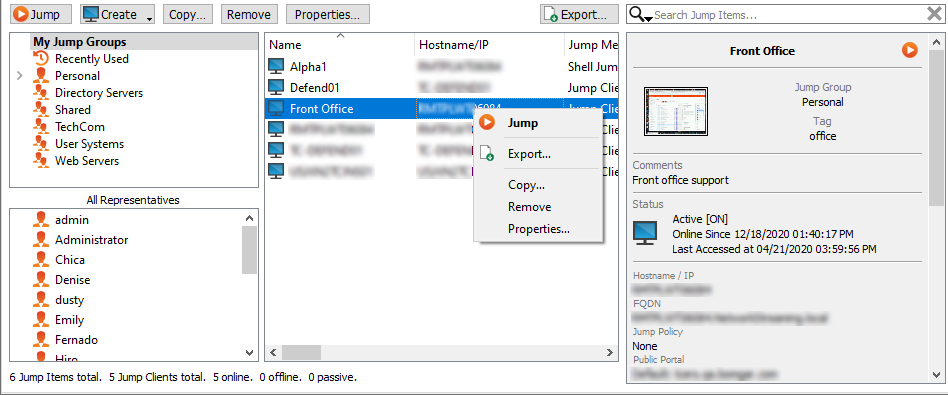
The Jump interface appears in the bottom half of the representative console. The list may contain Jump Clients, Jump shortcuts for Remote Jumps, Local Jumps, Remote and Local RDP sessions, Remote and Local VNC sessions, Shell Jumps, and Intel® vPro Jumps. Jump Item availability, including whether or not the Jump Item is in use, is listed in the Status column.
Jump Items are listed in Jump Groups. If you are assigned to one or more Jump Groups, you can access the Jump Items in those groups, with the permissions assigned by your admin. Selecting a Jump Group and then clicking Create auto-selects that Jump Group in the Jump Item configuration window.
Your personal list of Jump Items is primarily for your individual use, although your team leads, team managers, and users with permission to see all Jump Items may have access to your personal list of Jump Items. Similarly, if you are a team manager or lead with appropriate permissions, you may see team members' personal lists of Jump Items. Additionally, you may have permission to access Jump Items in Jump Groups you do not belong to and personal Jump Items for non-team members.
Jump to a Jump item
Browse through groups or dynamically search for computers.
To facilitate browsing the Jump Clients list, you may drag the columns into any order you wish, and then sort a column by clicking the column header. The representative console remembers the column order and the sort order the next time the representative console is launched.
In addition to browsing for Jump Clients, you can search based on multiple fields. Enter a string in the search field and then press Enter. To change the fields you are searching, click the magnifying glass and check or uncheck any of the available fields. Searchable fields include Comments, Console User, Domain, FQDN, Group, Hostname/IP, Jump Method, Last Accessed, Name, Private IP, Public IP, Status, Tag, and Workgroup.
Once you have found the computer you wish to access, double-click the entry, or select the entry and click the Jump button. This will attempt to start a session with the remote computer.
If you need to access Jump Items when no user is available, make sure the session permissions are set either to disable prompting or to default to Allow for unattended sessions.
You may programmatically connect to a Jump Item directly from your systems management or ticketing tool. If your search results in only one Jump Item, the session will start immediately. If multiple Jump Items are returned, select one of the Jump Items listed in the selection window and click OK.
For more information about scripting, please see Representative Console Scripting and Client Scripting API.
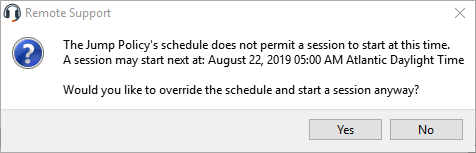
If a Jump Policy enforces a schedule for this Jump Item, an attempt to access the Jump Item outside of its permitted schedule prevents the Jump. A prompt informs you of the policy restrictions and provides the date and time when this Jump Item is next available for access.
If you have permission to modify Jump Policies, the prompt gives you the option to override the schedule and start a session anyway.
Default credentials for Jump items
When starting a Jump session that requires credentials, after selecting the credentials, you can check Remember as my default. Once a credential is selected as a default, it displays with other Jump item details, and subsequent sessions start without requesting credentials.
When a default credential is set, the Jump item details (accessed by right-clicking the Jump Item) include a button for Jump (Change Credentials). This opens the credential selection window, and you can either change default credential, select a different credential for this session, or clear the saved default credential.
If a default credential is no longer available to the user for that Jump item, the next time they start a session with that Jump item there is a warning that the requested credentials for starting the session were not found, and the option to continue. If you continue, the credential selection window opens and you can select a credential as usual.
Start multiple Jump sessions
You can select up to ten Jump items and start them with a single click. The jump items must either have saved default credentials, or not require credentials. Any Jump items that require credentials and do not have default credentials do not start.
Copy Jump items
Jump Items can be copied and can belong to multiple Jump Groups. This includes Jump Client items, providing administrators with the ability to set separate policies and group permissions without requiring an additional Jump Client installation on the target endpoint. Users with the appropriate permissions see the option to Copy Jump Items in the Representative Console by right-clicking the item. Users can perform this function on multiple Jump Items as well.
This feature enables admins and users to effectively manage different policies for Jump Items and Jump Clients without the need to create a new Jump Item. This functionality enables users to limit the number of clients necessary to enable Jump Client sessions, and limits manual administrative tasks when defining access pathways for users.