SAML: Set Up User Authentication through a SAML Identity Provider

Configure your B Series Appliance to allow users to authenticate to the /appliance interface using SAML.
To use SAML authentication, you must have an identity provider such as Okta, OneLogin, Entra ID, or ADFS.
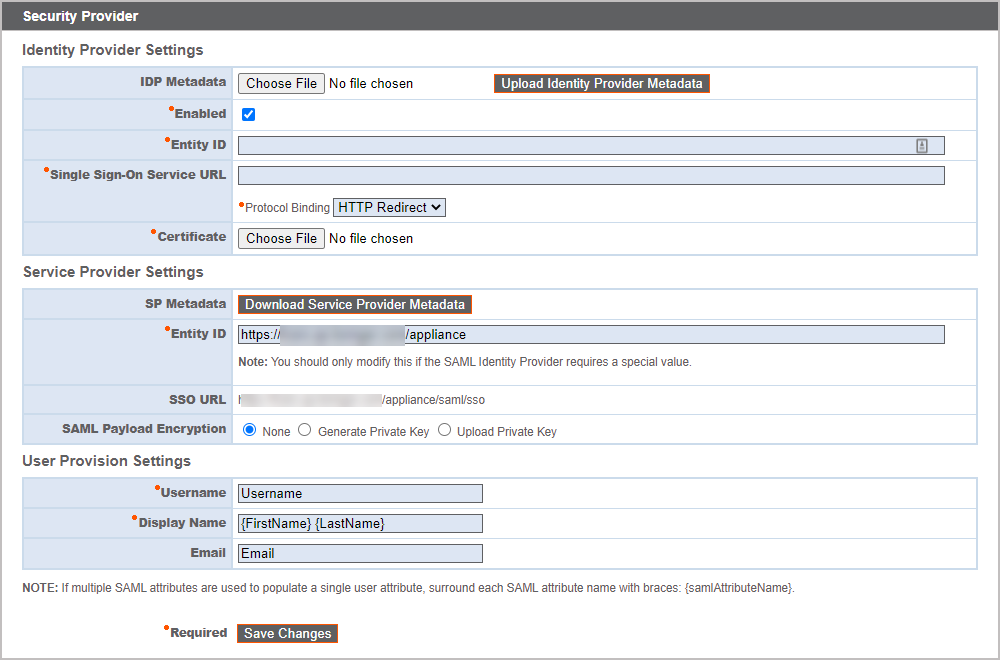
To set up the connection, start with the Service Provider Settings section. If your identity provider (IDP) allows you to upload metadata from the service provider (SP), click Download Service Provider Metadata. This gives you an XML file that you can upload to your IDP when creating the application. Alternatively, copy and paste the Entity ID and SSO URL into your IDP.
The Entity ID may be called Audience URI in your identity provider.
By default, SAML Payload Encryption is disabled, but you may generate or upload a private key to enable it. To have the B Series Appliance generate a private key and certificate, select Generate Private Key and click Save Changes. Then, click Download SP Certificate and upload the generated certificate to your identity provider. To provide the private key and certificate yourself, select Upload Private Key, choose the certificate file, and enter its password, if needed. You must upload the same certificate file to your identity provider.
After saving the application in your identity provider, you may have the option to download its metadata. If so, upload that file to your B Series Appliance with the Upload Identity Provider Metadata button. Alternatively, copy and paste the Entity ID and Single Sign-On Service URL into your B Series Appliance, in the Identity Provider Settings section.
The Entity ID may be called Identity Provider Issuer or Issuer URL, and the Single Sign-On Service URL may be called SAML 2.0 Endpoint.
Protocol Binding determines whether an HTTP POST occurs or whether the user is redirected to the sign-on URL. Leave this set to HTTP Redirect unless otherwise required by your identity provider. You must also provide the IDP Certificate, which you can download from the IDP.
Under User Provision Settings, map the Username, Display Name, and Email to the corresponding attributes in your identity provider.
Click Save Changes to save the SAML configuration.
Now, on the /appliance login page, users will see a link to Use SAML Authentication below the Login button. Users who have been assigned to the application created in your IDP can click this link to log in. If they are not already signed into the IDP, they will be redirected to the IDP to log in before being redirected back to /appliance.