Use Jump Items to Access Endpoints in the Privileged Web Access Console
To access an endpoint, install a Jump Item. You can install a Jump Item by clicking Create at the top of the Jump interface. Full details for creating Jump Items are provided later in this guide. To access an individual Windows, Mac, or Linux computer that is not on an accessible network, install a Jump Client on that system from the /login > Jump > Jump Clients page. Jump Clients appear in the Jump interface, as well as Jump Item shortcuts.
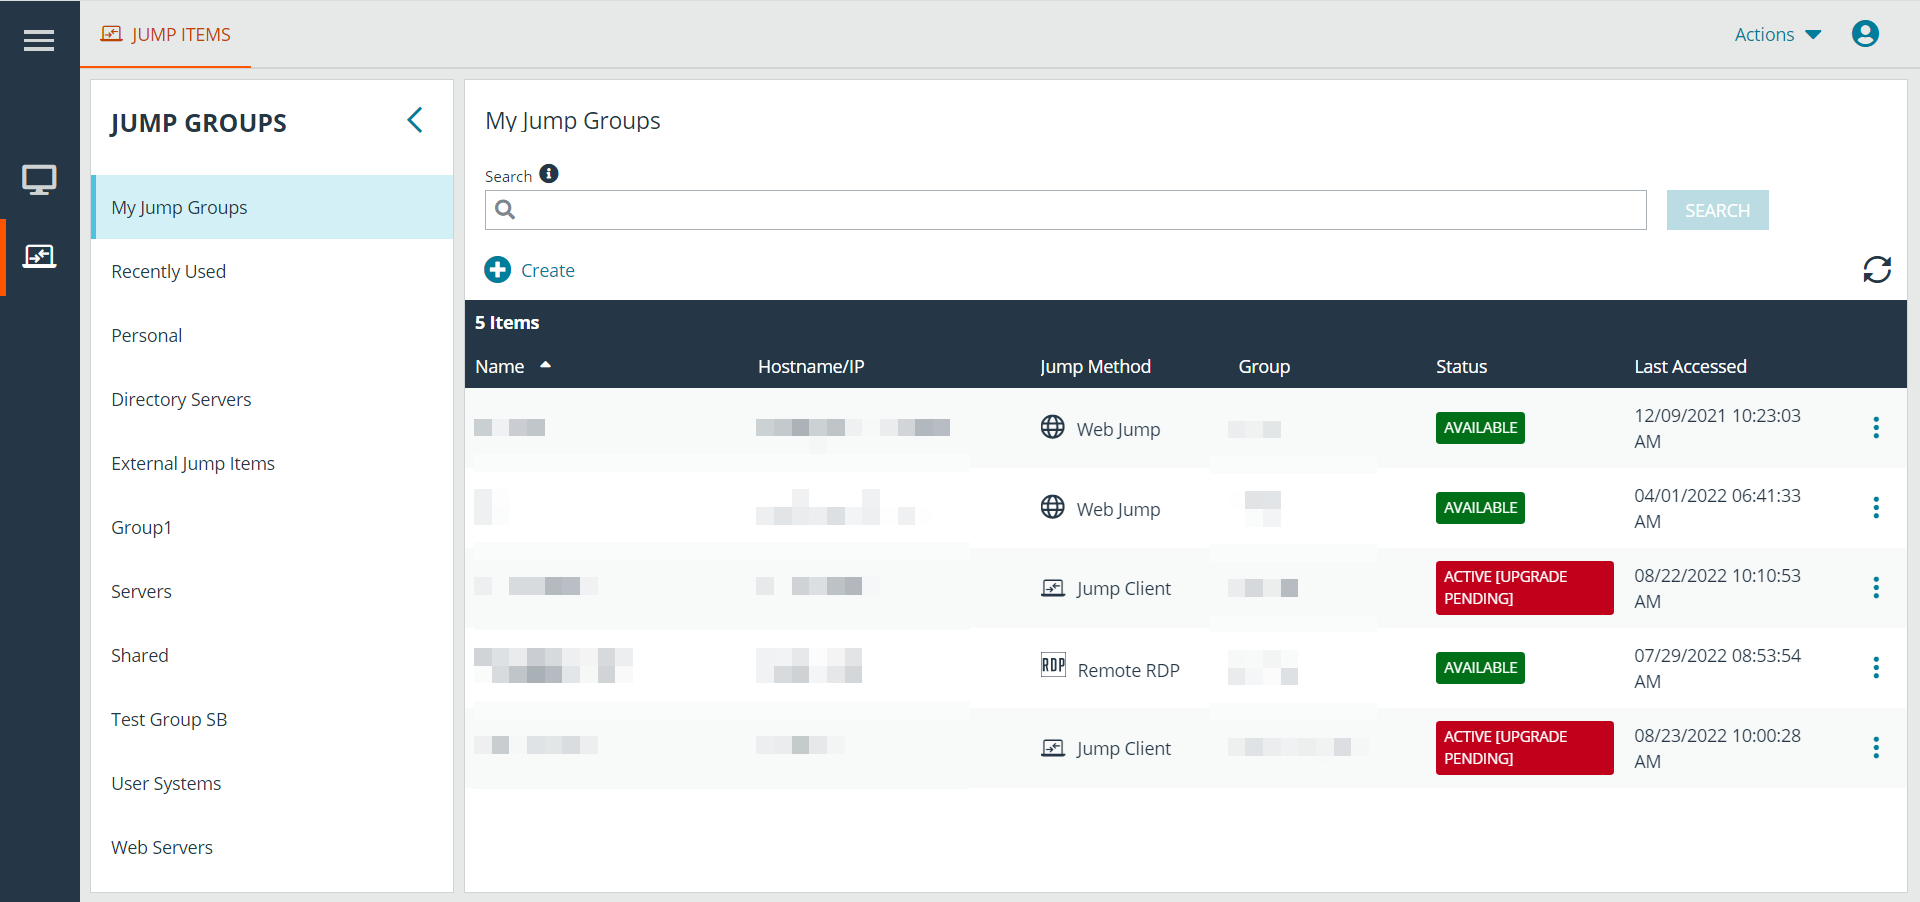
Jump Items are listed in Jump Groups. If you are assigned to one or more Jump Groups, you can access the Jump Items in those groups, with the permissions assigned by your admin.
Your personal list of Jump Items is primarily for your individual use, although your team leads, team managers, and users with permission to see all Jump Items may have access to your personal list of Jump Items. Similarly, if you are a team manager or lead with appropriate permissions, you may see team members' personal lists of Jump Items. Additionally, you may have permission to access Jump Items in Jump Groups you do not belong to and personal Jump Items for non-team members.
There are three ways that you can begin accessing endpoints:
- Locate and select an endpoint from the My Jump Groups list.
- Choose a Jump Group and then select an endpoint from that group's listing of endpoints.
- Select a session from the Frequently Used Jump Items list.
The Frequently Used Jump Items list displays all of the Jump Items that you access on a regular basis. To start a session with a frequented item, hover your mouse over the session and click Start Session.
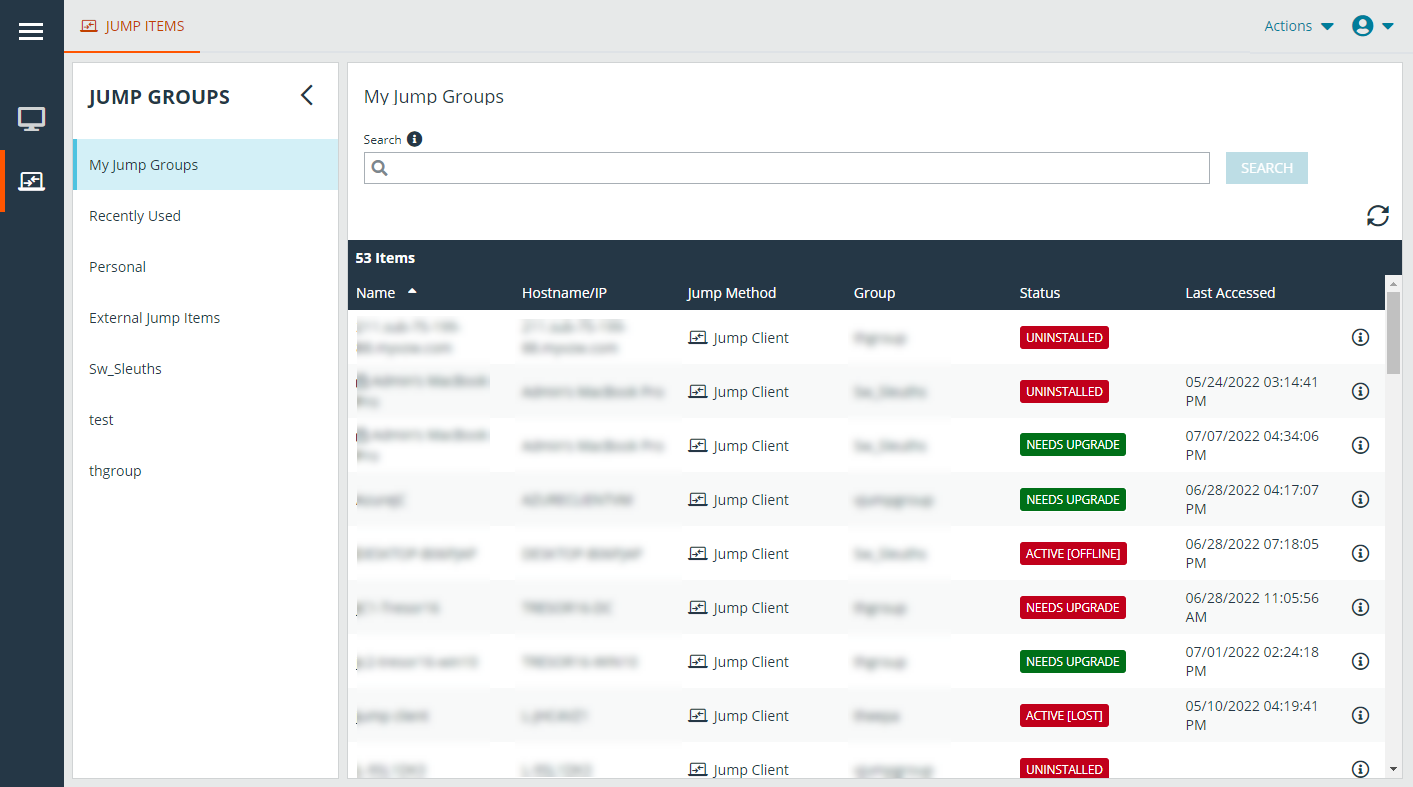
The Jump Items list can only display a maximum of 50 Jump Items.
To begin accessing Jump Items, follow the steps outlined below:
- Select a Jump Group and click the Refresh button.
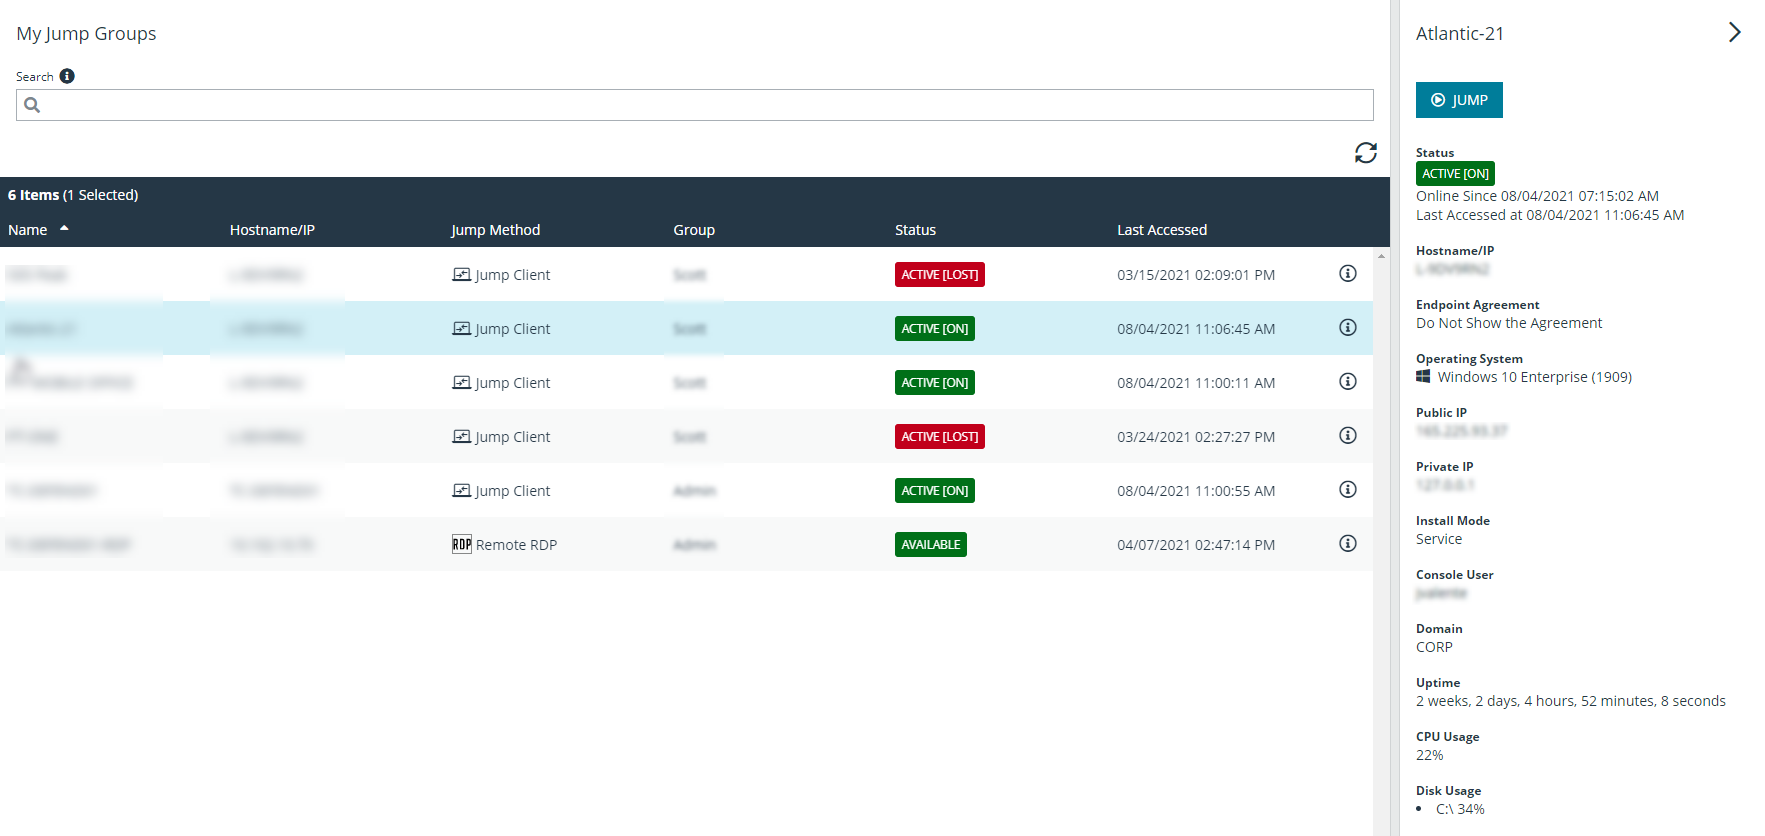
- A list of all Jump Items populates, and you can review details about the Jump Item, including: Name, Method, Group, Status, and Last Accessed. To review more details about the Jump Item, click on the plus sign beside the Jump Item's name.
- Click the JUMP button to start a session with the endpoint.
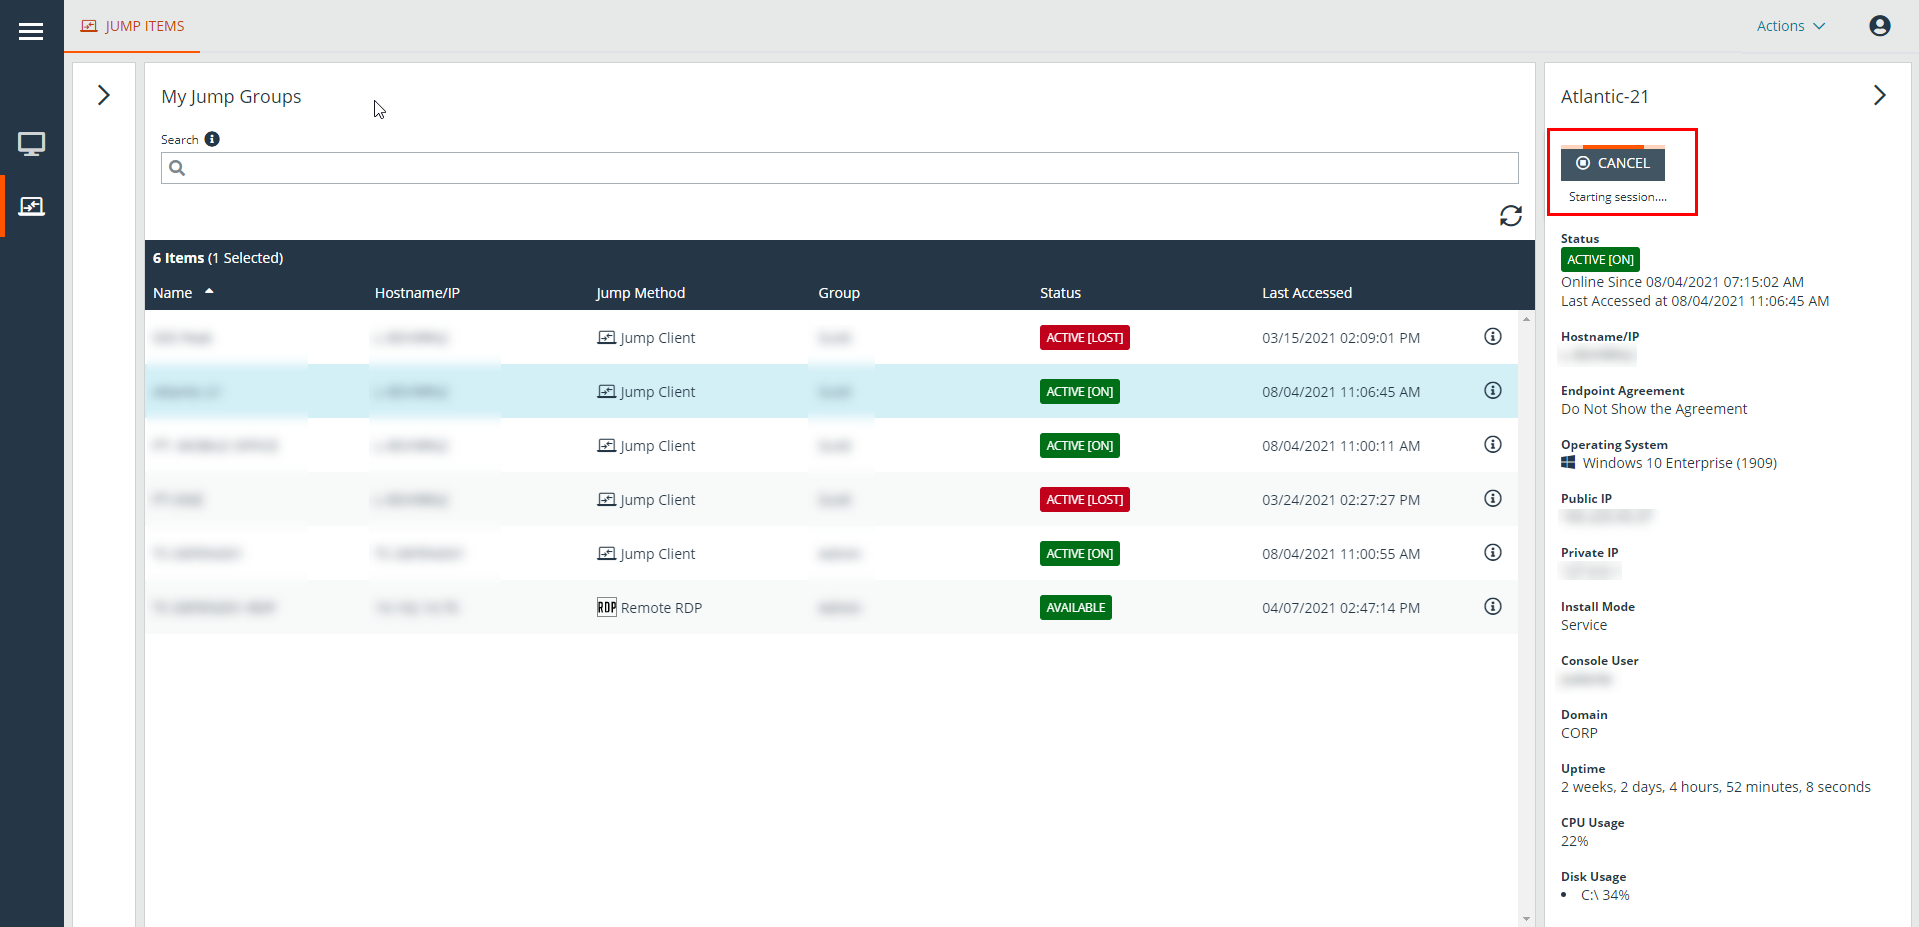
- To cancel a Jump access request, click Cancel.
End-User and Third-Party Authorization
Depending on the configuration of Jump Items within the /login administrative interface, a Jump Item may have a Jump Policy associated with it, and the policy may define an authorization component that forces you to request permission from a third-party or an administrator before you are able to start an access session with the Jump Item.
For more information about how to configure third party and end-user notifications and approval, please see Jump Policies: Set Schedules, Notifications, and Approval for Jump Items.
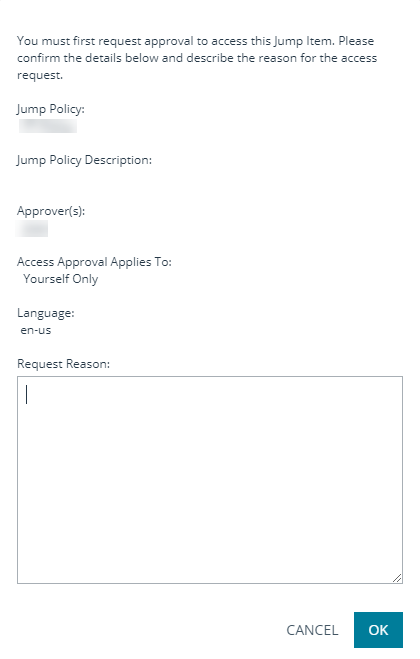
- After you have clicked the JUMP button and requested access, a prompt appears, and you are required to enter a reason for wanting to access the system.
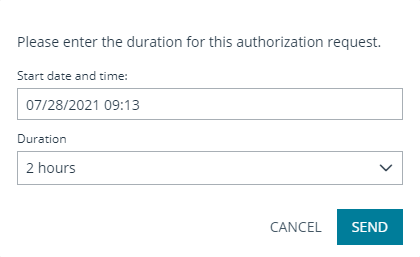
- Next, you must indicate when and for how long you will be accessing the system.
- Once the request has been submitted, the third party or person responsible for approving access requests is alerted through an email notification and has the opportunity to accept or deny the request. Although other approvers can see the email address of the person who approved or denied the request, the requestor cannot.
- After permission has been determined, an authorization notification appears within the Jump Item's information displaying either approved or denied. If access is granted, you can tap the Jump button to begin accessing the system.
- Then you are presented with a message asking if you would like to begin an access session.
- If you choose to begin the session, the approving party's comments appear, and you can begin accessing the system.
Revoke an Access Approval Request
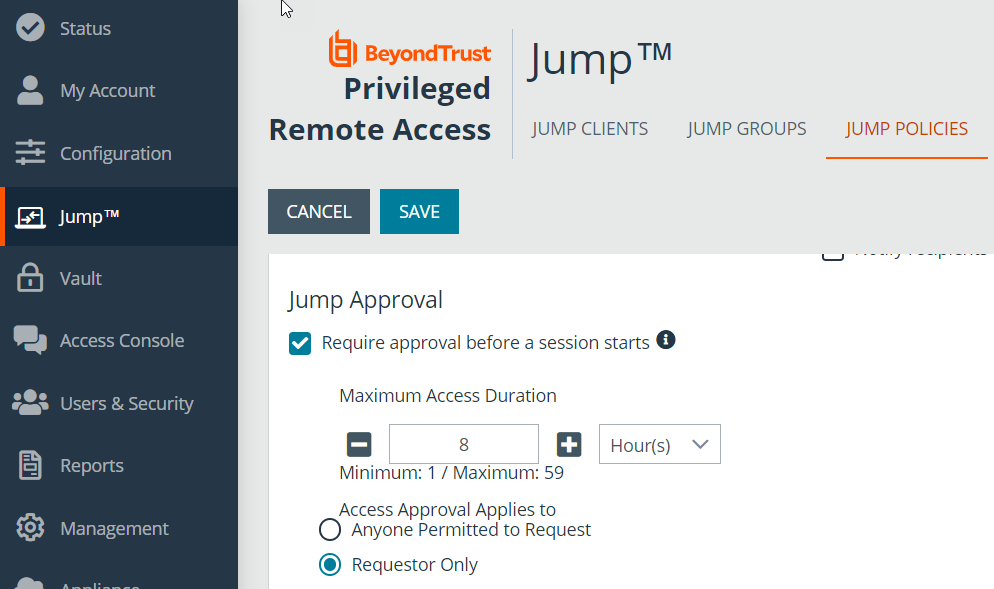
Permission to revoke approved access requests is controlled by Jump Policy. Any user who can approve requests on the Jump Policy can cancel requests, subject to the approval type. In the /login web management interface, go to Jump > Jump Policies. Under Jump Approval you have two options:
- Anyone Permitted to Request
- Requestor Only
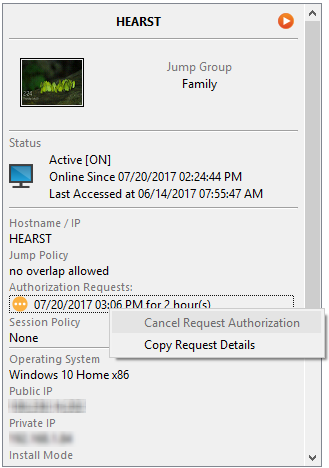
If the Jump Policy is set to requestor Only, and an Access Request is presently approved for User A, User B is asked to create a new Access Request if they attempt to Jump to the Jump Item, since that request does not apply to them. Additionally, if User B attempts to cancel the Access Approval Request, the option is grayed out. The only user who can cancel the approved request is User A, because they are the approved user for the request.
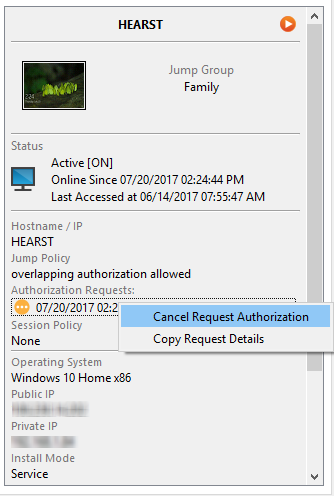
However, if the Jump Policy is set to Anyone Permitted to Request, and an Access Request is presently approved for User A, User B is allowed to start a new session with the Jump Item if they attempt to Jump to it. In addition, anyone with permission to access the Jump Item is allowed to cancel / revoke the request.
Automatic Log On Credentials
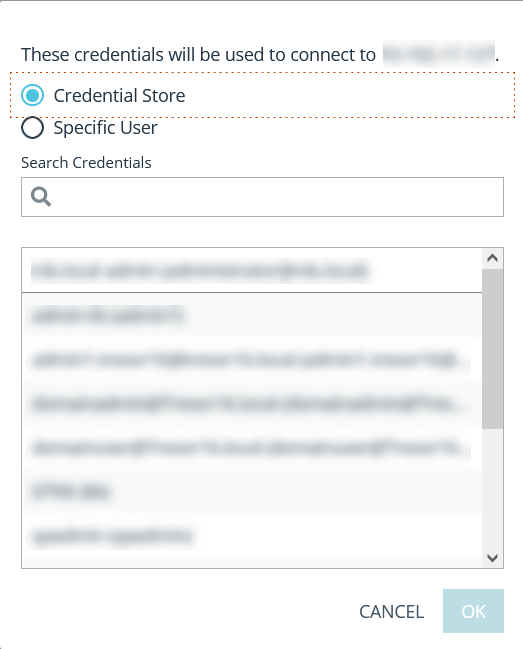
Credentials from the Endpoint Credential Manager can be used for RDP and for performing Remote Jump. If a user selects to Jump to a Remote Jump or Remote RDP and no automatic log on credentials are available, a username and password must be entered into the prompt before the access session can begin with the endpoint. If the /login administrative interface has been configured with automatic log on credentials and returns only one set of credentials as being available for a particular user and Jump Item, the credential request is skipped, and the single credential is used to start the session. If there is more than one credential configured in the /login administrative interface, the user has the choice either to choose credentials from the credential store or to enter their own credentials manually.
For more information on credential configuration and management, please see Security: Manage Security Settings.
Jump Client Upgrade
You can upgrade Jump Clients from within the privileged web access console. A Needs Upgrade banner displays under Status, in green if the Jump Client is online, red if offline. You can only upgrade Jump Clients that are online. To upgrade a given Jump Client, click the green banner.
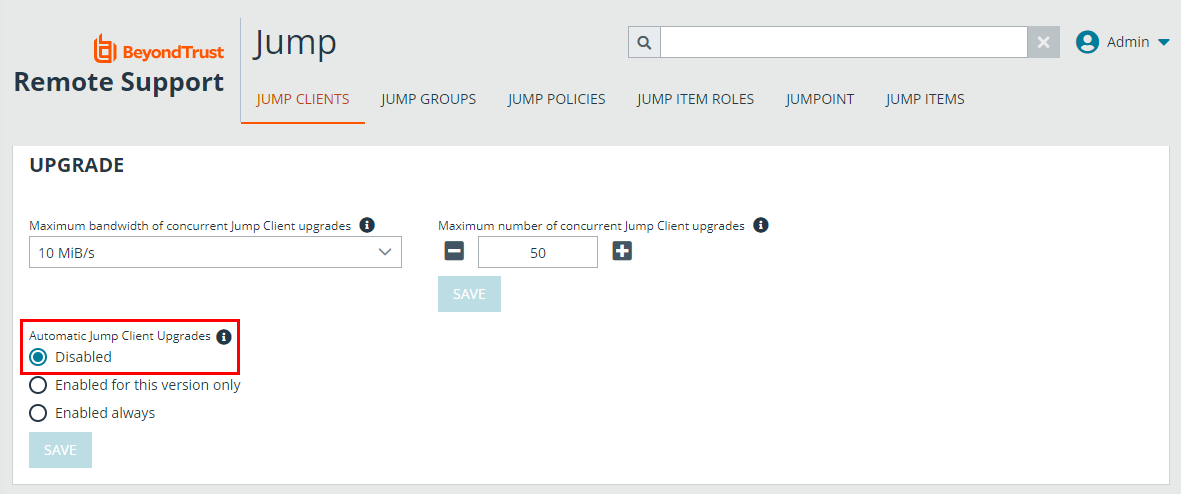
In order to be able to upgrade a Jump Client from the privileged web access console, you must make sure that Automatic Jump Client Upgrades is disabled in /login. To do so, go to /login > Jump > Jump Clients > Upgrades and disable Automatic Jump Client Upgrades. If automatic upgrading is not disabled, Jump Clients needing to upgrade display an Upgrade Pending banner instead.
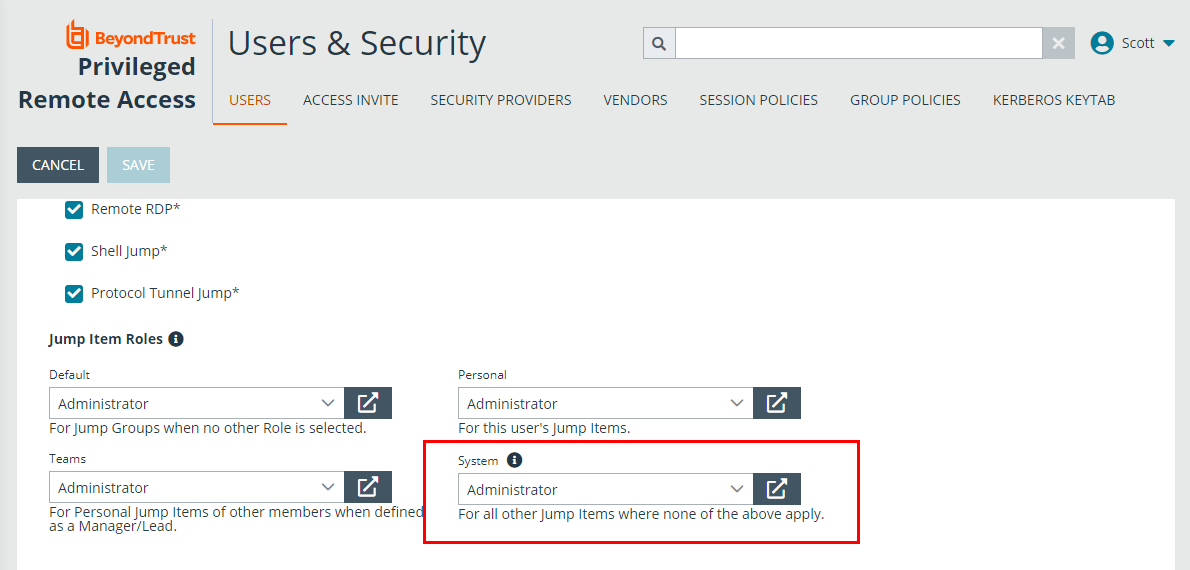
The rep must also have the right to perform the update. This can be set in /login > Users & Security > Users > Access Permissions > Jump Item Roles. Make sure that System is also set to Administrator.