Install the Web Service
Starting with Privileged Identity version 5.5.2, the web service is a requirement for the web application to function. In prior versions, the web service was an optional component used only for PowerShell cmdlets, application launcher, session recording, and API access.
You must install the web service locally to its host; it cannot be pushed to a target system from the management console.
To install the web service on a separate host, copy the manual installer to the remote host and run it there. The manual installer is found in the installation directory, typically C:\Program Files (x86)\Lieberman\Roulette\SupplementalInstallers\ERPMWebService.exe. Follow the steps below to complete the install wizard.
To install the web service on the same machine as the management console:

- From the Actions pane, click Manage Web App.
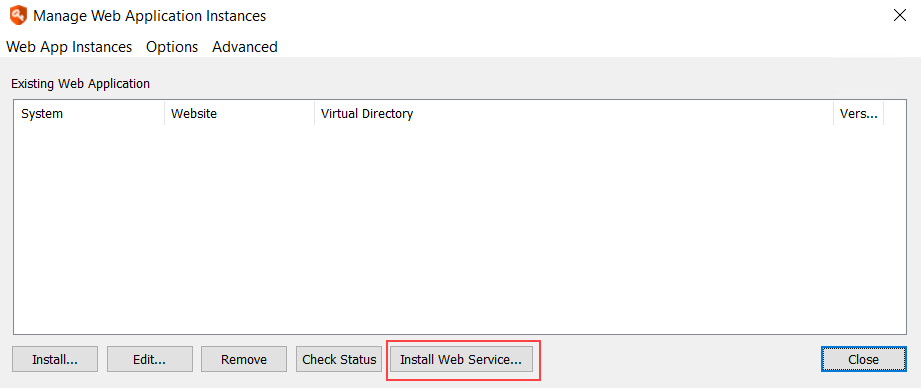
- In the Manage Web Application Instances dialog, click Install Web Service.
Follow the below steps to complete the install using the wizard:
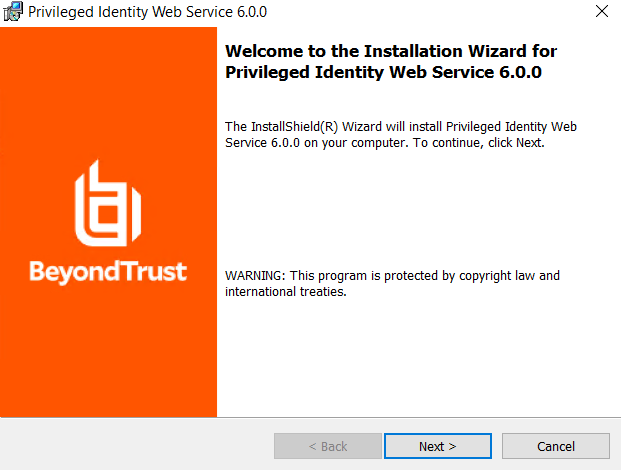
- On the welcome page, click Next.
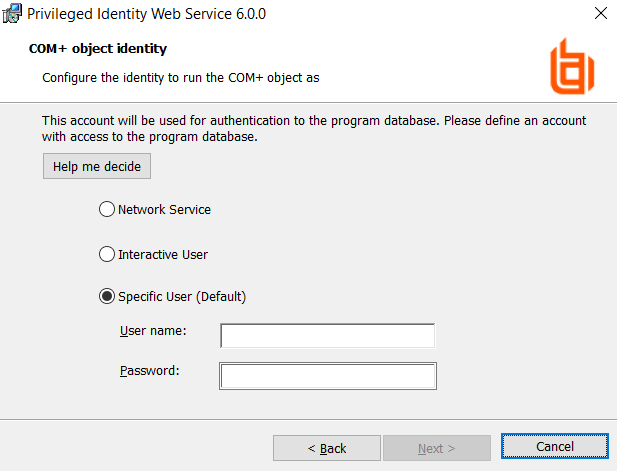
- On the COM+ Object Identity screen, choose an appropriate identity and click Next. Valid identity options are:
- Network Service: Choose this option when using database native authentication mode to connect to the database (for example, SA).
- Interactive User: (not recommended) Choose this option when you want the user calling the web service to pass their authentication token to the database. This works when using Integrated Windows Authentication but requires considerably more security configurations in the program data store.
- Specific User: (recommended, default) Choose this option when using Integrated Windows Authentication to the database or when you want to minimize rights granted to the COM application. This is the most compatible option. Supply the User name as DomainName\Username.
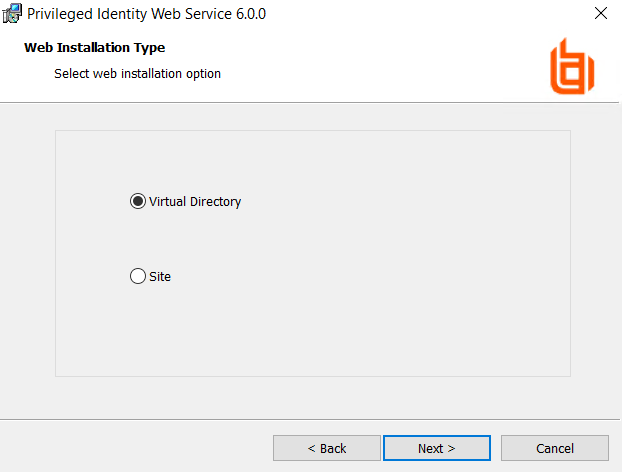
- On the Web Installation Type screen, select the location in the local IIS instance to install the web service to, and then click Next. Valid options are:
- Virtual Directory: (recommended, default) This installs the web service to a virtual directory called ERPMWebService, located under the parent web site you'll select next. This is the safest option to choose for both security and configuration reasons.
- Site: Choose this option to install the web service to the root web site. If there are multiple root web sites configured on the host, you will be presented with a selection of root web sites to choose from.
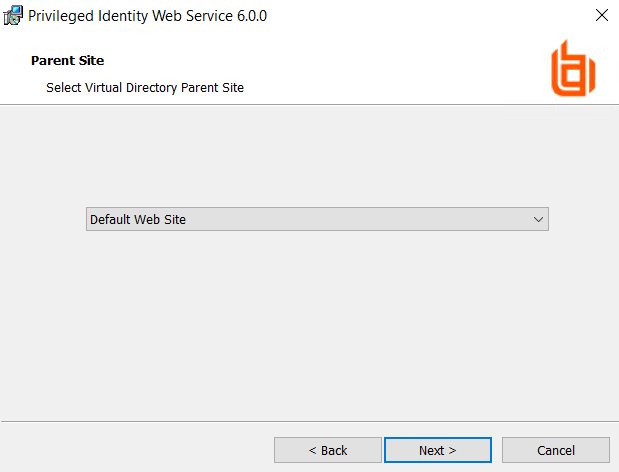
- If you chose Virtual Directory on the Web Installation Type screen, select a web site on Parent Site screen, and then click Next.
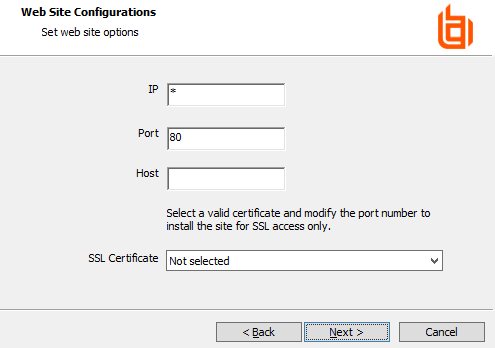
- If you chose Site on the Web Installation Type screen, configure site options on the Web Site Configuration screen.
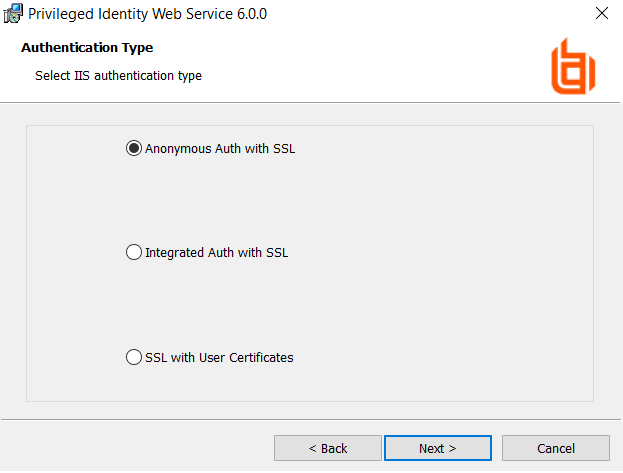
- On the Authentication Type screen, select the authentication method for connecting to the web service, and then click Next. Valid methods include:
- Anonymous Auth with SSL: Choose this when SSL is configured but Integrated Windows Authentication is not used.
- Anonymous Auth without SSL: (not recommended) Choose this when neither Integrated Windows Authentication nor SSL are used. Application Launcher will not work with this configuration.
- Integrated Auth with SSL: Choose this when SSL and Integrated Windows Authentication are used.
- Integrated Auth without SSL: Choose this when Integrated Windows Authentication is used but SSL is NOT configured. Application Launcher will not work with this configuration.
- SSL with User Certificates: Choose this when users must supply a user-based certificate (smart card, biometrics, etc.) to authenticate to the web site and web service. This causes more overhead in the overall configuration and may cause problems with some features.
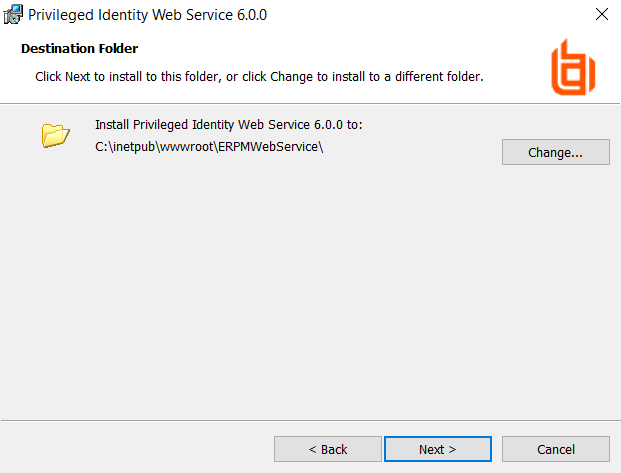
- On the Destination Folder screen, choose where to install the web service, and then click Next. The default location is %inetpub%\wwwroot\ERPMWebService, which automatically grants all permissions required for proper hosting. Changing the location may require additional configurations on the web server.
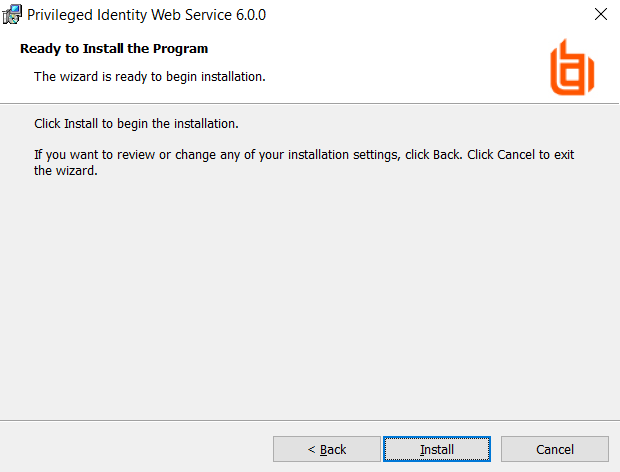
- Click Install.
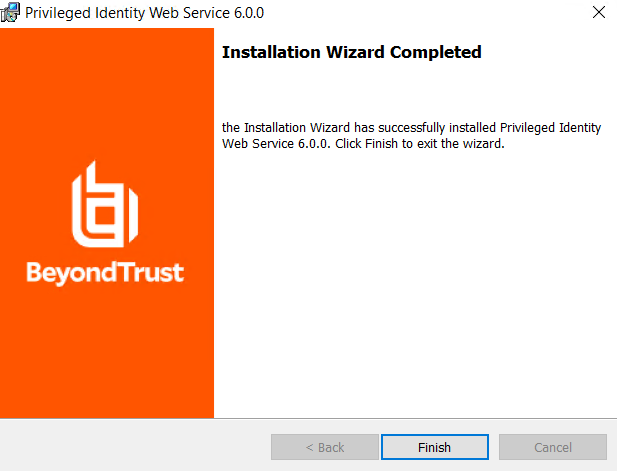
- Click Finish to exit the install wizard. The web service page and web service tester launches.
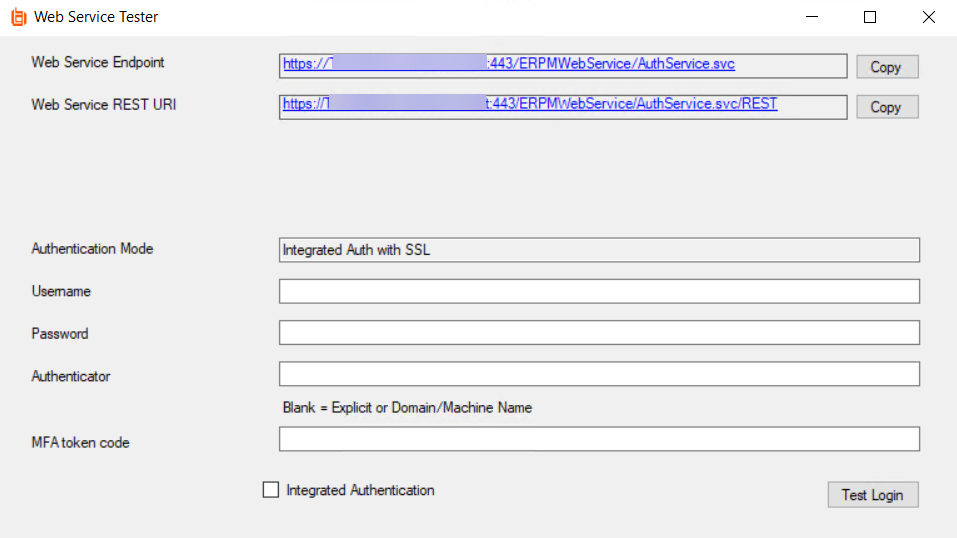
- From the Web Service Tester, make note of the Web Service REST URI, as it is required when configuring the web application. At this point, the web service will be non-functional, as it also requires settings. If the web service and web app are installed on the same host, the web service requires no further configuration. Close the Web Service Tester.

- On the Manage Web Application Instances dialog, select the web app, and then click Edit.
- When prompted to confirm settings overwrite, click Yes.
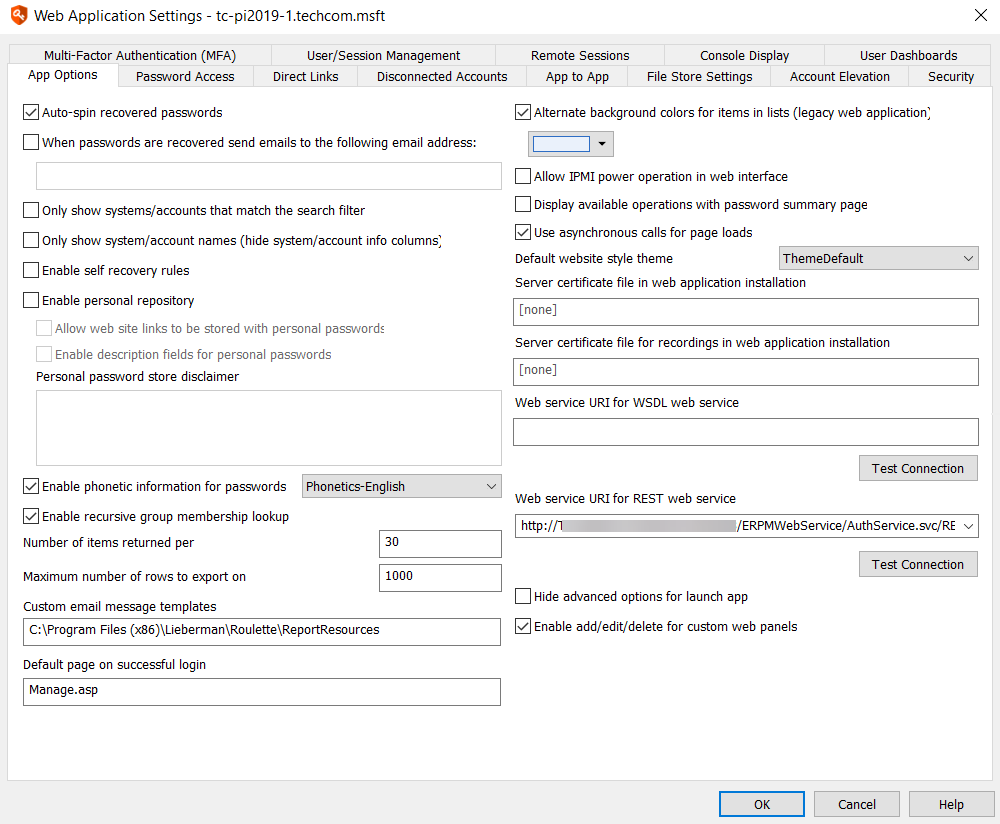
- On the App Options tab, find Web service URI for REST web service endpoint at the lower right of the dialog. Paste in the web service REST URI.
For example, let's say your server uses SSL on port 443 and your SSL certificate uses the fully qualified domain name of the server (server.example.int). The web service adds onto that (/erpmwebservice/authservice.svc/REST), making the URI https://server.example.int/erpmwebservice/authservice.svc/REST.
If you were behind a load balancer and the name of the load balanced cluster was securestore.example.com, the web service URI would be https://securestore.example.com/erpmwebservice/authservice.svc/REST.
- Click Test Connection to verify the settings.
- Click OK. When prompted that the settings have updated, click OK again.
- If the Privileged Identity web applications are behind a load balancer, the WebServiceConfig.json file located at ...\inetpub\wwwroot\PWCWeb\assets\ must specify the load balanced web service URI. For example: {"WebServiceAddress":"https://FullyQualifiedWebServer/ERPMWebService/AuthService.svc/REST"}.
- If you are load balancing the websites and using either SAML authentication or DUO MFA, you must install Microsoft .NET Core Runtime - 3.1.1. as well as updating the appsettings.json files located at ...\inetpub\wwwroot\SAML and ...\inetpub\wwwroot\DUO with the load balanced web service URI.
If you install to a virtual directory, the install process creates a virtual directory called ERPMWebService. This directory inherits the authentication settings, SSL settings, and other settings from the parent web site. If the parent site is configured to use anonymous authentication and the web service installer is configured to use Integrated Windows Authentication, the virtual directory is created with faulty settings. To correct this, you must open IIS and reconfigure the authentication settings after install.
If you install the web service on a machine that is NOT also hosting the web app, you must export the web app settings from the management console and import them onto the web service host. Otherwise, the web service will fail to load. To export the settings from the management console:
- Click Manage Web App from the left action pane.
- Select the desired web application instance from the list.
- From the top tools menu, select Advanced > Export web app registry config. This exports a regedit file; save this locally.
- You are prompted to generate the file for 64-bit Windows. Click Yes.
- Copy the registry export to the target web service host and double-click the file to import it.
These steps provide the web service with the necessary information to connect to the data store, the hardware security module, the encryption key, and other settings. Any time these settings change on the web app host, you must repeat these steps.
If the web service and web app have different host systems, and if the systems are accessed through different URLs (specifically the protocol, server name, or port), your web browser will block access to the web service, causing processes to malfunction.
To resolve this, enable cross-origin resource sharing (CORS). After you install the web service, open web.config and set EnableCORS to true.
Your specific browser may require additional configuration and may not work in all configurations. Please refer to your browser's documentation for more information on enabling CORS support.