Create Workstyles
- Navigate to the Windows > Workstyles node.
- Right-click the Workstyles node, and then click Create Workstyle on the top-right. The Workstyle Wizard is displayed.
- You can optionally enter a license code at this stage or you can enter it later once the Workstyle has been created.
- You can choose from Controlling or Blank for your Workstyle. A controlling Workstyle allows you to apply rules for access to privileges and applications. A blank Workstyle allows you to create an empty Workstyle without any predefined elements. If you selected a blank Workstyle, the next screen is Finish, as there is nothing to configure.
- Filtering (Controlling Workstyle only). This determines who receives this Workstyle. You can choose from standard users only or everyone. If you apply it to everyone, it applies to administrators. You can modify the filters and apply more detailed filtering once the Workstyle is created.
- Capabilities (Controlling Workstyle only). Allows you to choose Privilege Management and/or Application Control. If you don't select either capabilities, the next screen is Finish. This Workstyle contains only filtering information.
- Privilege Management (Controlling Workstyle with the Endpoint Privilege Management capability). Allows you to choose:
- Whether you want to display a notification to the user when applications are elevated by Endpoint Privilege Management for Windows
- How you want to manage Windows User Account Control (UAC) prompts
- Whether you want to allow the on-demand elevation of applications
If you select Present users with a challenge code from the dropdown, you are prompted to configure the challenge and response functionality at the end of creating your Workstyle, if your policy doesn't already have one.
- Application Control (Controlling Workstyle with the Application Control capability). Allows you to choose:
- How you want to apply application control. You can choose an allowlist or blocklist approach. We recommend you use an allowlist approach
- As an allowlist: How you want to handle non-allowed applications
- As a blocklist: How you want to handle blocked applications
- Finish. Allows you to enter a Name and Description for your new policy. If the Workstyle has been configured to use a Challenge/Response message and the policy doesn't have an existing key, you are asked to set a key. You can check the box on this screen to activate this Workstyle immediately or you can leave the box unchecked to continue to configure the Workstyle before you apply it to your endpoints.
Depending on the type of Workstyle you created and any capabilities that are included, Endpoint Privilege Management for Windows auto-generates certain Application Groups (containing rules), Content Groups, messages, and Custom Tokens. Filters are applied and subsequently configured as part of the Workstyle.
Disable/Enable Workstyles
You can enable or disable Workstyles to stop them being processed by Endpoint Privilege Management for Windows.
- Navigate to the policy and select the Workstyles node. You can see which policies are disabled and enabled in the list.
- Right-click on the Workstyle and click Disable Workstyle to disable it or Enable Workstyle to enable it.
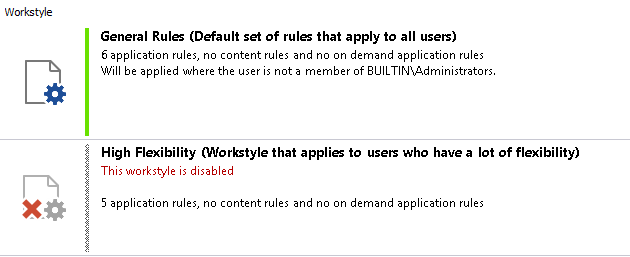
In the above example, the General Rules Workstyle is enabled and the High Flexibility Workstyle is disabled.
Workstyle Precedence
If you have multiple Workstyles, they are evaluated in the order in which they are listed. Workstyles that are higher in the list have a higher precedence. Once an application matches a Workstyle, no further Workstyles are processed for that application, so it is important that you order your Workstyles correctly, because it is possible for an application to match multiple Workstyles.
To change the precedence of a Workstyle:
- Select Windows > Workstyles from the left pane.
- Right-click and choose from the options Move Top, Move Up, Move Down, and Move Bottom as required.
Changes are automatically saved.