Install Endpoint Privilege Management for Windows
Endpoint Privilege Management for Windows requires that Windows short file name creation be enabled.
Client Packages
To install Endpoint Privilege Management for Windows, run the appropriate installation package:
- For 32-bit (x86) systems, run PrivilegeManagementForWindows_x86.exe.
- For 64-bit (x64) systems, run PrivilegeManagementForWindows_x64.exe.
The installation prompts you to install missing prerequisites.
Endpoint Privilege Management for Windows may be installed manually, but for larger installations we recommend you use a suitable third-party software deployment system.
There is no license to add during the client installation, as this is deployed with the Endpoint Privilege Management for Windows Workstyles, so the client may be installed silently.
As of version 5.5, all releases of Endpoint Privilege Management for Windows are signed only with a SHA-256 code signing certificate. Previous versions were dual signed with SHA-1 and SHA-256 certificates. The decision to drop SHA-1 certificates was made to avoid weaknesses in the SHA-1 algorithm and to align to industry security standards. For more information, see 2019 SHA-2 Code Signing Support requirement for Windows and WSUS.
If you intend to deploy Endpoint Privilege Management for Windows 5.5 to Windows 7 or Windows Server 2008 R2 machines, you must ensure the following KBs are installed prior to installation of this product:
We strongly recommend you keep your systems up to date with the latest Windows security updates.
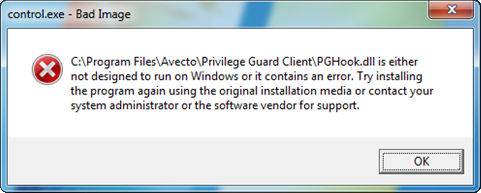
Installing this release on a system which does not support SHA-256 code signing verification results in Bad Image exceptions referring to PGHook.dll.
Unattended Client Deployment
When deploying Endpoint Privilege Management for Windows with automated deployment technologies, such as System Center Configuration Manager (SCCM), you can deploy the client silently and postpone the computer from restarting.
To install the client executable silently, without a reboot, use the following command line (the double quotes are required and the syntax must be copied exactly):
PrivilegeManagementForWindows_x86.exe /s /v" /qn /norestart"
To install the client MSI package silently, without a reboot, use the following command line:
Msiexec.exe /i PrivilegeManagementForWindows_x86.msi /qn /norestart
Endpoint Privilege Management for Windows will not be fully operational until a reboot. To perform an unattended deployment with a reboot, omit the /norestart switch.
Configure an Alternate Event Log Location
You can configure an alternate event log location in the following ways:
- From the client installer (initial installation or upgrade)
- In Windows registry after installation
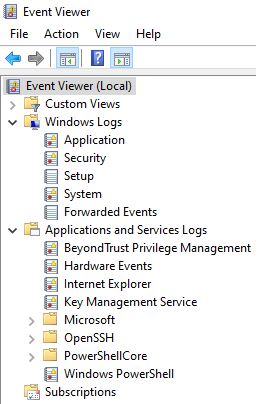
The default location is Windows Logs\Application. The alternate location is Application and Services Logs\BeyondTrust Privilege Management.
Set the Event Log Location Using the Installer
When running the installer, enter the parameter and value as shown:
msiexec.exe /i PrivilegeManagementForWindows_x64.msi APPEVENTLOGTYPE=1
or
PrivilegeManagementForWindows_x64.exe /v"APPEVENTLOGTYPE=1"
Change the Event Log Location in Windows Registry
If the client is already installed, set the value in the registry.
If agent protection is configured, you must first disable agent protection on the machine before you can change settings in the Registry Editor.
Run regedit.exe with elevated privileges and navigate to the following key:
HKEY_LOCAL_MACHINE\SOFTWARE\Avecto\Privilege Guard Client
ApplicationEventLogType=1
where:
0: Windows Logs\Application
1: Application and Services Logs\BeyondTrust Privilege Management
You must restart the service after changing the value.
Set Up Agent Protection
Add agent protection to your endpoints to prevent admin users from tampering with the product, including stopping the services running or deleting its files from the endpoint.
The setup is a two-part process:
- Generate public-private key pair.
- The public key is stored in a policy and distributed to all endpoints. The public key is automatically inserted into the policy when using the Policy Editor to create the key pair.
- The password-protected private key must be stored securely by the administrator. The private key and private key password are required when you want to disable agent protection.
- Enable protection.
Generate Key Pairs
The key pair can be generated using either Policy Editor or command line.
To generate the key pair in Policy Editor:
- In a Policy Editor:
- Web Policy Editor: Policies > Edit Policy > Utilities > Agent Protection Settings > Generate Key
- MMC Policy Editor: Right-click the Privilege Management Settings node, and then select Generate Agent Protection Keys.
- Enter a password to encrypt the private key.
- Click Generate.
- Navigate to a location to save the private key, and then click Save. The public key is automatically inserted into the policy.
To generate the key pair using the command line (or a tool like PowerShell):
- From the command line, call AgentProtectionUtility using the command:
GENERATE /PRIVATE <path> /PUBLIC <path>
- Enter the password at the prompt.
The private and public keys are generated and saved to the designated paths. You must use PowerShell API to insert the public key into the policy configuration.
For more information about AgentProtectionUtility, see Agent Protection Utility Usage and Options.
Enable Agent Protection
To enable protection:
- Expand the Endpoint Privilege Management Settings node.
- Select the Windows node, and then select Advanced Agent Settings.
- Click Add Value.
- Select 64-bit Agent Values from the Edit dropdown.
- Type AgentProtectionState in the Value Name box.
- Ensure type is DWORD.
- In the Value Data column, set the value to 1. There are three possible states: 0 = off, 1 = enabled, 2 = disabled.
Agent protection is enabled after the policy is deployed and loaded by the endpoints.
Disable Agent Protection Temporarily on One Endpoint
In some cases, there might be a legitimate need to uninstall the agent. You can use the Endpoint Utility to disable the protection.
Disabling the protection on an endpoint is a two-part process:
- First, a support engineer with the necessary rights uses the Agent Protection Utility, as well as the correct password-protected private key for the policy, to generate a time-based token.
- The token is then passed to the end-user computer and used by the Endpoint Utility to temporarily disable the agent protection for that endpoint.
To disable the agent protection:
- Generate an uninstall token. Use the Agent Protection Utility located in Program Files\Avecto\Privilege Guard Management Consoles or downloaded from EPM. The token must be generated using administrator credentials. The token is encrypted and is set to expire after the time you provide passes.
- From the command line, run the following:
UNINSTALL /EXPIRY <time> /PRIVATE <path> /TOKEN <path>
- Enter the password you set when generating the private key, when prompted. A token file is created at the designated path.
For example:
UNINSTALL /EXPIRY 30d /PRIVATE priv.txt /TOKEN token.txt
The token file contains a string of characters that is required to disable the endpoint. The token must reside on the end-user computer where you want to disable protection. Copy the token to that computer before proceeding to step 4.
- On the end-user computer, disable protection using the Endpoint Utility located in Program Files\Avecto\Privilege Guard Client.
- Run the following command:
/ap /t <tokencharacterstring>
A confirmation message indicates agent protection is disabled. The agent protection reverts to the enabled state after the Defendpoint service restarts.
For more information about Agent Protection Utility, see Agent Protection Utility Usage and Options.
Disable Agent Protection on all Endpoints
This procedure permanently disables agent protection on all endpoints on which the policy is deployed.
- Expand the Privilege Management Settings node.
- Select the Windows node, and then select Advanced Agent Settings.
- In the Value Name column, enter AgentProtectionState.
- In the Value Data column, set the value to 0.
Agent Protection Utility Usage and Options
Usage
AgentProtectionUtility GENERATE | UNINSTALL | VERIFY <options>
| Command | Description |
|---|---|
| GENERATE /PRIVATE <path> /PUBLIC <path> | Generates encrypted private/public key pair stored at <path> and <path>. The private key is encrypted with a password entered at the prompt. The password requires at least 12 characters. |
| UNINSTALL /EXPIRY <time> /PRIVATE <path> /TOKEN <path> |
Generate a secure token using the private key located at <path> to drop all protection for <time> days/hours. If the key is encrypted, a password prompt is displayed. Time format: 0d | 00h | 0d00h (up to a maximum of 30 days). |
| VERIFY /TOKEN <path> /PUBLIC <path> | Verify a secure token stored at <path> using public key stored at <path>. |