SailPoint IdentityIQ and EPM
This document provides the steps required to configure the integration between SailPoint IdentityIQ and Endpoint Privilege Management for Windows and Mac.
Create the IdentityIQ Service Account in EPM
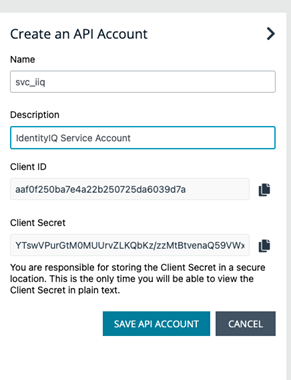
- Log on to the EPM web console as an Administrator.
- Go to Configuration, and then API Settings.
- Create an API account for IdentityIQ.
Configure SCIM Application in IdentityIQ for EPM
You must log on to IdentityIQ using administrator credentials.

- Go to Applications, and then Application Definition.
- Click the Add New Application button.
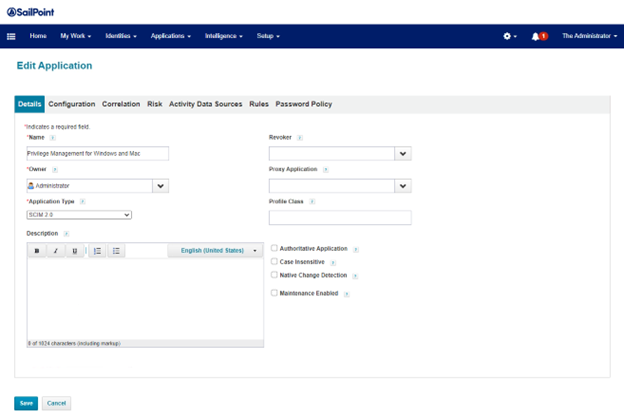
- From the Application Type menu, select SCIM 2.0. Provide a name for the application.
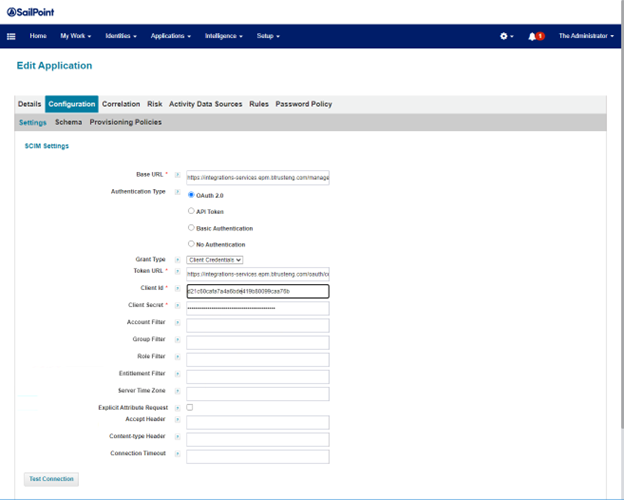
- On the Configuration tab, provide the base URL and token URL. Select Client Credentials for Grant type. Enter the client ID and secret for the svc_iiq API account.
If the instance URL is https://pmc01.acme.somedomain.net then the API URLs are based on https://pmc01-services.acme.somedomain.com.
- Try testing the connection at this point.
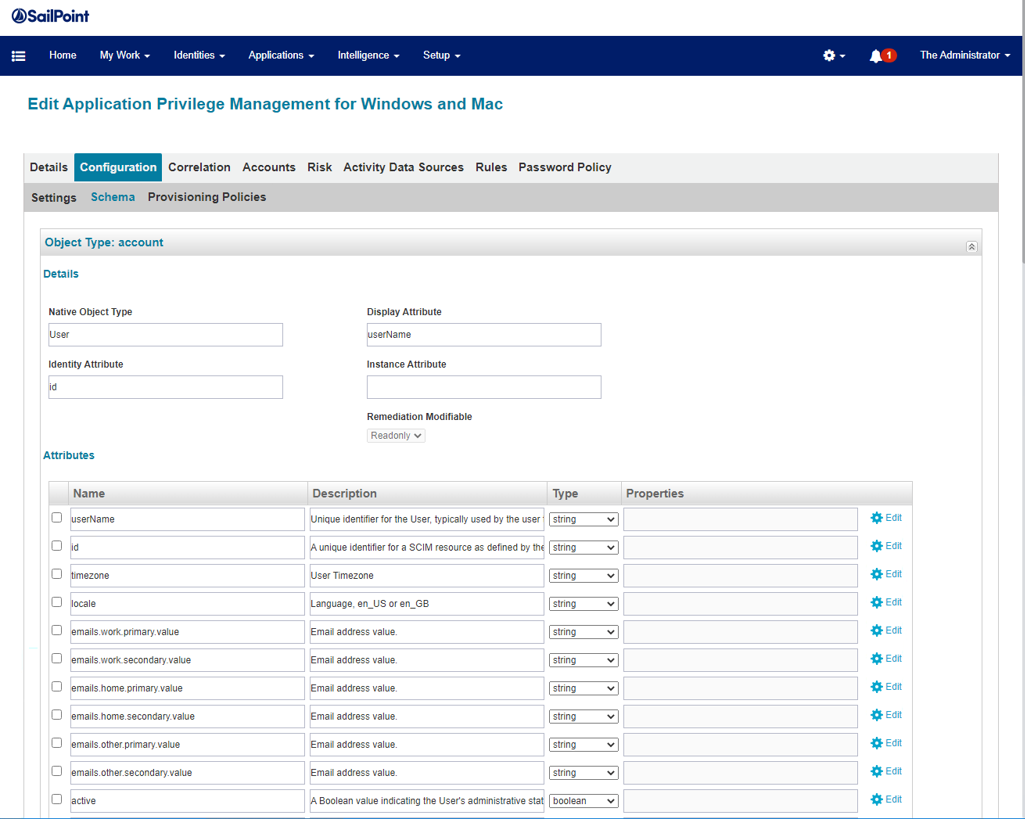
- Go to the Schema tab.
- Click Discover Schema Attributes for Object Type: account.
- The attributes discovered for account are shown.
- Delete extra attributes and keep the attributes shown here.
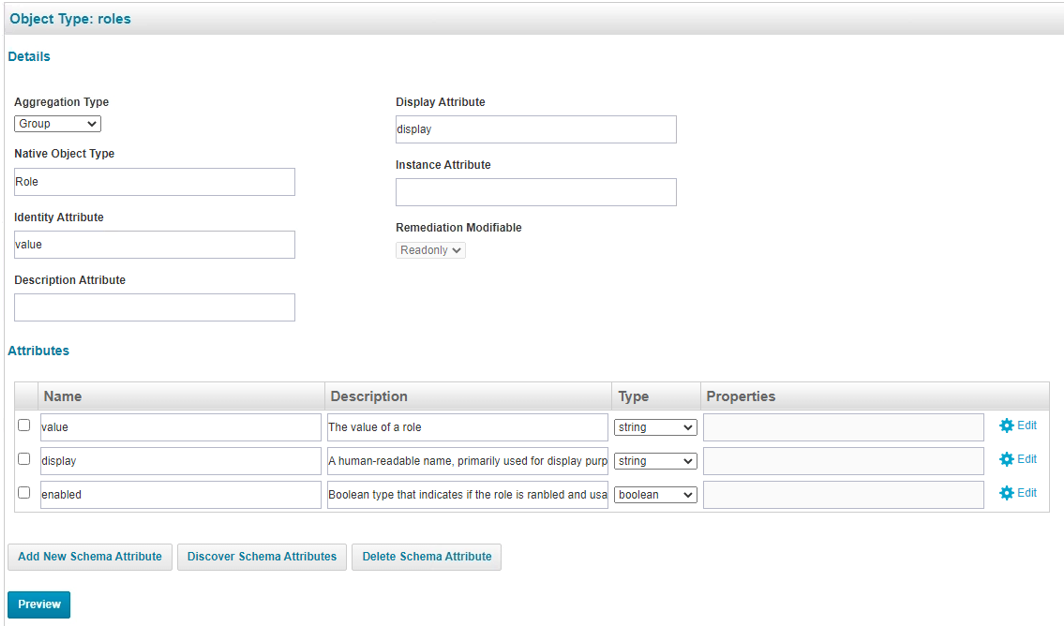
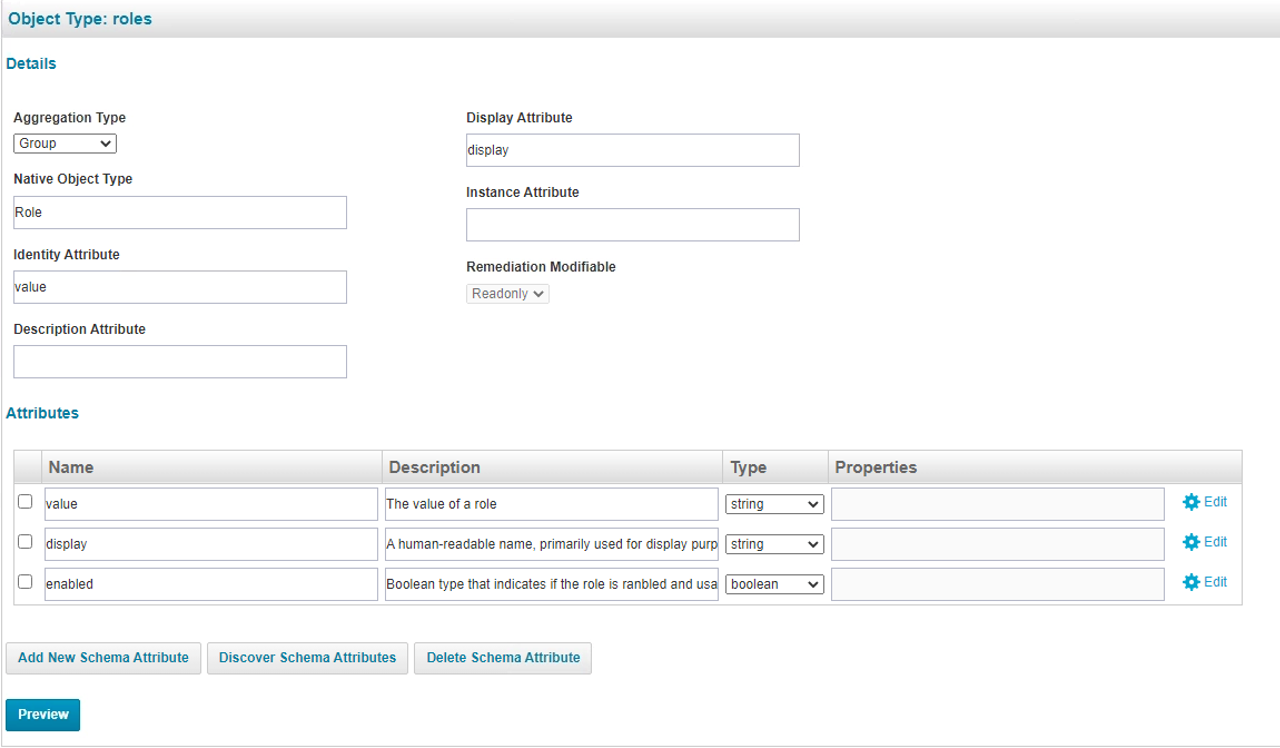
- Discover the schema attributes for roles, and keep the attributes as shown.
- Click Provisioning Policies.
- Click Add Policy, and then click Create Policy Form.
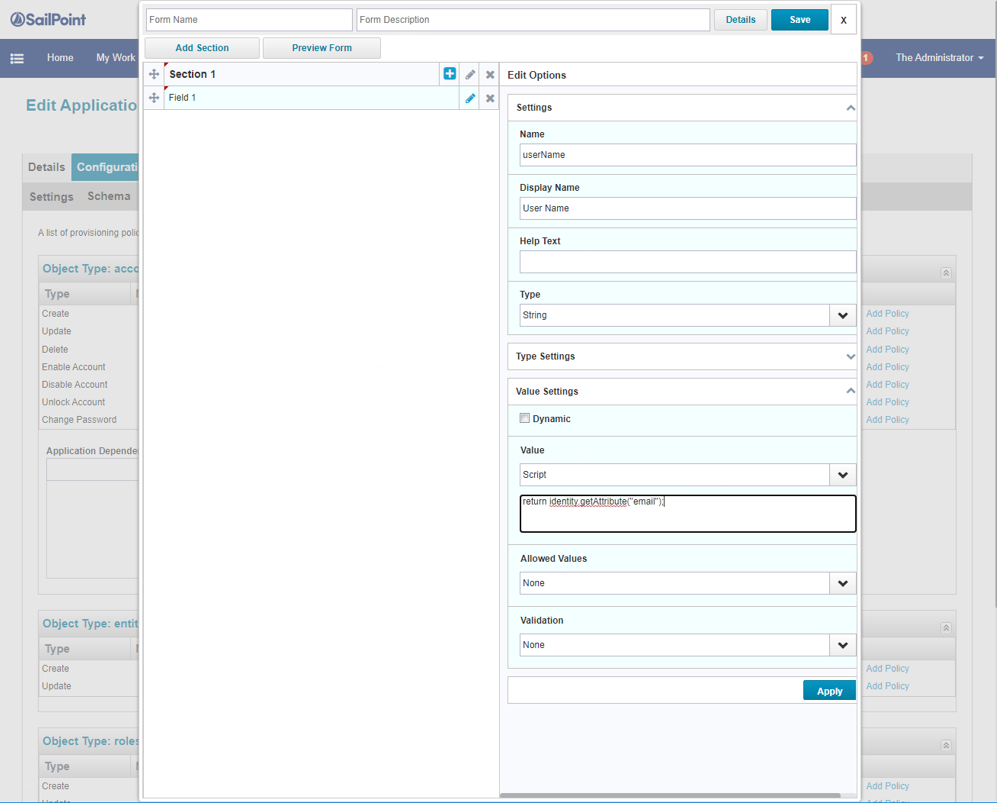
- Click Add Section, then + on the new Section and Add Field. The first field is userName which maps to email address. Click Apply.
The script format: return identity.getAttribute("email");
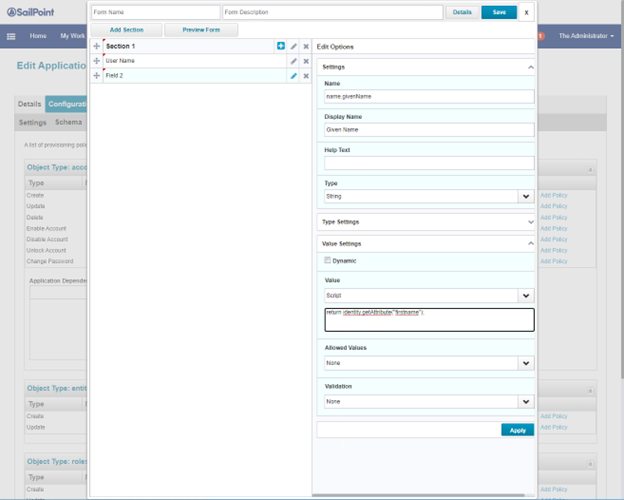
-
Set the attribute name.givenName. Click Apply.
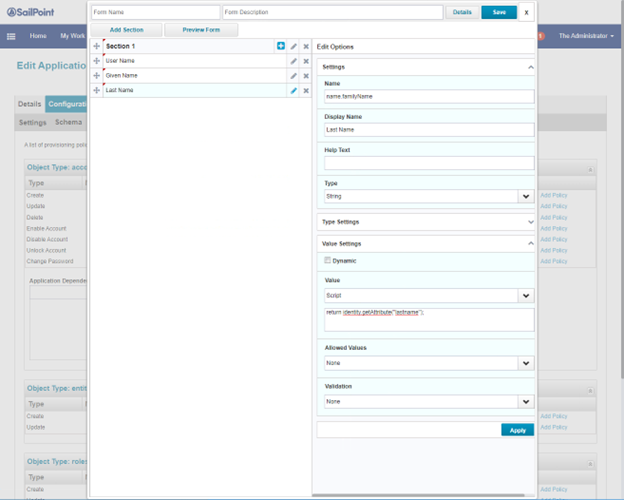
-
Set the attribute name.familyName. Click Apply.

-
Set the attribute email. Click Apply.
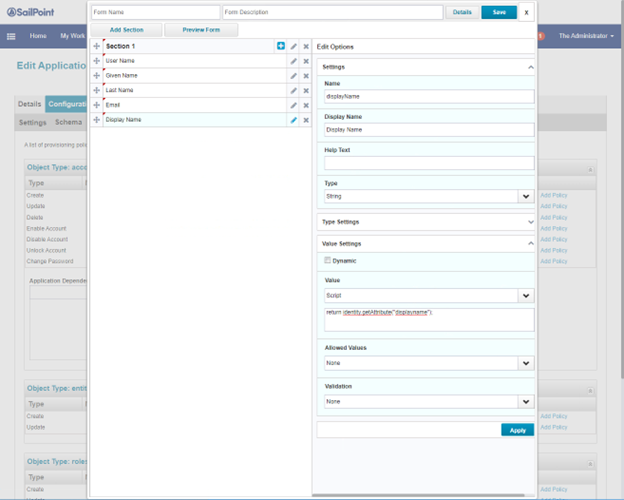
-
Set the attribute displayName. Click Apply.
-
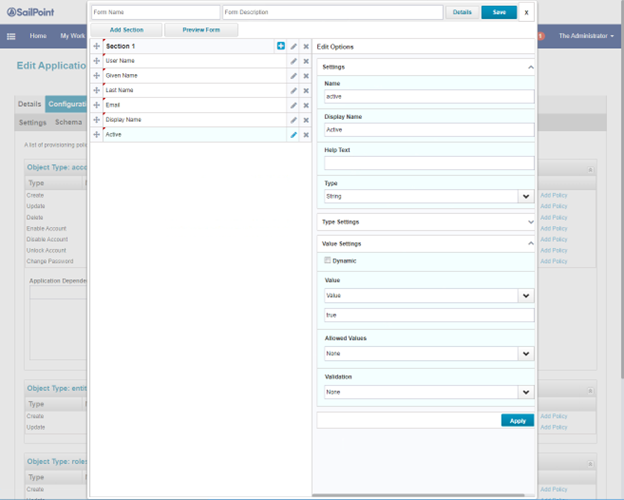
Set the attribute active. Click Apply.
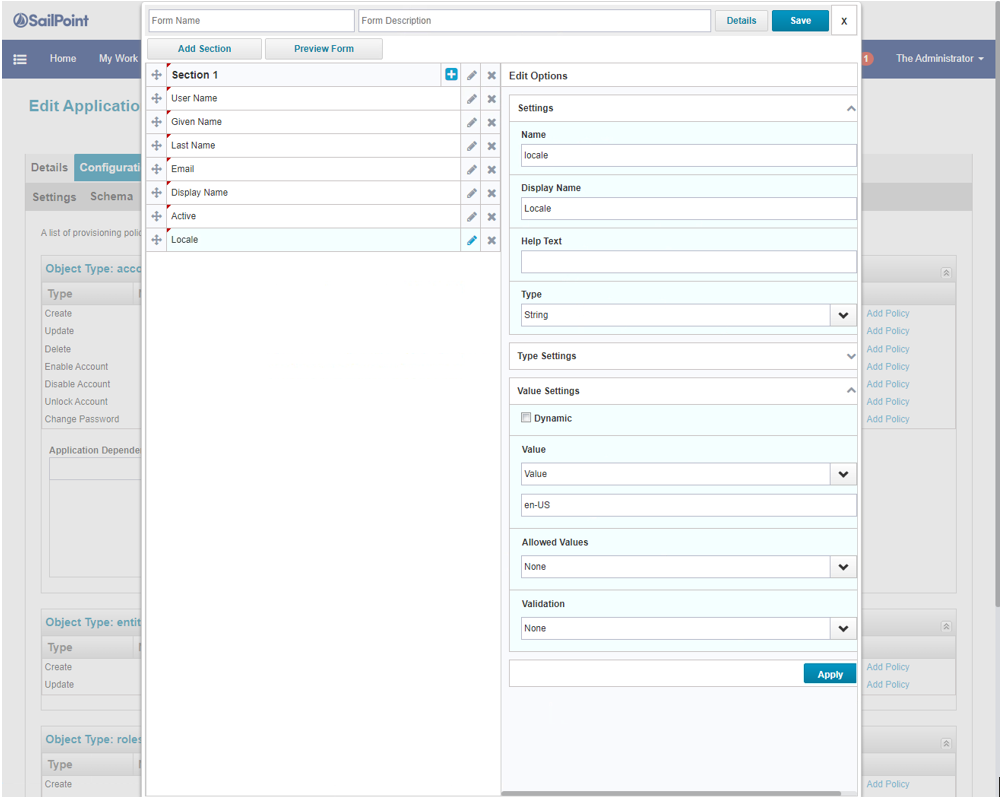
- Set the attribute locale to static, and Value to en-US or en-GB. This can be mapped to an Identity attribute, if available.
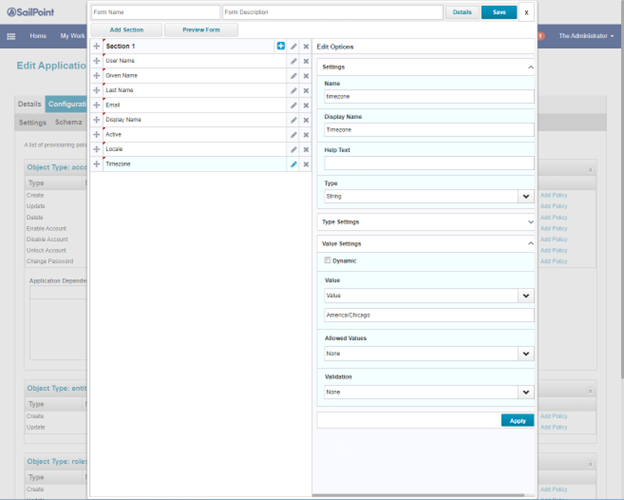
- Set the attribute timezone to static value. This can be mapped to an Identity attribute, if available.
- Provide a form name and description, and then save the form. Don’t forget to save the application.
- Edit the application again, and go to Correlation.
- Create a correlation rule. Save the application.
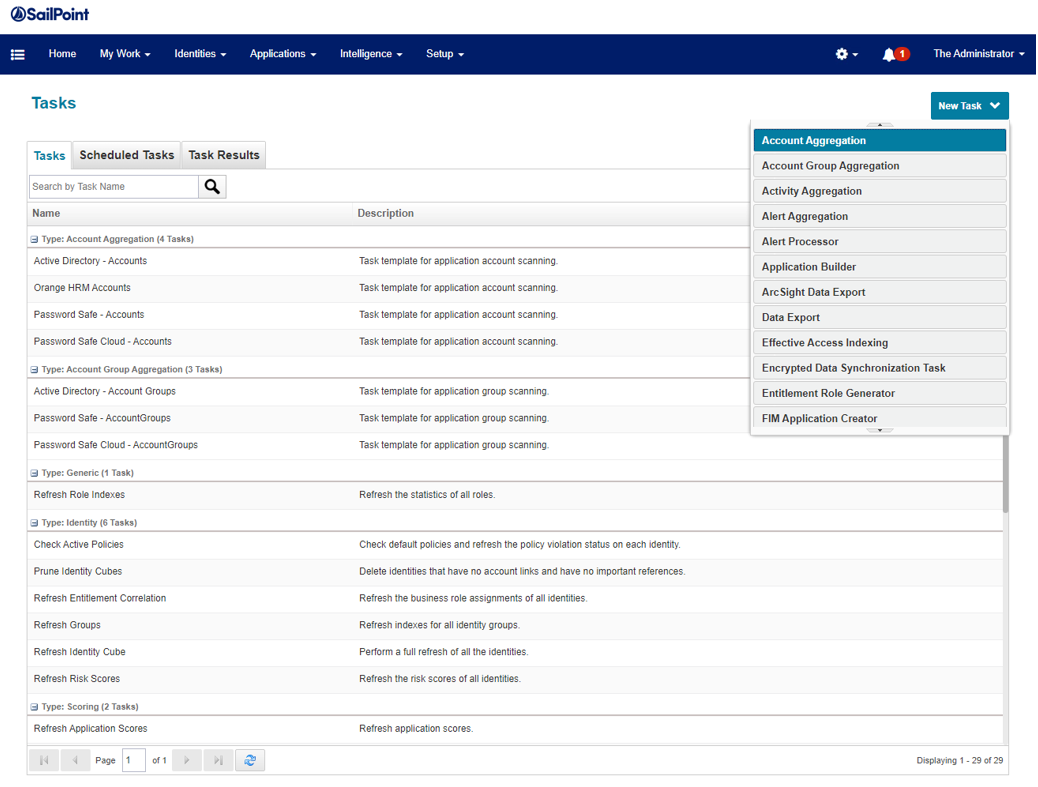
- Create the aggregation task for EPM. Navigate to Setup, then Tasks.
- Click the New Task menu, then select Account Aggregation.

- Configure the task to scan PM Cloud. Scroll to the bottom of the page and click Save and Execute.
- Confirm the Task result is Success.
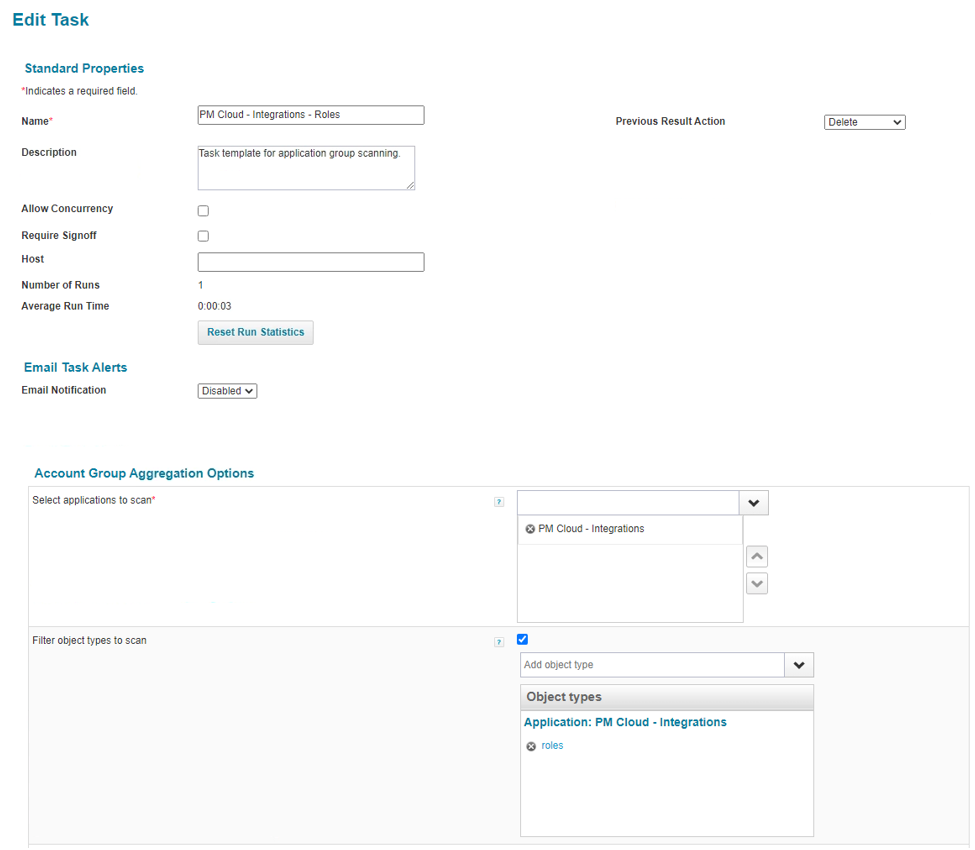
- Create a group aggregation task for roles, and filter for only the roles type. Click Save and Execute, and confirm the task executed successfully.
- Go back to the application and select the Accounts tab.
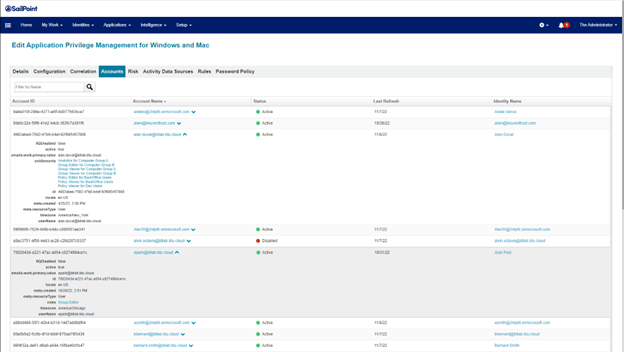
- Review the discovered or aggregated accounts together with roles.
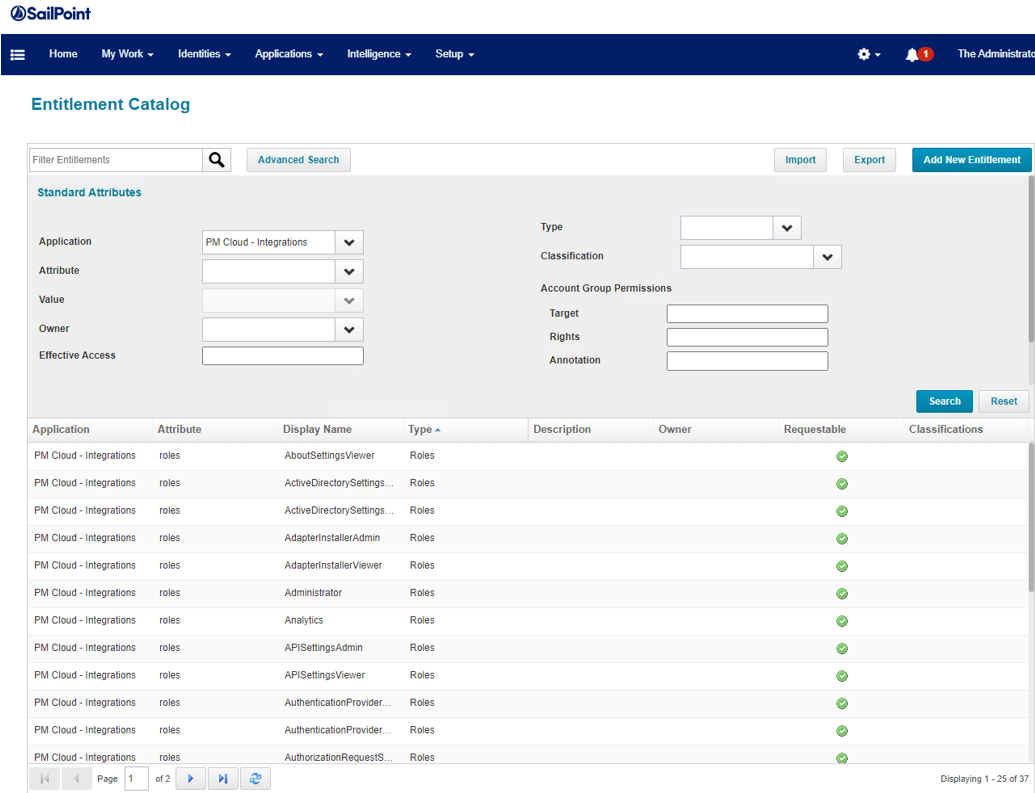
- Go to Applications, then Entitlement Catalog. Use Advanced Search to filter for the application. The screen capture shows the discovered roles.
- Go to Applications, then Entitlement Catalog. Use Advanced Search to filter for the Application. The screen capture shows the discovered roles.
Only roles are requestable. Entitlements are read-only in the current RBAC model.
- Select a user that does not yet have access to EPM from the menu in the upper left corner. Select Manage Access, and then Manage User Access.
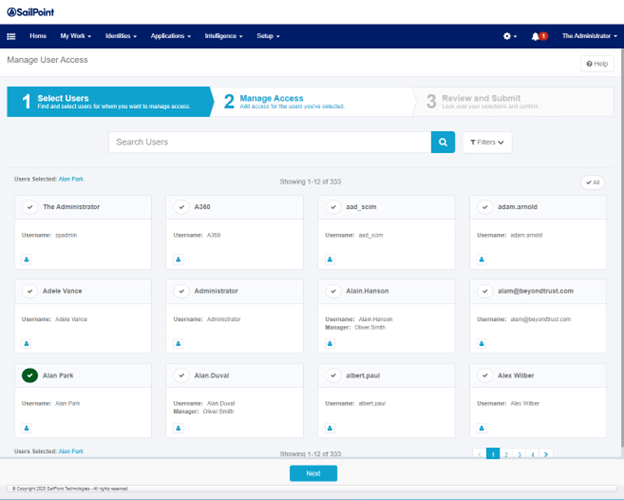
- Select a test user on the Manage User Access. Click Next.
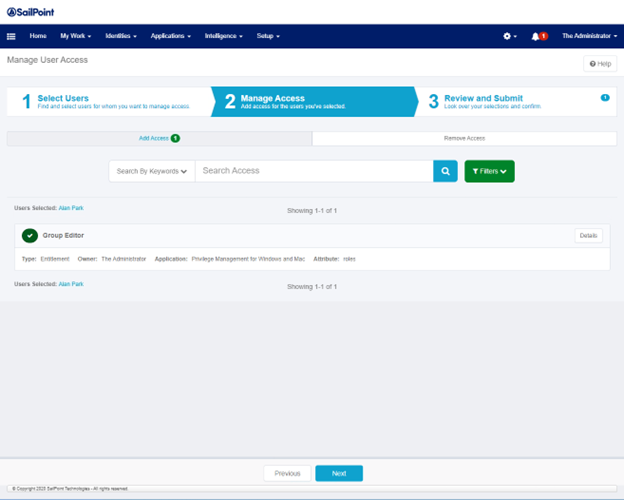
- Select a role under the EPM Application. Click Next.
- Click Submit.
- The request should be in Verifying mode.
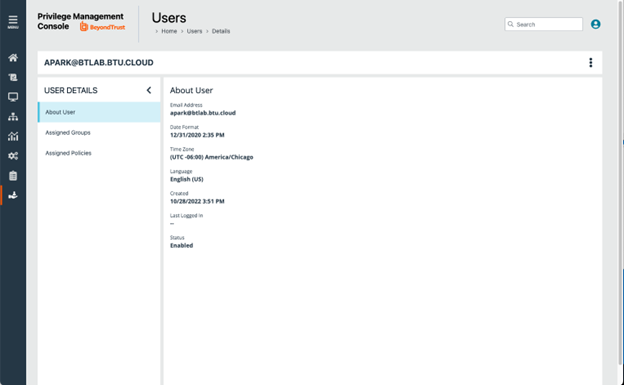
- Confirm the new user is added in EPM.
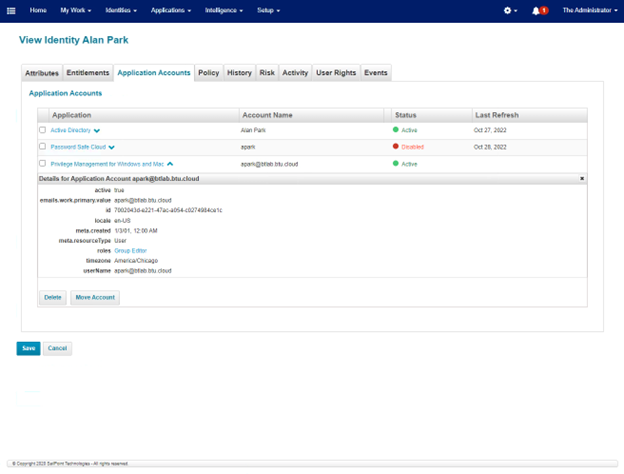
- Go to the Application Accounts tab and view the user application account and roles.