Integrate BeyondTrust EPM + IBM QRadar
This document describes the installation and configuration of the integration between BeyondTrust Endpoint Privilege Management and IBM QRadar.
The integration consists of:
- A pair of workflow definitions that are leveraged by IBM's Universal Cloud REST API Protocol
- Corresponding workflow parameters files
- An extension package which provides Log Source Categories, Log Source Extensions, Event Mappings, QID Records, and other components
Prerequisites
Before proceeding with the installation and configuration of the integration with EPM, it's important to ensure a few things are in place.
Network Considerations
Your QRadar instance needs to connect to various REST API endpoints provided by your EPM site. Communication is in the form of secure HTTP traffic on TCP port 443. The purpose of this connectivity is to query the EPM site for event information which can be ingested by QRadar.
Create an EPM API Account
The API account is used in QRadar to make API calls to EPM. This process is covered in the EPM Administration Guide.
For more information, see Configure Access to the Management API in the Endpoint Privilege Management Administration Guide at https://www.beyondtrust.com/docs/privilege-management/console/pm-cloud/configuration/configure-api-settings.htm
Install and Configure
Once the prerequisites are in place, you can move on to the installation and configuration of the integration.
Install Extension Package
The extension package is currently available via the downloads section of the BeyondTrust Support portal. Go to the portal to get the package.
To install the extension:
- Authenticate to your QRadar instance as an administrator.
- Navigate to Admin > System Configuration > Extensions Management.
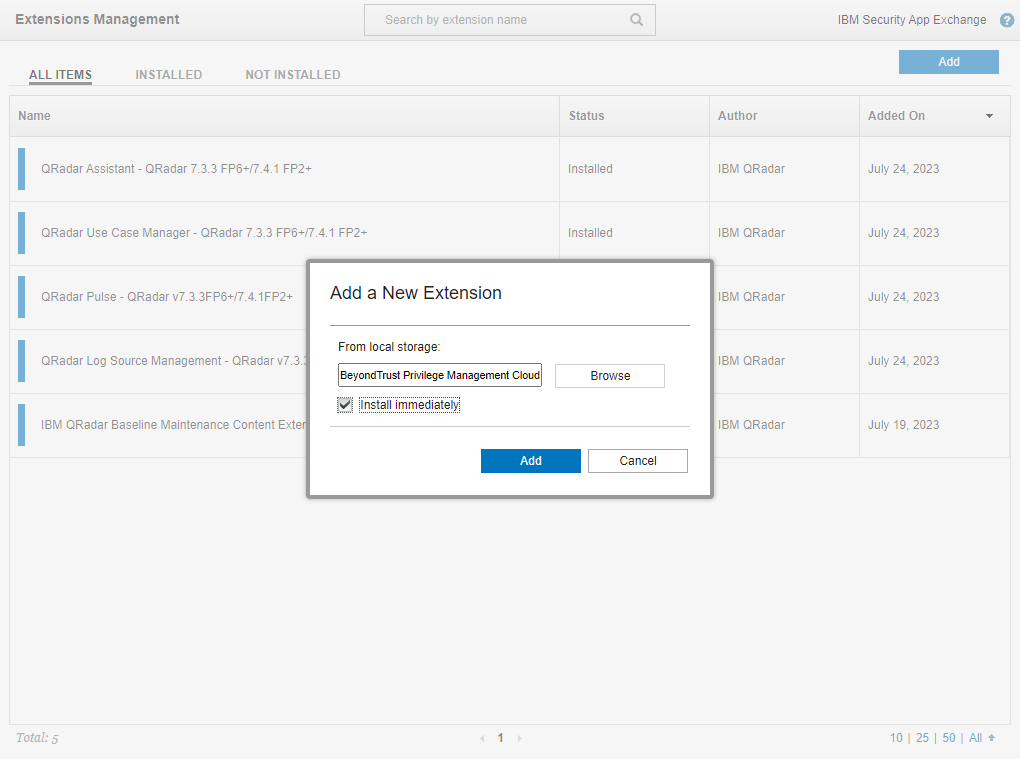
- In the Extensions Management window, click Add to begin the process of adding a new extension.
- Browse to and select the ZIP archive containing the extension and click Add to begin installation.
- Proceed through the subsequent dialogs to complete the installation process.
Download and Configure Workflows
After the extension is installed, the other primary component of the integration is the pair of workflow definitions and parameters. The two definitions files provide the logic to make the EPM API calls to retrieve event data while the parameters files provide the necessary configuration for those workflows.
- To get a copy of the definitions files, email integrations@beyondtrust.com
- Download all 4 XML files. These should include:
- BeyondTrust-PMCloud-ActivityAudits-Workflow.xml
- BeyondTrust-PMCloud-ActivityAudits-Workflow-Parameter-Values.xml
- BeyondTrust-PMCloud-ClientEvents-Workflow.xml
- BeyondTrust-PMCloud-ClientEvents-Workflow-Parameter-Values.xml
- Open each of the parameters files (BeyondTrust-PMCloud-xxxxx-Workflow-Parameter-Values.xml) in a text editor.
- Supply values for each of the following parameters in these two files:
- hostname: EPM Services Hostname. Be sure to include the -services part of the hostname (ex: if you access the web site at mysite.example.com then the value to enter here is mysite-services.example.com)
- client_id: EPM API Account Client ID
- client_secret: EPM API Account Client Secret
- You may also modify the page_size or batch_size values if desired. There are corresponding notes in each file which describe the purpose of these files, their default values, and the maximum values for each.
- Save your changes to each parameters file.
Create Log Sources
After the extension is installed and you downloaded and configured the workflows, the next step is to create log sources for the two event data feeds supported by the integration.
The two basic categories of events that can be consumed by the application are:
- Client Events: These events originate from the individual systems being managed by BeyondTrust Endpoint Privilege Management. They flow back to the EPM site, and are retrievable via the API. Examples include: user logon, a process started, a process blocked, etc.
- Activity Audits: These events represent activities that occur in the EPM web interface. Examples include: user role changes, editing or committing a policy draft, assigning a computer to a group, etc.
To add a log source for either of the two data feeds:
- Authenticate to your QRadar instance as an administrator.
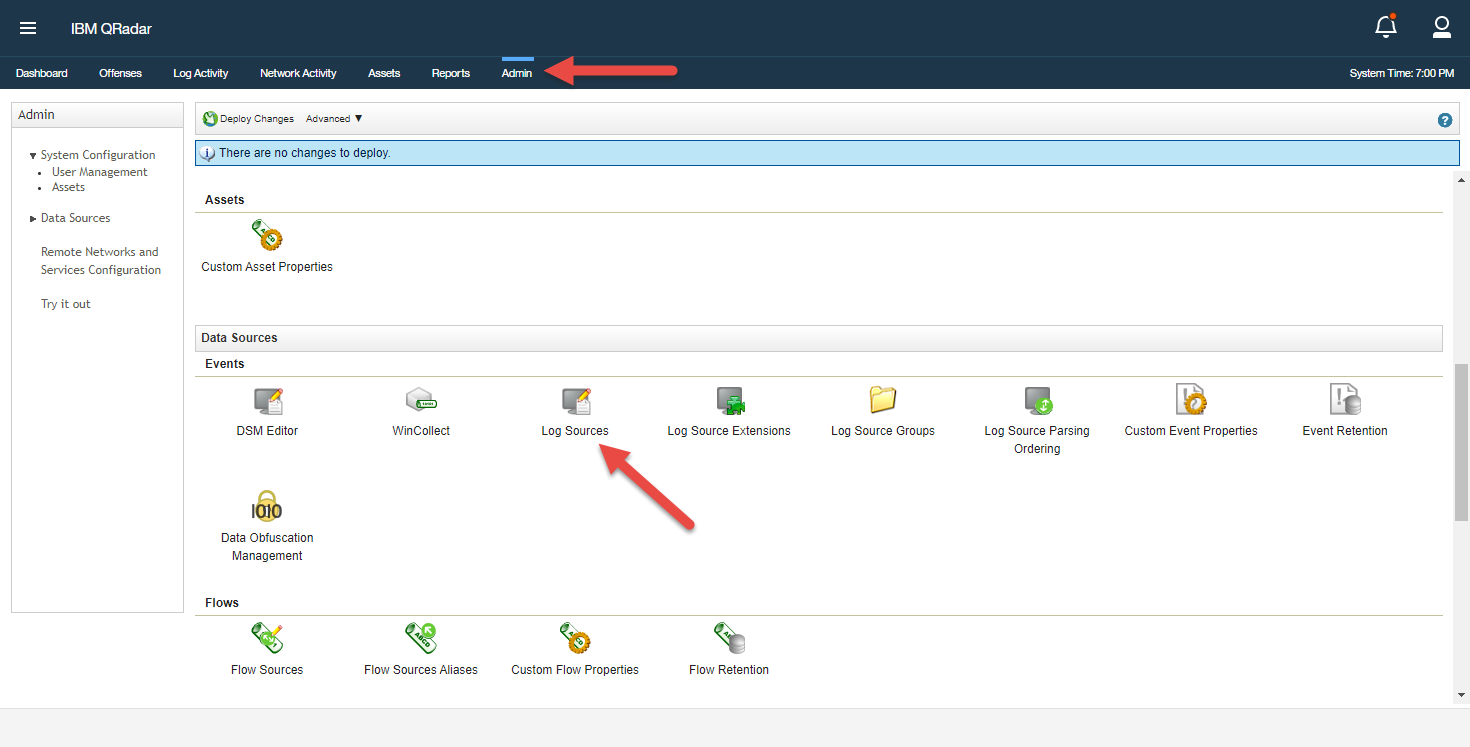
- Navigate to Admin > Data Sources > Events > Log Sources.
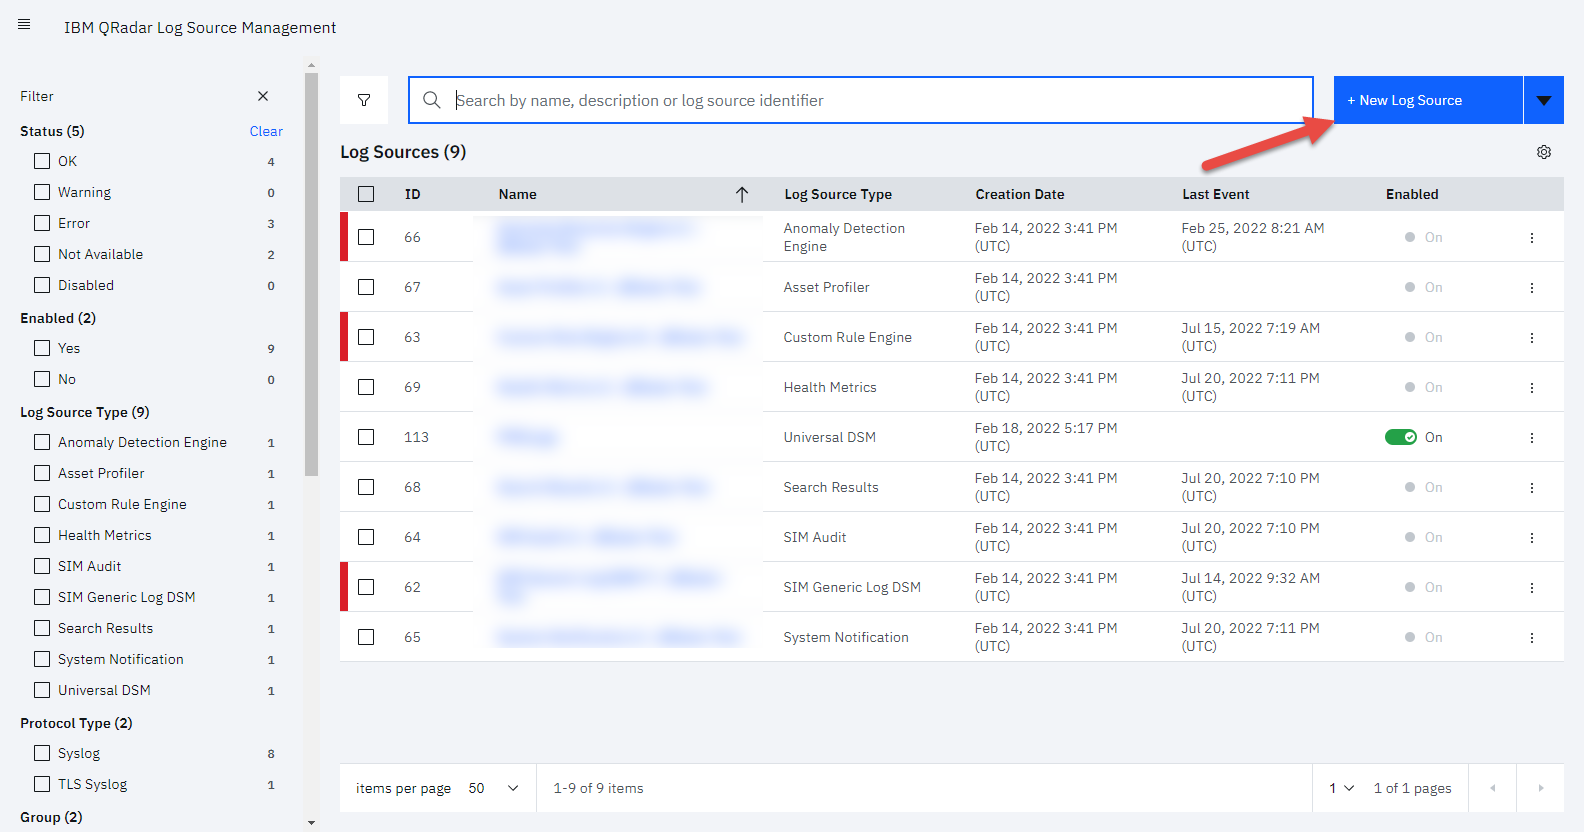
- In the Log Source Management window, click the arrow next to + New Log Source to expand additional options.
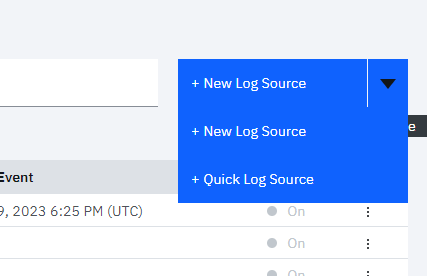
- From the expanded options, select + Quick Log Source.
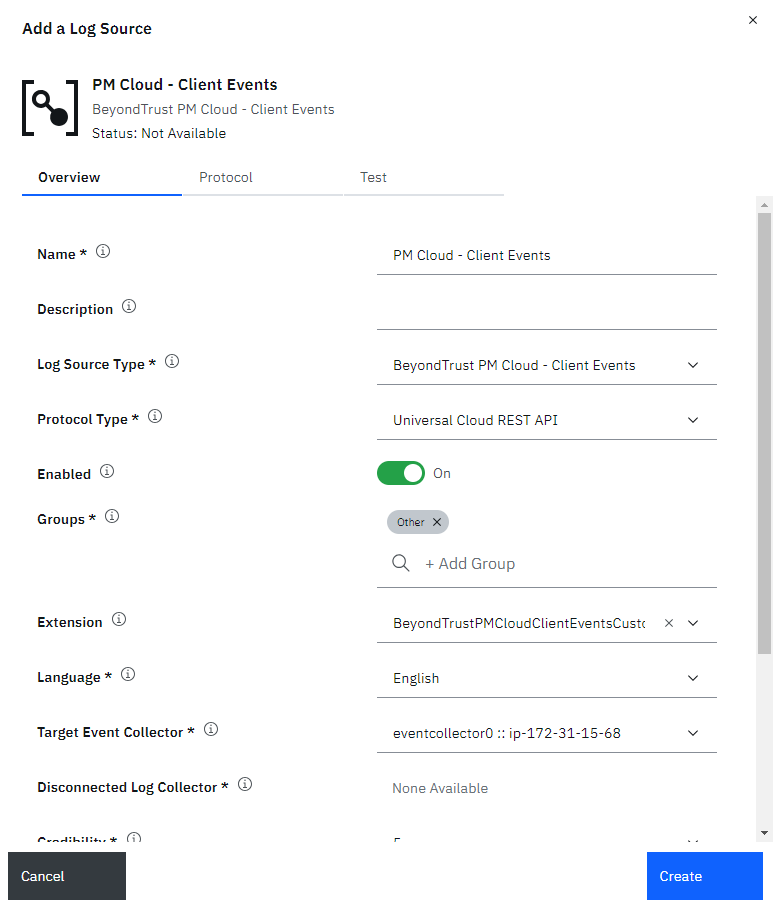
- On the Overview tab, enter the appropriate values in each of the configuration fields:
- Name: Give the log source a unique name.
- Log Source Type: Select one of the two BeyondTrust PM Cloud - xxxxx types.
- Protocol Type: Select Universal Cloud REST API.
- Extension: Select the BeyondTrustPMCloudxxxxxCustom_ext corresponding to the selected Log Source Type.
- Add or modify other fields as needed.
- Click the Protocol tab to proceed to the next configuration section.
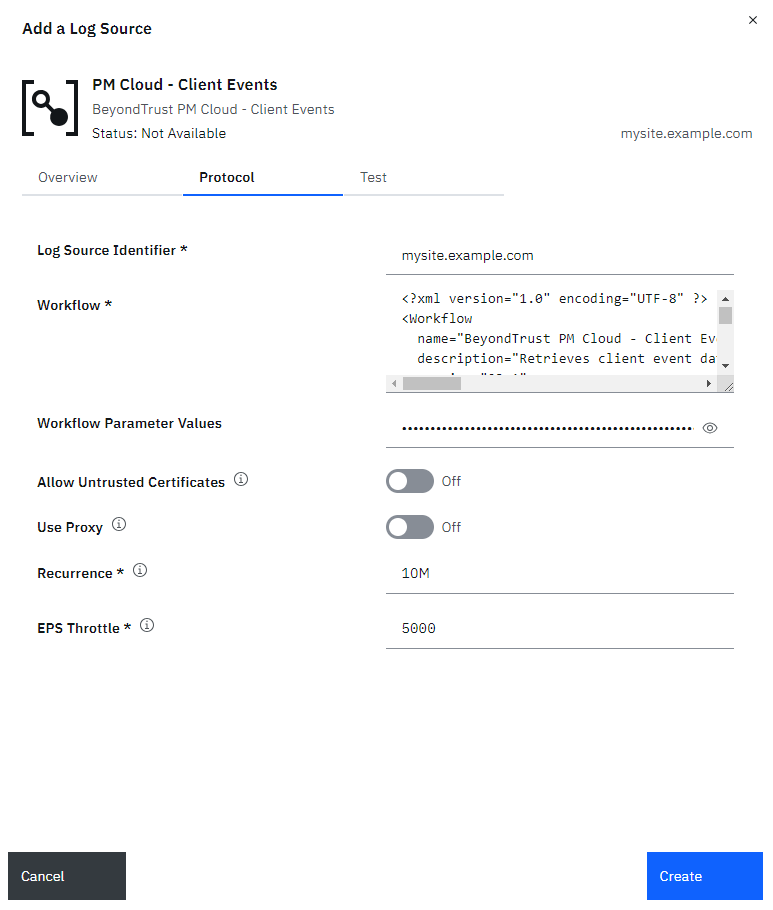
- On the Protocol tab, enter the appropriate values in each of the configuration fields:
- Log Source Identifier: Provide a value to describe the source of these events; IBM suggests the name or hostname of the system generating the events.
- Workflow: Copy the contents of the appropriate workflow XML file here.
- Workflow Parameters: Copy the contents of the appropriate workflow parameters XML file here.
- Add or modify other fields as needed.
- Click the Test tab, and then Start Test to verify your configuration.
- If the test was successful, click Create to save the new log source.
- Repeat steps 1–9 to add a second log source for the other type of events.

- Click Deploy Changes to activate the new log sources.
Troubleshooting and Support
If you encounter issues with event ingestion, the application writes to the standard QRadar log and error log. Review the logs first to determine if an issue has occurred.
For more information about QRadar logs, see QRadar log files at https://www.ibm.com/docs/en/qsip/7.5?topic=problems-qradar-log-files.
If you require additional assistance, please contact BeyondTrust Support through the Customer Support Portal.