Zilla Security and Password Safe Integration Guide
Zilla Security is a SaaS platform that enables you to maintain a secure and compliant posture for identity and access across your attack surface. Zilla integrates with BeyondTrust Password Safe to manage users, groups, and permissions.
Before integrating Password Safe with Zilla, you must configure a Zilla service account and a connector in BeyondInsight, as detailed in the below sections.
Configure the Zilla Service Account
Creating a Zilla service account in BeyondInsight requires the following steps:
- Create a user group.
- Enable features and Smart Groups for the user group.
- Create a user account and add it to the user group.
- Generate OAuth credentials for the newly created Zilla service account using the SCIM connector in BeyondInsight.
The below sections detail the steps to take to accomplish the above.
This integration is based on SCIM 2.0.
Create a New Group for the Service Account
To create a local group in BeyondInsight, follow the below steps:
- Navigate to Configuration > Role Based Access > User Management.

- From the Groups tab, click + Create New Group.
- Select Create a New Group.
- Enter a Group Name and Description for the group.
- Click Create Group.
- Follow the steps in the below sections to enable features and Smart Group for your newly created group.
In addition to creating groups locally, you can import Active Directory, Entra ID, and LDAP groups into BeyondInsight.
Enable Features for the Group
To enable features for a group in BeyondInsight, assign permissions to the features as follows:
- Go to Configuration > Role Based Access > User Management.
- From the Groups tab, find the group and click on the corresponding ellipsis to right of the group.
- Select View Group Details from the list.
- Click Features located under Group Details.
- Select All Features from the Show dropdown above the grid to display a list of features in the grid.
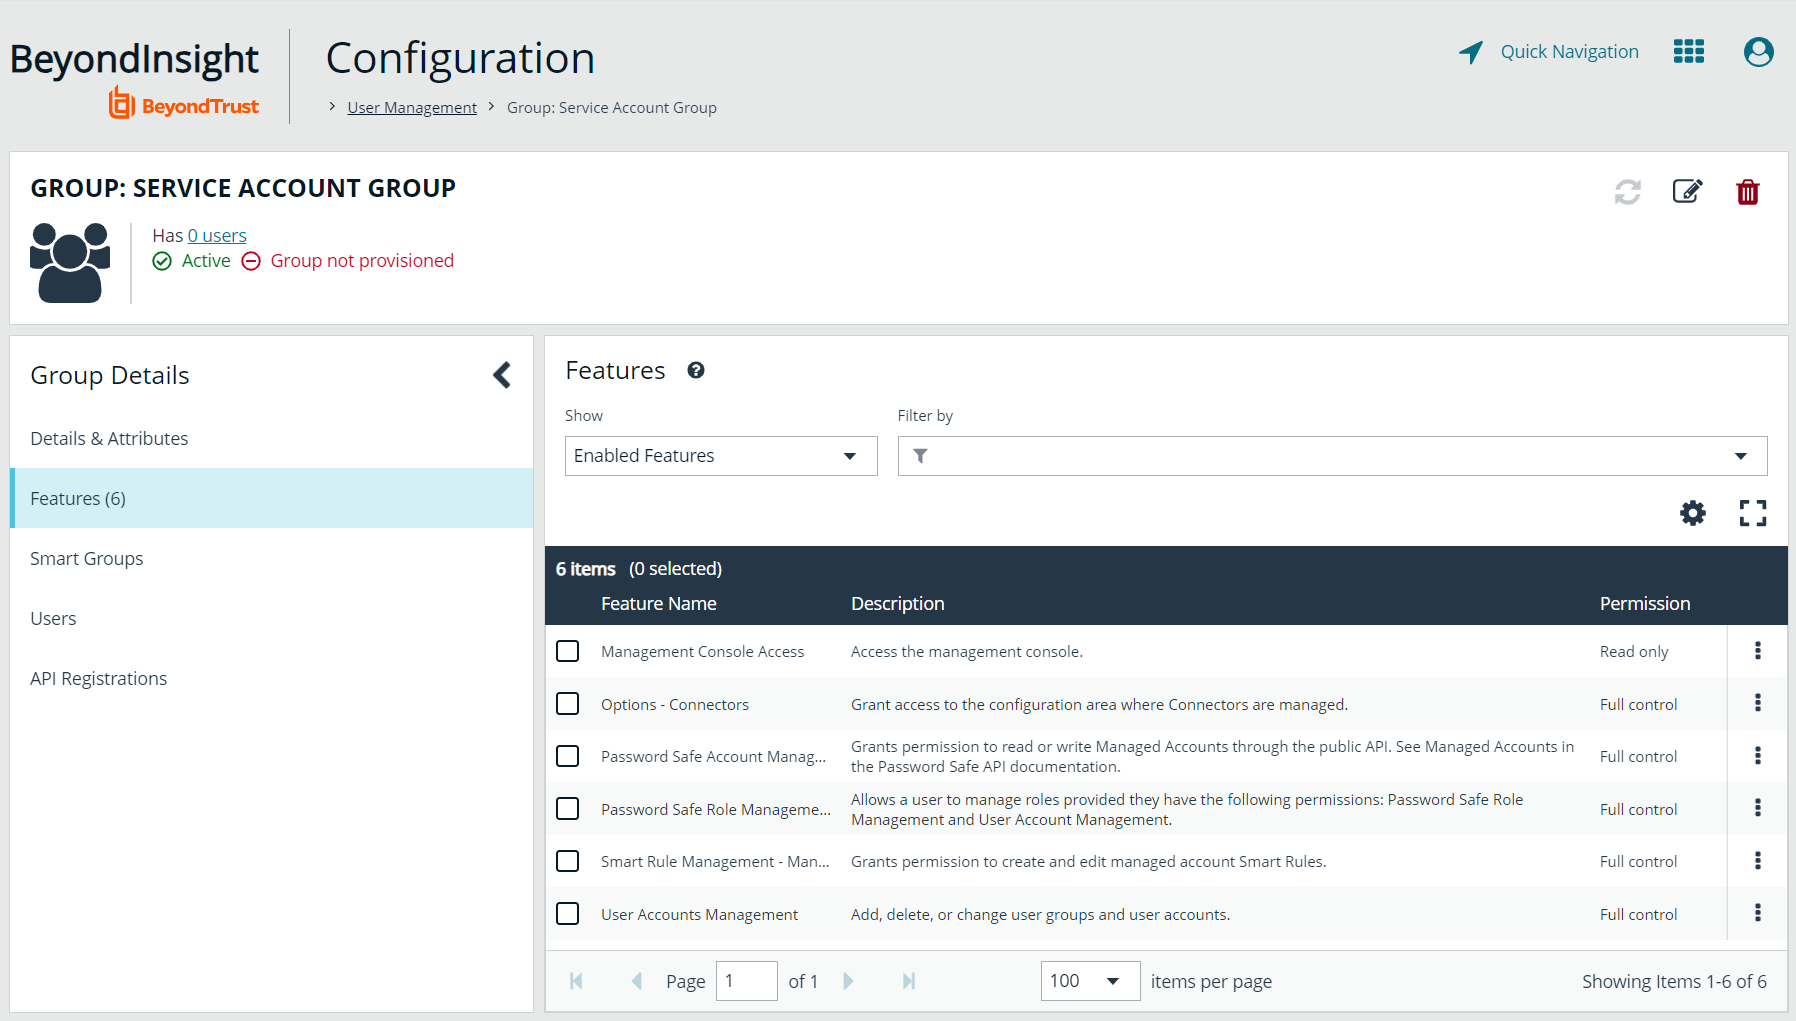
- Select the Management Console Access feature and click Assign Permissions > Assign Permissions Read Only above the grid. This permission is required so the service account can log in to BeyondInsight and obtain the service accounts’ unique OAuth credentials.
- Select the following features and click Assign Permissions > Assign Permissions Full Control above the grid.
- Options - Connectors: This feature is required to allow the creation of OAuth credentials by the member account. In production, this permission could be removed after connection is established, but is needed again to cycle client_secret and refresh_token.
- Password Safe Account Management: This feature is required to read or write managed accounts through the public API.
- Password Safe Role Management: This feature is required to allow visibility into account Smart Groups, which are assigned via user groups in BeyondInsight.
- Smart Rule Management - Managed Account: This feature is required to manage Smart Rules for managed accounts.
- User Accounts Management: This feature is required for the service account to manage user groups and user accounts.
Enable Smart Groups for the Group
To enable Smart Groups for a group in BeyondInsight, assign permissions to the Smart Groups as follows:
- Go to Configuration > Role Based Access > User Management.
- From the Groups tab, find the group and click on the corresponding ellipsis to right of the group.
- Select View Group Details from the list.
- Click Smart Groups located under Group Details.
- Select All Smart Groups from the Show dropdown above the grid to display a list of Smart Groups in the grid.

- Select the All Managed Accounts Smart Group and click Assign Permissions > Assign Permissions Read Only above the grid.
Managed Account Smart Groups with a category of Managed Accounts are visible via the SCIM API. Managed Account Smart Groups with a category of Platforms are not visible. However, you can recreate the same Smart Group with a category of Managed Accounts.
Create a New User and Assign to Group
Once the group is created and assigned the appropriate features and Smart Groups permissions, you can create a new account in BeyondInsight for the service account and add it to the group.
Permissions are assigned only to the group, not to the account.

- Go to Configuration > Role Based Access > User Management.
- From the Users tab, click Create New User.
- Select Create a New User.
- Provide Identification, Credentials, Contact Information, User Status, and Authentication Options as needed.
- Click Create User.

- You are taken to the details page for the user account where Groups is automatically selected. Select All Groups from the Show dropdown above the Groups grid to list all available user groups.
- Locate the group you created above for the service account, select it, and then click Assign Group above the grid.
In addition to creating user accounts locally, you can import AD, Entra ID, and LDAP accounts and add them to either local or imported groups.
Create or Update the SCIM Connector to Generate OAuth Credentials
The SCIM connector adds a SCIM API to Password Safe to allow third-party applications to view and modify users, groups, and Smart Rule permissions.
- SCIM implementations at http://www.simplecloud.info/
- The PAM extension at https://datatracker.ietf.org/doc/html/draft-grizzle-scim-pam-ext-00
The below steps detail how to create and update a SCIM connector in BeyondInsight.
Only one SCIM connector can be created by Password Safe per instance. If your Password Safe instance already has a SCIM connector configured, then you must log in to BeyondInsight with the service account credentials you created for the integration and generate OAuth credentials as detailed in step #9 below.
- In BeyondInsight, go to Configuration > General > Connectors.
- From the Connectors pane, click Create New Connector.
- Enter a name for the connector.
- Select SCIM from the Connector Type dropdown.
- Click Create Connector.
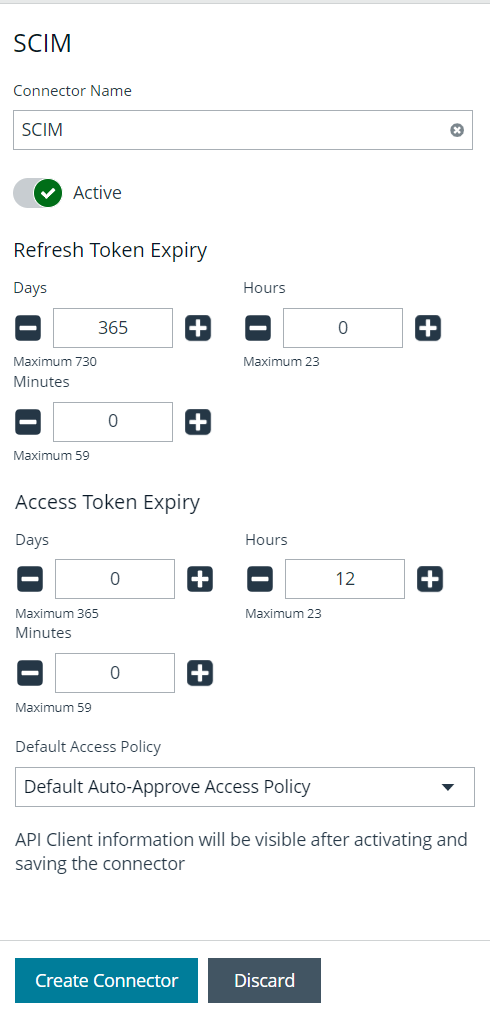
- Set the Refresh Token Expiry.
This is intended to be long-lived.
- Set the Access Token Expiry.
This is intended to be short-lived.
Refresh and access tokens are an OAuth 2.0 concept.
- Select a Default Access Policy, and then click Create Connector.
If the Requestor role is assigned to a group via the SCIM API, this access policy is assigned. The API does not support assigning different access policies. The container permissions you can provision include Read, Write, and Password Safe roles, such as Requester and Approver.

- Now that the connector has been created, the API is available to access, and you see the Client ID specific to the user currently logged into BeyondInsight when viewing the SCIM connector from the Connectors page. You can also generate a refresh token and recycle the client secret as follows:
- To generate a refresh token:
- Click Generate Refresh Token.
- Enter your Password and Client Secret.
- Click Generate Refresh Token.
- To create a new client secret key:
- Click Recycle Client Secret.
- Click Recycle on the Recycle Secret Access Key pop-up. This generates a unique access key and invalidates the previous key.
- Click Update Connector after generating the refresh token or recycling the client secret.
- To generate a refresh token:
Every Password Safe user with full control permissions assigned to the Options – Connectors feature can obtain a Client ID and Client Secret via the connector. Using client credentials (client ID and client secret) is recommended for lab or testing environments. For a production environment, using refresh tokens is a more secure option.
-
To obtain a refresh and access token using the API, you can use client credentials or password authentication. Send a POST request with a body in one of these formats:
The Client ID and Client Secret are part of your credentials for requesting refresh and access tokens. The authentication endpoint is [host]/scim/oauth/token.
Client Credentials:
grant_type=client_credentials&client_id=[Client ID]&client_secret=[Client Secret]
Password:
grant_type=password&username=[Username]&password=[Password]
If you already have a refresh token, you can get a new access token with a POST request in this format:
grant_type=refresh_token&refresh_token=[Refresh Token]
The base URL for non-authentication requests is [host]/scim/v2.
Once the above steps have been completed, you are ready to configure the BeyondTrust Password Safe integration in Zilla.
Zilla provides instructions for integrating with BeyondTrust on their wiki page.