Integrate Workday with Password Safe
Workday provides cloud-based software specializing in applications for financial management, enterprise resource planning, and human capital management. Integrating Workday with Password Safe allows the Change Password action to be performed for Workday managed accounts. Test Managed Account and Test Functional Account features are not implemented.
BeyondTrust recommends the assistance of the Professional Services Team to implement this integration. Please contact your BeyondTrust Account Manager to discuss costs and time requirements for this service.
Prerequisites
Before implementing the integration, ensure the following prerequisites are met:
- Access to Workday cloud tenant
- The DistinguishedName for the managed account needs to be the WorkerID (e.g. 156) for the managed account
- Name for the managed account is format ma01@tenant
- Default password policy configured in Password Safe with no spaces and at least one special character
- Workday functional account in Password Safe needs access to Workday cloud tenant API and this function: Update_Workday_Account
- Access to Password Safe Cloud instance, or on-premises version 23.1.1 or later release
Create a Password Policy
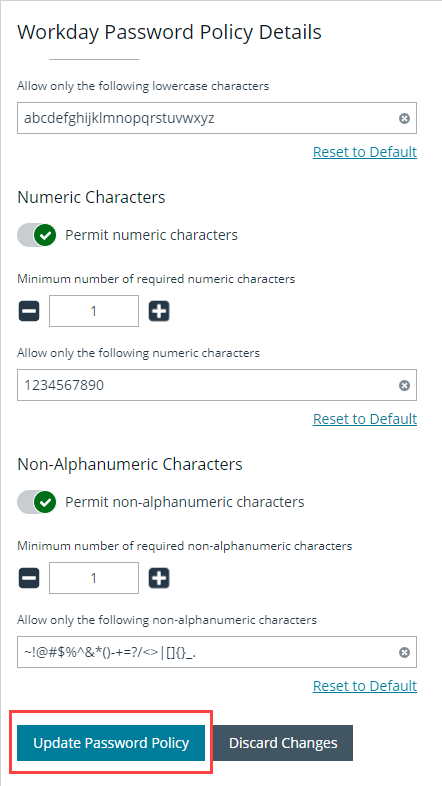
Simple Object Access Protocol (SOAP) is a message specification for exchanging information between systems and applications. Take care when adding special characters to the password policy. Some special characters, such as < ,will break the SOAP body.
- Log in to the BeyondInsight console as a BeyondInsight administrator.
- Go to Configuration > Privileged Access Management Policies > Password Policies.
- Click Create New Password Policy.
- Type in a name and then scroll down to the bottom and remove special characters other than ! and @.
- Click Update Password Policy.
Create a Functional Account
Still logged in as a BeyondInsight administrator, create a functional account as follows:
- Go to Configuration > Privileged Access Management > Functional Account.
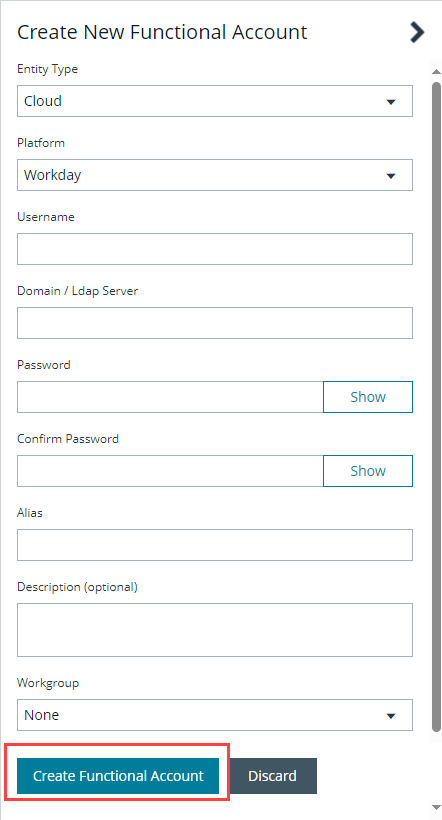
- Click Create New Functional Account. Fill out all required fields.
- Select Cloud from the Entity Type dropdown.
- Select Workday from the Platform dropdown.
- Type in the username in the format of Username@tenantid.
- Enter the URL in the Domain/LDAP server field:
- (e.g.; wd2-impl-services1.workday.com)
- Enter the password and confirm it.
- Enter an alias name. The alias can be the same as the username.
- Select the appropriate workgroup from the Workgroup dropdown.
- Click Create Functional Account.
Create a Managed System
- From the left menu in the console, click Managed Systems.
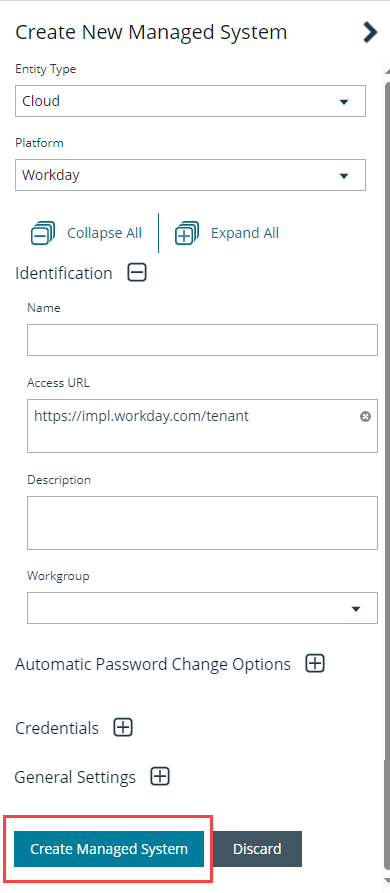
- Click Create New Managed System.
- Select Cloud from the Entity Type dropdown.
- Select Workday from the Platform dropdown.
- Enter a Name.
- Enter the Access URL.
- Select the same workgroup as the functional account from the Workgroup dropdown. Fill out all required fields.
- Expand the Credential section and select the functional account.
- Click Create Managed System.
Create a Managed Account
- From the left menu in the console, click Managed Systems.
- Select Platform from the Filter by dropdown, and then select Workday from the Platform dropdown.
- Click the vertical ellipsis to the right of the Workday managed system and select Go to Advanced Details.
- Under Advanced Details, select Managed Accounts.
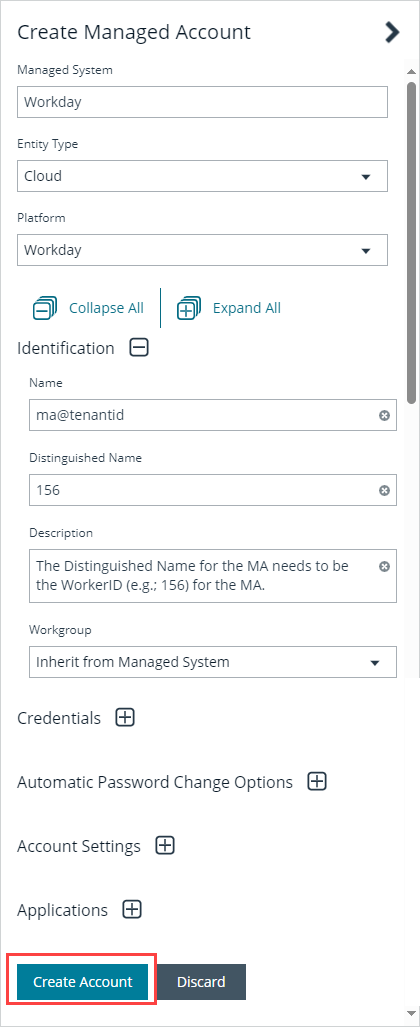
- Click Create New Managed Account.
- Enter the name in the format of ma01@tenant.
- Enter the WorkerID (e.g. 156) for the managed account in the Distinguished Name field.
- Click Create Account.
If you encounter any issues or errors, please contact BeyondTrust Support for additional assistance.


