Integrate Automation Anywhere with Password Safe
Automation Anywhere is a leading provider of Robotic Process Automation (RPA) solutions, enabling businesses to automate repetitive and rule-based tasks using software bots. The company's RPA technology is designed to improve operational efficiency, reduce costs, and enhance customer experience.
Automation 360 is Automation Anywhere's web-based automation platform.
This guide covers the steps to integrate Automation 360 with Password Safe to leverage Password Safe credentials.
Setup in Password Safe
Create an API Registration
An API registration must be assigned to the Automation 360 bot, with an IP Filter rule to allow the bot access to the Password Safe API. To create a new API registration:
- In the BeyondInsight Console, go to Configuration > General > API Registrations.
- Click the Create New API Registration button.
- Type a name in the API Registration Name field.
- Click the Create API Registration button.
- Add an IP Rule to allow the bot access to the Password Safe API:
- In the API Registration Details pane, under Authentication Rules, click the Add Authentication Rule button.
- Under IP Rule, select Single IP Address as the Type.
- Provide the IP Address of your Automation 360 server or instance.
- Click Create Rule.
For more information, please see Automation 360 IP Address for External Integrations.
Create a New Group with API Access
To create a group for the Automation 360 bot in Password Safe:
- In the BeyondInsight Console, go to Configuration > Role Based Access > User Management > Groups > Create New Group > Create a New Group.
- Add a Group Name and Description, and then click Create Group. The Group Details page is displayed.
- Under Group Details, select API Registrations. Check the box next to the Automation 360 API Registration created above to assign it to the group.
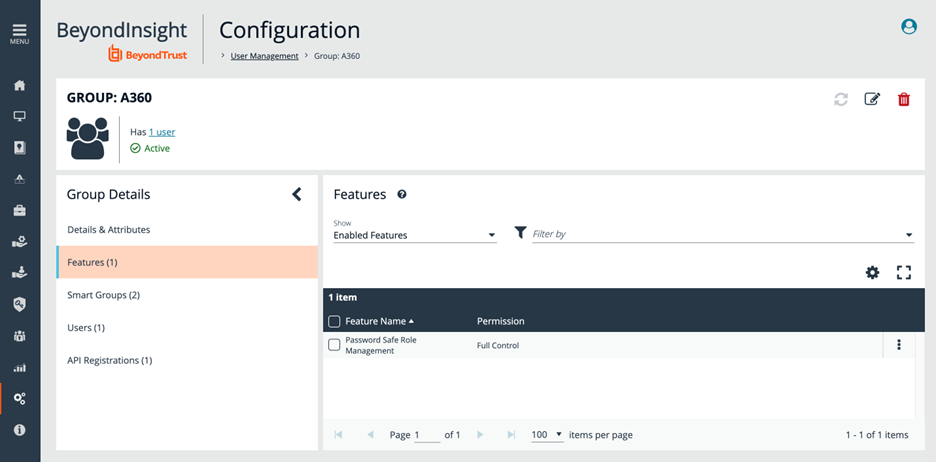
- Assign the Password Safe Role Management Feature to the new group.
- Under Group Details, select Features.
- Under the Show dropdown list, select All Features.
- Filter by Feature Name.
- Type Password Safe Role Management in the Feature Name text box.
- Check the box next to Password Safe Role Management, and then click the Assign Permissions button. Select Assign Permissions Full Control.
Assign Smart Rules to the Service Account
The All Assets Smart Group with Read Only permissions must be added to the newly created group.
- Go to Configuration > Role Based Access > User Management > Groups. Find the group and click the corresponding ellipsis to the right of the group.
- Select View Group Details from the list.
- On the next screen, select Smart Groups, located under Group Details.
- Under Smart Group Permissions, select All Smart Groups from the Show dropdown list. Check the box next to the All Assets Smart Groups to assign it.
- Once the Smart Group is selected, click the Assign Permissions button, and then select Assign Permissions Read Only.
Add Information Security Administrator Role for Assets
- Right-click the ellipsis to the right of the All Assets Smart Group. Select Edit Password Safe Roles.
- Check the Information Security Administrator box.
- Click Save Roles.
Create a New User and Assign to the Group
A bot service account must be created and assigned to the new group.
- In the BeyondInsight Console, go to Configuration > Role Based Access > User Management > Users > Create New User > Create a New User.
- On the pop-out screen, provide Identification, Credentials, Contact Information, User Status, and Authentication Options as needed.
- Click Create User.
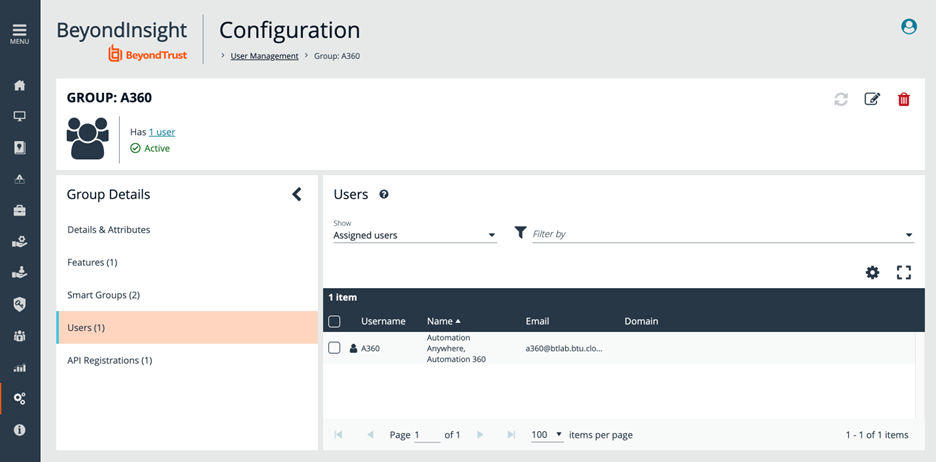
- Return to the Group Details page to add the new user to the group:
- Go to Configuration > Role Based Access > User Management > Groups.
- Find the group, and then right-click on the ellipsis to the right of that group. Select View Group Details.
- Under Group Details, click Users.
- In the Show dropdown list, select Users Not Assigned. Filter by the name of the user just created, and then check the box to the left of the username.
- Click the Assign User button to assign the user to the group.
Select an API-Enabled Local Managed Account
Identify an account that is API-enabled to use as a test account in Automation 360.
- In the BeyondInsight Console, go to Managed Systems.
- Find your managed system, and then right-click the ellipsis to the right of that system. Select Go To Advanced Details.
- Under Advanced Details, click Managed Accounts.
- Right-click the ellipsis to the right of the test account and select Edit Account.
- Scroll down to Account Settings. Make sure the API Enabled toggle button is set to on. Click Update Account if required.
Overview of Configuration Steps in Automation 360
The images below demonstrate the steps required by a user to configure Automation 360 for Password Safe.
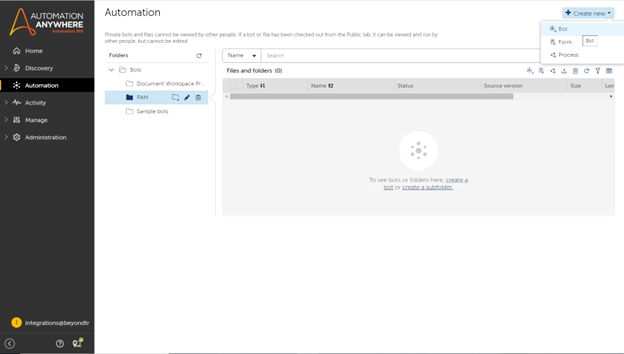
In Automation 360, create a new bot in the appropriate folder.
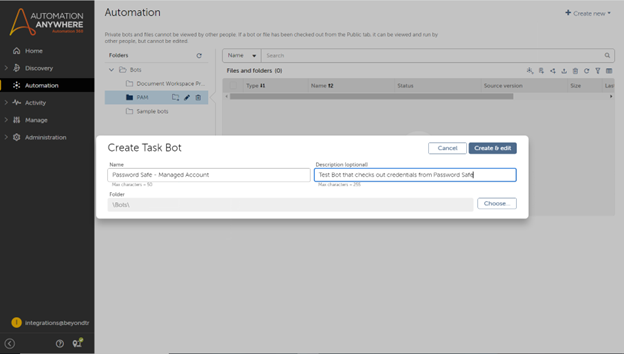
Provide a name and description. Click Create and Edit.
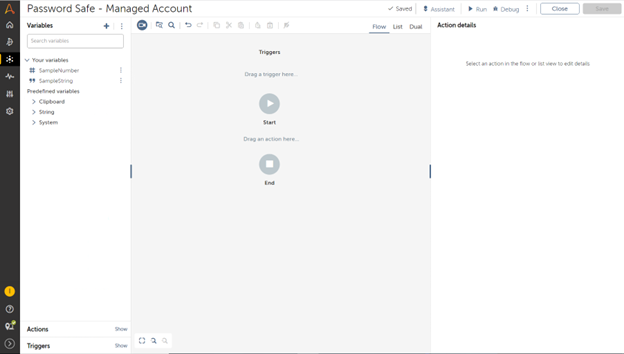
Select Variables in the left navigation menu.
Assign values to the following input variables (string):
- ApiServer: Your instance URL (does not includehttps:// prefix)
- Application: RunAs account for Automation Anywhere in BeyondInsight
- ApiKey: API Key for API Registration in BeyondInsight
- ManagedSystem: System where managed account is located
- ManagedAccount: Account that contains the password to check out, API enabled
Define the following runtime variables:
- access_output (dictionary)
- access_token (string)
- checkout_output (dictionary)
- ManagedAccount_output (dictionary)
- systemID (string)
- accountID (string)
- password (string)
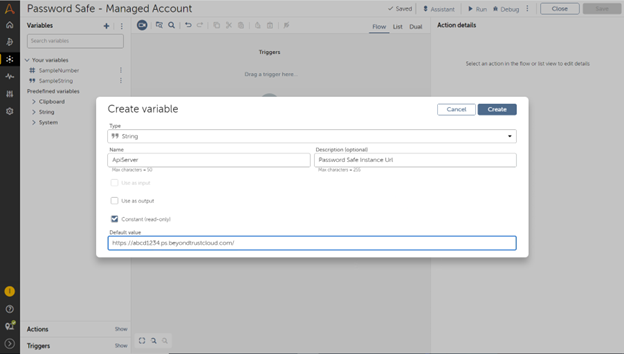
Example: ApiServer input variable. Replace value with instance URL.
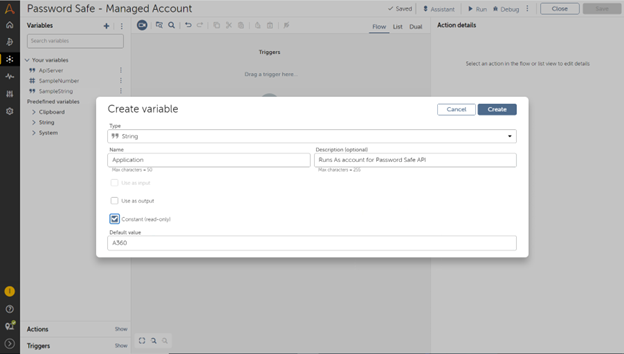
Create the application variable that contains the API Run As user account name.
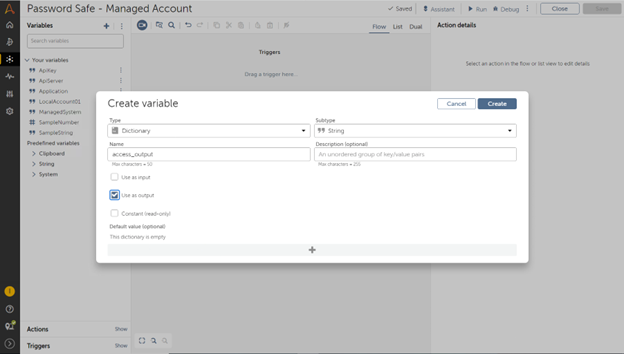
This image displays the access_output variable.

Ensure that your variables resemble those listed below:
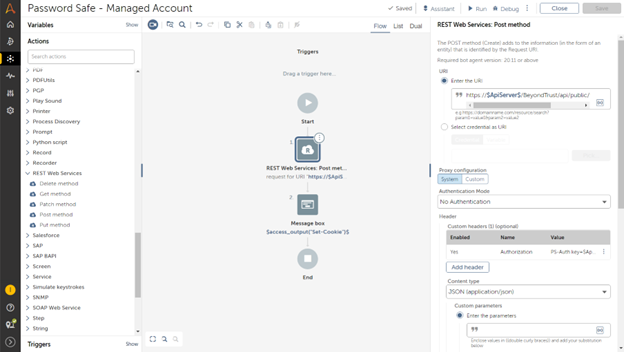
Add Actions from the left menu to allow the bot to check out credentials at run time from Password Safe. Start with Authentication, which requires a POST method.
REST Web Services (POST method) for authentication.
Add the following URI: https://$APIServer$/BeyondTrust/api/public/v3/auth/SignAppin
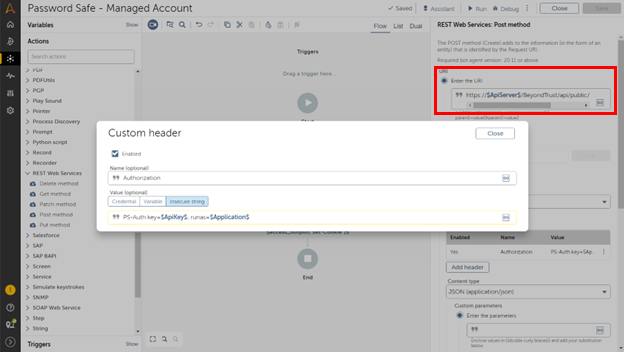
Add the following Header: Authorization = PS-Auth key=$ApiKey$; runas=$Application$;

Assign the output to a variable from the dictionary: access_output.
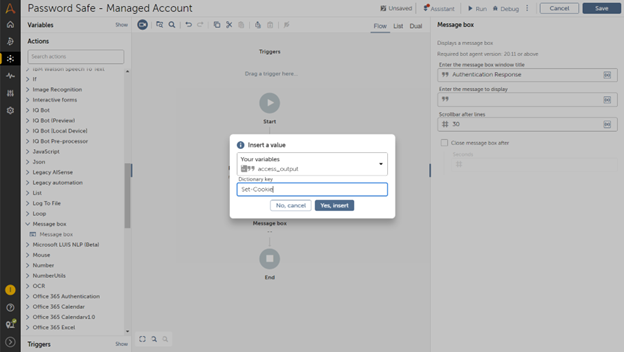
For troubleshooting purposes, add a message box to display the output of the authentication action. This screen demonstrates the setup to display the session cookie.
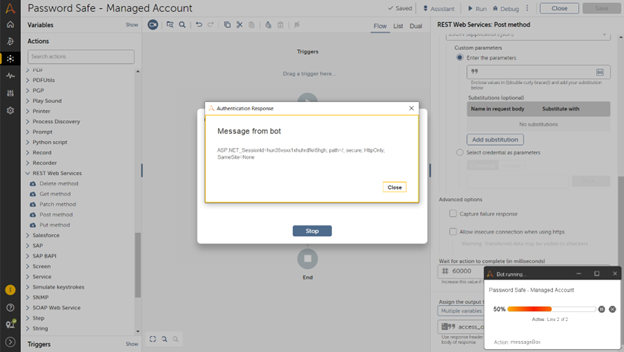
This screen displays the message box with the session cookie.
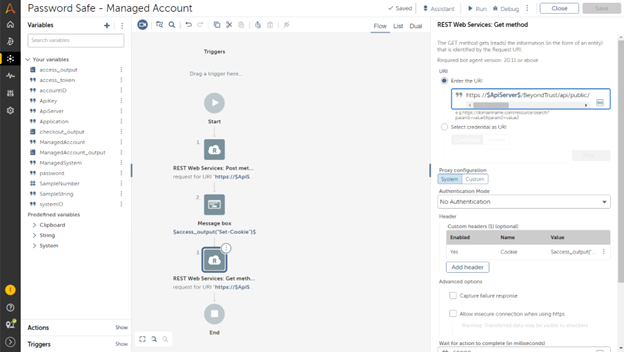
Add an action to retrieve the managed system and account IDs using the GET method.
Add the following URL:
https://$ApiServer$/BeyondTrust/api/public/v3/ManagedAccounts?system Name=$ManagedSystem$&accountName=$ManagedAccount$&type= system
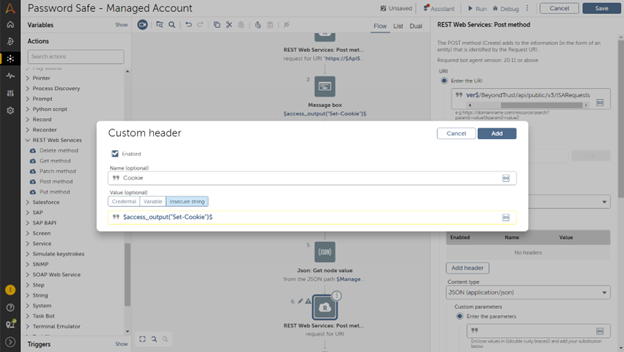
Add the following Header:
Authorization = PS-Auth key=$ApiKey$; runas=$Application$; Header: Cookie = $access_output{"Set-Cookie"}$
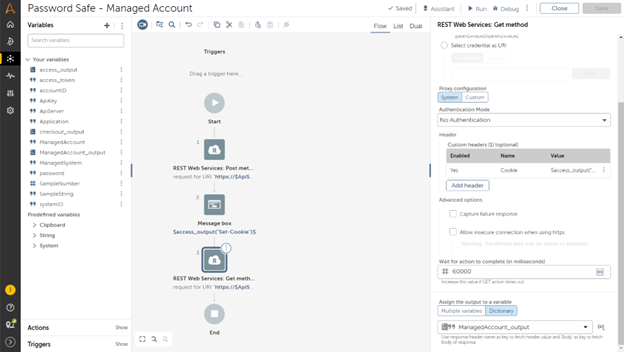
Assign output to dictionary variable ManagedAccount_output.
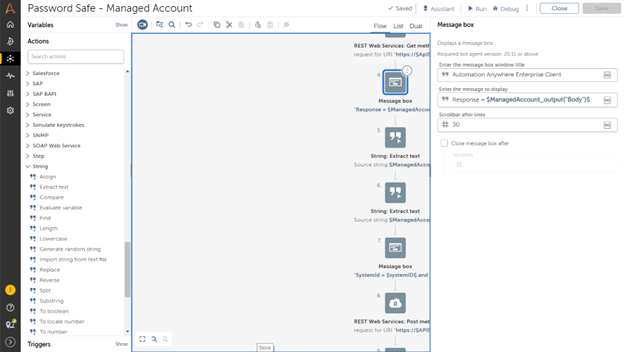
Display the response from GET managed accounts action via a message box.
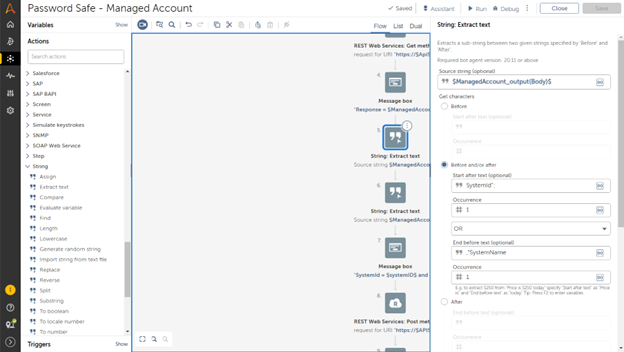
Extract SystemId from ManagedAccount_output and assign the output to variable systemID.
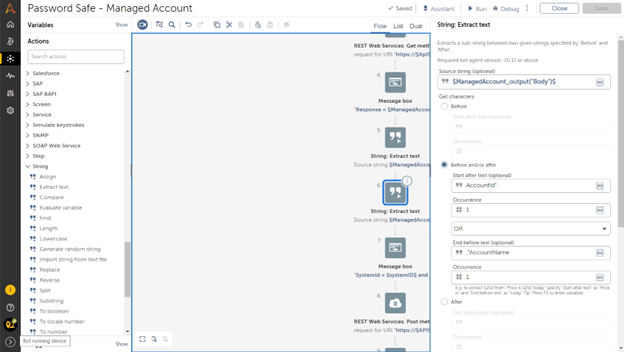
Extract AccountId from ManagedAccount_output and assign the output to variable accountID.
Now that you have SystemId and AccountId, use the ISA Request call via the POST method to check out credentials for the managed account.
Add the action to check out the credentials for the managed account by ID.
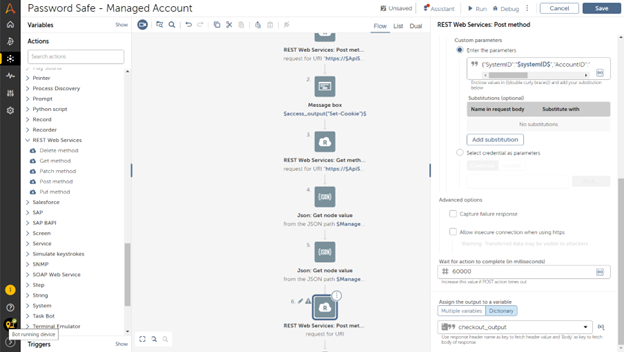
JSON content and output to checkout_output.
Add the following URI: https://$APIServer$/BeyondTrust/api/public/v3/ ISARequests
Add the following Header:Authorization = PS-Auth key=$ApiKey$; runas=$Application$;
Add the following Header:Cookie = $access_output{"Set-Cookie"}$
JSON Body: {"SystemID":"$systemID$","AccountID":"$accountID$"," DurationMinutes":"1","Reason":" AA test"}
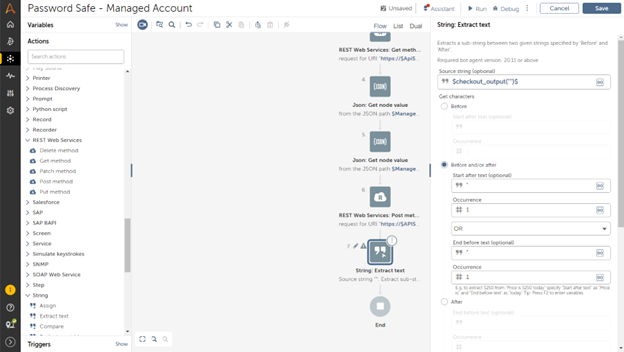
Use a string action to extract text and remove the double quotes from checkout output. Assign the output to variable password.
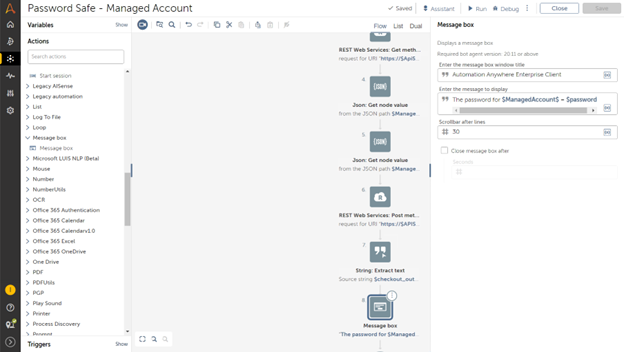
Add a Message action to display the password for the managed account.
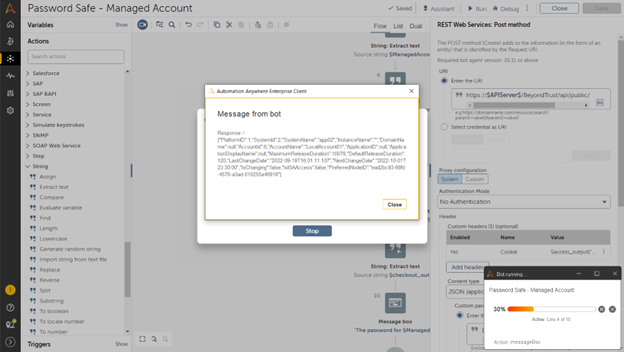
The message box displays the response from GET managed accounts action.
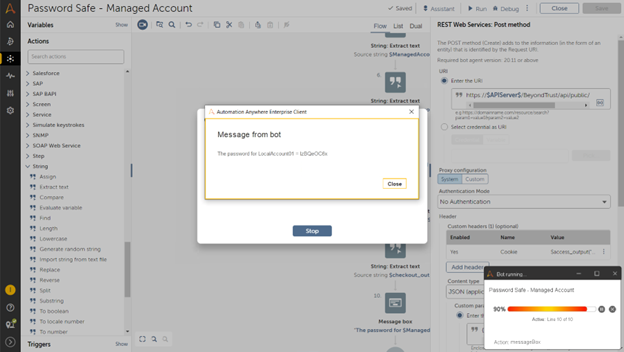
The message box displays the password checked out for the managed account and available to the bot.
For more information, please see Managed Accounts.