Create and manage user accounts
User accounts create the user identity that BeyondInsight uses to authenticate and authorize access to specific system resources. You can create local BeyondInsight users, as well as add Active Directory, Entra ID, and LDAP users into BeyondInsight.
You can also add application users, which are used to represent applications that interface with the public API. Application users cannot log in to the BeyondInsight console. They can only authenticate and interact with the public API.
A user account must be a member of a BeyondInsight user group because permissions to features are assigned at the group level. If a user is not a member of any groups in BeyondInsight, the user cannot log in to the console, and application users cannot authenticate with the public API.
Create a BeyondInsight local user account
- Navigate to Configuration > Role Based Access > User Management.
- Click the Users tab to display the list of users in the grid.
- Click Create New User above the grid.
- Select Create a New User.
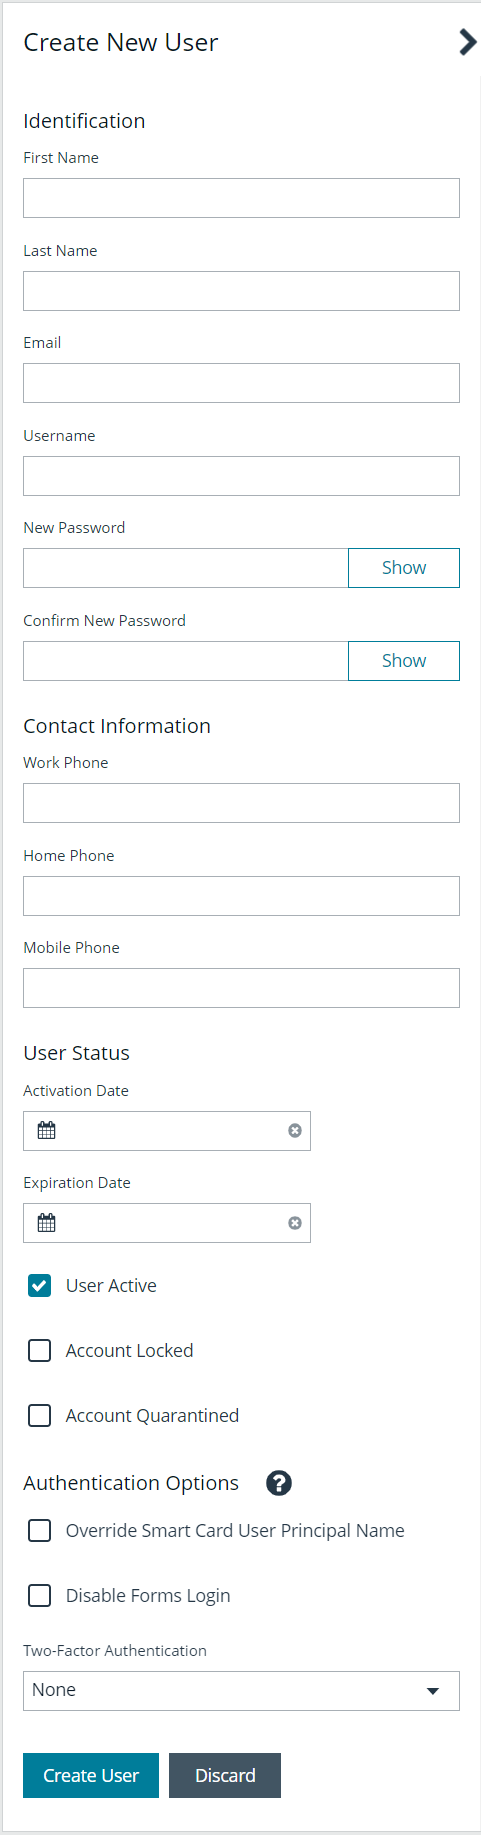
- Provide a First Name, Last Name, Email, and Username for the new user. These fields are required.
You may use an email address for the username.
- Provide a password and confirm it.
The password must meet the complexity requirements as defined by your default password policy, defined at Configuration > Role Based Access > Password Policy.
- Optionally, enter the user’s contact information.
- Select an Activation Date and an Expiration Date for the user account.
These dates are based on UTC time on the BeyondInsight server and are considered during the user's login attempt. The attempt fails if the user account is not yet active or if the expiration date has passed.
- Check User Active to activate the user account.
- Leave the Account Locked and Account Quarantined options unchecked.
- Check the two Authentication Options, if applicable:
- Override Smart Card User Principal Name: when enabled, allows a BeyondInsight user with a smart card that has a different Subject Alternative Name to log in to BeyondInsight and maps the smart card to the user.
- Disable Login Forms: when enabled, disallows SAML users from using the standard BeyondInsight log in form. Check this option only if SAML is configured in your environment. Users authenticate with third party identity provider.
- Select a Two-Factor Authentication method and mapping information, if applicable.
- Click Create User.
- The user is created and User Details > Groups is displayed. You can filter the list of groups displayed by type, name, or description. Select a group, and then click Assign Group above the grid.
The user must belong to at least one group
- To remove the user from a group, select Assigned Groups from the Show dropdown, and then select a group and click Remove Group.
Update default password policy for local users
The default password policy defines the password complexity requirements for local BeyondInsight users. This includes the minimum and maximum length of the password and the type of characters required and permitted in the password. Update the default password policy as follows:
- Go to Configuration > Role Based Access > Password Policy.
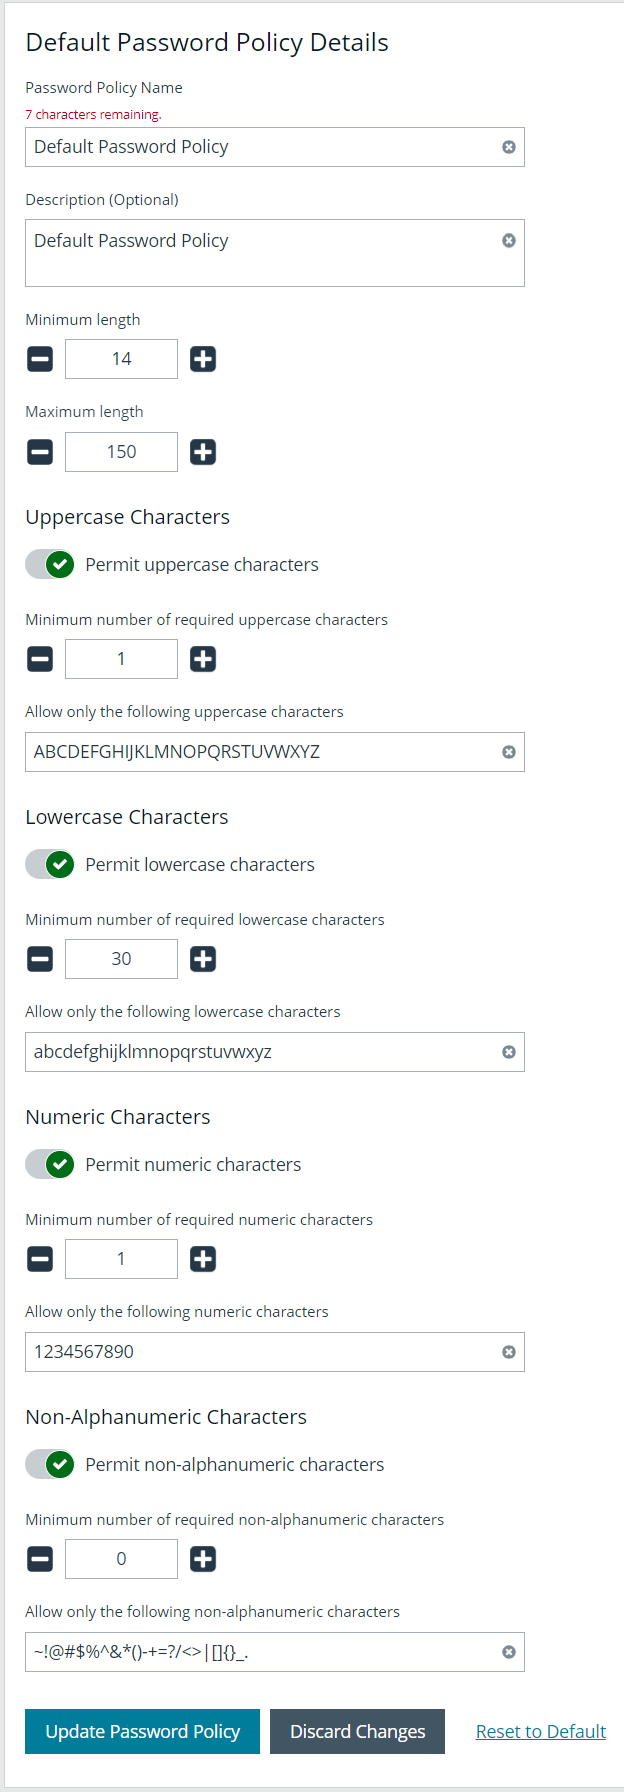
- Enter a name for the policy and an optional description.
- Set the minimum and maximum password length, and set the types of characters to be used: uppercase, lowercase, numeric, and non-alphanumeric.
- Click Update Password Policy when done. You can also discard changes or reset to default if desired.
Add an active directory user
Active Directory users can log in to the management console and perform tasks based on the permissions assigned to their groups. The user can authenticate against either a domain or domain controller.
Active Directory users must log in to the management console at least once to receive email notifications.
- Navigate to Configuration > Role Based Access > User Management.
- Click the Users tab to display the list of users in the grid.
- Click Create New User above the grid.
- Select Add an Active Directory User.
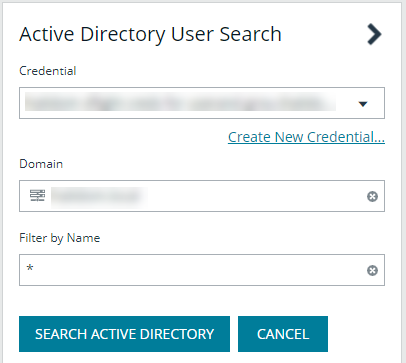
- Select a credential from the list.
If you require a new credential, click Create a New Credential to create a new credential. The new credential is added to the list of available credentials.
- If not automatically populated, enter the name of a domain or domain controller.
- After you enter the domain or domain controller credential information, click Search Active Directory. A list of users in the selected domain is displayed.
For performance reasons, a maximum of 250 users from Active Directory is retrieved. The default filter is an asterisk (*), which is a wild card filter that returns all users. Filter by user name to refine the list.
- a* returns all group names that start with a.
- *d returns all group names that end with d.
- *sql* returns all groups that contain sql in the name.
- Click Search Active Directory.
- Select a user, and then click Add User.
- Assign at least one group to the user.
Add an Entra ID user
Entra ID users can log in to the management console and perform tasks based on the permissions assigned to their groups. The user can authenticate against either a domain or domain controller.
Entra ID users must log in to the management console at least once to receive email notifications.
- Navigate to Configuration > Role Based Access > User Management.
- Click the Users tab to display the list of users in the grid.
- Click Create New User above the grid.
- Select Add a Microsoft Entra ID User.
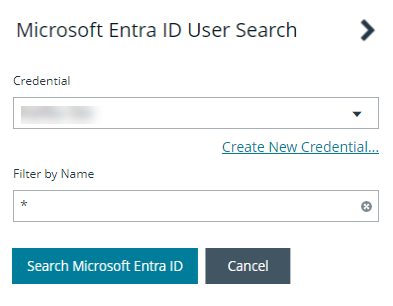
- Select a credential from the list.
If you require a new credential, click Create a New Credential to create a new credential. The new credential is added to the list of available credentials.
For performance reasons, a maximum of 250 users from Entra ID is retrieved. The default filter is an asterisk (*), which is a wild card filter that returns all groups. Filter by user name to refine the list.
- a* returns all group names that start with a.
- *d returns all group names that end with d.
- *sql* returns all groups that contain sql in the name.
- Click Search Microsoft Entra ID.
- Select a user, and then click Add User.
- Assign at least one group to the user.
Change the preferred domain controller for active directory user accounts

The preferred domain controller for a user is set by the group they are in, provided that the group was created with the propagate option turned on, and that this action happened before the user was set up.
If you want to change the preferred domain controller for a user, edit the user, select an appropriate credential, and then select a different preferred domain controller from the list.
Any future change to the preferred domain controller at the group level can overwrite this setting if the propagate switch is turned on.
Add an LDAP user
- Navigate to Configuration > Role Based Access > User Management.
- Click the Users tab to display the list of users in the grid.
- Click Create New User above the grid.
- Select Add an LDAP User from the list.

- Select a credential from the list.
If you require a new credential, click Create a New Credential to create a new credential. The new credential is added to the list of available credentials.
- Click Fetch to load the list Domain Controllers, and then select one.
- To filter the user search, enter keywords in the user filter or use a wild card.
- Click Search LDAP.
- Select a user, and then click Add User.
- Assign at least one group to the user.
Add an application user
Application users represent applications that interface with the BeyondInsight public API. Application users cannot log in to the BeyondInsight console. They can only authenticate and interact with the public API, using Client ID and Client Secret for credentials within the OAuth client credential flow.
An API Registration type of API Access Policy must be assigned to an application user, and is used for processing IP rules. To create an application user:
- Go to Configuration > Role Based Access > User Management > Users.
- Click Create New User.
- Select Add an Application User from the dropdown list. The Create New Application User screen is displayed.
- Add a username.
- Under API Access Policy, select the policy.
- Copy the information from the Client ID and Client Secret fields for later use.
- Click Create User.
- Assign the user to a group that has the required permissions to access BeyondInsight and Password Safe features.
- Click the vertical ellipsis for the user, and then select View User Details.
- From the User Details pane, click Groups.
- Locate the group, select it, and click Assign Group above the grid.
Recycle the client secret for an application user
When editing an application user, you have an option to recycle their secret. Once recycled, you can copy or view the new secret. When a secret is recycled and the user account is updated with this change, the previous client secret is no longer valid.
To recycle the secret for an application user:
- Go to Configuration > Role Based Access > User Management > Users.
- Locate the application user in the grid.
- Click the ellipsis to the right of the user, and then select Edit User Details.
- Click the Recycle icon to the right of the Client Secret.
- Click Recycle on the confirmation message that displays.
- Copy the new secret for later use.
- Click Update User.
View and update OAuth secret expiry
The user's secret will eventually expire. The Users grid has an OAuth Secret Expiry column, which you can use to view what is close to expiring. The default duration of a client secret is 365 days. You can adjust the lifetime of the secret from the Authentication Options configuration area in BeyondInsight. Updating this value only changes the secret expiry date for new application users and recycled client secrets. Older secrets cannot be updated.
To view the OAuth Secret Expiry for an application user:
- Go to Configuration > Role Based Access > User Management > Users.
- Locate the application user. The OAuth Secret Expiry column lists the date and time that a client secret for that user expires.
To update the duration for client secrets:
- Go to Configuration > Authentication Management > Authentication Options.
- Under Application User Authentication Settings, enter the new duration of the client secret in the Client Secret Expiry field.
- Click Update Application User Authentications Settings.
Edit a user account
Administrators can edit user details such as change the name, username, email, and password, update active status, lock and unlock the account, and update multi-factor authentication settings as follows:
- Navigate to Configuration > Role Based Access > User Management.
- Click Users to display the list of users in the grid.
- Optionally, filter the list of users displayed in the grid using the Filter By dropdown.
- Select a user, click the vertical ellipsis button, and then select Edit User Details.
- In the Edit User pane, update the details as required, and then click Update User.
For more information on creating and editing directory credentials, please see Create and edit directory credentials.
Add user to groups
- From the User Management page, click the Users tab to display the list of users in the grid.
- Optionally, filter the list of users displayed in the grid using the Filter by dropdown.
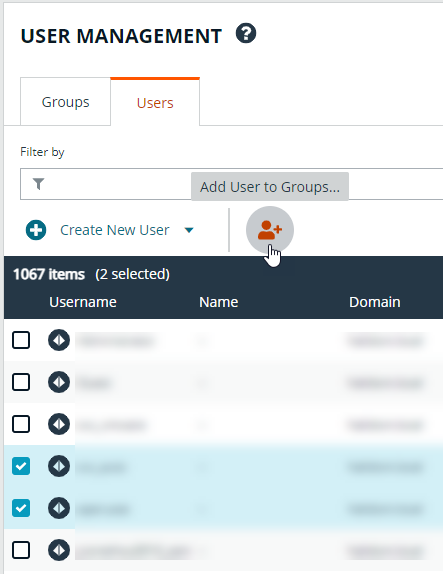
- Select a user or multiple users, and then click the Add User to Groups button above the grid.
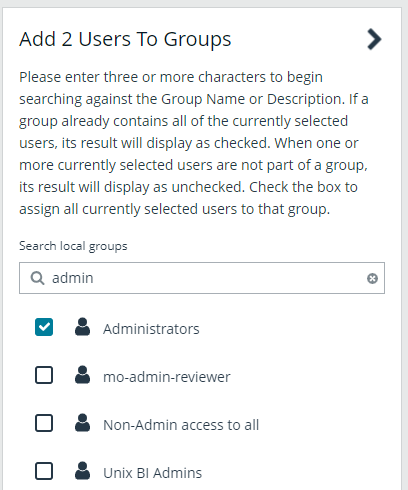
- Search for the group or groups, and then select the group or groups to assign currently selected users to the selected groups.
If a group already contains all of the selected users, a check mark is displayed next to the group name.
Delete a user account
Administrators can delete user accounts as follows:
- Navigate to Configuration > Role Based Access > User Management.
- Click the Users tab to display the list of users in the grid.
- Optionally, filter the list of users displayed in the grid using the Filter by dropdown.
- For local accounts, select the user, click the Delete button above the grid, and then click Delete to confirm.
- For directory accounts, select the user, click the vertical ellipsis, select Delete User, and then click Delete to confirm.
For auditing purposes, if a user account is linked to any Password Safe session recordings, you cannot delete the account; however, you may disable the account.
Directory accounts may be deleted only if they do not belong to any groups.