Register and configure an application in Entra ID
Before you can create Entra ID credentials and add Entra ID groups and users into BeyondInsight, you must first register and configure an application in the Entra ID tenant where the user accounts reside. The below steps walk through creating a registered application in Entra ID, creating a client secret for the registered app, and configuring API permissions for the registered app.
Create a registered application in Entra ID
Sign into Azure and connect to the Entra ID tenant where the credentials you wish to add into BeyondInsight reside. Then follow these steps:
- On the left menu, select App registrations.
- Click + New Registration.
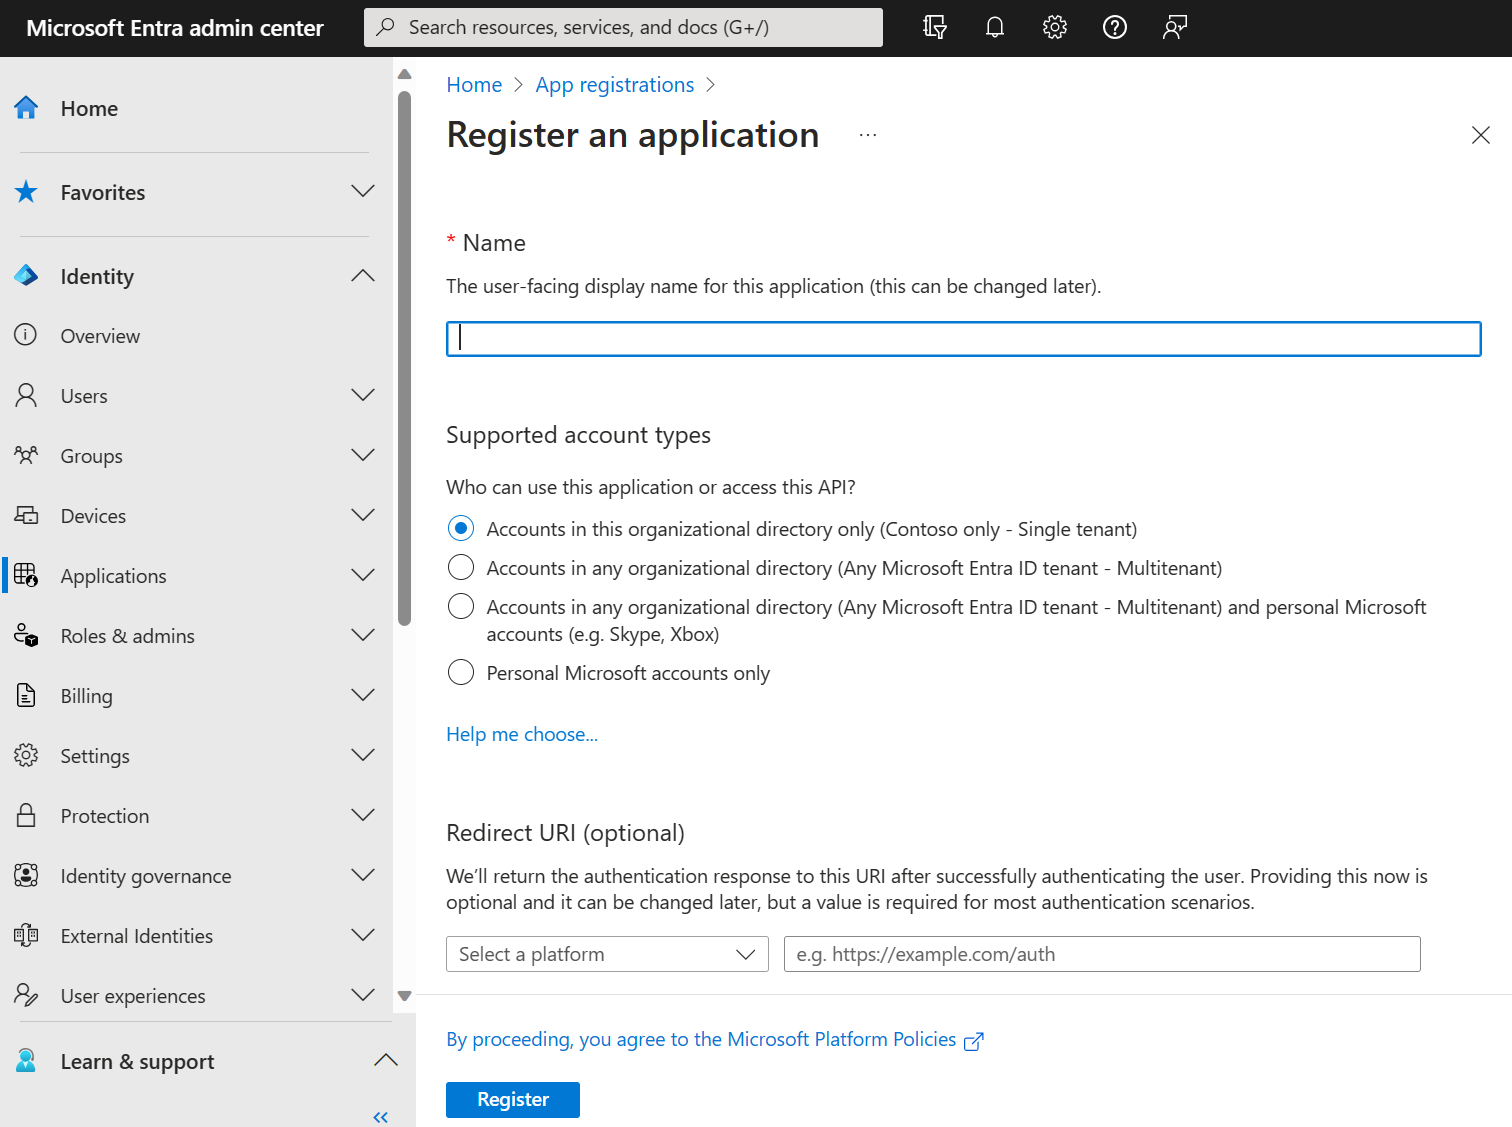
- Under Name, enter a unique application name.
- Under Supported account types, select Accounts in this organizational directory only.
- Click Register.
Create a client secret for the registered app
- Select the newly created app from the list of App Registrations (if not already visible).
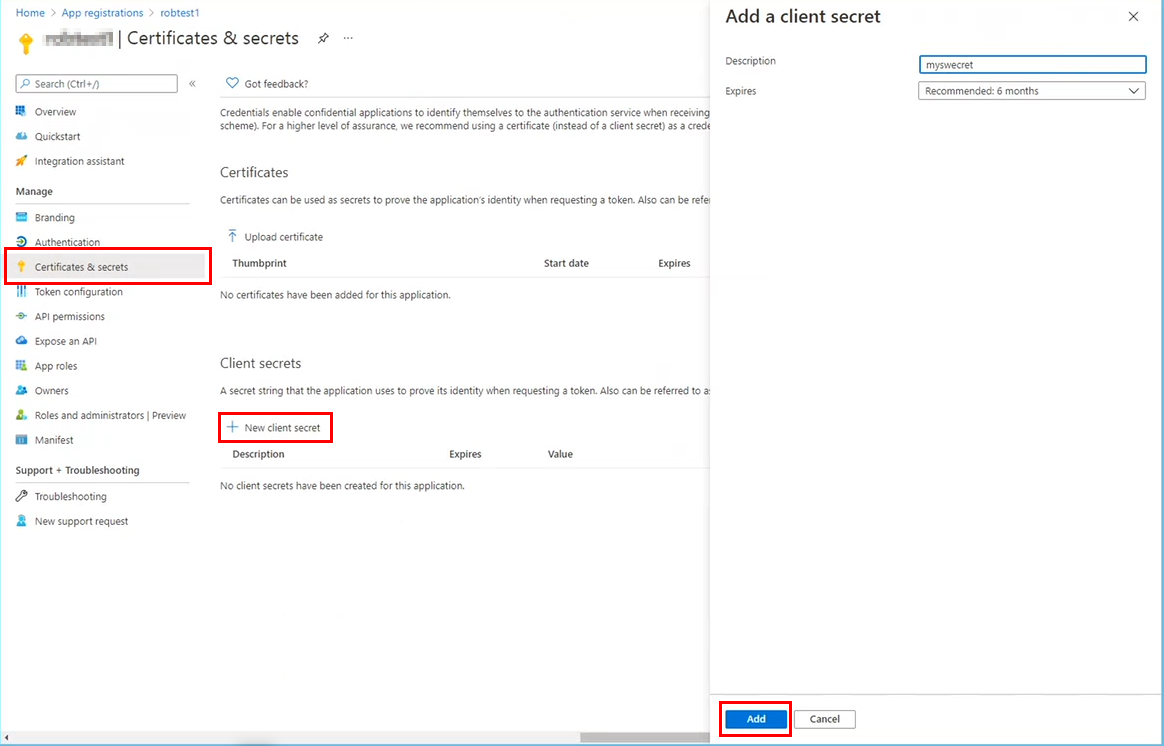
- Select Certificates & secrets from the left menu.
- Click + New Client Secret.
- Provide a Description and appropriate Expiry. If you select 1 or 2 years, the directory credential must be refreshed in BeyondInsight with a new client secret on the anniversary of its creation.
- Click Add.
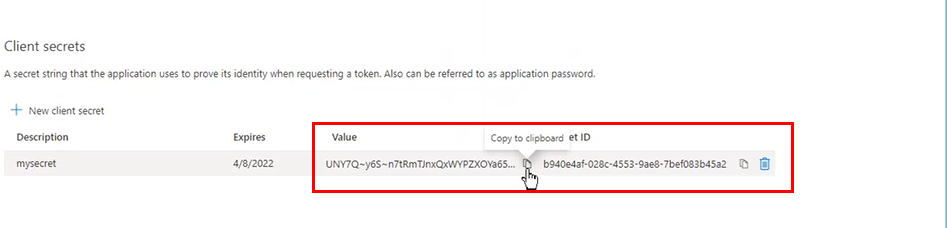
- Copy the client secret and store it in a safe place. It is required when creating directory credentials for Entra ID in BeyondInsight.
This is the only time this client secret value is displayed.
Assign API permissions to the registered application
- Select the newly created app from the list of App Registrations
- Select API Permissions from the left menu.
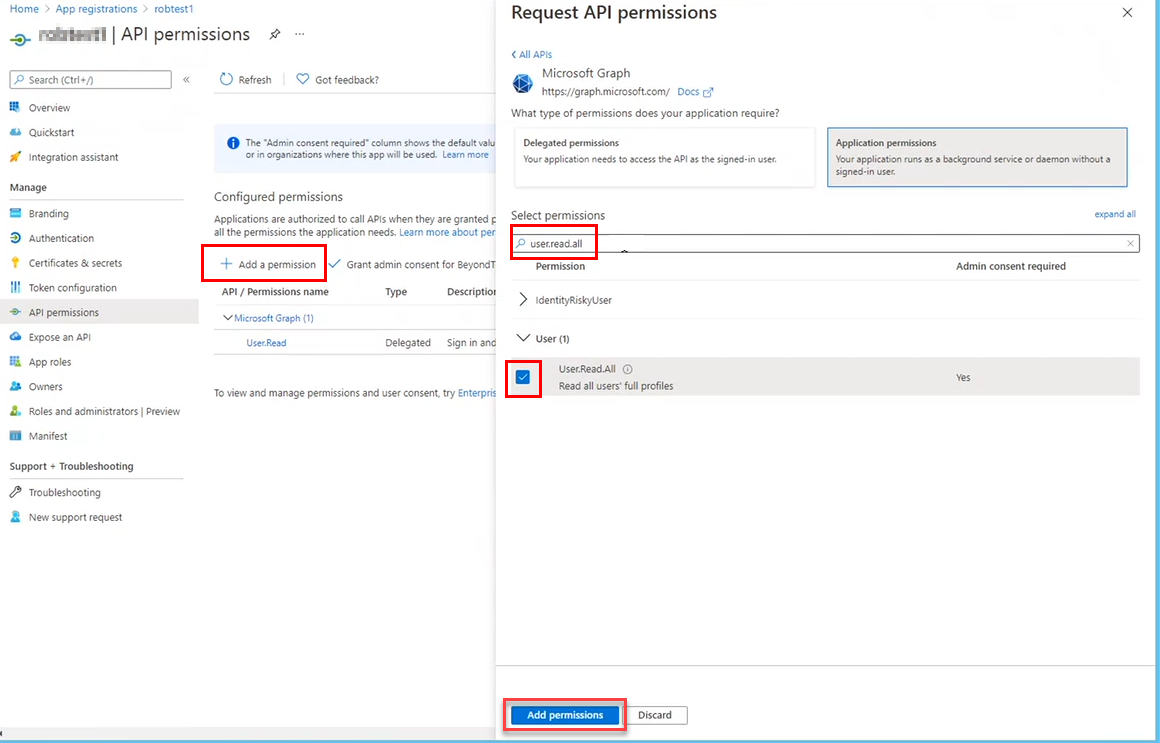
- Click + Add a permission.
- Click Microsoft Graph.
- Click Application Permissions.
- Search for User.Read.All and check the box in the search results.
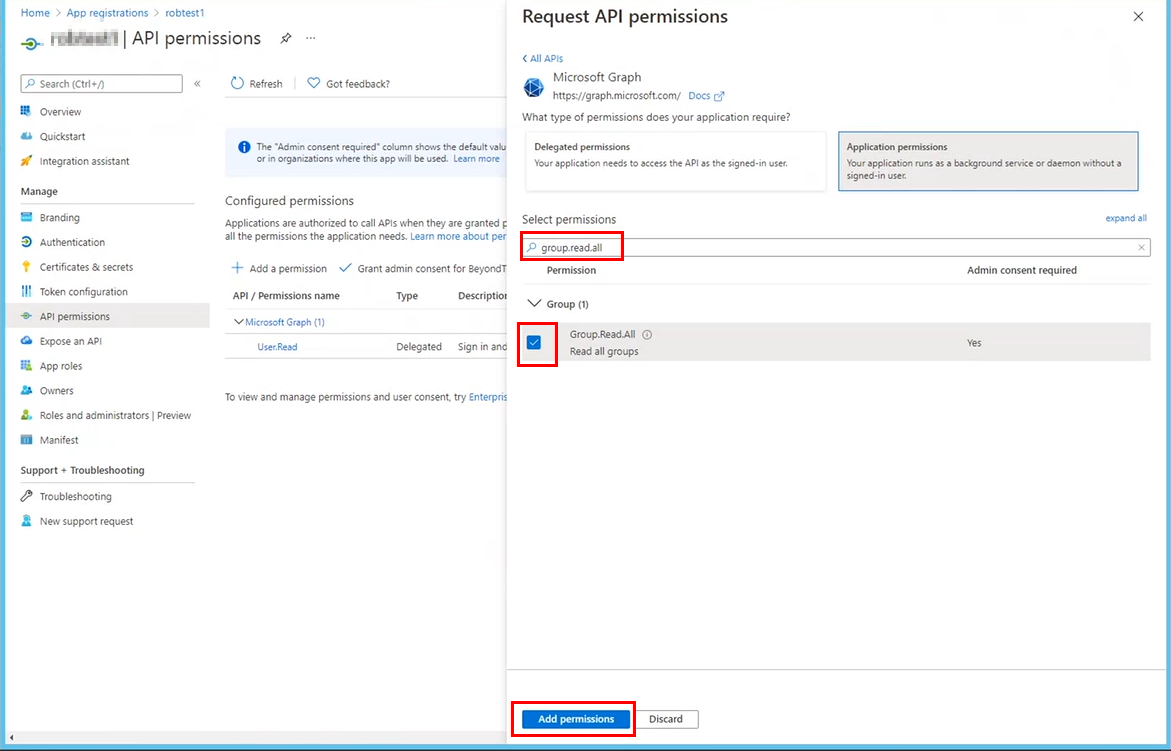
- Search for Group.Read.All and check the box in the search results.
- Click Add permissions.
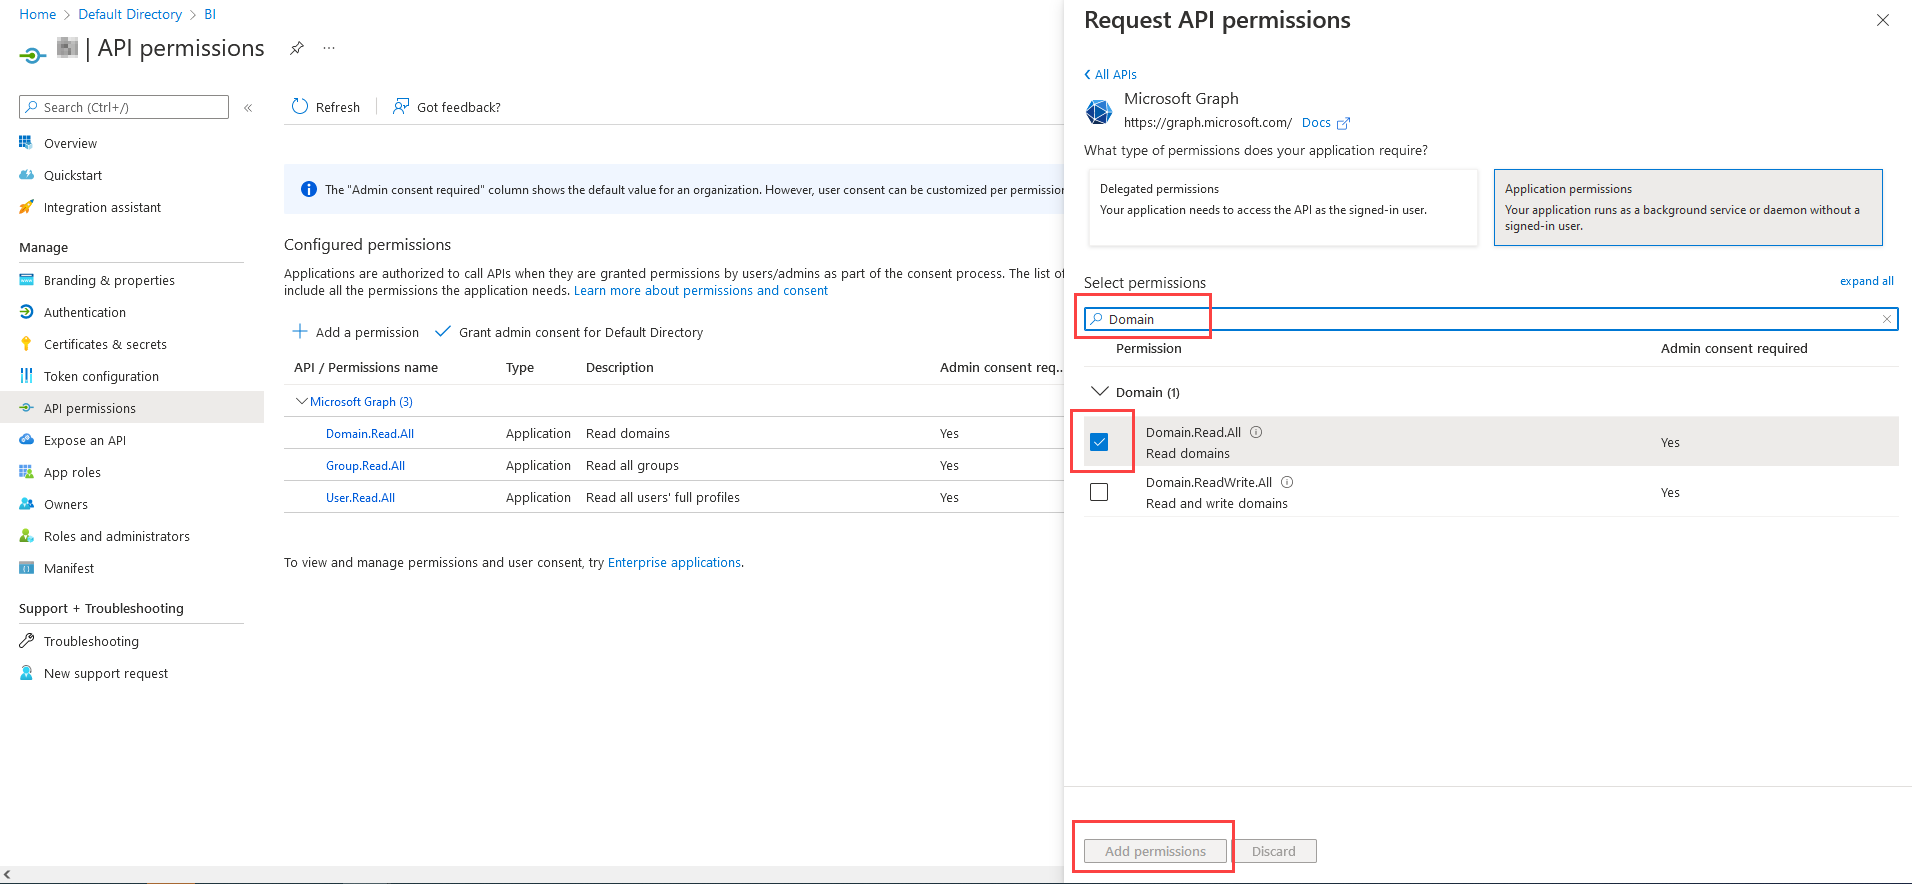
- Search for Domain.Read.All and check the box in the search results.
- Click Add permissions.
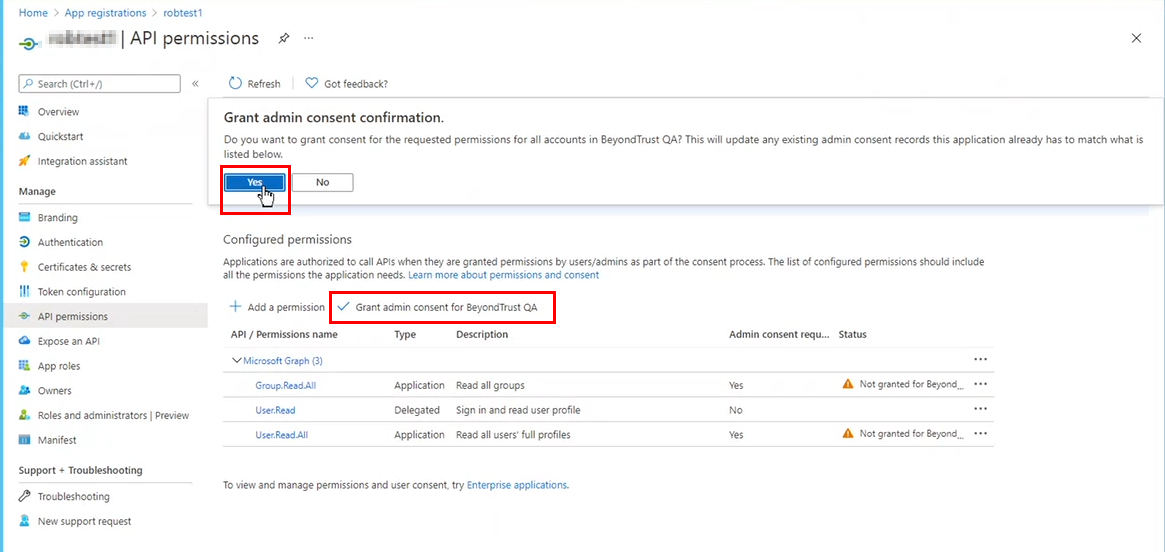
- Click Grant Admin Consent for <directory name> to give consent to the app to have those permissions you just added.
- Click Yes to confirm.
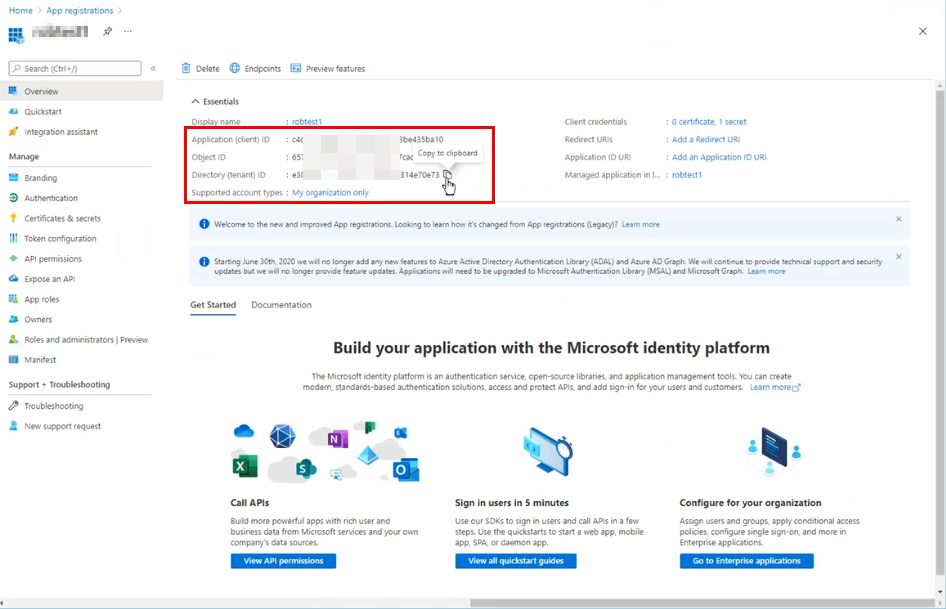
Now that your registered app is created, has a client secret, and has API permissions assigned, select Overview from the left menu and copy the Application (client) ID and the Directory (tenant) ID. Store these in a safe place as these are required when creating directory credentials for Entra ID in BeyondInsight.
For more information on directory credentials, please see Create and edit directory credentials.