Troubleshoot Session Policies
Session policies can be applied to multiple objects within the same session. The Session Policy Simulator allows you to determine what the outcome of complex policy layering will be. The simulator can also be used to troubleshoot permission errors, such as a permission being unexpectedly unavailable.
- To access the session policy simulator, navigate to /login > Users & Security > Session Policies. Scroll to the bottom of the page.
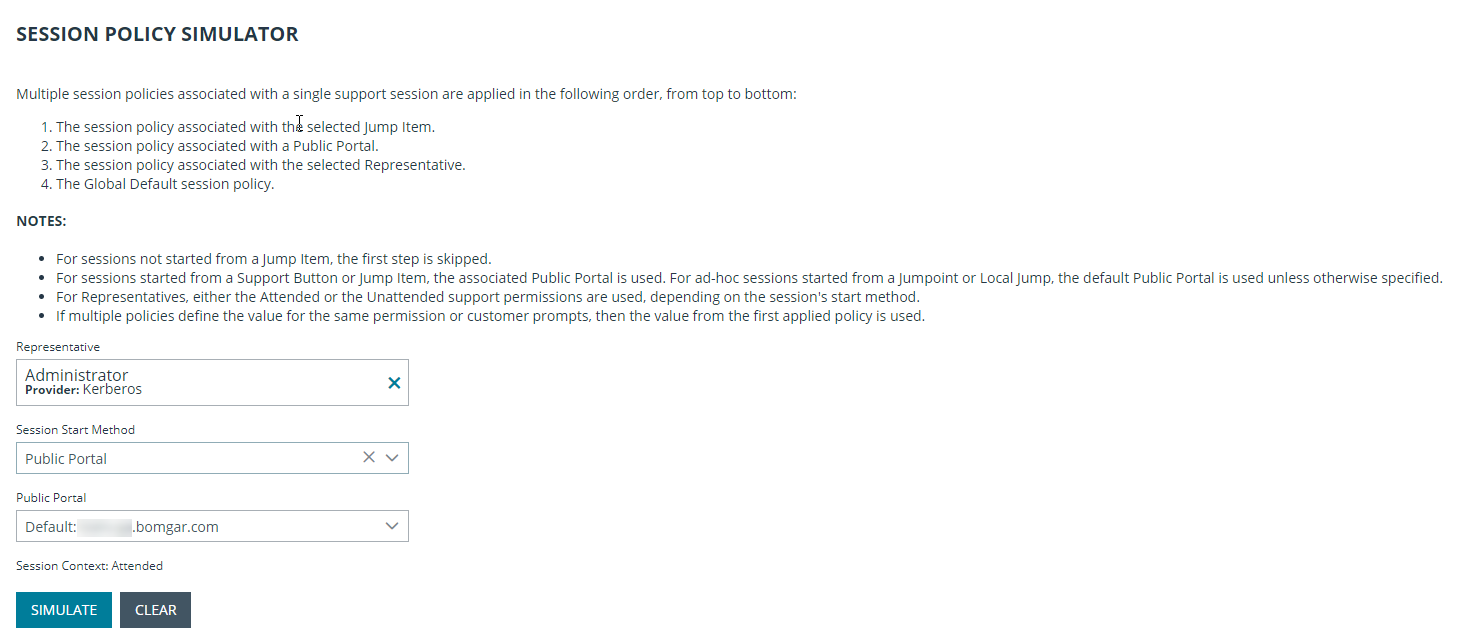
- Select the representative performing the session. This dropdown includes user accounts and rep invite policies.
- Next, select the session start method.
- If you selected Public Portal, choose the public portal to use for this simulation of a customer-initiated session.
- If you selected Support Button, search for a deployed Support Button by profile, associated public portal, associated queue, computer name, or description. The associated public portal is automatically selected above.
- Because local Jumps and Jumpoints are always associated with the default public portal, there are no further settings to define.
- If you selected Jump Client or a Jump Shortcut, search for a pinned Jump Item by name, comments, Jump Group, tag, or associated public portal. The associated public portal is automatically selected above. You can choose whether the customer should appear as present or not.
- Click Simulate. In the area below, the permissions configurable by session policy are displayed in read-only mode. You can see which permissions are allowed or denied as a result of the stacked policies, as well as which policy set each permission.