Transfer the BeyondTrust-ServiceNow Integration Update Sets
You must purchase this integration separately for both your Remote Support software and your ServiceNow solution. For more information, contact BeyondTrust's Sales team.
The steps below are typically used after the integration has been imported and configured in a test/development instance of ServiceNow and is being transferred to a production instance. However, they are also applicable to transferring the integration between any ServiceNow instances.
Transfer Update Set
- Follow the steps in the ServiceNow documentation to transfer the BeyondTrust - ServiceNow Integration update set(s) into the destination instance of ServiceNow.
This is typically achieved by retrieving the update sets from the destination instance or by exporting the update sets from the original instance as XML files. For details, please see Export and Import XML files.
- Follow the same steps to transfer the BeyondTrust - ServiceNow Integration Configuration update set.
Configure Production Outbound Event
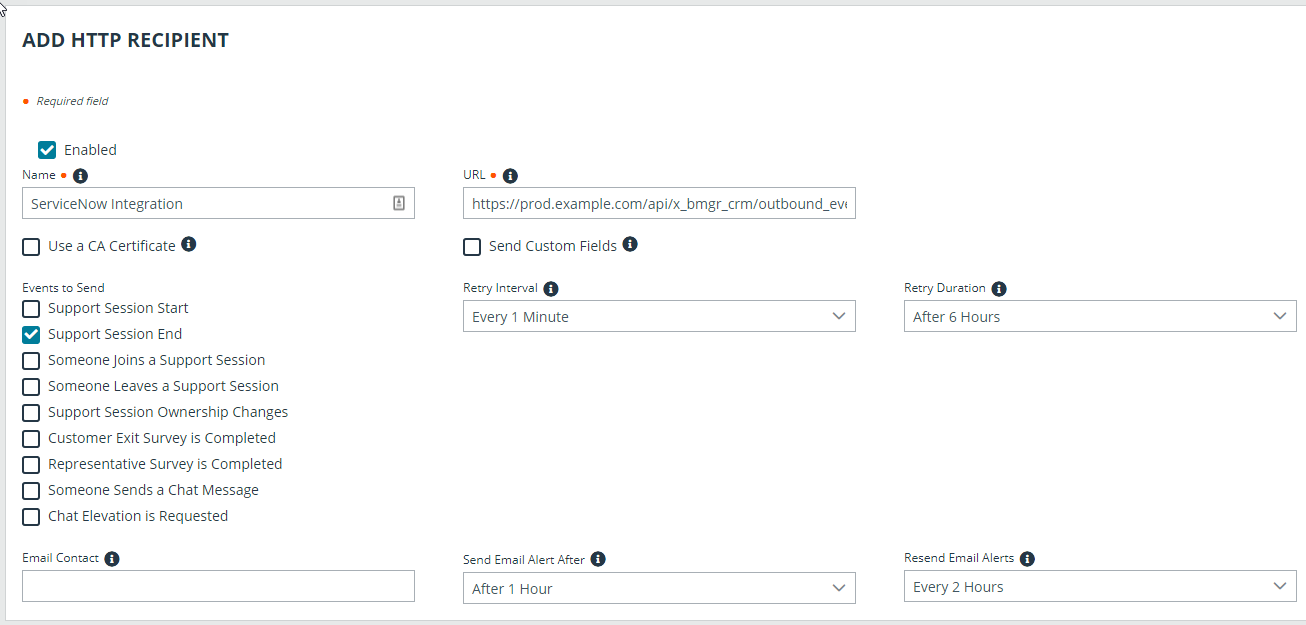
- In the BeyondTrust interface, go to /login > Management > Outbound Events.
- Copy the URL of the event for the original ServiceNow instance.
- Click Add to create a new HTTP recipient.
- In the URL field, paste and replace the name of the original ServiceNow instance with that of the new one such that /api/x_bmgr_support_ent/outbound_event/session_end is preserved at the end. The result should be similar to https://example.service-now.com/api/x_bmgr_support_ent/outbound_event/session_end, as opposed to https://example-dev.service-now.com/api/x_bmgr_support_ent/outbound_event/session_end.
- Scroll to Events to Send and check the following events:
- Support Session End
- Customer Exit Survey is Completed
- Representative Survey is Completed
- Scroll to the bottom and click Add Recipient.
- Locate the outbound event created during testing and click Edit.
- Check Disabled and save.
Configure Custom Link
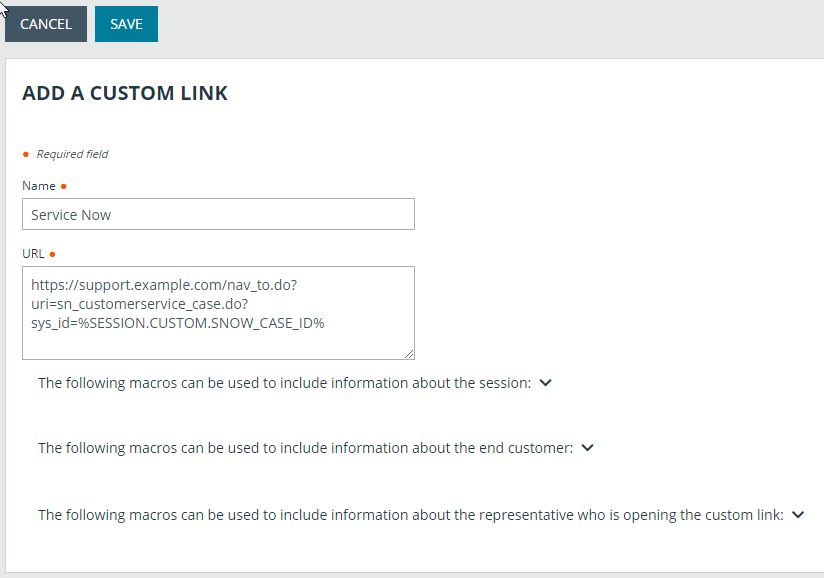
- Browse to /login > Rep Console > Custom Links.
- Edit or add a link and update the ServiceNow URL to direct to the destination instance of ServiceNow. Be careful to preserve /nav_to.do?uri=task.do?sys_id=%EXTERNAL_KEY% at the end.
- Click Save.
- Test the integration setup in its new location following the same steps used to test the original instance.
For more information, please see Test the Setup of the Remote Support and ServiceNow Integration.