Configure ServiceNow for Integration with BeyondTrust
Unless otherwise noted, all of the steps in this section take place in the ServiceNow interface. We recommend that you initially use development or test instances of ServiceNow before installation in the production instance, so that the integration can be thoroughly tested.
Install BeyondTrust Integration
The Integration must be purchased directly from BeyondTrust. After the purchase, it is installed via the ServiceNow Store. There is no mechanism to purchase the integration at the ServiceNow Store. Follow the steps below to request and install the integration.
- Log in to your ServiceNow platform with your corporate account. Please contact your company Now Support (HI) admin if you do not have credentials.

- Search for BeyondTrust Remote Support CSM Integration, or go to the app's page.
- Click Request App.
- Request Remote Support with CSM.
- Within a business day, BeyondTrust approves the request with a $0 purchase price, and sends a copy of these installation instructions to the requester.
- Once you receive the confirmation, return to the app's page in the ServiceNow store.
- Click Complete Purchase.
- Review the contract details.
- If you agree, check Accept the Site Terms of Use.
- Click Complete Purchase.
- The app is ready for installation on your ServiceNow instance(s).
- Repeat the steps below for each instance.
- Login to the ServiceNow instance on which you want to install the app.
- Navigate to System Applications > All Available Applications > All.
- Search for the app you want to install.
- Click Install.
Set Up ServiceNow Integration with Remote Support
Follow these steps in ServiceNow to connect ServiceNow to Remote Support.
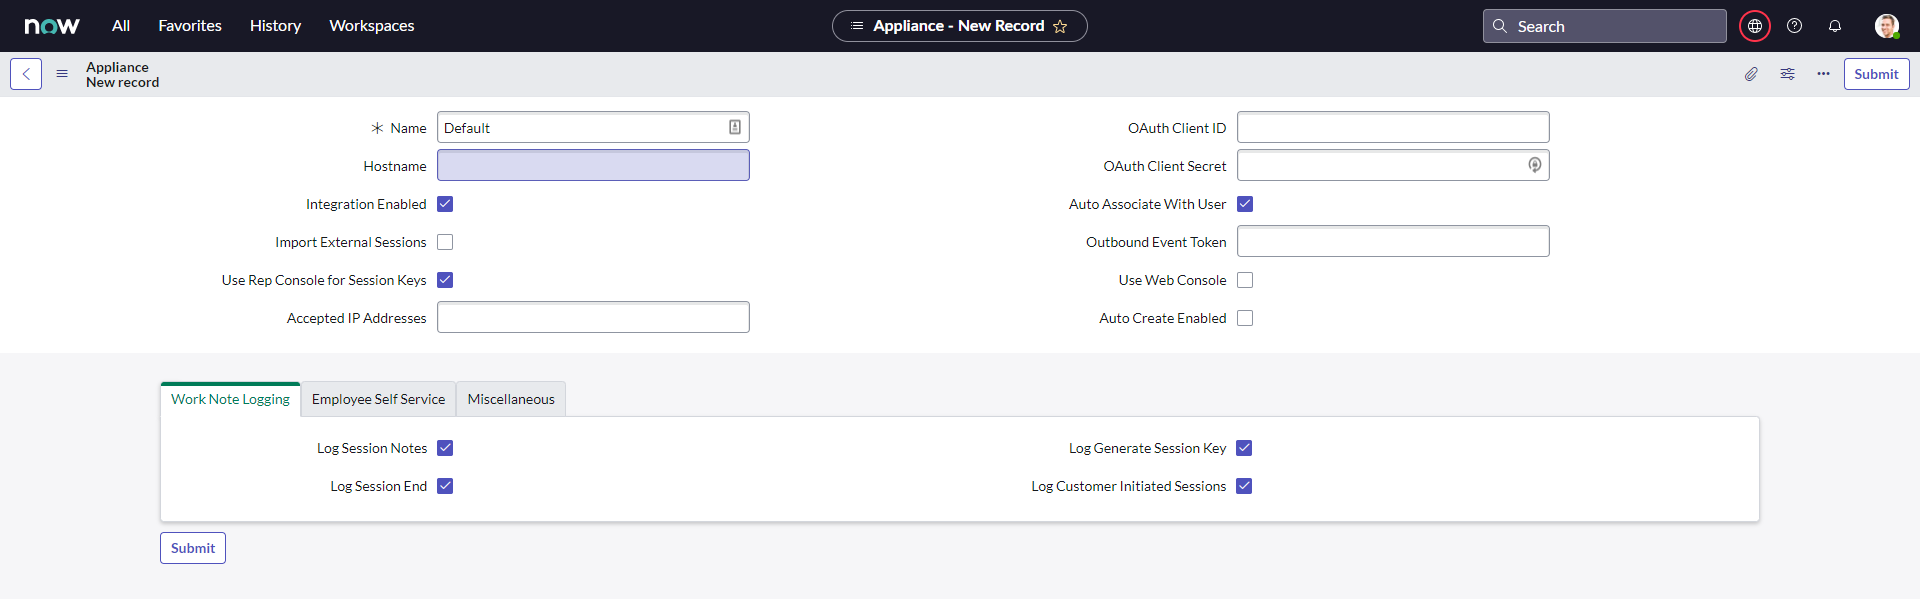
Browse to BeyondTrust CSM Appliances.
Click New to add a new Remote Support appliance record and enter the following values:
- Name: Must be Default.
- Hostname: Host name of the Remote Support deployment.
- OAuth Client ID: The OAuth client ID that is used to authenticate to the Remote Support deployment. This is obtained in a previous step, Create a ServiceNow OAuth API Account.
- OAuth Client Secret: The OAuth client secret that is used to authenticate to the Remote Support deployment. This is obtained in a previous step, Create a ServiceNow OAuth API Account.
- Integration Enabled: Check this box to enable the integration.
- Outbound Event Token: The token that is used as an added security measure to confirm outbound events are coming from the Remote Support deployment that is sending the same token. If left blank, this outbound event token process is ignored. If a value is provided, however, the same value must be sent from all outbound events coming from BeyondTrust as a parameter named outbound_event_token.
- Accepted IP Addresses: A comma-separated list of IP addresses from which this integration accepts outbound events.
Assign Users Appropriate Roles
Give the x_bmgr_crm.agent role to ITIL users who provide technical support using this integration.
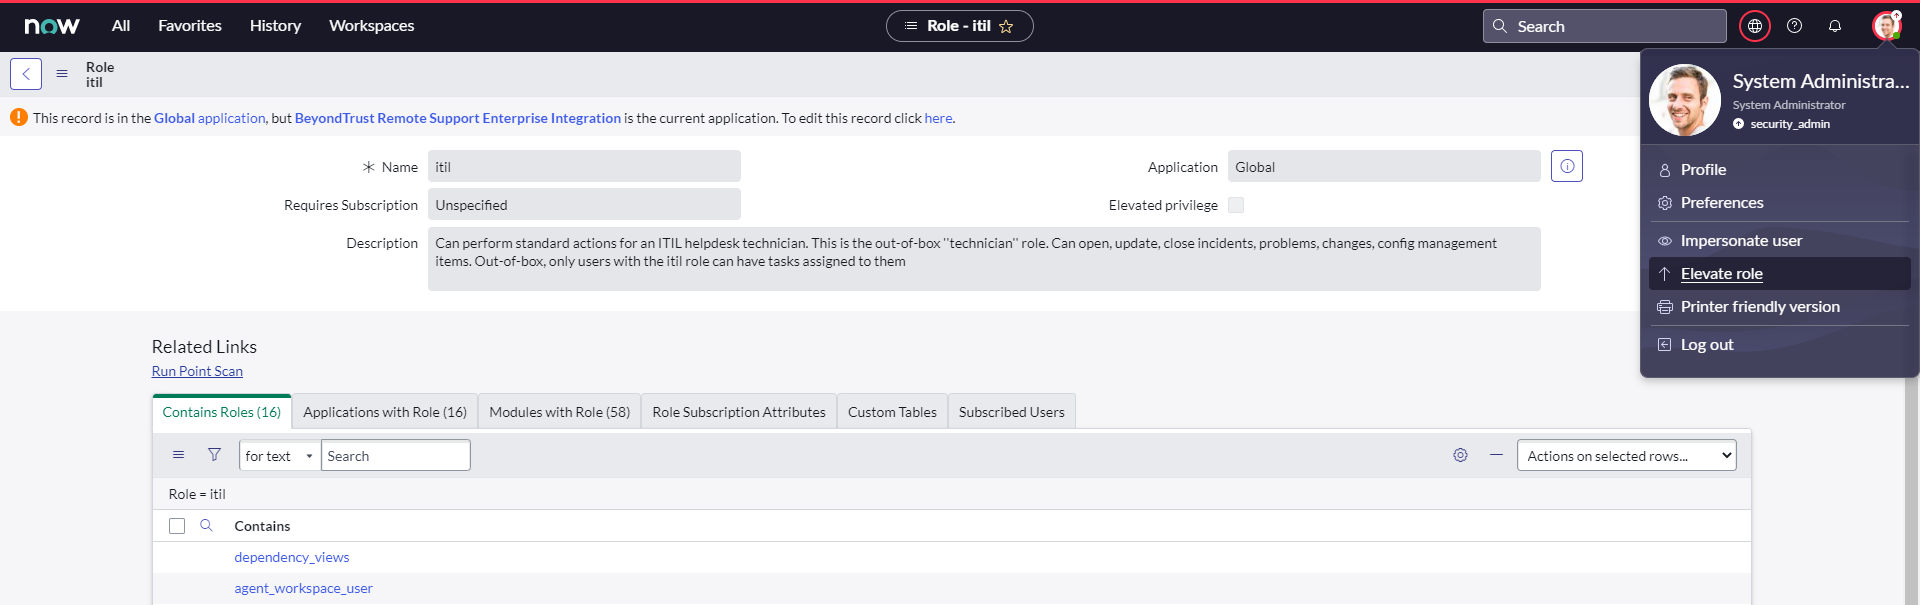
You must elevate the admin's role in order to make the following change.
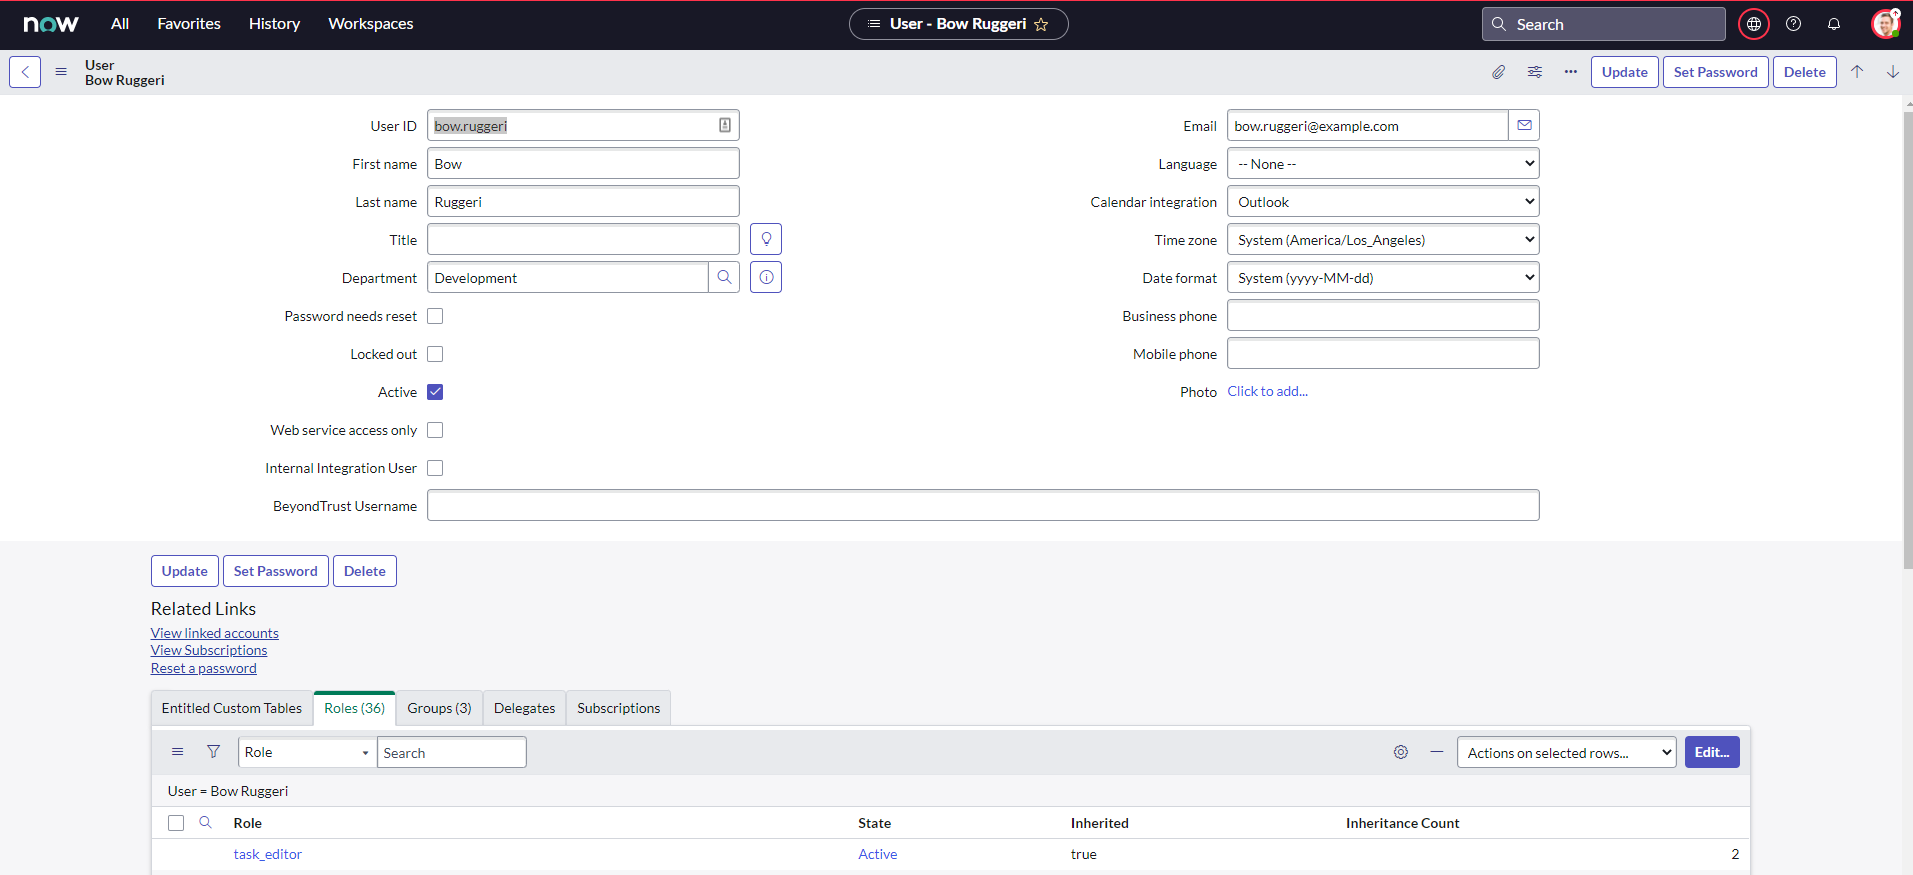
- Browse to User Administration > Users.
- Select a user.
- Click the Roles tab, and then click the Edit button.
- Add the x_bmgr_crm.agent role from the Collection list to the Roles list.
- Click Save.
Configure Case States
Case states are used in the Remote Support Integration, specifically UI Actions like Session Key, to control when the button shows up on case forms.
- Browse to Case and click Open to see a list of open cases.
- Click Case Number to select a case.
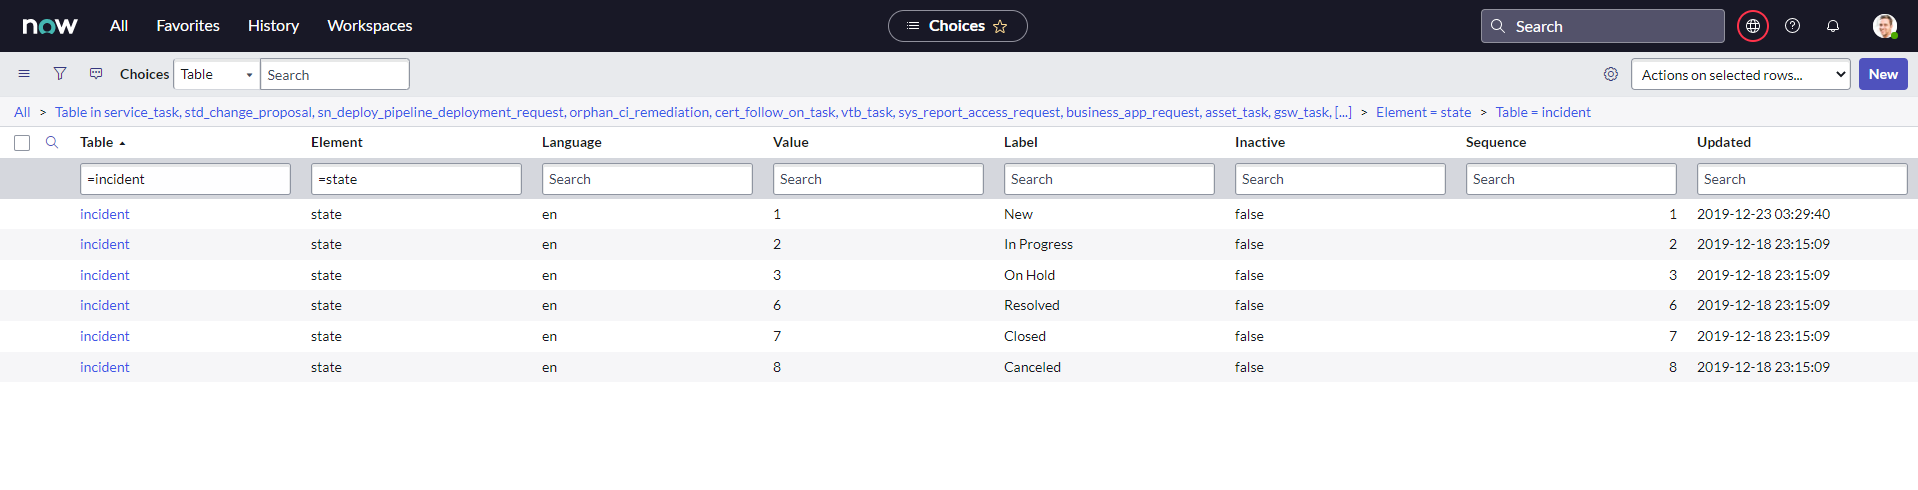
- Right-click the label for the State field or any other field which uses a dropdown or choice list, and click Show Choice List.
- Filter the list by Table=sn_customerservice_case and Element=state.
- Take note of the different sn_customerservice_case choices, specifically the value of cases with a label of Resolved or Closed, and any custom case states for which the Remote Support Session Key button should not appear.
- Go back to the case, right-click the Session Key button located in the Case title bar, and select Configure > UI Actions.
- In the UI Actions list, click Remote Support Session Key, select the Condition field, and ensure current.state is configured to include the IDs of the case states for which the session key button should not appear.
The following code in the UI Action condition field controls which states the Session Key button displays for. By default, the Session Key button displays for cases whose states are set to New, Open, or Awaiting Info, for example, cases with states set to 1, 10, or 18 respectively.
x_bmgr_crm.BomgarUtil.showSessionKeyOnCaseForm('Default', current.getUniqueValue(), [1,10,18])
For example, if you had a custom state of 27, which represented a Pending Case, and you wanted the Session Key button to also display for that state, you would modify the code above to the following:
x_bmgr_crm.BomgarUtil.showSessionKeyOnCaseForm('Default', current.getUniqueValue(), [1,10,18,27])
Configure Chat Now Form in Service Portal
- Browse to Service Portal and click Service Portal Configuration to open the configuration landing page.

- Click Designer to launch the Service Portal Designer.

- Scroll down the list of pages and click the Service Portal index page (or whichever page is marked with the home icon).
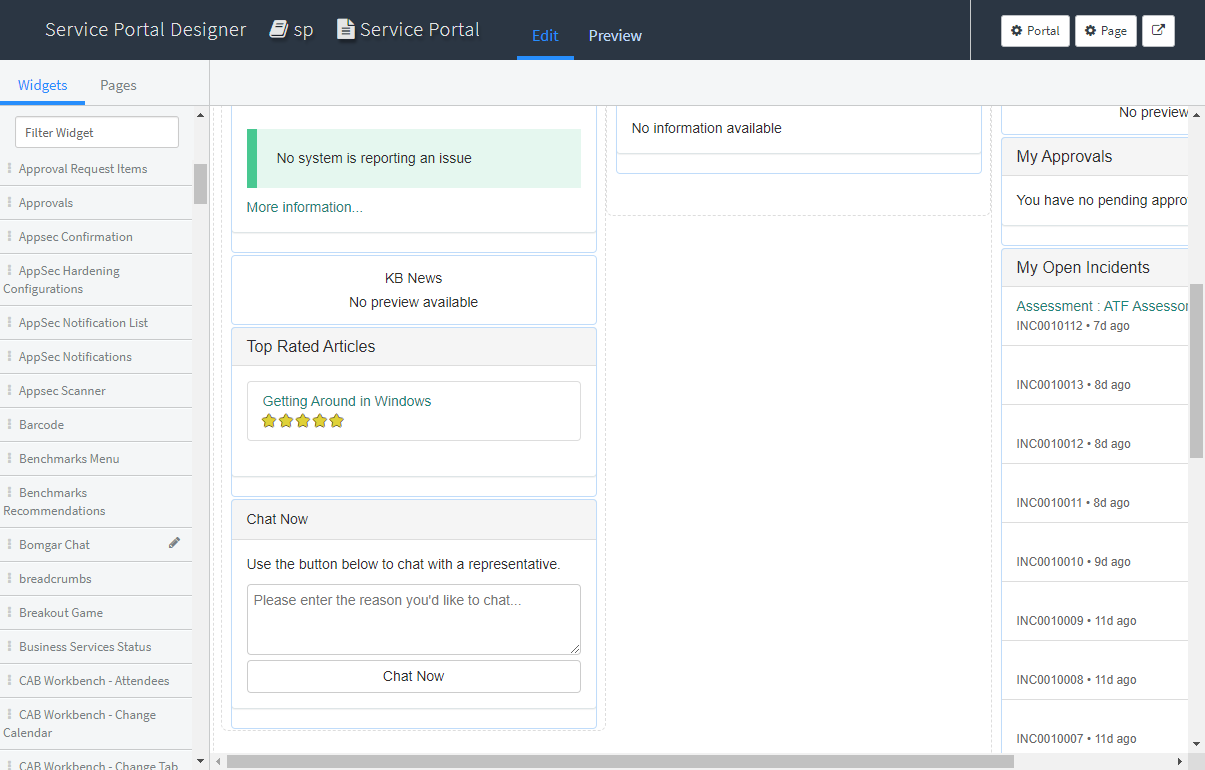
- In the Widgets menu on the left, find the Bomgar Chat widget. Drag it onto the page, and place it where you'd like it to display.
ServiceNow MID Server Option
It is possible to avoid direct connection between ServiceNow and Remote Support by using a MID server for internal Remote Support deployments.
To configure the integration to use a MID server for API requests to a Remote Support site, specify the MID server to use on the individual outbound REST messages:
- In ServiceNow, navigate to System Web Services > Outbound > REST Message.
- Filter to show only messages for the BeyondTrust application being configured.
- Click the Name of one of the messages to edit its properties.
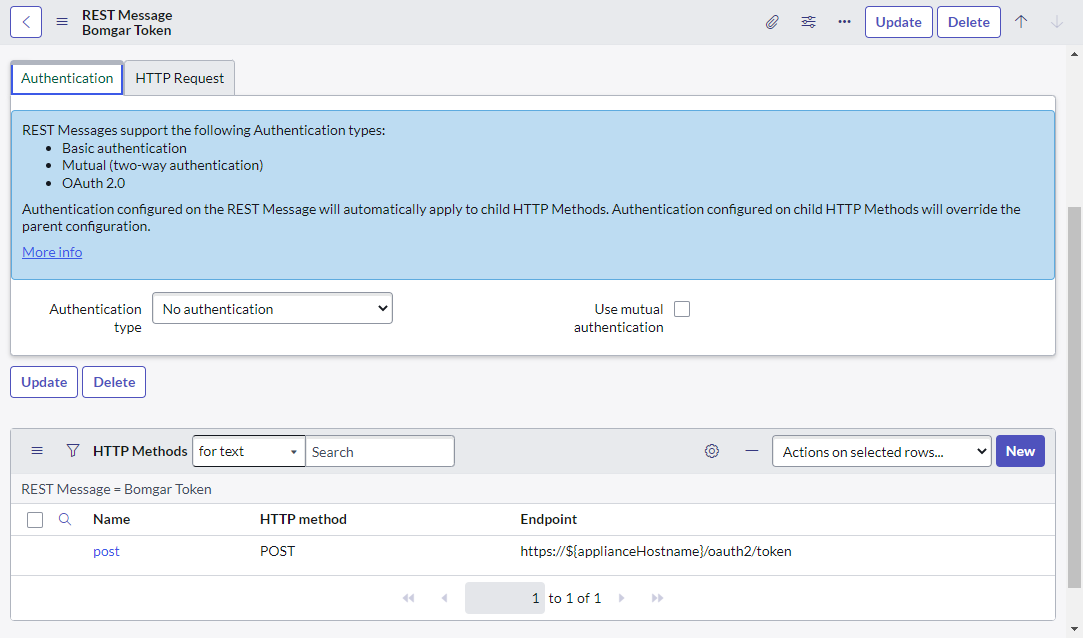
- In the HTTP Methods related list at the bottom, select the Name of the method (typically post).
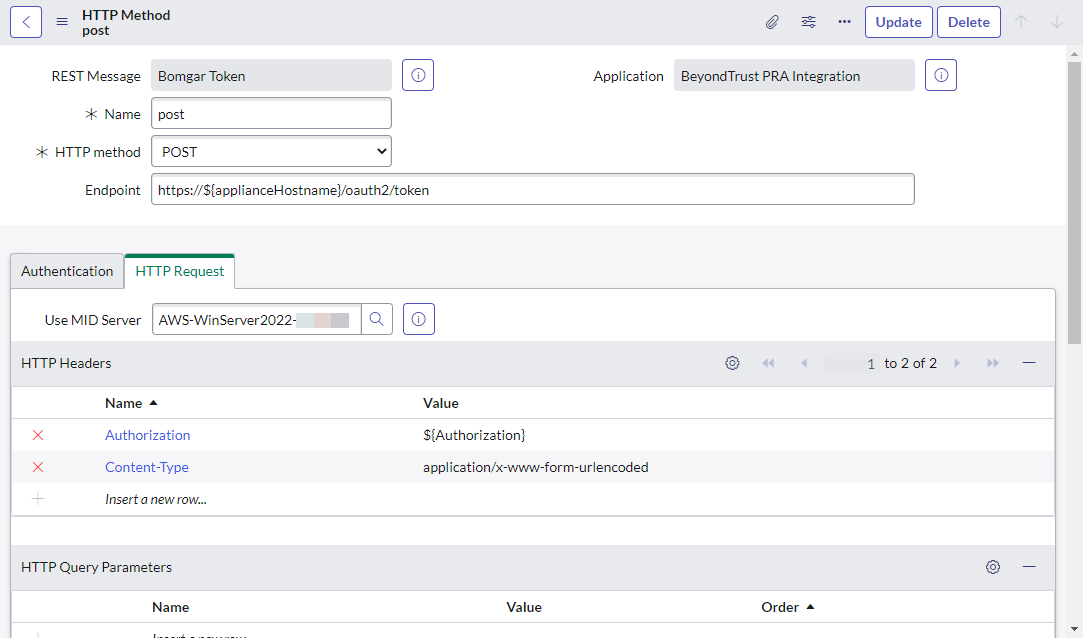
- On the resulting form, select the HTTP Request tab and select your MID server in the Use MID Server field.
- Click Update to save the changes.
Repeat these steps for each outbound REST message that is a part of the application.
For more information on MID servers, please see MID Server.