Configure Salesforce for Integration with BeyondTrust Remote Support
You must purchase this integration separately for both your Remote Support software and your Salesforce solution. For more information, contact BeyondTrust's Sales team.
Integrating Remote Support with Salesforce requires configuration updates in both applications. Unless otherwise noted, all of the steps in this section take place in the Salesforce.com interface. The development and/or test instances of Salesforce.com should be used initially so that the integration can be thoroughly tested before installation in the production instance.
Install the BeyondTrust Managed Package
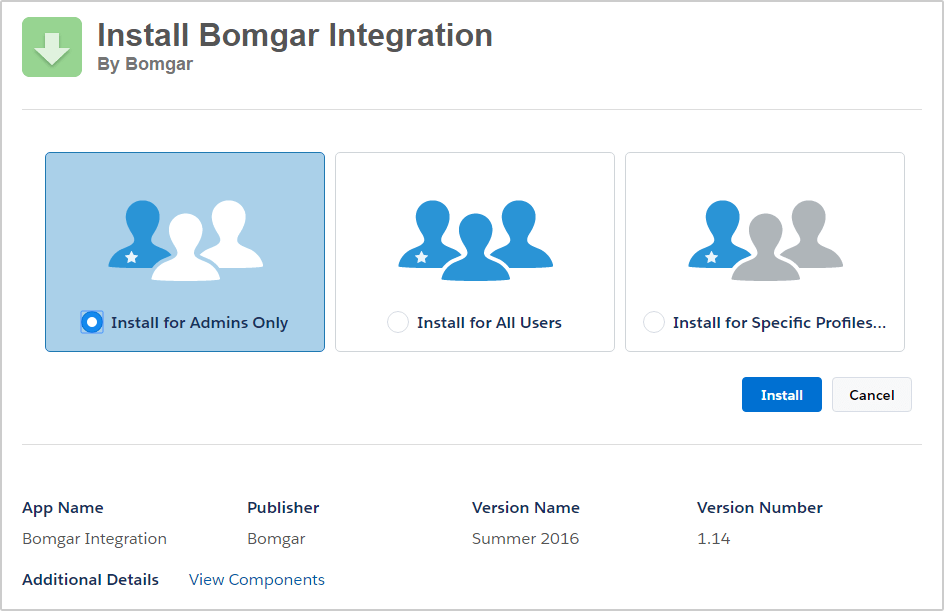
- Enter the managed package installation URL into the browser, and then click the Continue button.
You can obtain the managed package installation URL from your BeyondTrust technical contact.
- Select Install for Admins Only and click the Install button.
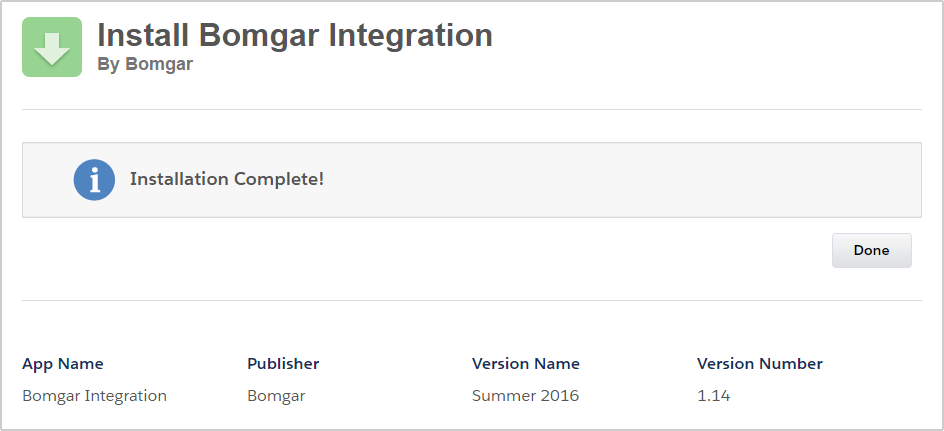
- Once you see the Installation Complete message, click the Done button to return to Salesforce.com setup.
Create a New Remote Site

- In Salesforce.com, click the link labeled Sales in the upper-right corner of the screen, and select BeyondTrust RS Integration.
- Under Administer > Security Controls > Remote Site Settings, click the New Remote Site button. Enter the following values:
- Remote Site Name: BeyondTrustRemoteSupport
- Remote Site URL: https://your-remote-support-appliance.com.
- Click the Save button.
Set Up Integration Mapping

- In Salesforce.com, go to Develop > Custom Settings and click the Manage link next to the item labeled Integration Mapping.
- Click the New button directly above the list of settings.
- Enter the following:
- Name: 500
- BeyondTrust Remote Support Field Name: external_key
- Salesforce Field Name: Case__c
- Click the Save button.
there are 2 underscores in the Field name
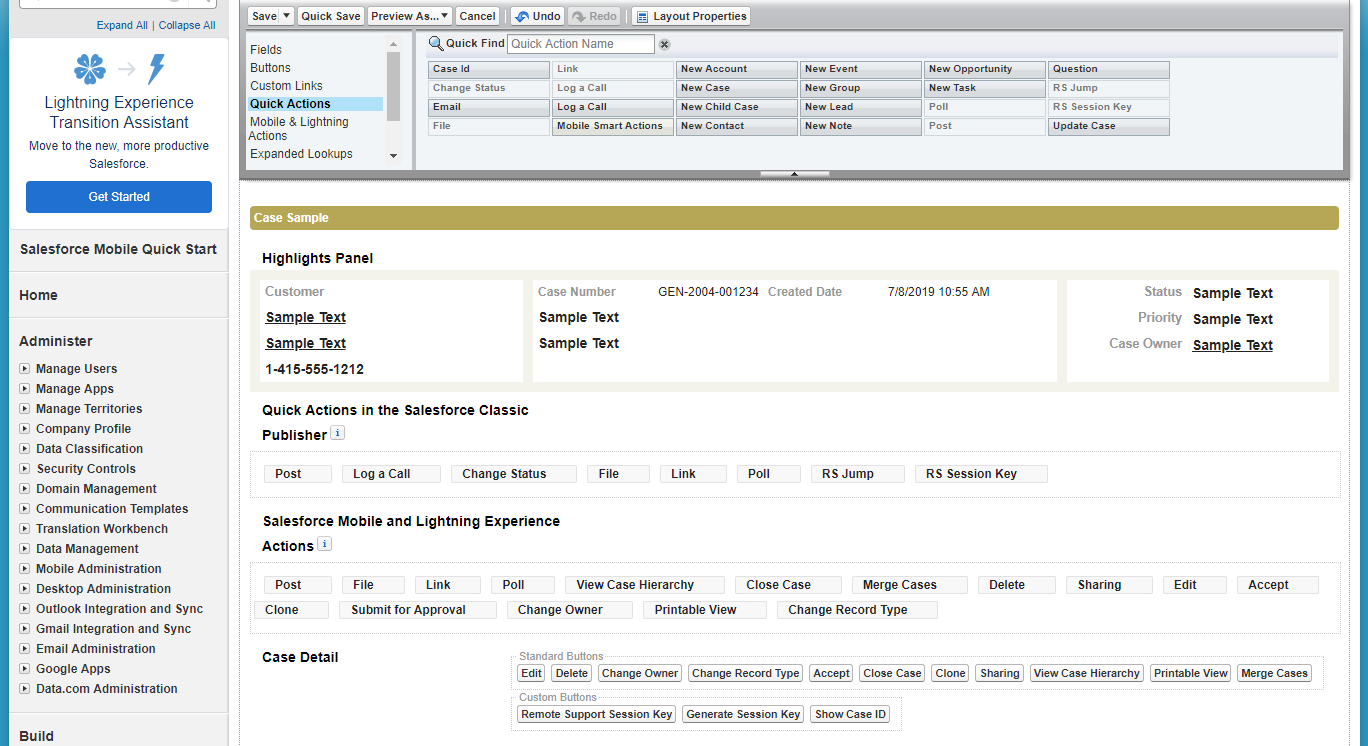
Customize the Case Page Layout

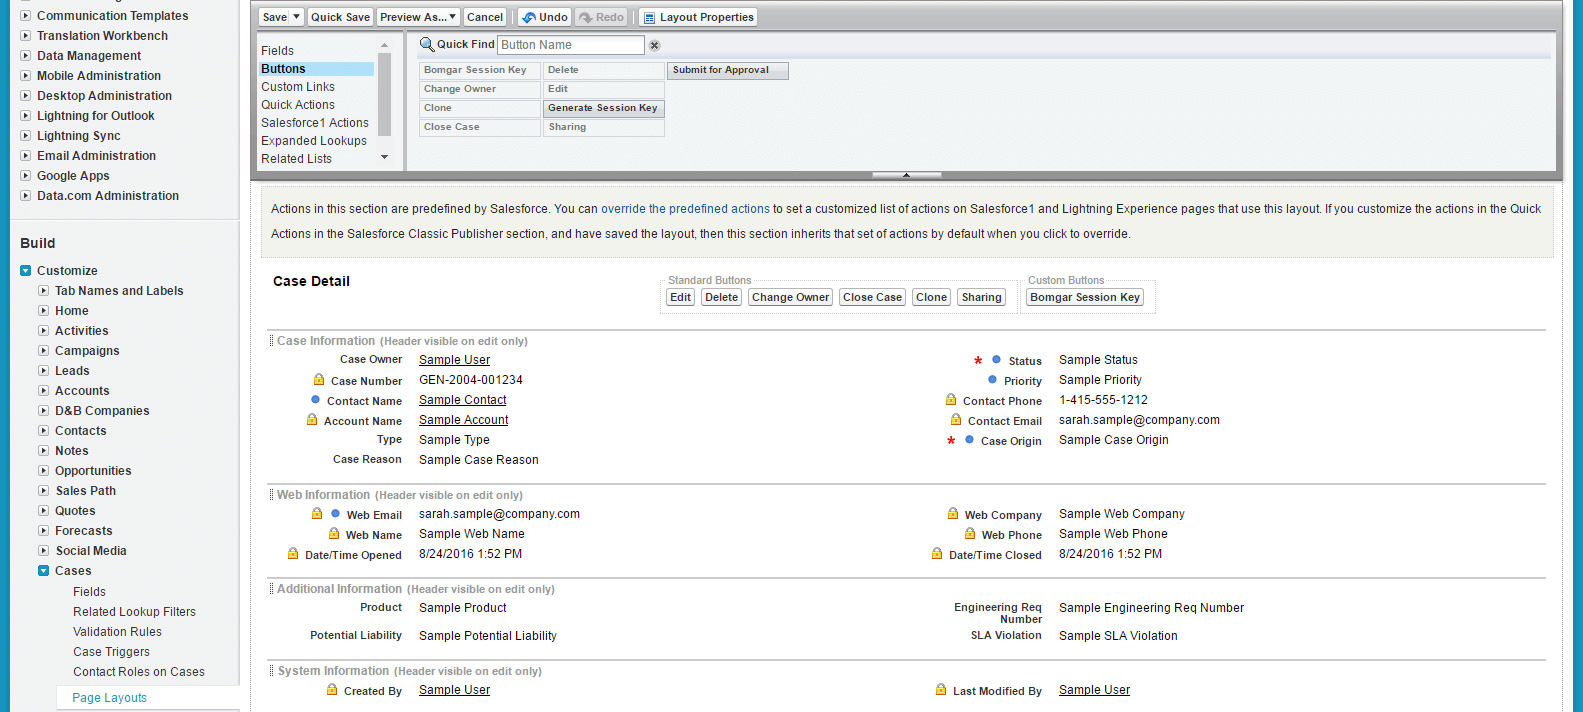
- In Salesforce.com, go to Customize > Cases > Page Layouts and click the Edit button next to Case Layout.

- In the menu box at the top, select Buttons, and then drag the Generate Session Key or BeyondTrust Session Key button to the Custom Buttons section.
Generate Session Key: Generates the session key server-side via the BeyondTrust Command API and provides the user with a dialog containing three things: 1) session key, 2) session key URL, and 3) email session key to customer button.
BeyondTrust Session Key: generates a session key URL via the Remote Support Scripting API that essentially launches the rep console where the standard rep console session key dialogue is displayed.
Remote Support Web Session Key: generates a session key URL via the Remote Support Scripting API that essentially launches the web console where the web session key dialogue is displayed.
Show Case ID: Display the current case internal ID.

- In the menu box at the top, select Related Lists, and then drag the BeyondTrust Sessions related list to the Related Lists section.
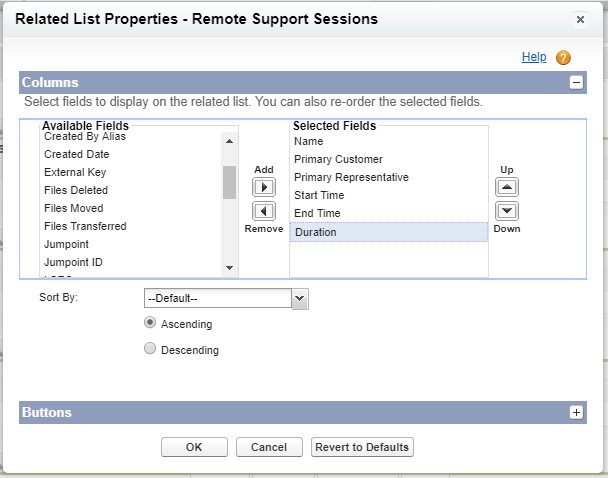
- Scroll down the page and find the BeyondTrust Sessions section under Related Lists, and then click the wrench icon to edit its properties.
- Add the following fields from Available to Selected in this order:
- Primary Customer
- Primary Representative
- Start Time
- End Time
- Duration
- Sort by Start Time, Descending.
- Expand the Buttons section and make sure New is unchecked.
- Click OK.
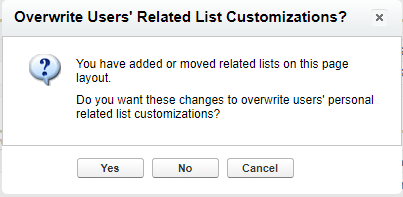
- Click the Save button in the menu box at the top to save the layout.
- When prompted to Overwrite Users Related List Customization, click the No button.
Add the Show Case ID Button
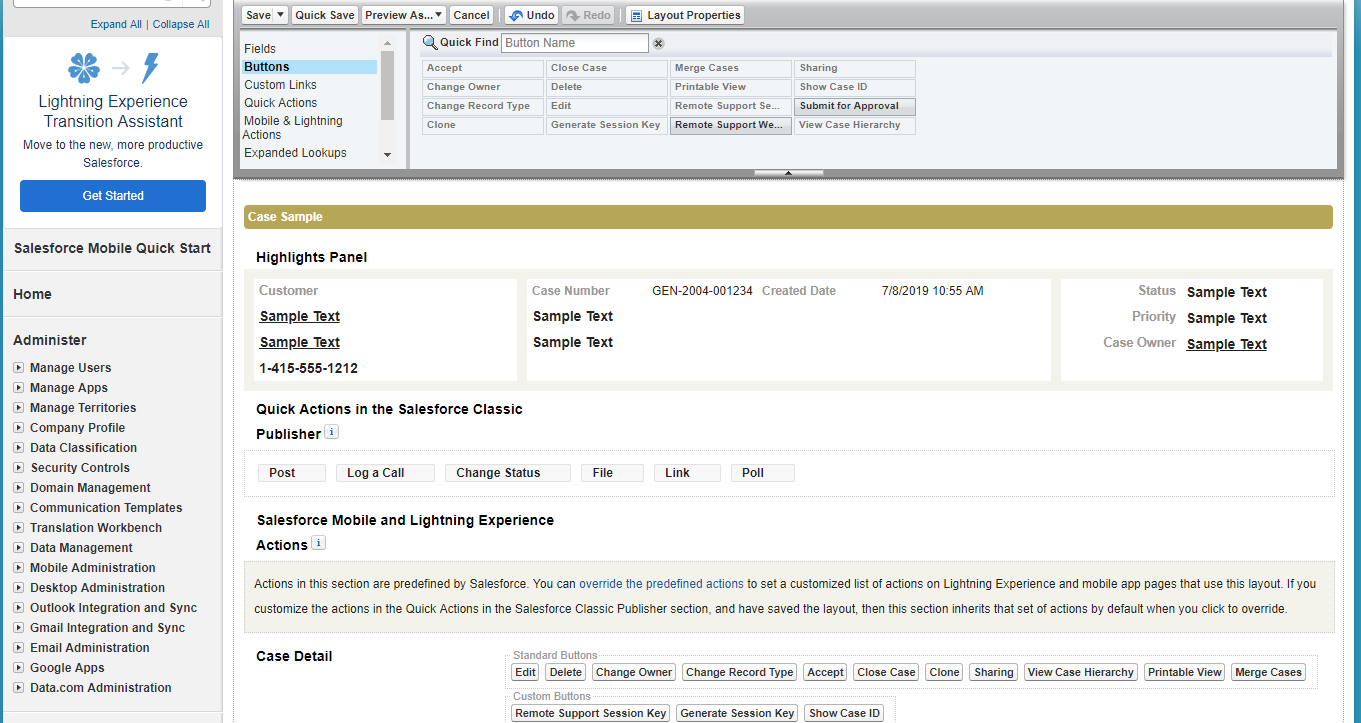
- Under Customize > Cases > Page Layouts, click the Edit button next to Case Layout.
- In the menu box at the top, select Buttons, and then drag the Show Case ID button to the Custom Buttons section. This allows technicians to easily get the case ID.
Add Quick Actions
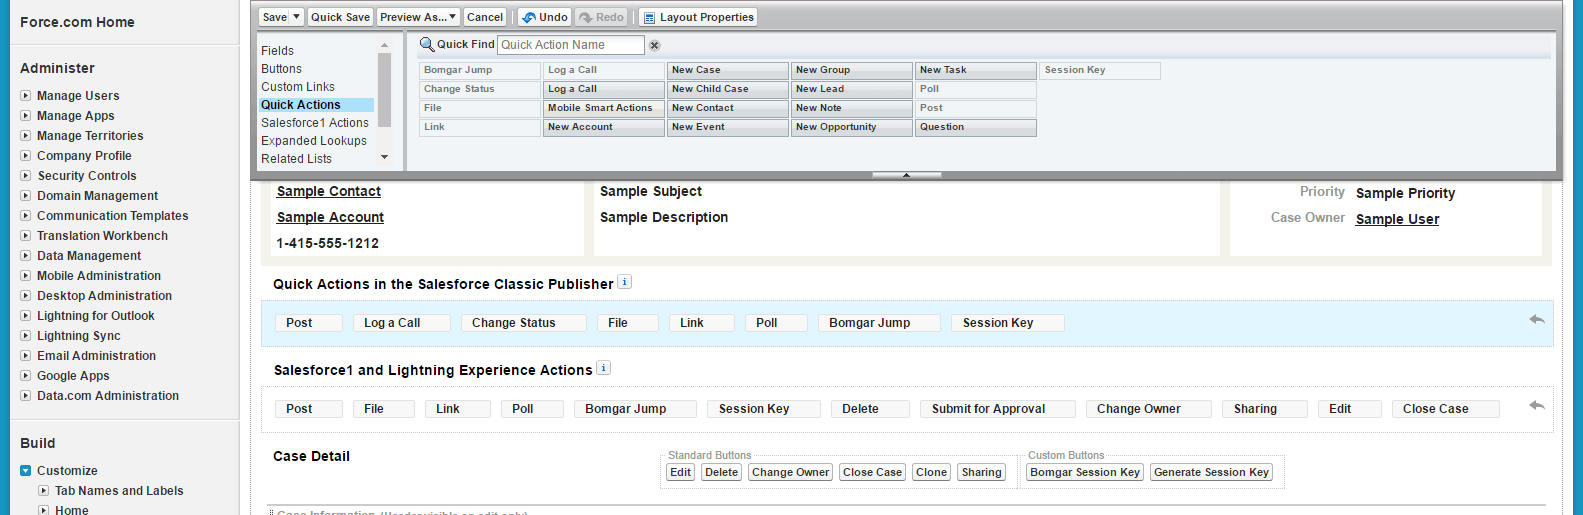
- In Salesforce.com, go to Customize > Cases > Page Layouts, and click the Edit button next to Case Layout.
- In the menu box at the top, select Quick Actions, and then drag the BeyondTrust Jump and/or Session Key quick actions to the Quick Actions section in the Salesforce Classic Publisher area below.
- Click the Save button in the menu box at the top to save the layout.
Confirm Quick Actions
- Go back into the layout you just saved by clicking the Edit button next to its listing.
- Find the section titled Salesforce1 and Lightning Experience Actions, hover over it, and then click the wrench icon.
- You should now see the BeyondTrust Jump and Session Key quick actions listed in this section.
- Click the Save button in the menu box at the top to save the layout.
Remove Quick Actions for Salesforce Classic
- Next, remove the quick actions from the Quick Actions section in the Salesforce Classic Publisher section by editing the page layout once more and dragging the BeyondTrust Jump and Session Key quick actions out of the section and back to the menu box.
These quick actions are designed solely for the Lightning UX.
- Under Customize > Cases > Page Layouts, click the Edit button next to Case Layout.
- In the Menu Box at the top, click the Save button.
Add Case Field to Remote Support Session Layout
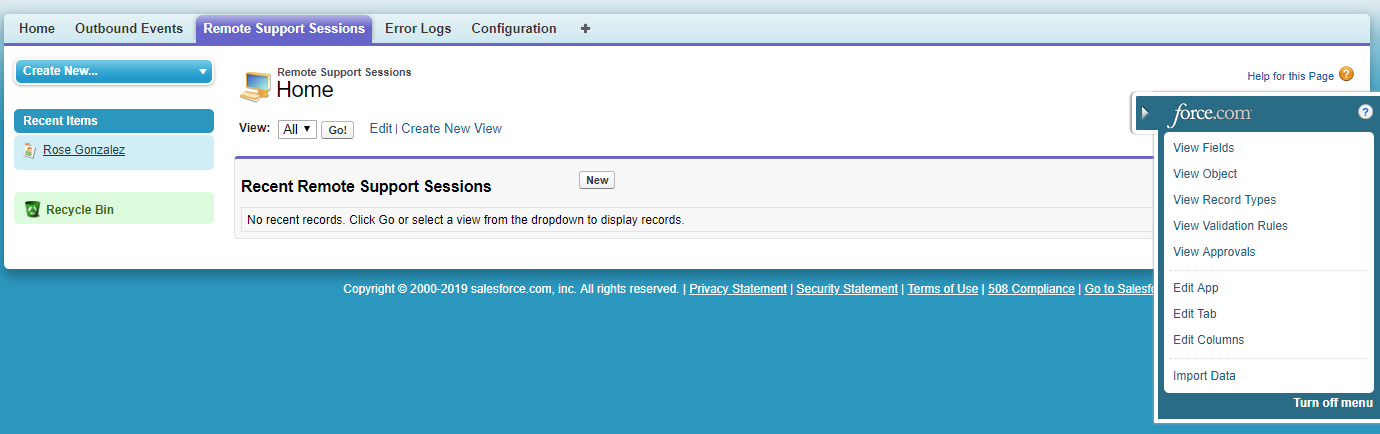
- Select the BeyondTrust Integration app, and then click the BeyondTrust Sessions tab.
- Click the arrow that is docked to the right side of the screen and click the View Object link.

- Click the Page Layouts link located directly beneath the page title.

- Click the Edit link for the BeyondTrust Session Layout.
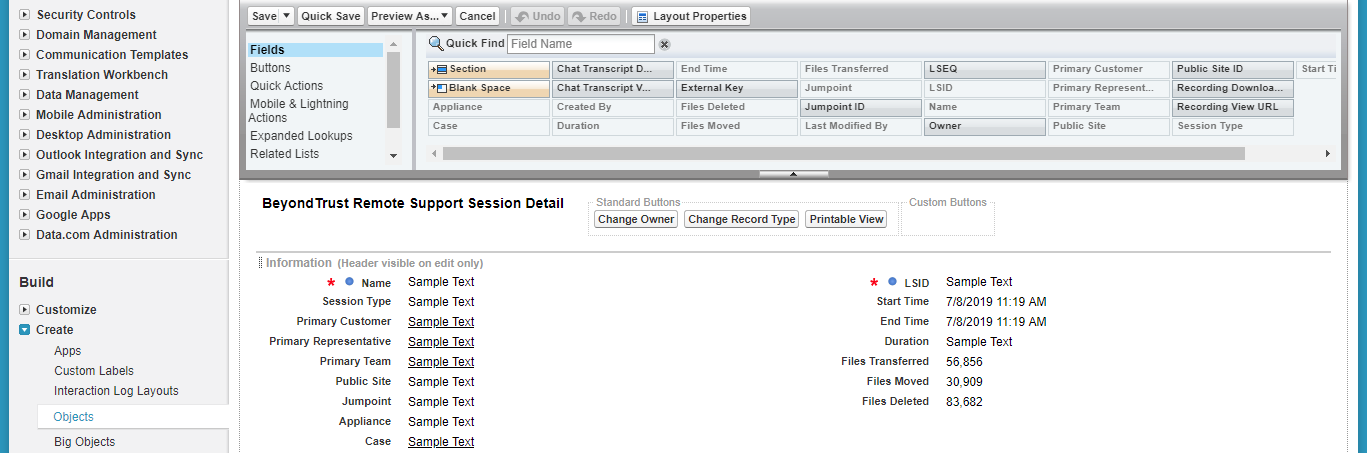
- From the Fields menu, drag the Case element to the Information section under BeyondTrust Session Detail.
- Click the Save button in the menu box at the top to save the layout.


Add Remote Support Username to User Layout

- In Salesforce.com, go to Setup from the header menu.
- Under Customize > Users > Page Layouts, click the Edit button next to User Layout.
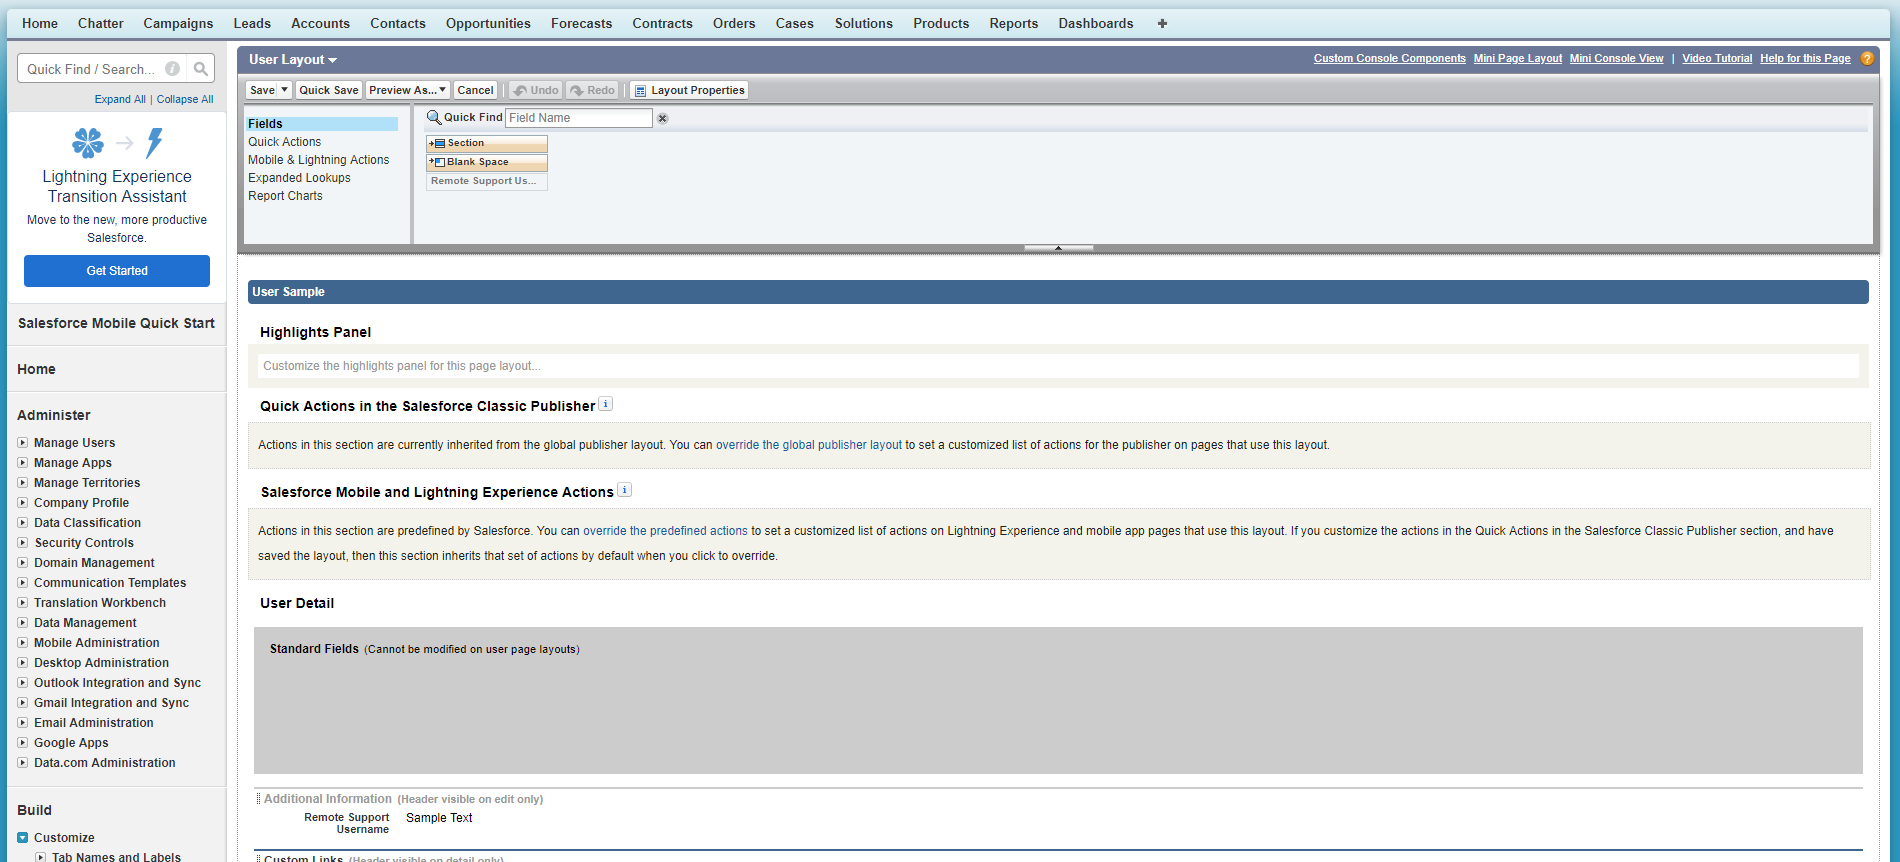
- Drag the BeyondTrust Username field to the Additional Information section.
- Click the Save button in the menu box at the top to save the layout.

Create New BeyondTrust Site
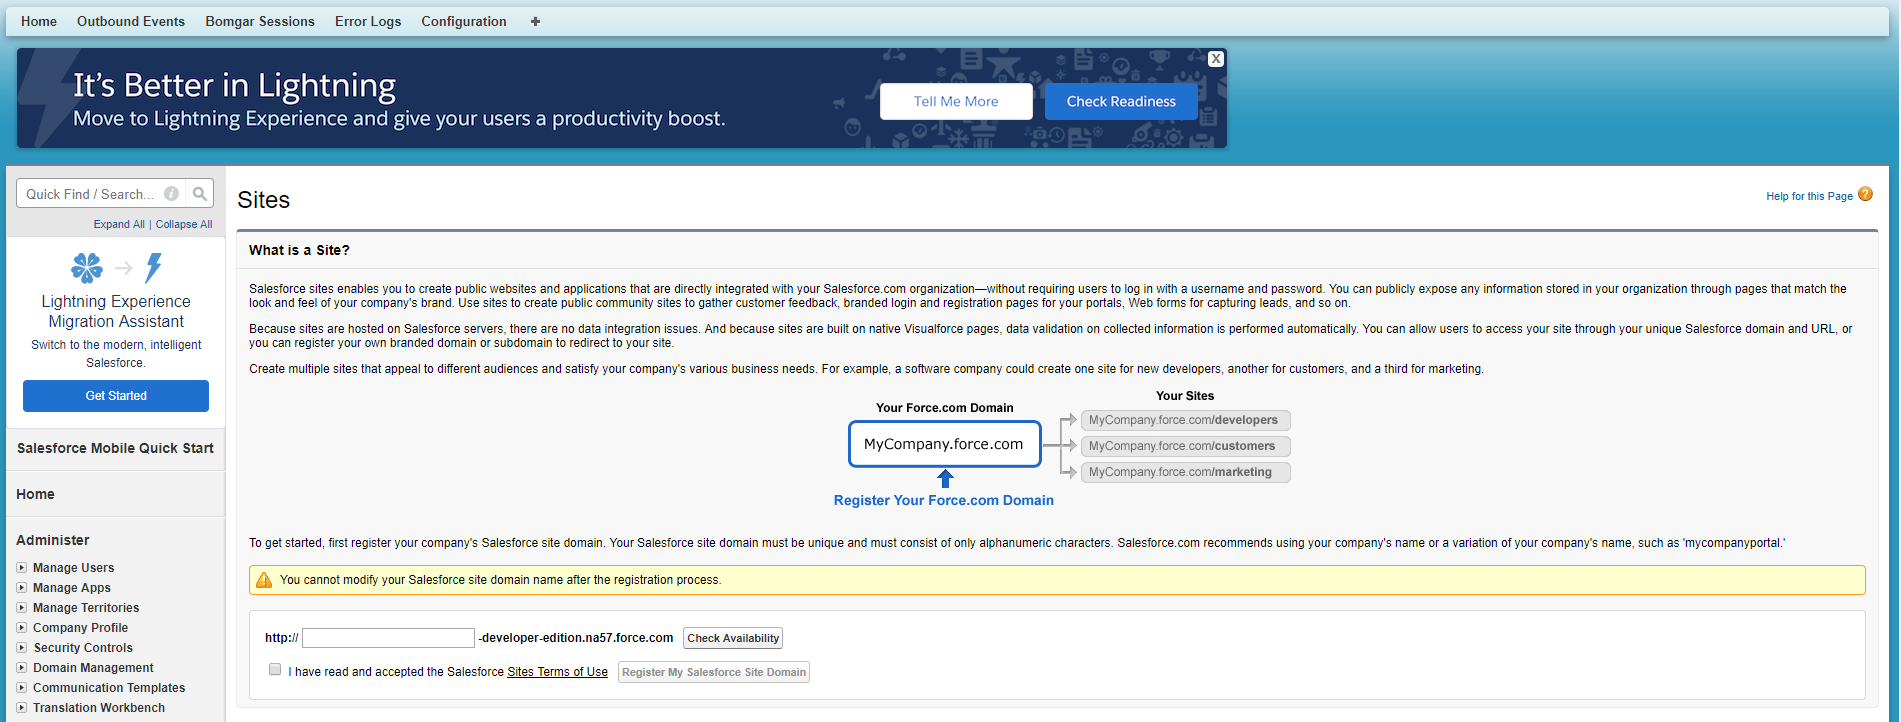


- In Salesforce.com, go to Setup from the header menu.
- Under Develop > Sites, click the New button.
- Enter the following information:
- Site Label: BeyondTrust
- Site Name: BeyondTrust
- Active: [checked]
- Default Web Address: [BeyondTrust site address]
- Active Site Homepage: [Search for SiteLogin and add it as the homepage]
- Click the Save button.
Import BeyondTrust Session Event Types
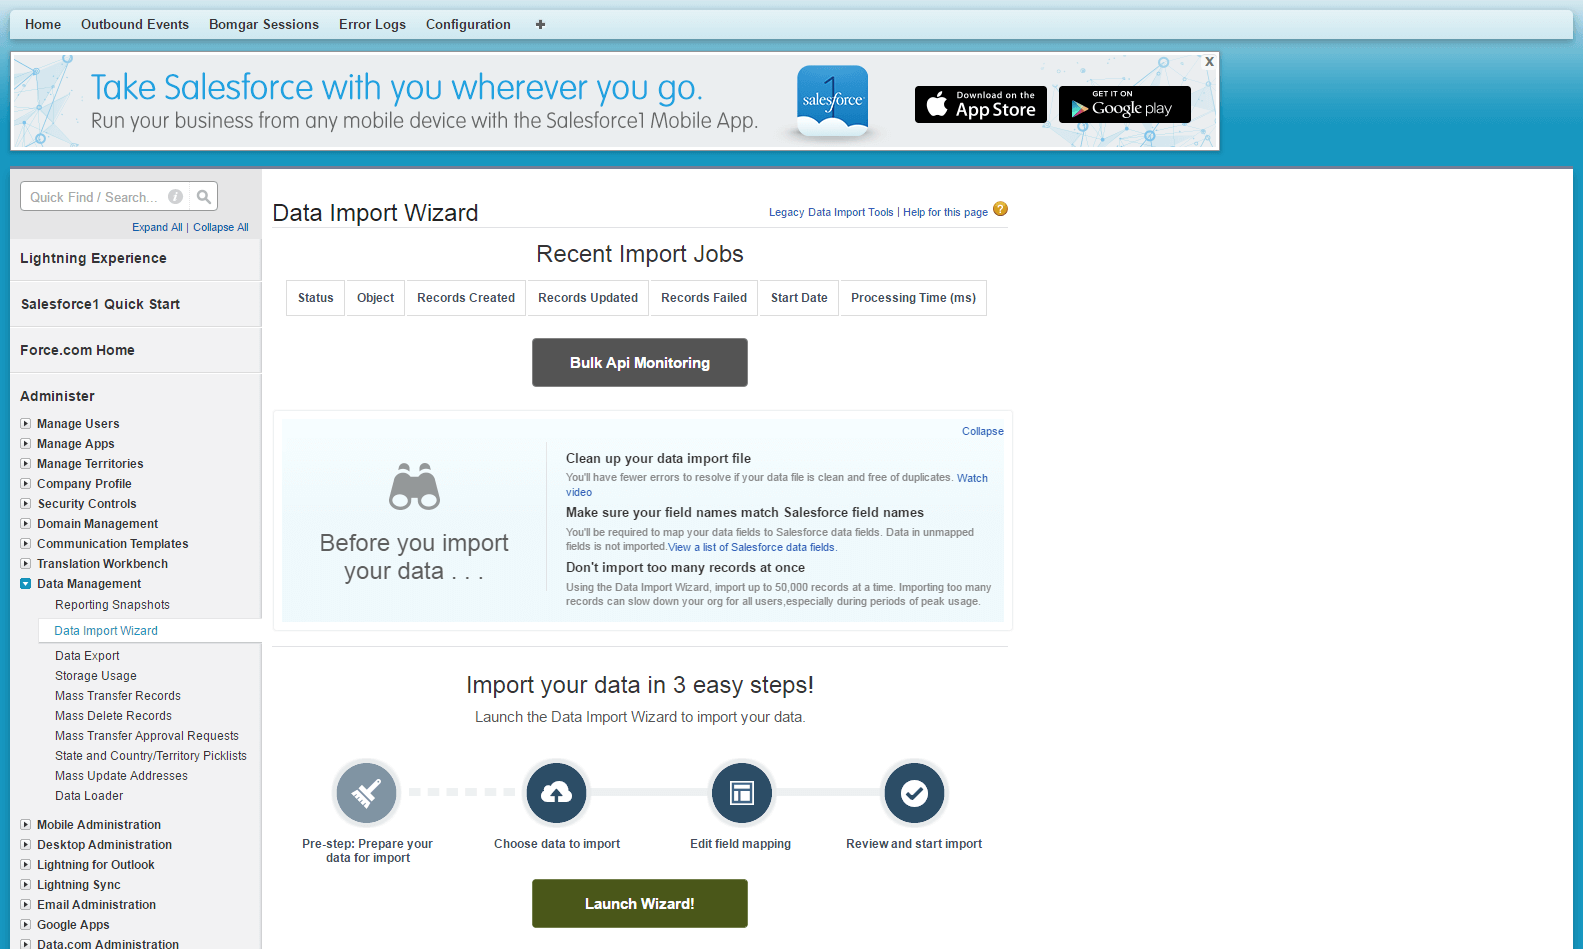
- In Salesforce.com, go to Setup from the header menu.
- Under Administer > Data Management > Data Import Wizard, click Launch Wizard.
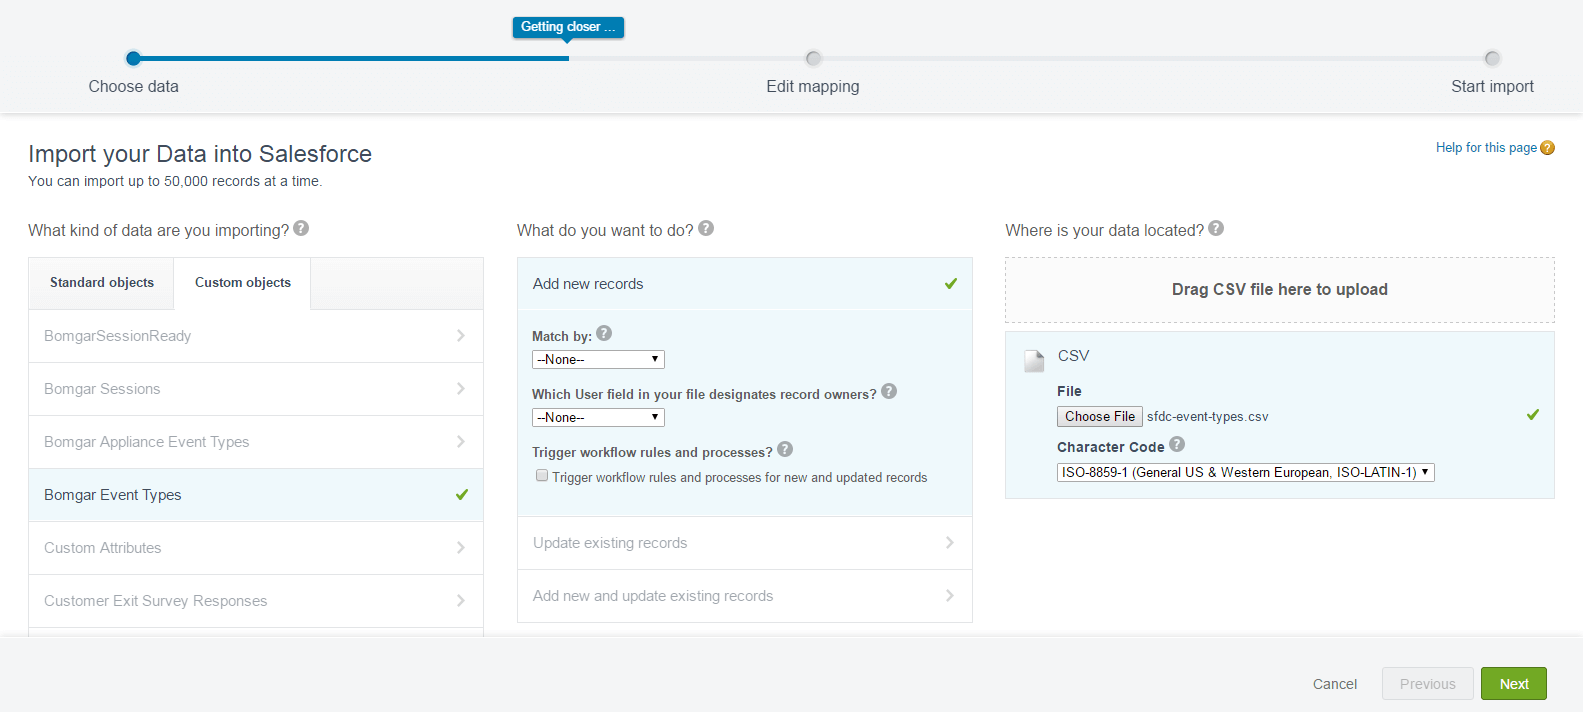
- Click Custom objects > BeyondTrust Event Types.

- Click Add new records.
- Click CSV, and then click the Choose File button and select the BeyondTrust Event Types.csv file.
This CSV file is provided by the BeyondTrust implementation team.
- Click Next.
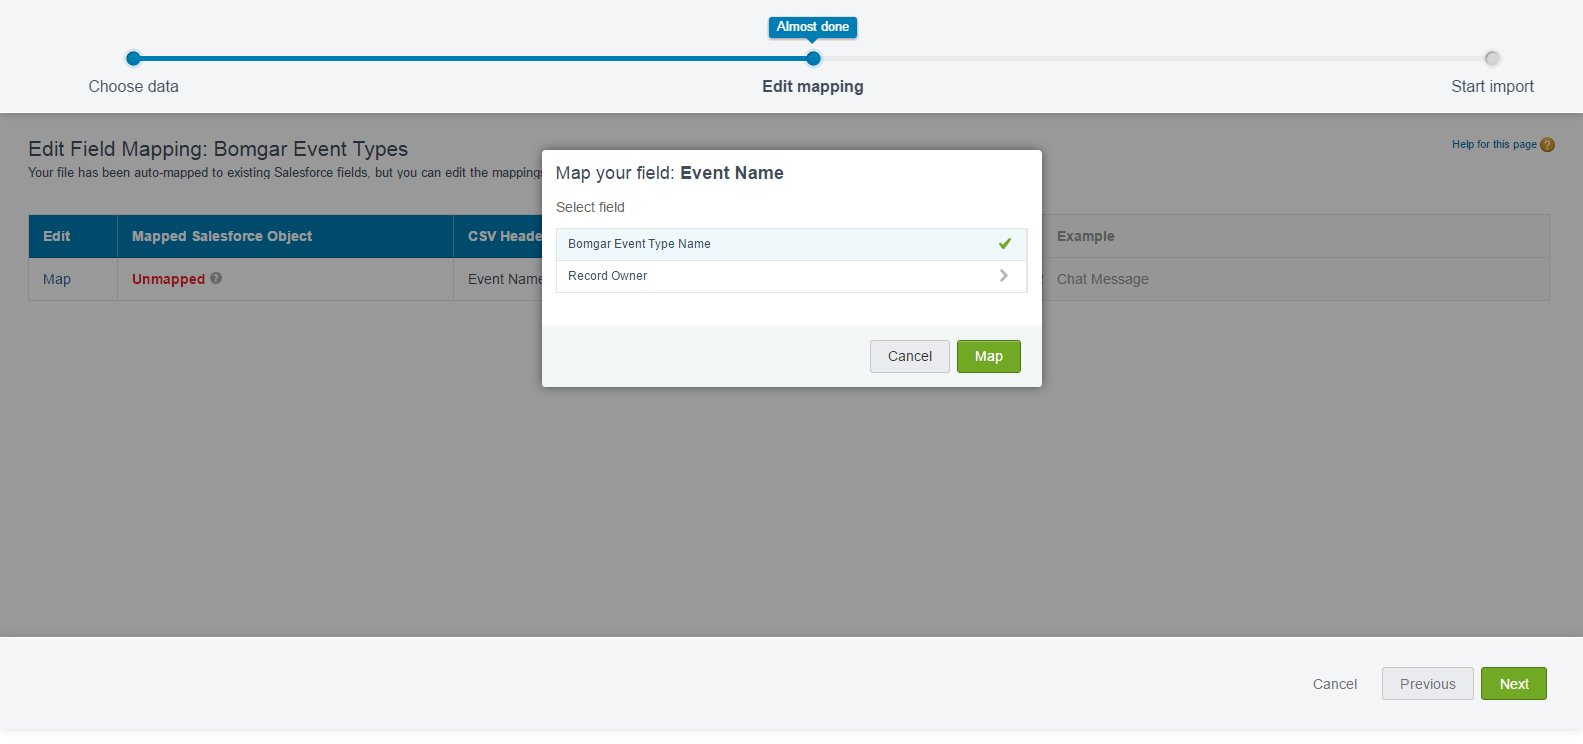
- Click the Map link, click BeyondTrust Event Type Name, and then click the Map button.

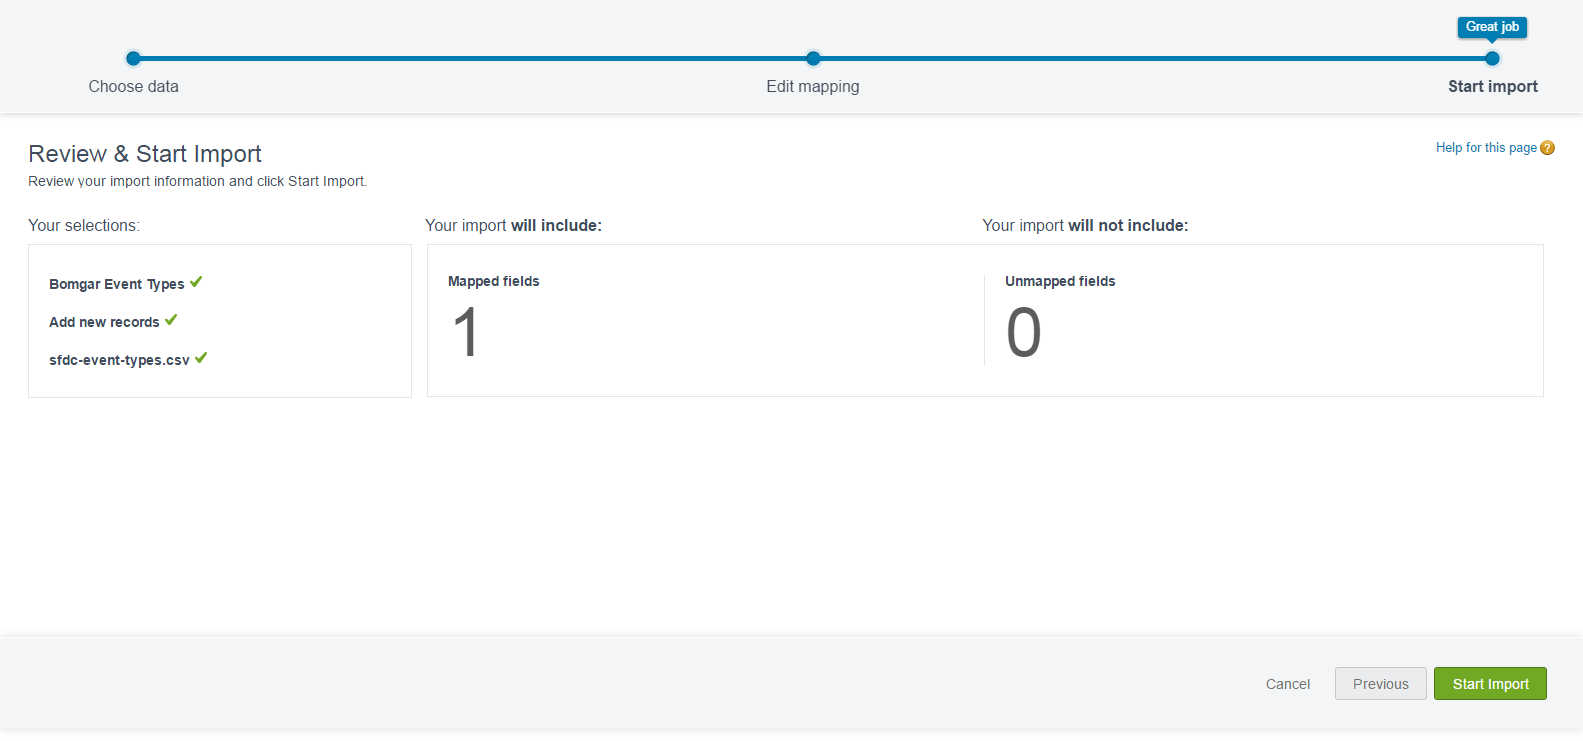

- Click Start Import.
- Click OK and verify that that Records Processed has a value of 53 and Status displays Completed.
Configure B Series Appliance
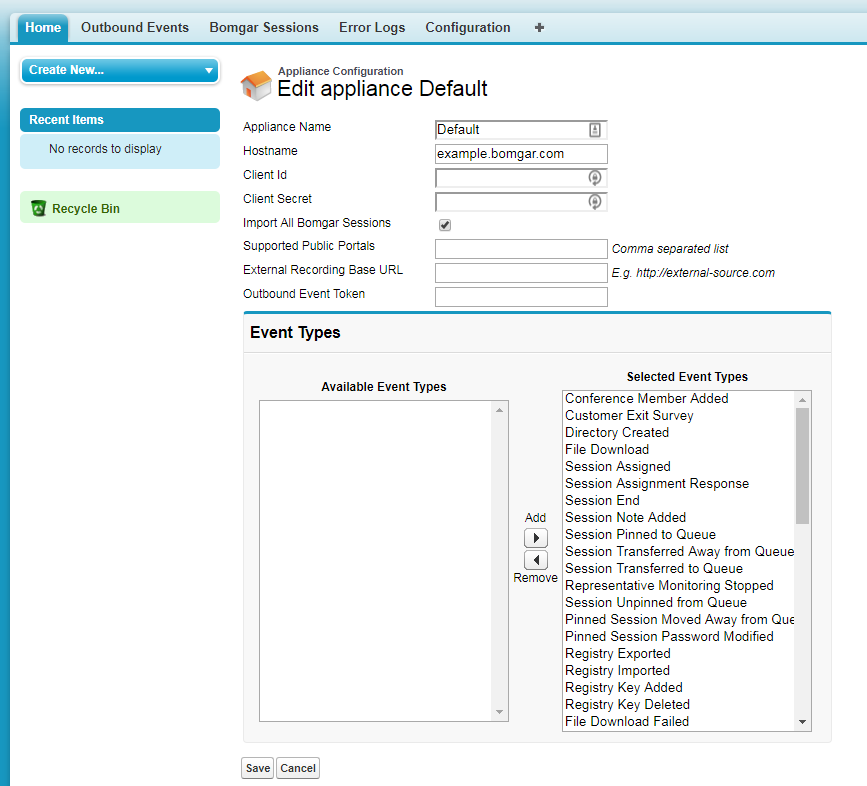
- Select the BeyondTrust Integration app, and then click Configuration.
- Click New.
- Enter the following information:
- Appliance Name: If you have only one B Series Appliance, it must be named Default.
- Hostname: Your B Series Appliance hostname.
You must have exactly one B Series Appliance named Default.
- Client Id: Remote Support API Client Id.
- Client Secret: Remote Support API Client Secret.
- Import All BeyondTrust Sessions: Check if you want to import BeyondTrust session data for sessions that were not initiated from within Salesforce.com.
- Supported Public Portals: A comma-separated list of public portals by name only (for example, Default) that the integration supports. Leave empty if you are supporting only a single public portal.
- External Recording Base URL: a URL representing the location where external recordings are stored. This is used in the Lightning Experience only, as a way to link to a Remote Support Session Recording from within the session detail view.
lsid=[session_lsid] is automatically be appended to the URL as the unique identifier used in locating the session recording.
- Outbound Event Token: (optional) a secret token used to validate outbound events from the BeyondTrust Appliance B Series. To use this feature, append &outbound_event_token=[secret_token] to the outbound event URL on the B Series Appliance. The secret_token can be a random alphanumeric string less than 256 characters long.
- Event Types: Move all supported event types from the Available Event Types list to the Selected Event Types list.
- Click Save.