Configure BeyondTrust for the CA Service Desk Integration
You must purchase this integration separately for both your Remote Support software and your CA Service Desk solution. For more information, contact BeyondTrust's Sales team.
Several configuration changes are necessary on the BeyondTrust Appliance B Series to integrate with CA Service Desk. You must make these changes on each appliance for which you intend to create a plugin configuration, described in Configure the CA Service Desk Plugin for Integration with BeyondTrust Remote Support.
All of the steps in this section take place in the BeyondTrust /login administrative interface. Access your Remote Support interface by going to the hostname of your B Series Appliance followed by /login (e.g., https://support.example.com/login).
Verify the API Is Enabled
Management
API Configuration

This integration requires the BeyondTrust XML API to be enabled. This feature is used by the BeyondTrust Middleware Engine to communicate with the BeyondTrust APIs.
Go to /login > Management > API Configuration and verify that Enable XML API is checked.
Create an OAuth API Account
Management
API Configuration
The CA Service Desk API account is used from within CA Service Desk to make Remote Support Command API calls to Remote Support.

- In /login, navigate to Management > API Configuration.
- Click Add.
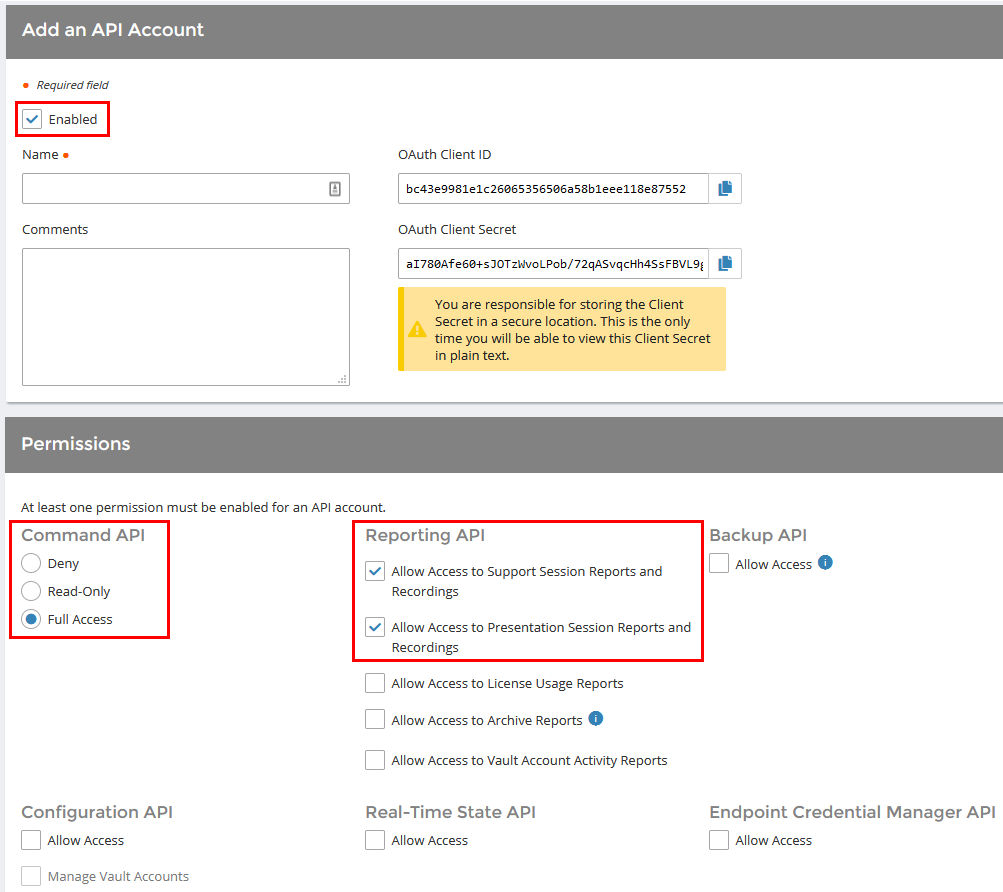
- Check Enabled.
- Enter a name for the account.
- OAuth Client ID and OAuth Client Secret is used during the OAuth configuration step in CA Service Desk.
- Under Permissions, check the following:
- Command API: Full Access.
- Reporting API: Allow Access to Support Session Reports and Recordings, and Allow Access to Presentation Session Reports and Recordings.
- Click Save at the top of the page to create the account.
Add an Outbound Event URL
Management
Outbound Events
- Go to /login > Management > Outbound Events.
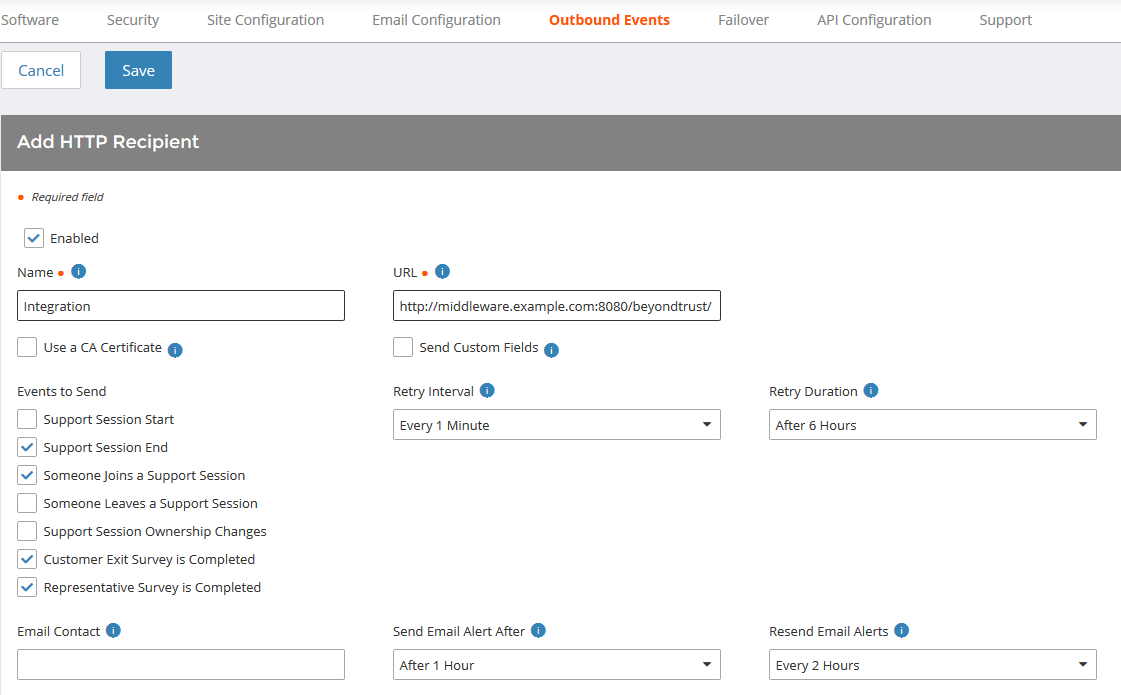
- In the HTTP Recipients section, click Add and name it Integration or something similar.
- Enter the URL to use:
- If using an appliance ID of default: http://<middleware-host>:<port>/ERSPost. The default port is 8180.
- If using an appliance ID other than default: http://<middleware-host>:<port>/ERSPost?appliance=<appliance-id> where <middleware-host> is the hostname where the BeyondTrust Middleware Engine is installed. The default port is 8180. The <appliance-id> is an arbitrary name, but note the value used, as it is entered later in the plugin configuration. This name accepts only alphanumeric values, periods, and underscores.
- Scroll to Events to Send and check the following events:
- Support Session End
- Customer Exit Survey is Completed
- Representative Survey is Completed
- Someone Joins a Support Session (Optional)
- Click Save.

- The list of outbound events contains the event just added. The Status column displays a value of OK if communication is working. If communication is not working, the Status column displays an error which you can use to repair communication.