Show Notices and Business Hours on the Public Portal
At times, you may need to display temporary messages to customers. Rather than requiring you to modify the HTML template, BeyondTrust provides two ways to display these messages: customer notices and public portal schedule messages.
Customer Notices for Alerts and Information
Create notifications to temporarily display on your public site, in Support Buttons, and in the customer client. By making a notice visible to your customers, you could, for example, help alleviate a large number of sessions related to a known issue. You could also alert customers to upcoming service windows or holidays.
Below are step-by-step instructions to create a customer notice.
- From the /login administrative interface, go to Public Portals > Customer Notices.

- Click Add to add a customer notice. To edit an existing notice, click Edit.

- Specify a name for this customer notice. This name is to identify it in the list of notices on the /login page. It does not appear to the customer.
- Add the text to display on the public site, in Support Buttons, and in the customer client. You can use macros, as well as BBCode to do some low level formatting, such as adding bold, colors, or hyperlinks. Click on Macros or BBCode to display a list of codes and their resulting applications.

As a best practice, keep messages relatively short so they can be viewed without much scrolling in the customer client. This applies to both the native client and click-to-chat modes.
- If this notice has a definite end time, such as a scheduled maintenance window or upcoming holiday hours, set an expiration date and time. Any notice which has been expired for more than 24 hours is automatically deleted. If the notice does not have a known end date, check Never Expires. This notice then remains on your site until it is manually deleted.
- If you have more than one public site, select which ones should display the notice. You can select multiple portals.
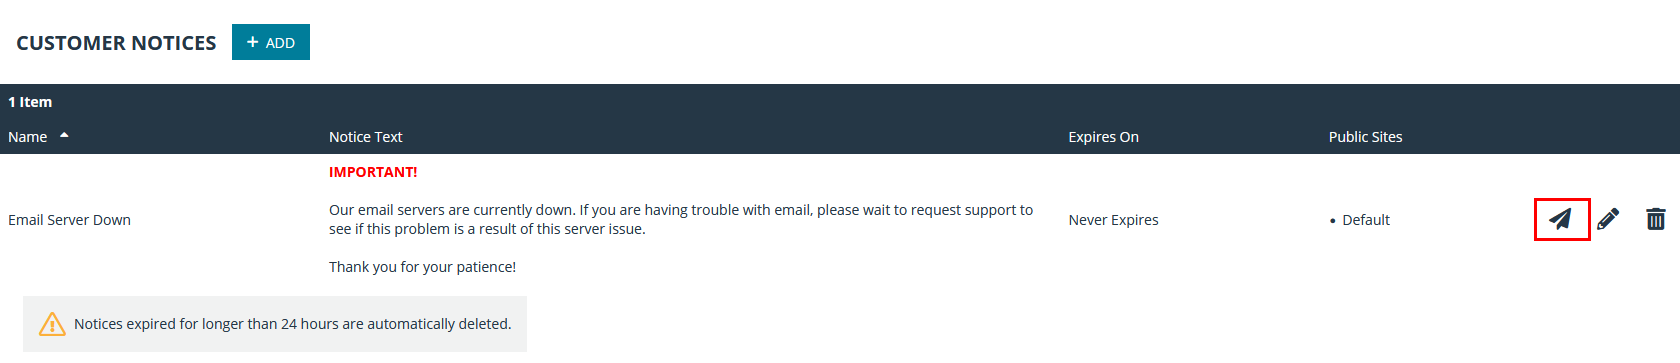
- After saving a customer notice, it automatically appears on the selected public portals and Support Buttons, as well as in the customer client of any new sessions linked to those portals. If you want to push a message to sessions already in progress, click Send.
Public Portal Schedules for Regular Business Hours
Configure one or more schedules of regular business hours for your public portals. Outside of these scheduled hours, session start methods other than session keys are removed from your public site, and a portal closed message displays on your public site.
- From the /login administrative interface, go to Public Portals > Schedule.
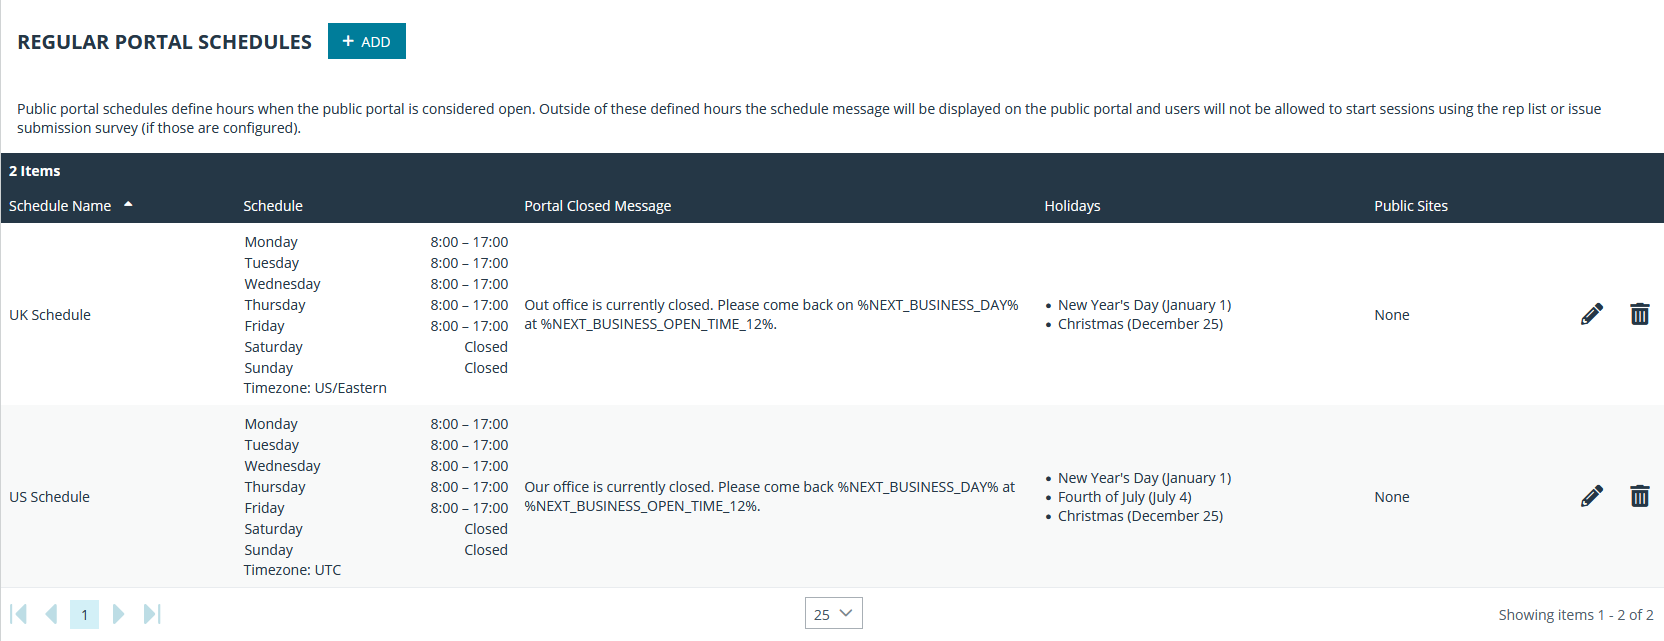
- To add a schedule for normal business hours, click Add. To edit an existing schedule, click Edit.
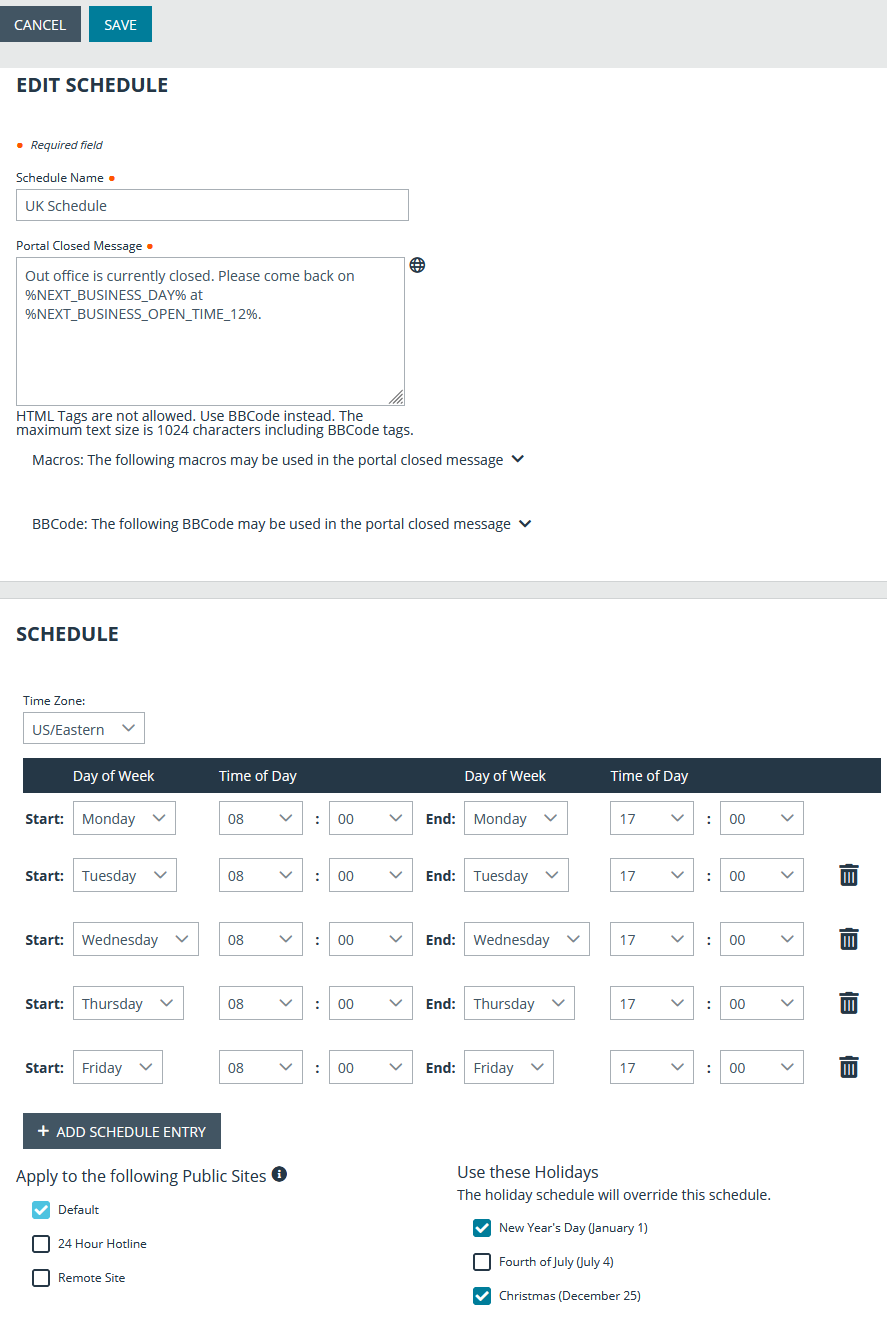
- Specify a name for this schedule. This name is to identify it in the list of schedules on the /login page. It does not appear to the customer.
- Create the text to display outside of regularly scheduled hours. Messages can contain macros indicating the next open business day and time. You can use macros, as well as BBCode to do some low level formatting, such as adding bold, colors, or hyperlinks. Click on Macros or BBCode to display a list of codes and their resulting applications.
- Set a schedule to define when customers can initiate support sessions. Set the time zone you want to use for this schedule, and then add one or more schedule entries. For each entry, set the start day and time and the end day and time.
If, for instance, the time is set to start at 8 am and end at 5 pm, a customer can start a session at any time during this window. Sessions already in progress are allowed to continue past the schedule end. If session keys are enabled, a representative can send a customer a session key to start a session even outside of the public site schedule.
- If you have already created holiday schedules, you can select which if any of those should apply to this regular schedule. Associations made here also apply to the holiday schedule settings.
- If you have more than one public site, select which should follow this schedule. You can select multiple portals.
Holiday Hours for Public Portal Availability
When a holiday schedule is applied to a regular schedule, the hours set in the holiday schedule override the normal business hours. Holiday schedules can be used to set days off, days with abbreviated hours, or even days with extended hours.
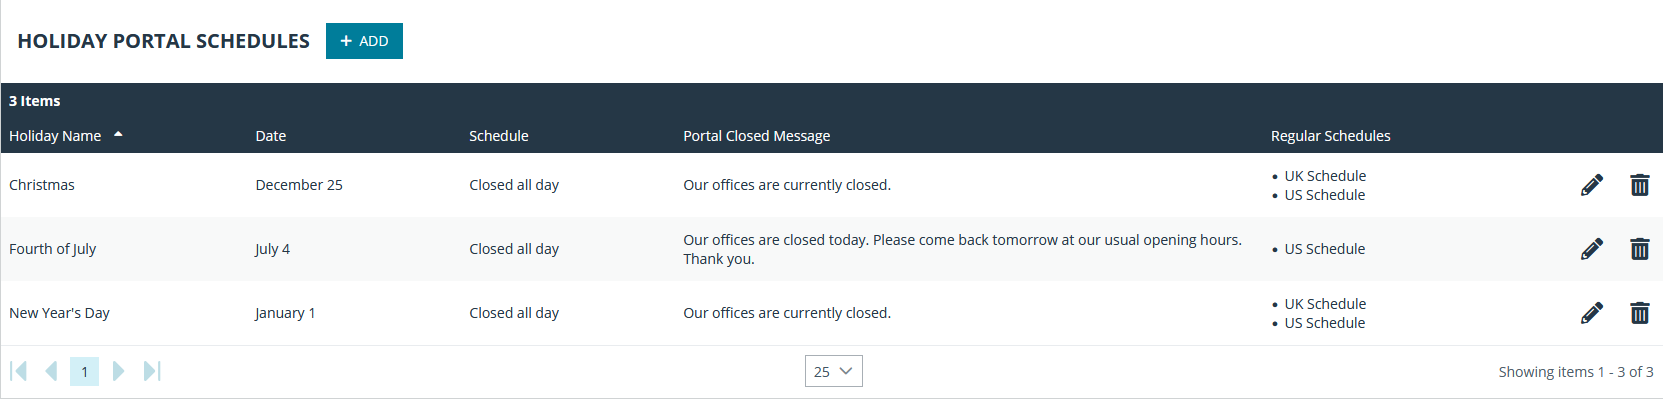
- To add a schedule for holiday business hours, click Add under Holiday Portal Schedules. Click the Edit icon to edit an existing schedule.

- Specify a name for this schedule. This name is to identify it in the list of holiday schedules on the /login page. It does not appear to the customer.
- Set the date when this schedule should apply.
- Create the text to display outside of scheduled hours for this date. You can use Macros, as well as BBCode, to do some low level formatting, such as adding bold, colors, or hyperlinks. Click on BBCode to display a list of codes and their resulting applications.
- Either select Closed all day or set a start time and end time. A modified schedule time can either shorten the regularly scheduled hours or lengthen them.
- If you have already created regular schedules, you can select which if any this holiday schedule should apply to. Associations made here also apply to the regular schedule settings.