Deploy the BeyondTrust SRA Virtual Appliance into a Hyper-V Environment
Review Prerequisites for Hyper-V
You must have a Hyper-V account and environment already configured.
Before beginning the BeyondTrust SRA Virtual Appliance setup, please review the following prerequisites:
- Hyper-V 2012 R2 (standalone or as a role) and Generation 2 hardware only.
- At least 4GB of memory available.
- At least 140GB of storage available.
- One 32GB partition for the BeyondTrust OS, and at least 100GB available for logs and recordings.
- External IP SANs require a 1Gbit or 10Gbit reserved network with a 10K RPM disk or better.
For more information about sizes, please see Review License and Sizing Conditions.
- A static IP for your SRA Virtual Appliance.
- A private DNS A-record resolving to the static IP of your SRA Virtual Appliance. A public A-record and a public IP are also required if public clients access the B Series Appliance. The DNS A-record is the fully qualified domain name (FQDN) of your site (support.example.com, for example).
"Public clients" include any client software (browsers, BeyondTrust representative consoles, endpoint clients, etc.) which connect from external networks and VPN(s) local to the B Series Appliance's network.
- A valid NTP server that is reachable by the B Series Appliance.
- Ensure that the system time between the host ESXi server and the guest BeyondTrust OS are in sync. Variations by only a few seconds can potentially result in performance or connectivity issues.
Configure via Hyper-V Manager

- Open the email you received from BeyondTrust Technical Support and click the link to download the BeyondTrust SRA Virtual Appliance (Hyper-V and Azure) file. Save the file to an appropriate location so that it can be imported to your Hyper-V host, and then double-click the self-extracting ZIP file to extract your SRA Virtual Appliance.
- Start Hyper-V Manager.
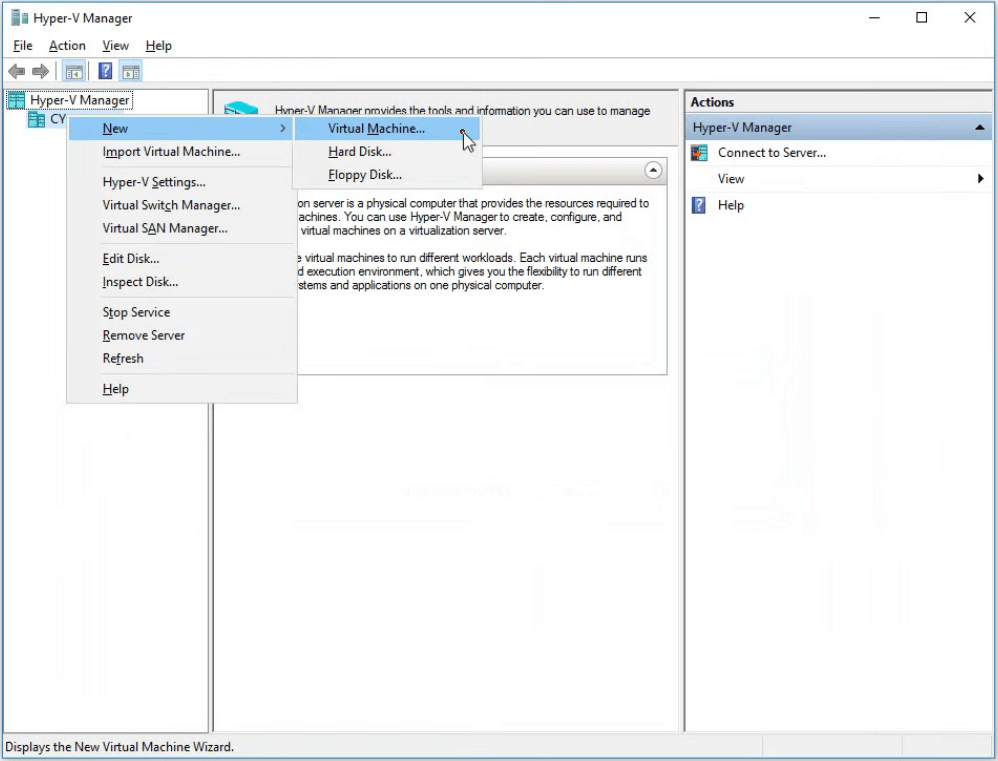
- Ensure the server you will install the SRA Virtual Appliance is present. Right-click the desired server and select New > Virtual Machine to start the New Virtual Machine Wizard.

- Enter a display name to easily identify the virtual machine, and choose a location for the BeyondTrust SRA Virtual Appliance. Then click Next.
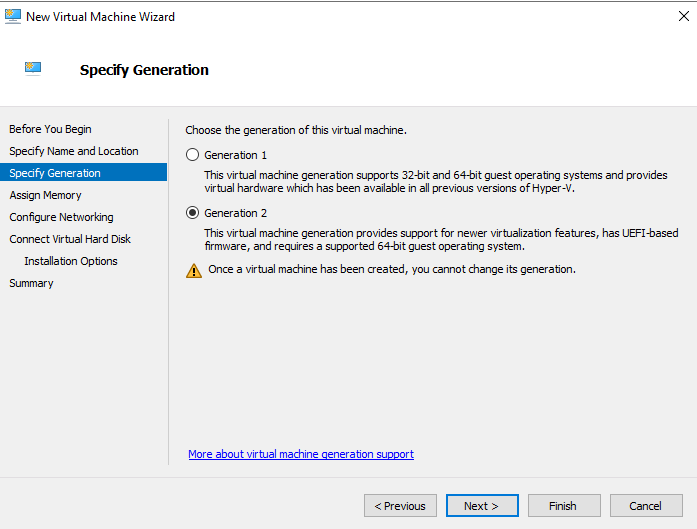
- Select Generation 2 and click Next.
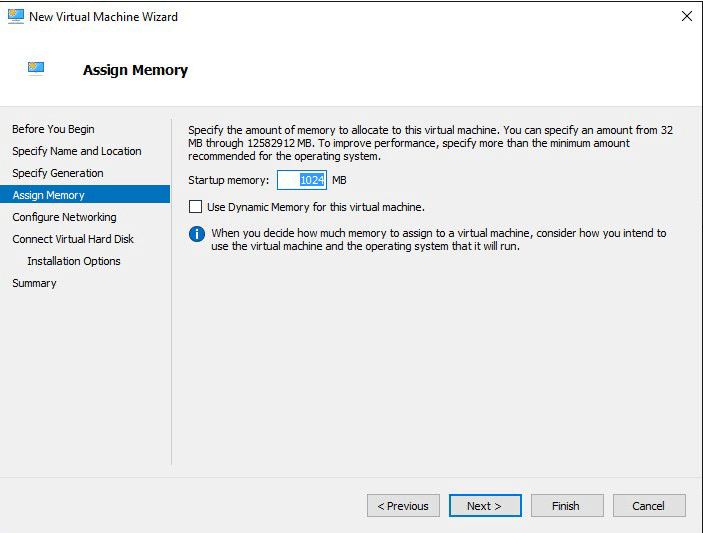
- Enter 4096 MB for a small deployment, or 8192 MB for any other size. Do not use dynamic memory. Click Next.
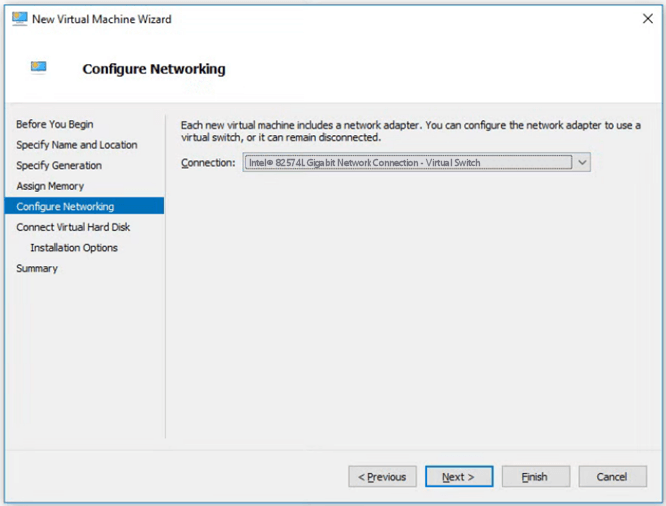
- From the Connection dropdown, select the network interface option that best suits your needs, and then click Next.
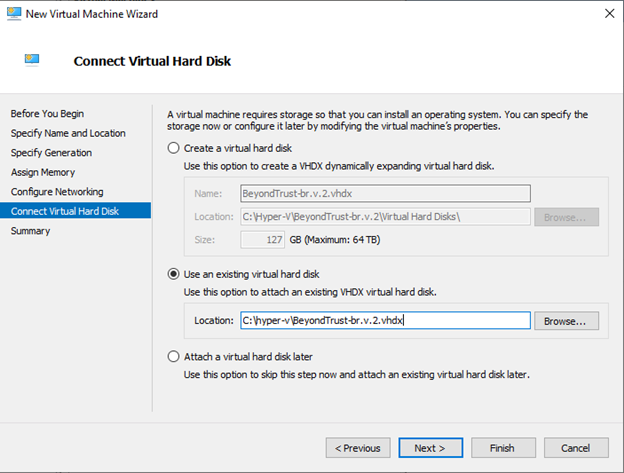
- Select Use an existing virtual hard disk and select the BeyondTrust-br.v.2.vhdx file that was extracted earlier from the download archive. BeyondTrust recommends putting the VHD file in the same location where the VM resides. Click Next.
- Review the VM details on the Summary page and click Finish.

- Once the VM has been created, right-click it and select Settings.
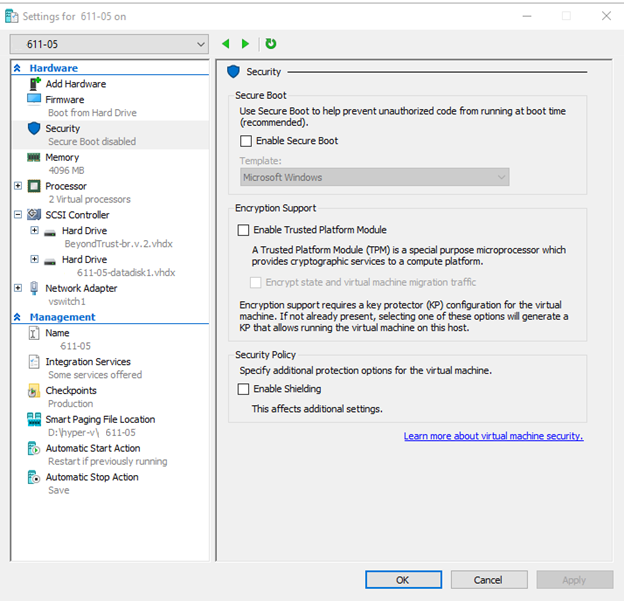
- Click Security, and uncheck Enable Secure Boot. This will help prevent unauthorized code from running when the machine is started.
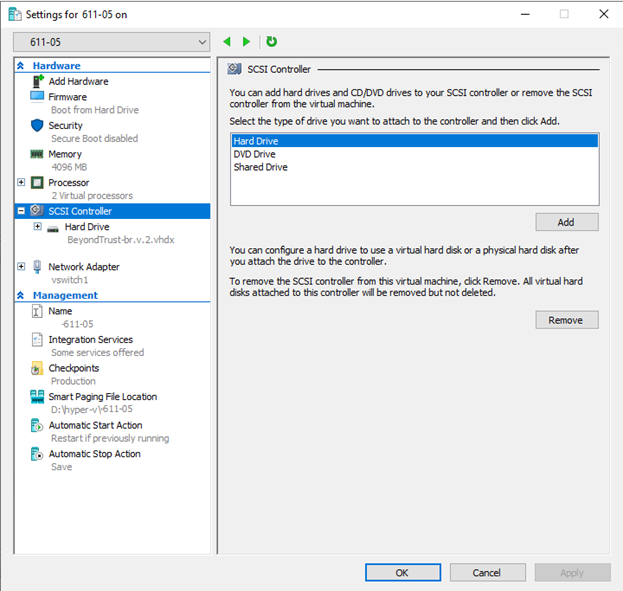
- Click SCSI Controller and select Hard Drive. Then click Add.
- Click the New button to create a new virtual hard disk. The New Virtual Hard Disk Wizard launches.
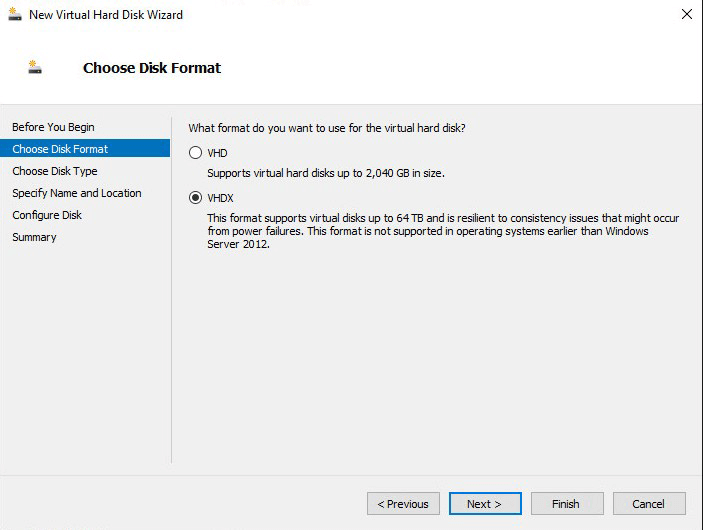
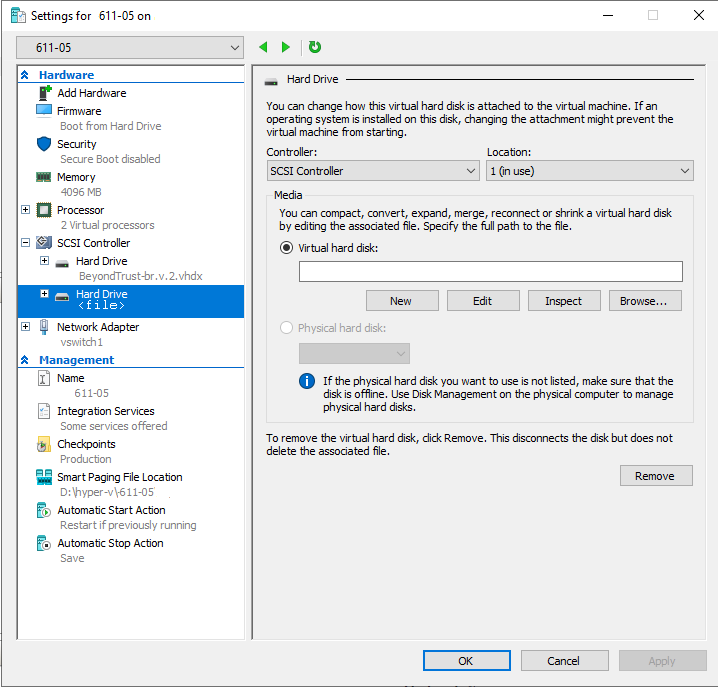
- On the Choose Disk Format page, select VHDX and click Next.
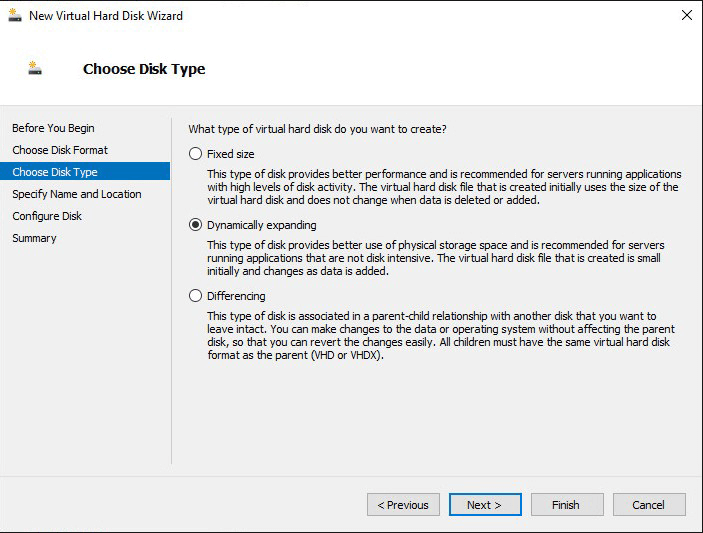
- Choose your desired disk type on the Choose Disk Type page, and click Next.
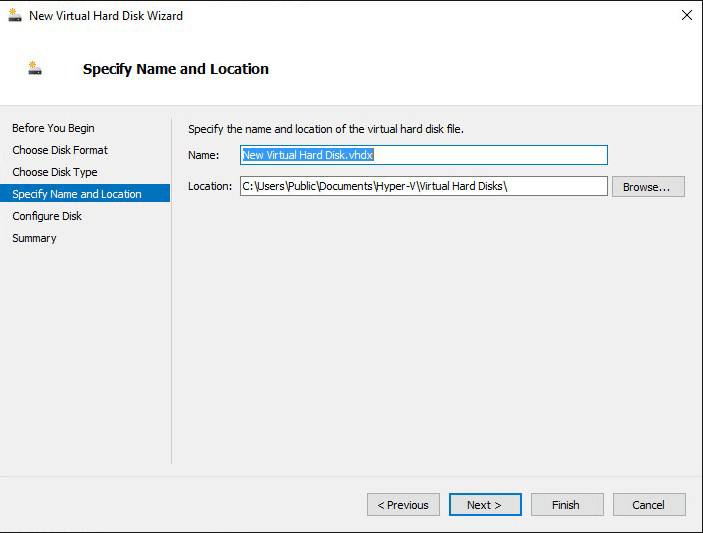
- On the Specify Name and Location page, provide a name and location for the virtual hard disk file. Click Next.
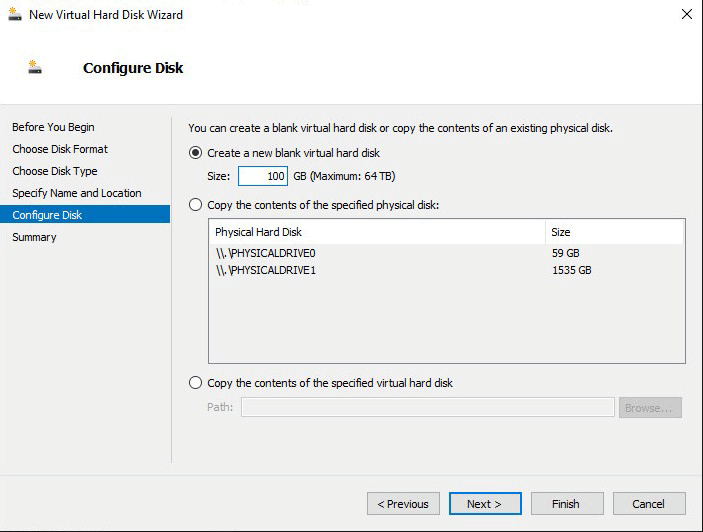
- Select Create a new blank virtual hard disk and specify a size of 100 GB. Click Next.
- Review the hard disk option on the Summary page and then click Finish.
- If your sizing requirements are for a medium or larger virtual machine, follow the above steps to create an additional disk, and specify a size of 500 GB.
For more information about sizes, please see Review License and Sizing Conditions.
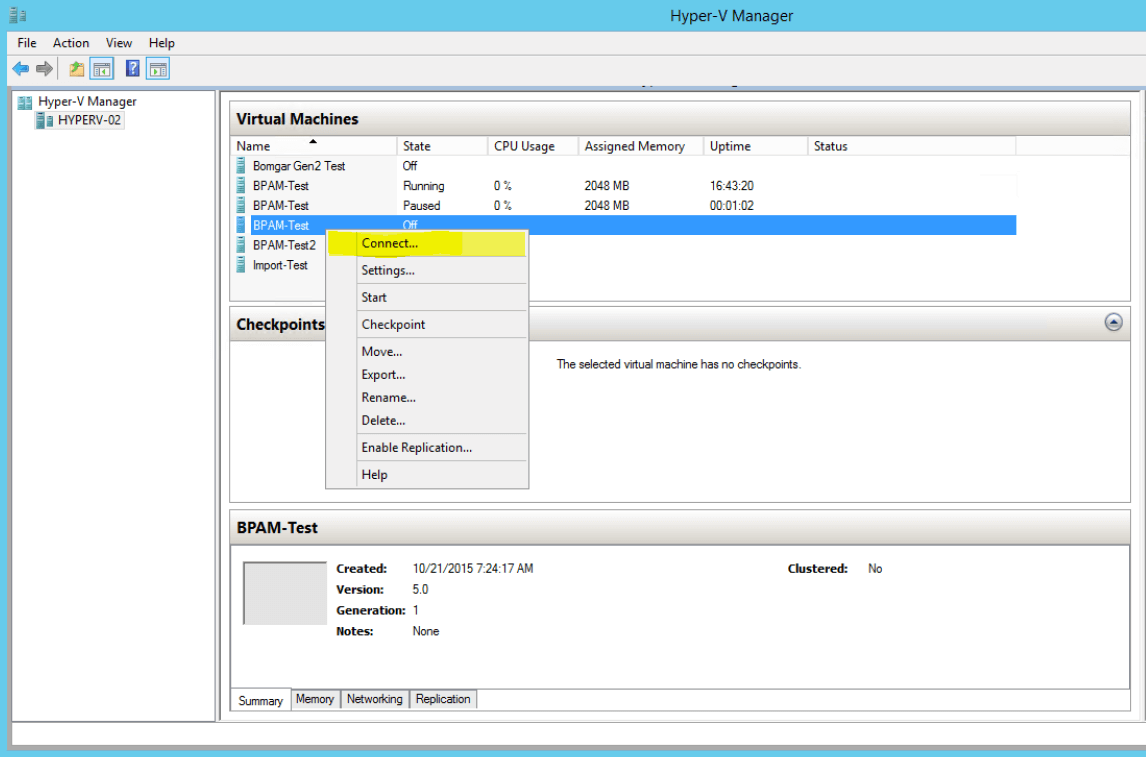
- Finally, right click on the virtual machine and select Connect.
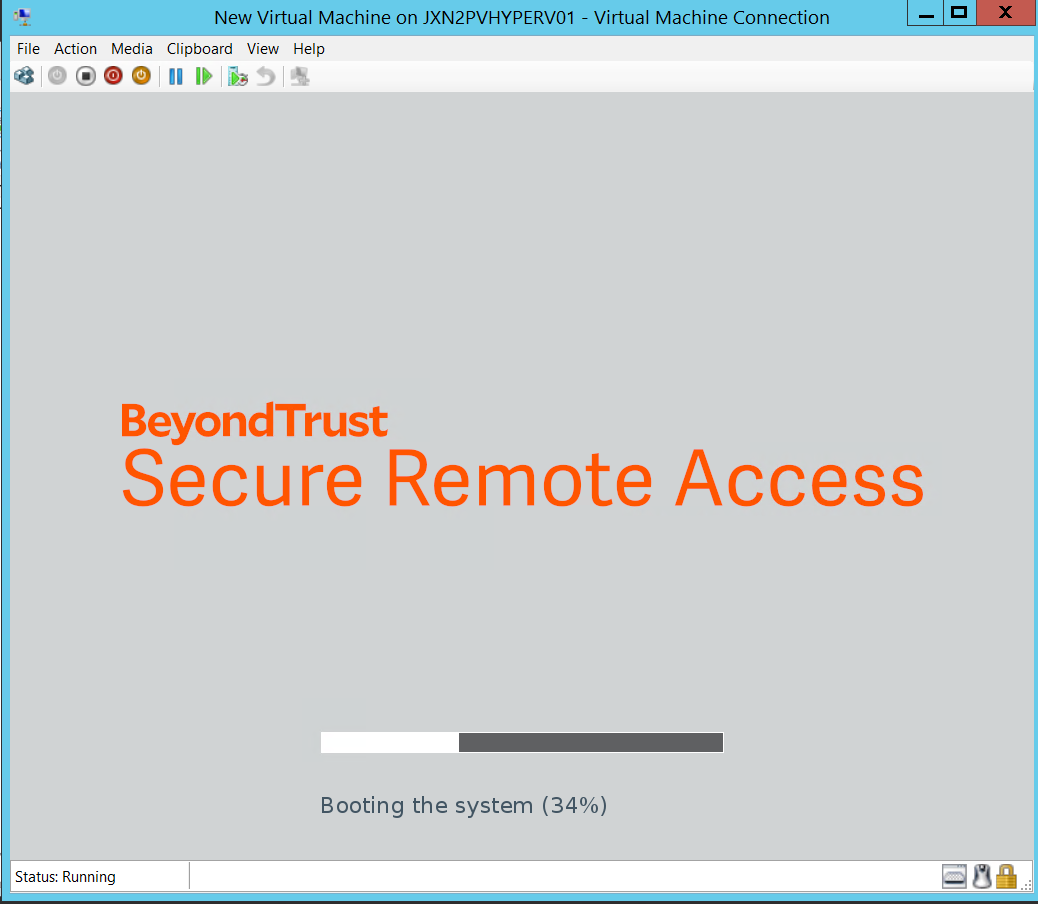
- Click the Start button to start the Hyper-V virtual machine.

- From the initial console configuration screen, press Enter, and then press 1 to enter the Appliance License Key.
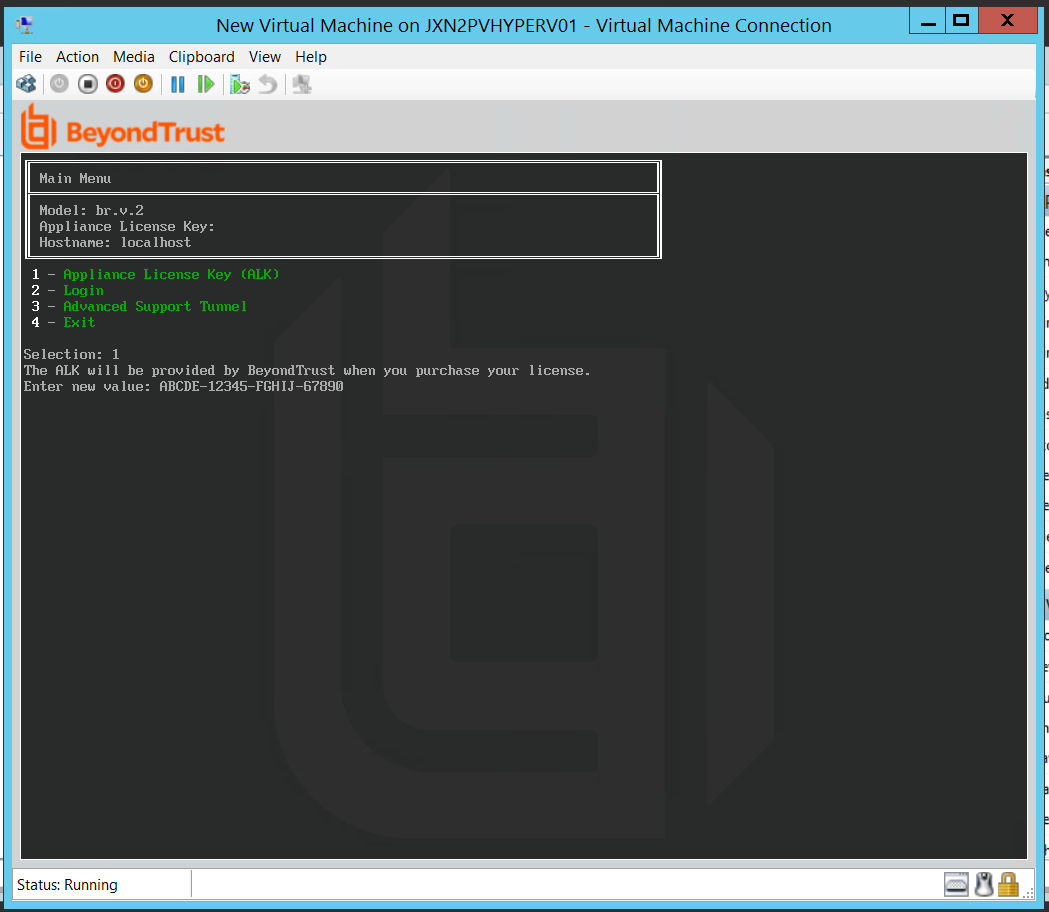
- Go back to the email you received from BeyondTrust Technical Support, get the Appliance License Key, enter it here, and then press Enter.
If you are unable to provide the Appliance License Key at this time, you can manually enter it later from the virtual machine console.
Configure via PowerShell
To deploy the BeyondTrustSRA Virtual Appliance into a Hyper environment using Powershell, follow the steps below:
- Open the email you received from BeyondTrust Technical Support and click the link to download the BeyondTrust SRA Virtual Appliance (Hyper-V and Azure) file. Save the file to an appropriate location so that it can be imported to your Hyper-V host, and then double-click the self-extracting ZIP file to extract your SRA Virtual Appliance.
- Double click BeyondTrust Remote Support-hyperv-azure.exe within your file browser to begin extraction.
- Choose the destination directory for the extraction and click Extract.
Extract to a directory where you want to run the virtual machine from.
- When extraction is complete, the following files appear in the designated location:
- Deploy-AzBeyondTrustVM.ps1: PowerShell script to assist deployment of your appliance to Hyper-V.
- Deploy-HyperVBeyondTrustVM.ps1: PowerShell script to assist Azure deployment. Not used.
- BeyondTrust-br.v.2.vhdx.
- Deploy- HyperVBeyondTrustVM.ps1 uses the Hyper-V PowerShell module. Right-click on the script and click Edit.
- Once the PowerShell script opens, locate the following variables and edit for your environment:
- $vmName: The name for the virtual machine.
- $vmLocation: The directory that the virtual machine resides in.
- $vmSwitch: The virtual switch this virtual machine uses.
- $beyondtrustVHD: The name of the VHDX. Leave as is.

- Set the value of the $size variable to the desired deployment size for your virtual machine. The options are:
- small
- medium
- large
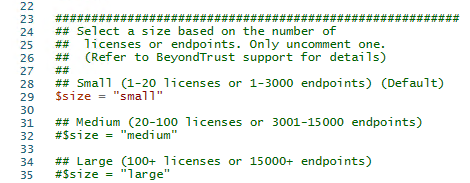
For more information about sizes, please see Review License and Sizing Conditions.
- Save and run the script in Windows Powershell.
- Once complete, you can view the newly created virtual machine in Hyper-V Manager or via PowerShell Hyper-V commands.
| Network Location Considerations for B Series Appliances | |
|---|---|
| Network Location | Advantages/Disadvantages |
|
Outside your firewall |
Does not require that ports 80 and 443 be open inbound for TCP traffic on your firewall. Simplifies the setup process significantly because both the representative and customer clients are built to resolve to a specific DNS; if your registered DNS resolves to a public IP address directly assigned to your B Series Appliance, no additional setup is required by you to initiate a session. |
|
DMZ |
Might require additional setup depending on your router or routers. |
|
Inside your firewall |
Requires port forwarding on your firewall and possibly additional setup of your NAT routing and internal DNS. |