Add and Manage Vault Accounts
Credential accounts can be added and managed on the Accounts page. Adding accounts enables users with the correct roles to access the account credentials for injections and rotations.
Vault can import, rotate, and manage up to 60,000 accounts.
Add Generic Credentials and SSH Keys
Outside of the discovery process, you can manually add individual credential accounts to BeyondTrust Vault. You can add shared generic accounts and personal generic accounts. Shared generic accounts can be used by all users who have been assigned to the account with the Inject or the Inject and Check Out Vault account role. Personal generic accounts can be used only by the account owner (the user who created the account). To add generic accounts, follow the steps below.
Add a Shared Generic Account
- From the /login interface, navigate to Vault > Accounts.
- Click Add.
- Select Shared Generic Account.
- Provide a Name, Description, and Username for the account.
- Select the type of authentication the account uses:
- Password
- Enter and confirm the password.
Select a specific policy for the account or leave Account Policy set to the default value of Inherit Policy Settings, in which case the account inherits the policy settings of the account group. If no account group is selected for the account, the account inherits the policy settings set for the global default account policy on the Vault > Options page.
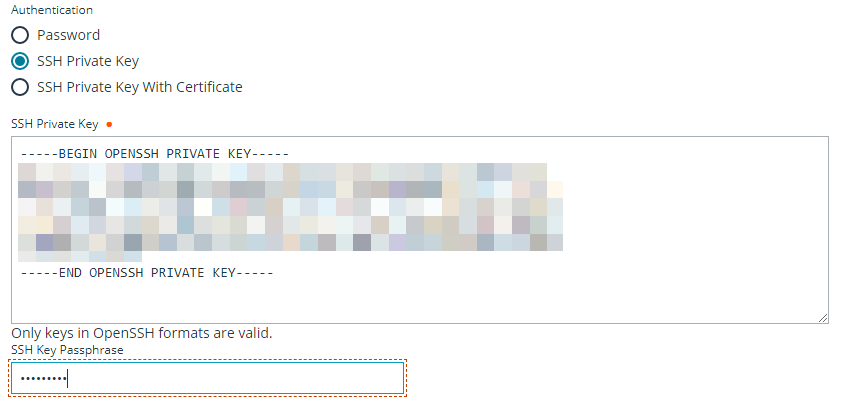
- SSH Private Key
- If using an SSH private key, provide the key and passphrase.
- SSH Private Key with Certificate
- If using an SSH private key with certificate, provide the key, passphrase, and certificate.
- A public key is generated after the account is saved, and can be viewed and copied by editing the account.
- SSH Certificate Authority
- Select if the private key is generated by BeyondTrust Privileged Remote Access or you will upload your own key.
- If uploading your own key, provide the key and passphrase. The private key cannot be modified or retrieved.
- Password
After creating and saving the account, select the Edit action and copy the public key. It starts with cert-authority. Add this public key to the endpoint's SSH configuration as a trusted CA or in an account's known_hosts file, so that the endpoint trusts certificates signed by the CA.
- Select an Account Group from the list to add this account to a group. If no account group is selected, the account is automatically added to the Default Group.
Adding a credential account to an account group allows all users who have been assigned to that group to use this credential. If an account group is not selected, you must add account users individually to this new credential and assign their role.
- If you are not adding this new credential account to an account group, add users and their Vault role individually in the Account Users section.
-
Select the type of Jump Item Associations for the account. The Jump Item Associations setting determines which Jump Items the account is associated with, so the account is available only for relevant target machines in the access console during credential injection attempts. Select one of the following associations methods:
- Inherited from the Account Group: Associations for this account are determined by the associations defined in this account's Account Group.
- Any Jump Items: This account can be injected within any session started from a Jump Item in which the account is applicable.
- No Jump Items: This account cannot be injected into any session started from a Jump Item.
- Jump Items Matching Criteria: This account can be injected only within sessions started from Jump Items that match the criteria you define, in which the account is applicable.
- You can define a direct association between Vault accounts and specific Jump Items by selecting the Jump Items from the list, and then clicking Add Jump Item.
- You can further define the association between Vault accounts and Jump Items by specifying matching criteria based on the following Jump Item attributes. If configured, the account is available for injection for any Jump Items that match the specified attribute criteria in addition to any specific Jump Items you added as matching criteria.
- Shared Jump Groups: Select a Jump Group from the list.
- Name: This filter is matched against the value that appears in the Name column of the jump item in the access console.
- Hostname / IP: This filter is matched against the value that appears in the Hostname / IP column of the Jump Item in the access console.
- Tag: This filter is matched against the value that appears in the Tag column of the Jump Item in the access console.
- Comments: This filter is matched against the value that appears in the Comments column of the Jump Item in the access console.
Click the i icon for each option and attribute to view more specific information about it.
Local accounts are available for injection within the endpoints on which they were discovered.
- Click Save at the top of the page to save the new shared credential account.
Add a Personal Generic Account
- From the /login interface, navigate to Vault > Accounts.
- Click Add.
- Select Personal Generic Account.
- Provide a Name, Description, and Username for the account.
- Select the type of authentication the account uses: Password, SSH Private Key, or SSH Private Key with Certificate.
- If using an SSH private key, provide the key and passphrase.
- If using an SSH private key with certificate, provide the key, passphrase, and certificate.
- A public key is generated after the account is saved, and can be viewed and copied by editing the account.
- Click Save at the top of the page to save the new personal credential account.
Vault administrators can view personal accounts but cannot edit them, inject them, or view their passwords. Only the user who created the personal account can modify, inject, or view the account's password.
Users can create up to 50 Vault personal accounts.
Edit or Delete a Vault Account
- From the /login interface, navigate to Vault > Accounts.
- For shared accounts:
- From the Shared tab, locate the account you wish to edit or delete.
- Click the ellipsis button for the account.
- To edit:
- Select Edit, modify options as necessary, and then click Save.
- To delete:
- Select Delete and click Yes to confirm.
- For personal accounts:
- From the Personal tab, locate the account you wish to edit or delete.
- To edit:
- Click Edit Account (pencil icon) for the account.
- Modify options as necessary, and then click Save.
- To delete:
- Click Delete Account (trash can icon) for the account.
- Click Yes to confirm.
View or Copy an SSH Public Key
When creating the account, enter the SSH private key and passphrase. It is validated when the account is saved. The account cannot save if the key is invalid, not in an accepted format, or cannot be decrypted with the provided passphrase.
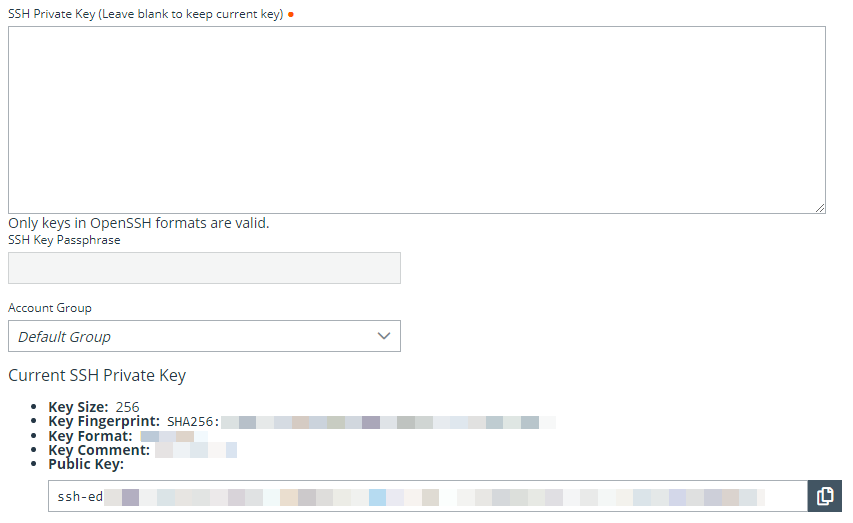
After saving the account, edit the account to view details for the public key, and copy the public key. The public key details can also be queried with an API.
View the Status of a Vault Account
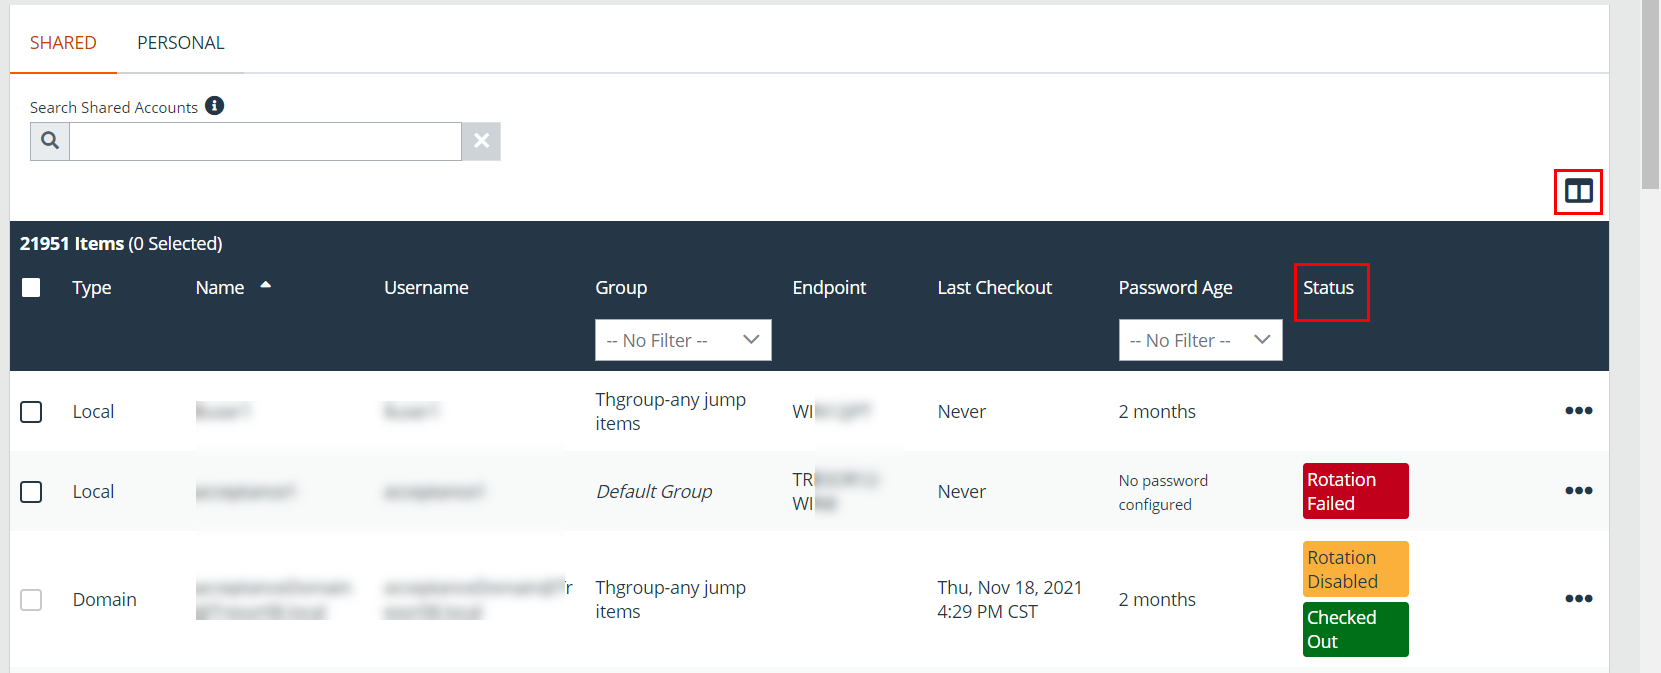
On the Vault > Accounts page, a Status column displays when at least one of the accounts has a warning, error, or checked-out status to indicate. Accounts managed by Entra ID are identified in the Status column, as well as an alert if there is no service principal for the account. Accounts used to run a Windows service are indicated as Service Account in the Status column. Multiple statuses for an account are stacked and displayed in different colors. You can mouse-over a specific status to view more details about it.
Click the Select visible columns button above the grid to customize the columns displayed in the grid.
The Status column is auto-hidden when none of the accounts have a status currently set.