Add and Manage Vault Account Groups
Vault admins can use account groups to logically group credentials together, granting users access to multiple shared Vault accounts at one time. Account groups can also be associated to a group policy, allowing policy members to access that group of shared Vault accounts.
A shared Vault account can belong to only one group at a time. Personal Vault accounts cannot be added to an account group.
Add an Account Group
- From the /login interface, navigate to Vault > Account Groups.
- Click Add.
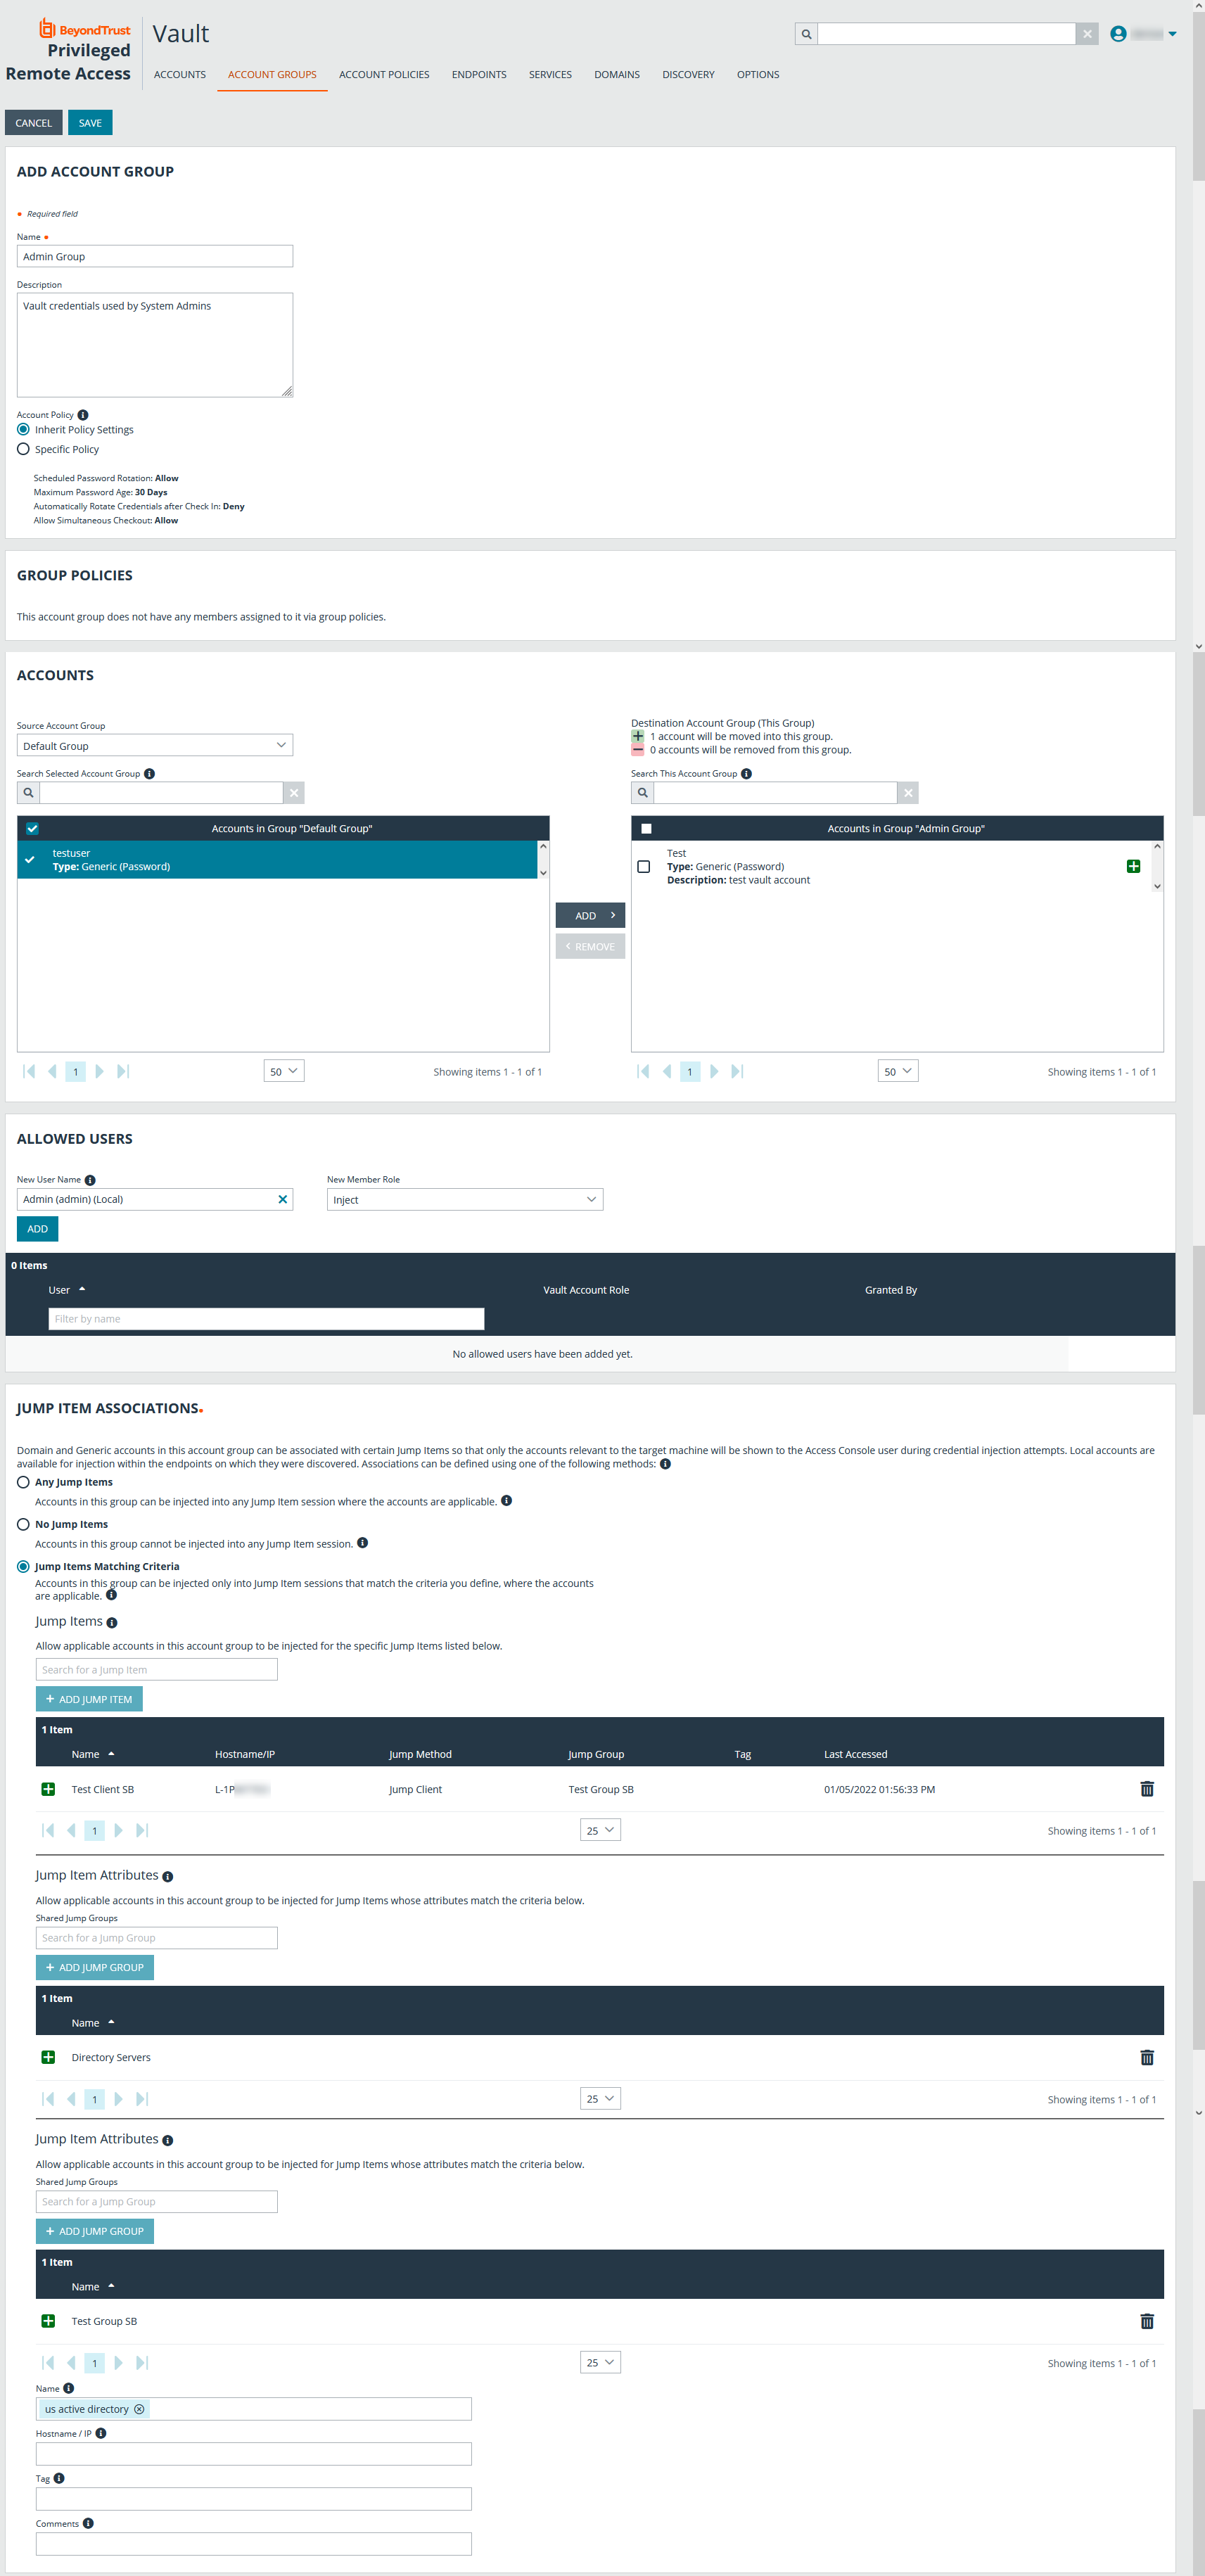
- Provide a Name and Description for the group.
-
Select a specific policy for the account group or leave Account Policy set to the default value of Inherit Policy Settings, in which case the accounts in this account group inherit the policy settings set for the global default account policy on the Vault > Options page.
- Under Accounts, select the group from the Source Account Group list, and then select the accounts to add to this group.
The Default Group is a system generated group that contains all user accounts that do not belong to an account group. The Default Group is selected by default. You can filter the list of available accounts to add to the group by selecting a group from the Source Account Group list or by using the Search Selected Account Group box to search by Name, Endpoint, and Description.
- Click Add to move the accounts over to the Accounts in This Group list.
- In the Allowed Users section, add a user and select their Vault role from the New Member Role dropdown, and then click Add.
-
Select the type of Jump Item Associations for the account group. The Jump Item Associations setting determines which Jump Items the accounts in this account group are associated with, so that only the accounts relevant to the target machine are available in the access console during credential injection attempts. Select one of the following associations methods:
- Any Jump Items: Accounts in this group can be injected into any Jump Item session in which the accounts are applicable.
- No Jump Items: Accounts in this group cannot be injected into any Jump Item session.
- Jump Items Matching Criteria: Accounts in this group can be injected only into Jump Item sessions that match the criteria you define, in which the accounts are applicable.
- You can define a direct association between applicable accounts in this account group and specific Jump Items by selecting the Jump Items from the list, and then clicking Add Jump Item.
- You can further define the association between applicable accounts in this account group and Jump Items by specifying matching criteria based on the following Jump Item attributes. If configured, accounts in this account group are available for injection for any Jump Items that match the specified attribute criteria in addition to any specific Jump Items you added as matching criteria.
- Shared Jump Groups: Select a Jump Group from the list.
- Name: This filter is matched against the value that appears in the Name column of the Jump Item in the access console.
- Hostname / IP: This filter is matched against the value that appears in the Hostname / IP column of the Jump Item in the access console.
- Tag: This filter is matched against the value that appears in the Tag column of the Jump Item in the access console.
- Comments: This filter is matched against the value that appears in the Comments column of the Jump Item in the access console.
Click the i icon for each option and attribute to view more specific information about it.
Local accounts are available for injection within the endpoints on which they were discovered.
- Click Save at the top of the page.
Add a Vault Account to an Account Group from the Accounts Page
- From the /login interface, navigate to Vault > Accounts.
- From the Shared tab, click the ellipsis button for the account, and then select Edit.
- Select the group from the Account Group list, and then click Save at the top of the page.
Import a Discovered Account to an Account Group
- From the /login interface, navigate to Vault > Discovery.
- Scroll down to the Discovery Jobs section.
- Click View Results for the job.
- Select the Local Accounts or Domain Accounts tab as applicable.
- Select the account you wish to import.
- Click Import Selected.
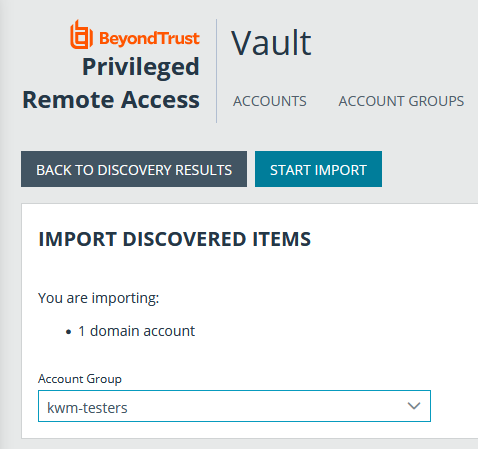
- Select the group from the Account Group list.
- Click Start Import.
Add an Account Group to a Group Policy
- From the /login interface, navigate to Users & Security > Group Policies.
- Click Edit (pencil icon) for the desired group policy.
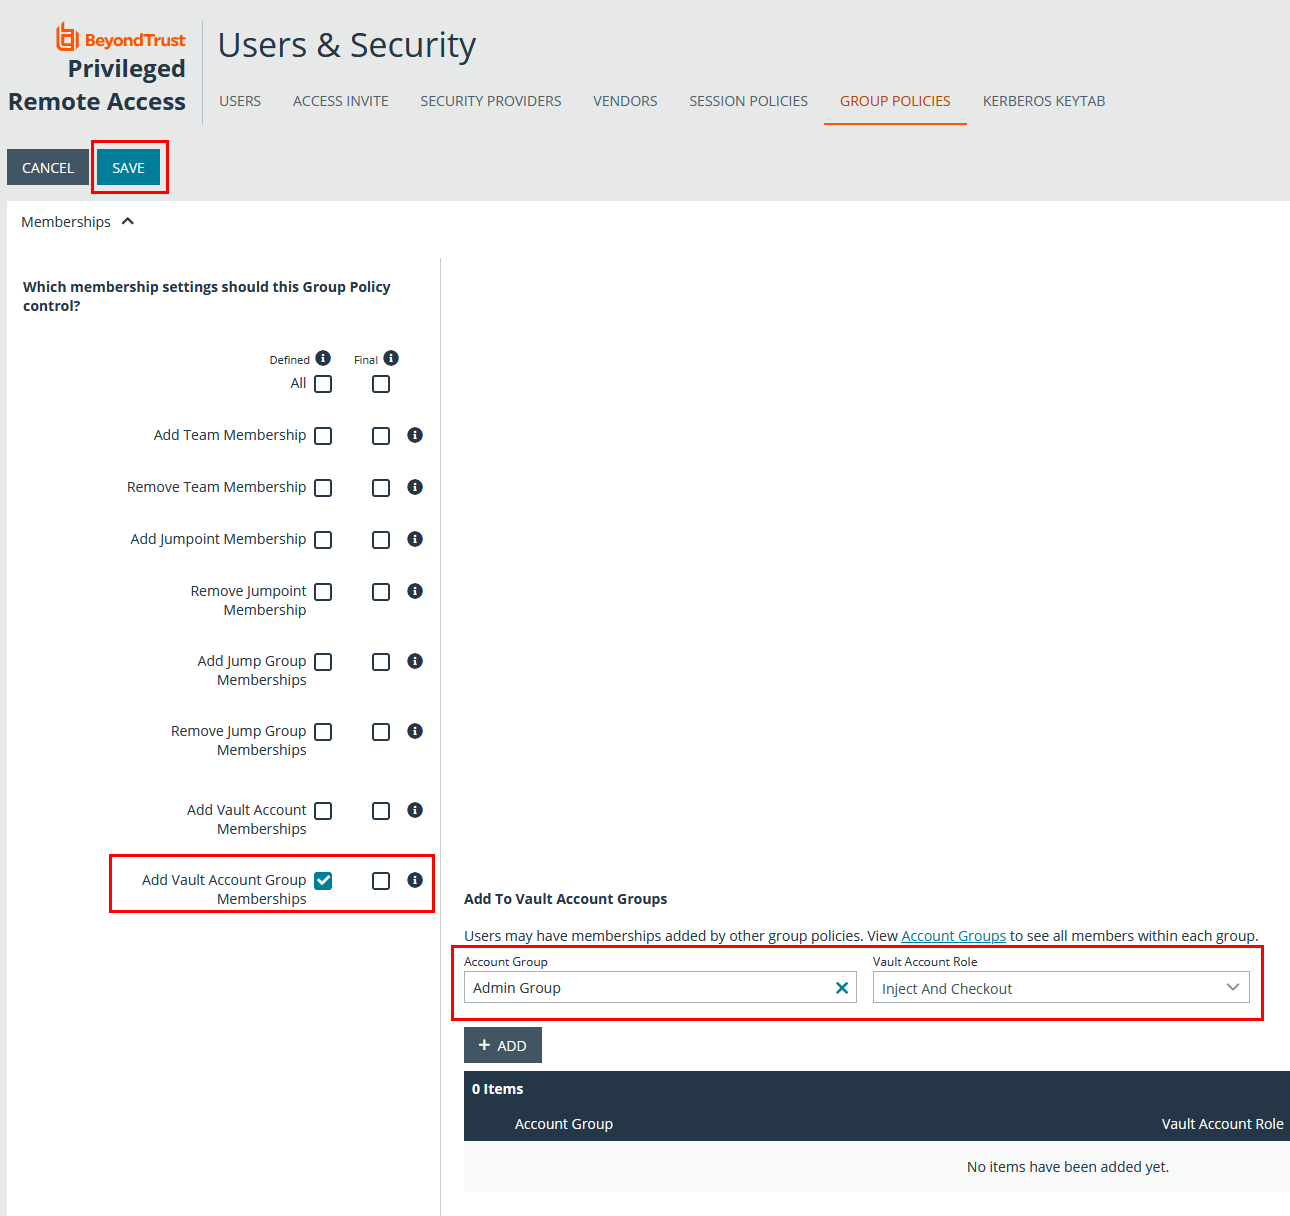
- Scroll down to the Memberships section.
- Check the Add Vault Account Group Memberships setting.
- Select the Account Group from the list.
- Select the Vault Account Role from the list.
- Click Add.
- Click Save at the top of the page.
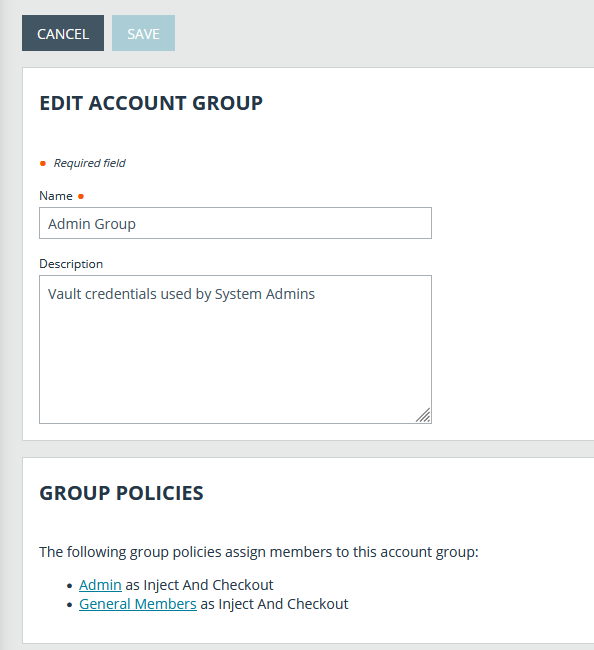
- The group policy and its Vault account role are now displayed under the Group Policies section for the account group that was added to the policy.
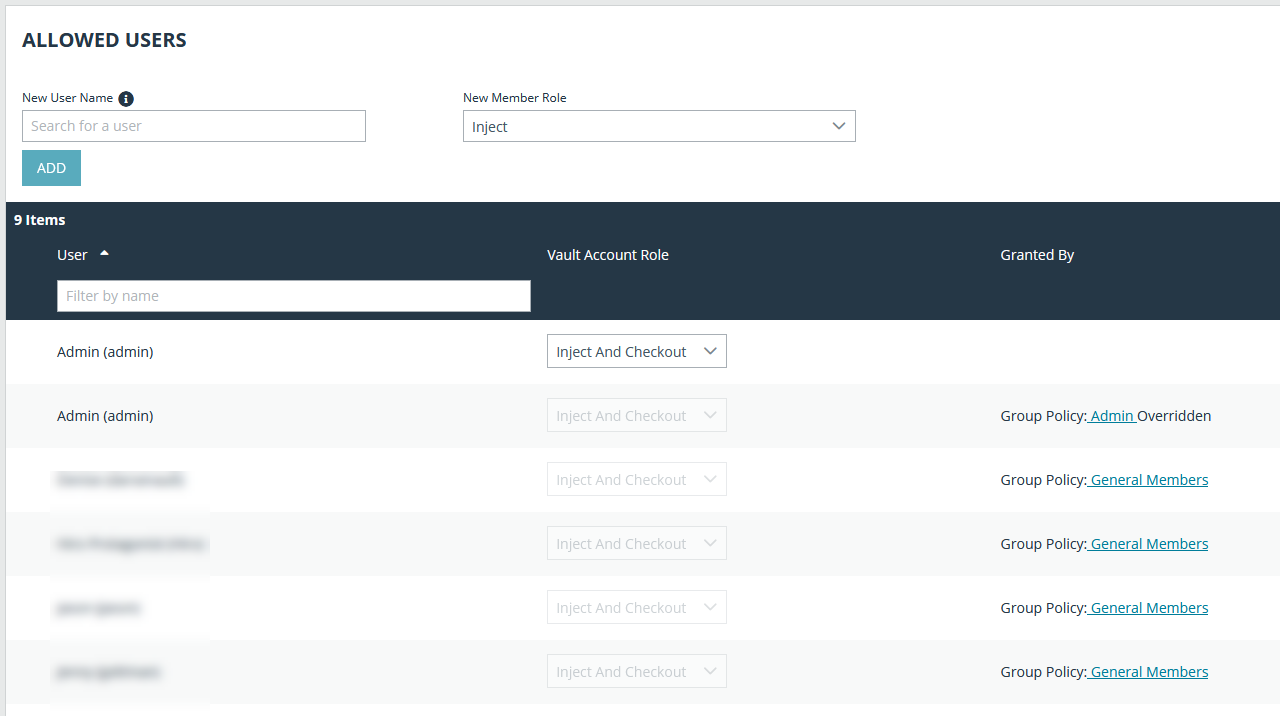
- The members of the group policy are now added under Allowed Users for the account group.
If a user was granted access individually from the account group edit page and also through a group policy, the group policy access is overidden by the explicity granted individual access for this this user.