Configure ServiceNow for Integration with BeyondTrust PRA
You must purchase this integration separately from your BeyondTrust Privileged Remote Access solution. For more information, contact BeyondTrust's Sales team.
Unless otherwise noted, all of the steps in this section take place in the ServiceNow interface. The development and/or test instances of ServiceNow should be used initially so that the integration can be thoroughly tested before installation in the production instance.
Install BeyondTrust Integration
The Integration must be purchased directly from BeyondTrust. After the purchase, it is installed via the ServiceNow Store. There is no mechanism to purchase the integration at the ServiceNow Store. Follow the steps below to request and install the integration.
- Log in to your ServiceNow platform with your corporate account. Please contact your company Now Support (HI) admin if you do not have credentials.
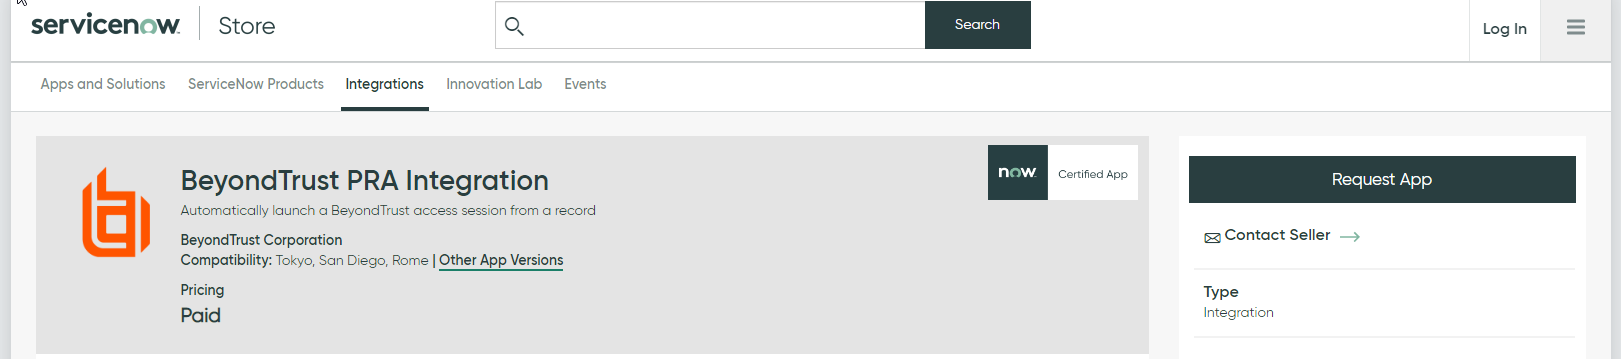
- Search for BeyondTrust PRA Integration, or go to the app's page.
- Click Request App.
- Request Privileged Remote Access with ITSM.
- Within a business day, BeyondTrust approves the request with a $0 purchase price, and sends a copy of these installation instructions to the requester.
- Once you receive the confirmation, return to the app's page in the ServiceNow store.
- Click Complete Purchase.
- Review the contract details.
- If you agree, check Accept the Site Terms of Use.
- Click Complete Purchase.
- The app is ready for installation on your ServiceNow instance(s).
- Repeat the steps below for each instance.
- Login to the ServiceNow instance on which you want to install the app.
- Navigate to System Applications > All Available Applications > All.
- Search for the app you want to install.
- Click Install.
Create Local Update Set
Local update sets are used in ServiceNow to capture configuration changes. They can be used to quickly transfer these configuration changes to other environments.
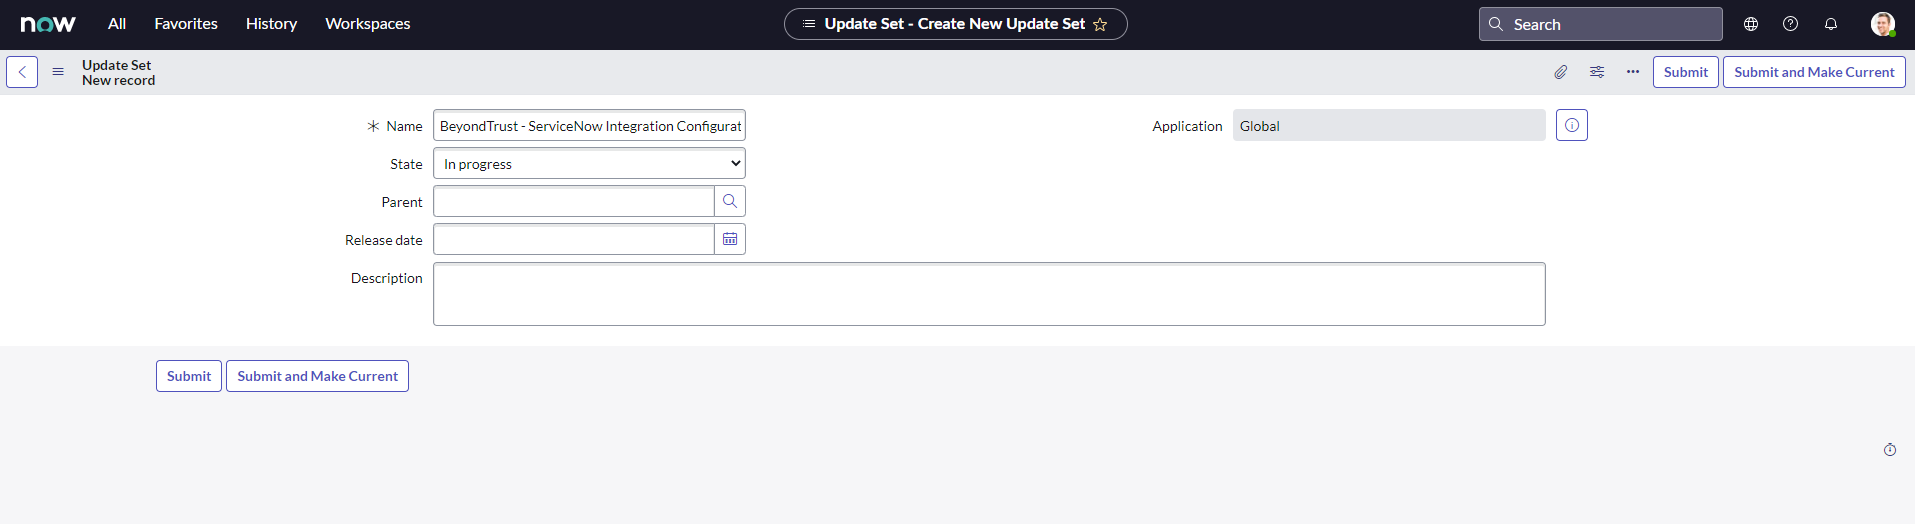
- Select System Update Sets > Local Update Sets, and click the New button above the list of update sets to create a new local update set.
- In the Name field, enter BeyondTrust - ServiceNow Integration Configuration (or an equivalent).
- Click Submit and Make Current. This update set captures any changes you make during the configuration process. Make sure that the BeyondTrust - ServiceNow Integration Configuration update set is selected in ServiceNow's update set dropdown for the following steps.
- Make sure the Application is set to BeyondTrust PRA Integration. If it is not, use the settings cog in the upper right of the screen to switch to the aforementioned scope.
- After configuration is complete and tested, the local update set can be imported or promoted to new instances of ServiceNow (e.g., the production instance) to quickly replicate the integration. This must be done after transferring the BeyondTrust - ServiceNow retrieved update set.
For more information on transferring update sets, please see Transfer the BeyondTrust PRA-ServiceNow Integration Update Sets.
Update BeyondTrust PRA Session Event Types
Event types are used to control which BeyondTrust events are processed with a BeyondTrust session import. This step updates the database with all the available event types.

- Select BeyondTrust PRA > Update Event Types.
- This loads all the available BeyondTrust session event types into the database, so that unwanted events can be filtered out in a subsequent step when setting up your B Series Appliances.
Set Up B Series Appliance
B Series Appliances are set up in ServiceNow to connect ServiceNow with a B Series Appliance.
- Select BeyondTrust PRA > Appliances.
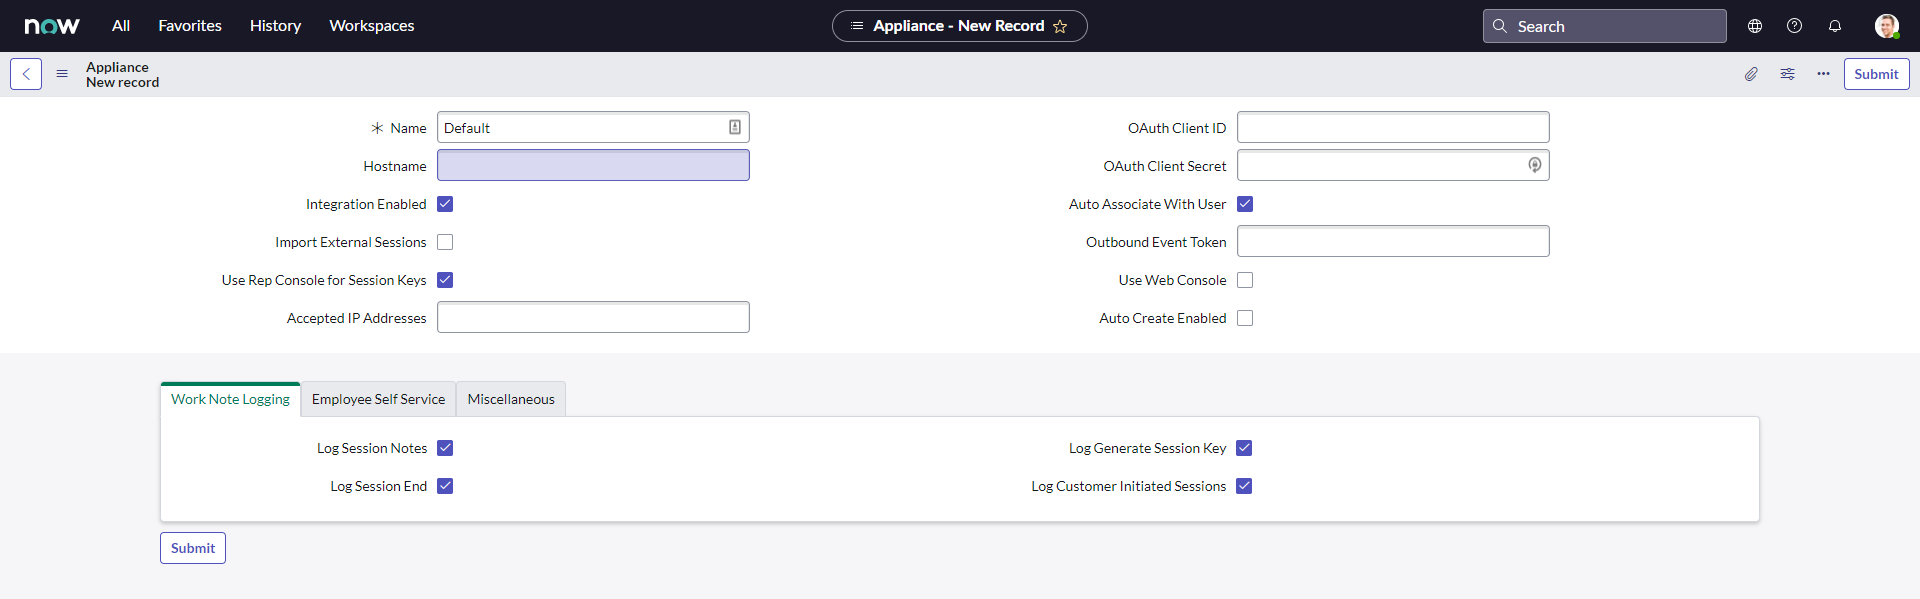
- Click New to add a new BeyondTrust Appliance B Series and enter the following values:
- Name: Must be Default.
- Hostname: Hostname of the BeyondTrust Appliance B Series.
- OAuth Client ID/ OAuth Client Secret: the OAuth client id and Client Secret that are used to authenticate to B Series Appliance. This is obtained in a previous step, Create a ServiceNow OAuth API Account.
- Outbound Event Token: The token that is used as an added security measure to confirm outbound events are coming from the B Series Appliance that is sending the same token. If left blank, this outbound event token process is ignored. However, if a value is provided, the same value must be sent from all outbound events coming from BeyondTrust as a parameter named outbound_event_token.
- Integration Enabled: Turns the integration on and off.
- Import External Sessions: If checked, session reports for sessions that are started external to ServiceNow are imported into ServiceNow.
- Accepted IP Addresses: A comma-separated list of IP addresses from which this integration accepts outbound events.
- Auto Associate With User: If checked, when the session report is imported, the integration attempts to associate a ServiceNow user with the session. The lookup is based on the session's primary user's username.
- Auto Associate With Config Item: If checked, when the session report is imported, the integration attempts to associate a ServiceNow config item with the session.

- Events to Import: A list of BeyondTrust session events to process when importing a BeyondTrust session.
You cannot configure this setting until after the B Series Appliance has been saved.
Configure Events to Import
Event types are used to control which BeyondTrust events are processed with a BeyondTrust session import. This step defines which events are processed for each BeyondTrust session import.
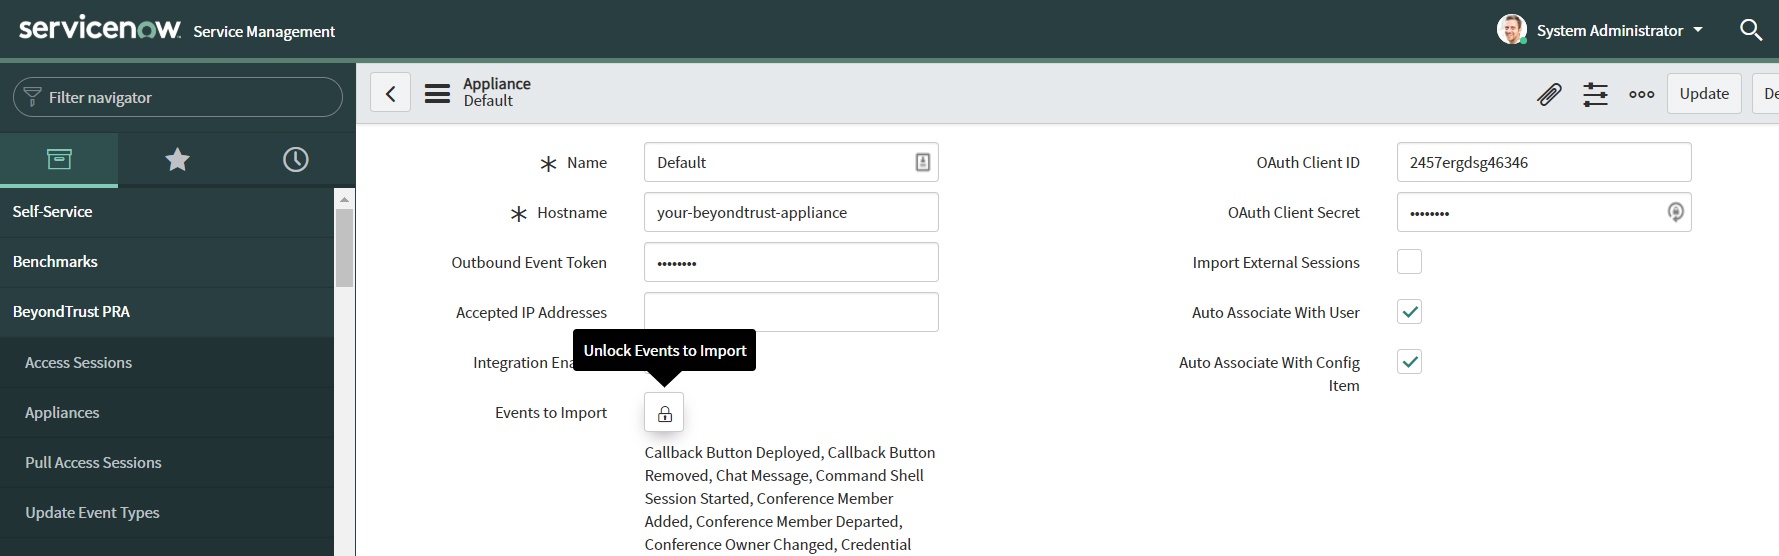
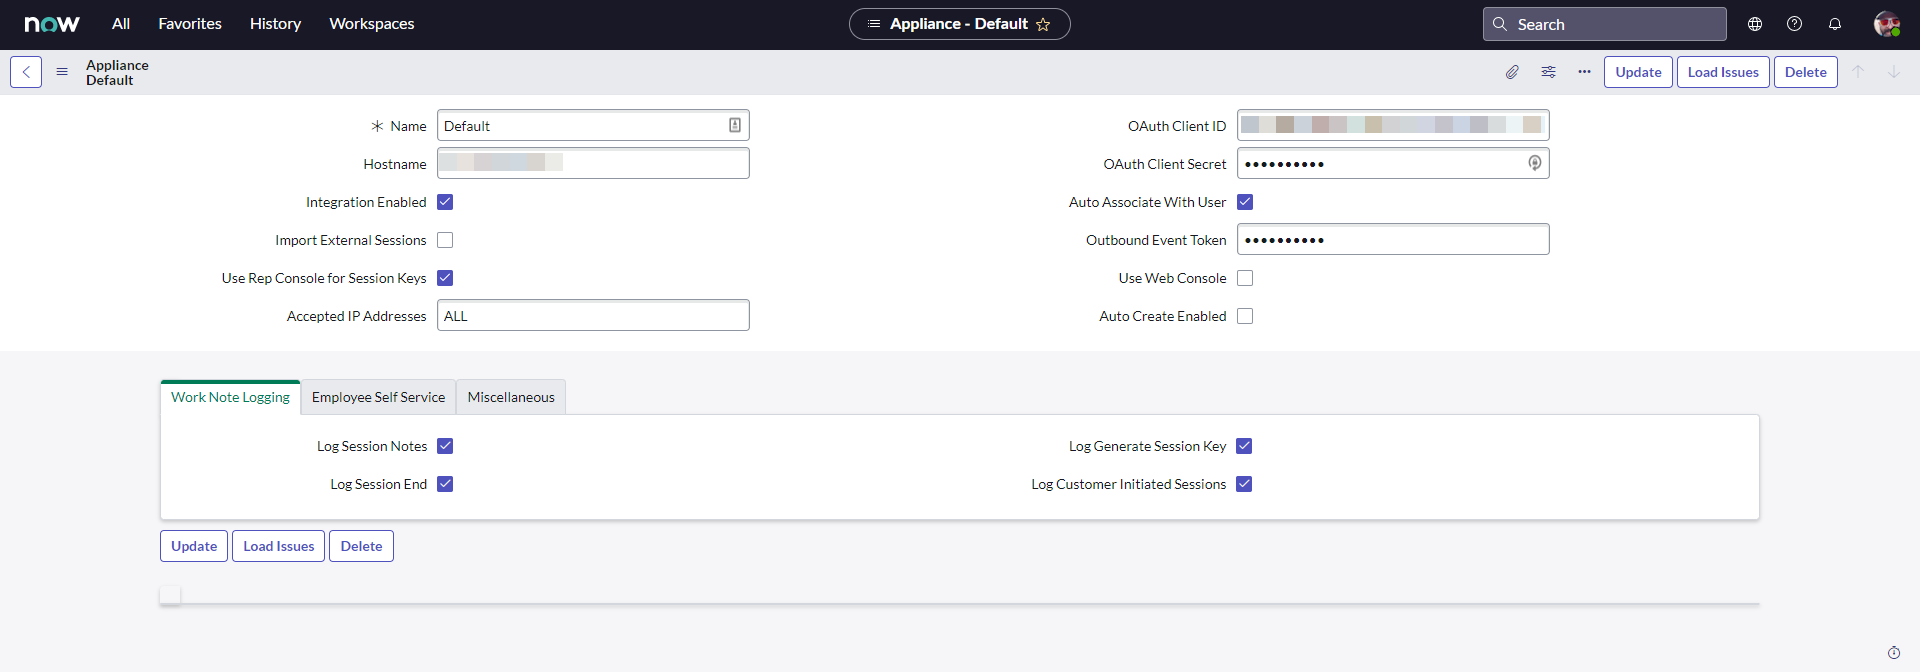
- Select BeyondTrust PRA > Appliances.
- Click the name of your B Series Appliance.
- Click the Edit Events to Import button (the lock icon).
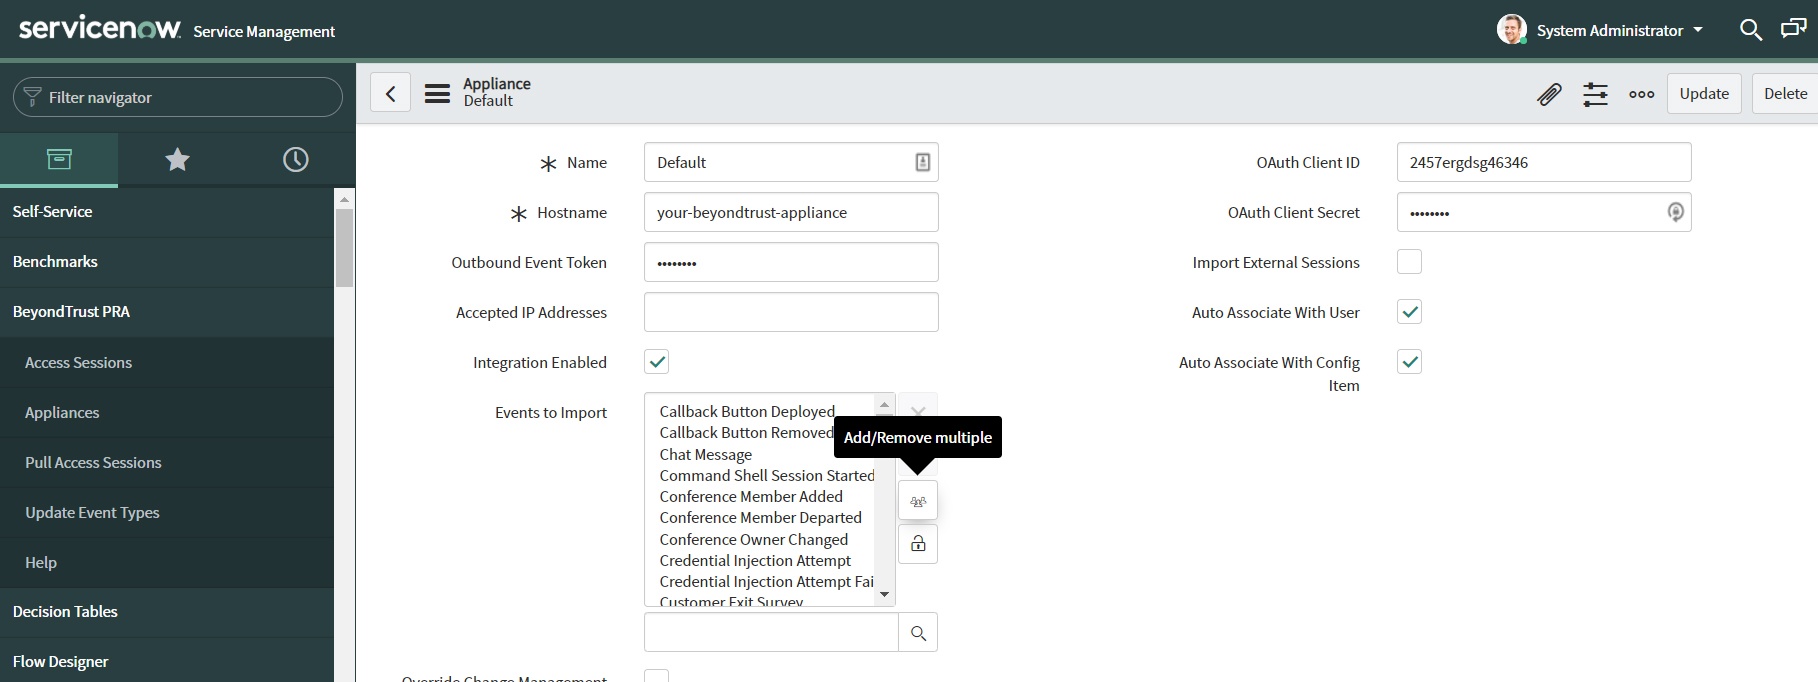
- Click the Add/Remove multiple button (the group of people icon) located on the right side of the field.
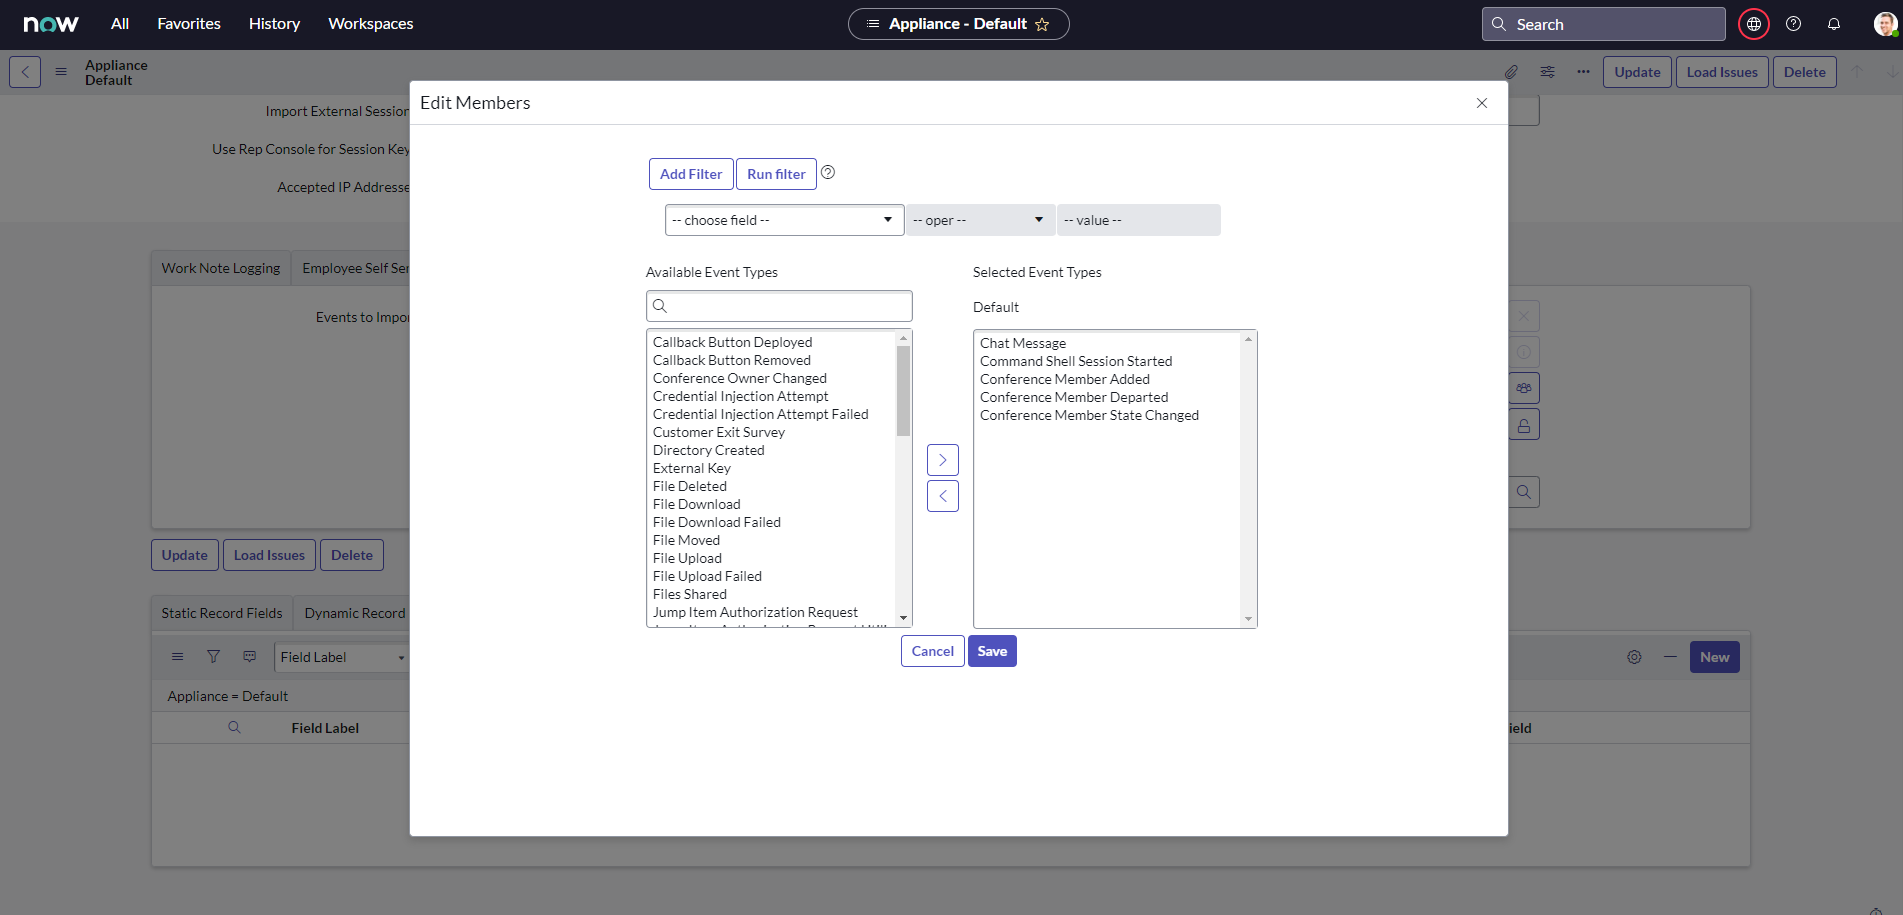
- Select the events you want from the Collection field on the left and use the arrows to move the events to the List field on the right.
You can use CTRL+A to select all events.
- Click the Save button when you are finished.
Configure BeyondTrust Session Related Lists
Related lists are used to provide a list of BeyondTrust sessions that are associated with a task (incident, change request, service catalog, etc.) or configuration item.
Task Configuration
- Select Incident or the desired task type.
- Click Open to see a list of open tasks.
- Select an incident by clicking the Task Number.
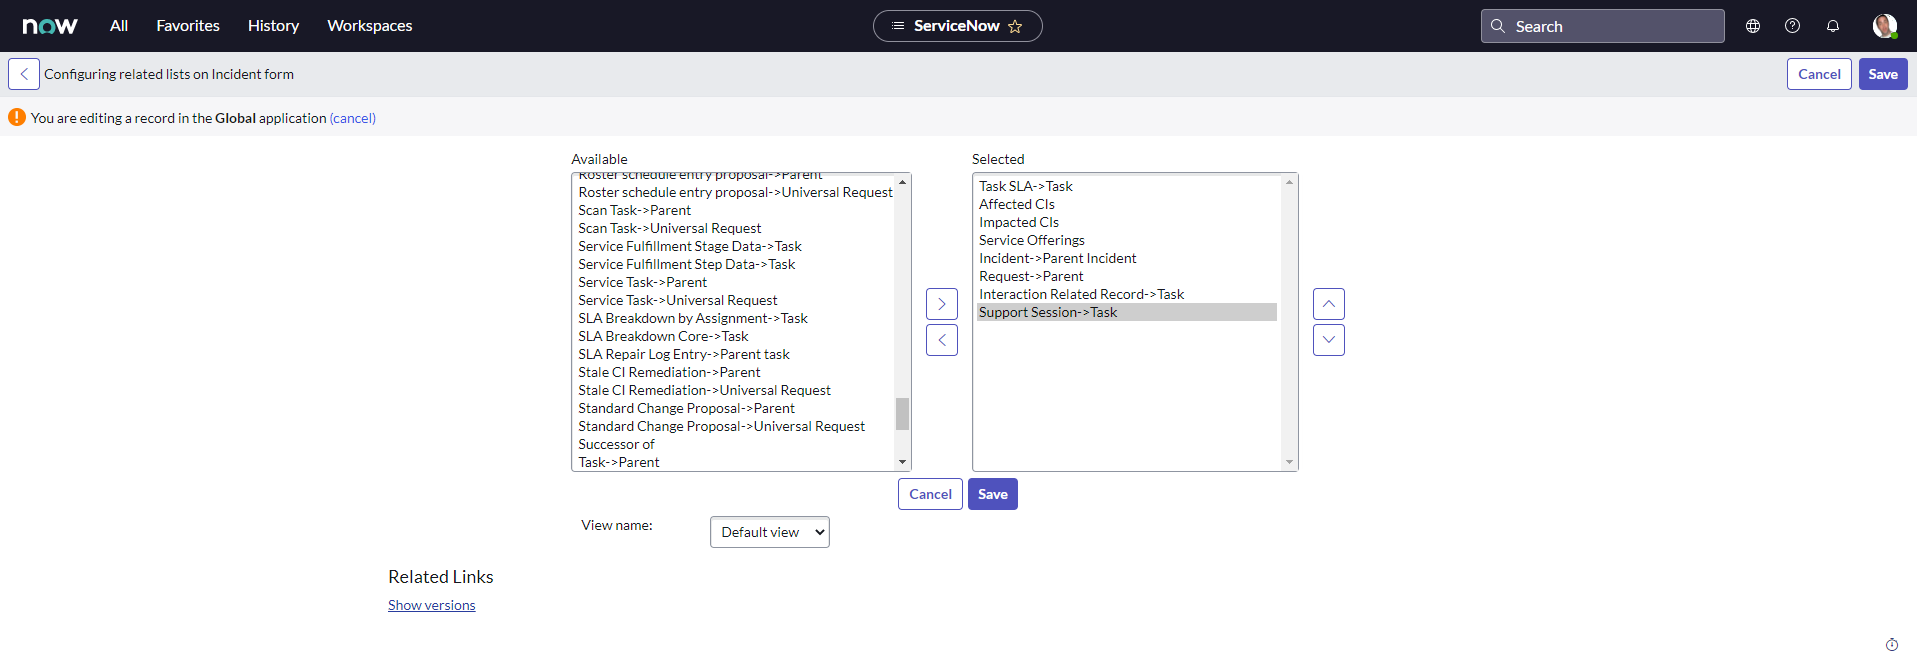
- Right-click the title bar and select Configure > Related Lists.
- Ensure that Access Session > Task has been moved to the Selected column.
- Click the Save button.
- The BeyondTrust sessions list appears towards the bottom of the form once these steps are complete.
CMDB Configuration
- Select Configuration > Servers.
- Click All to see a list of servers.
- Select a server by clicking the Name of a server.
- Right-click the Incident title bar and select Configure > Related Lists.
- Ensure that Access Session > Configuration Item has been moved to the Selected column.
- Click the Save button.
- The BeyondTrust sessions list appears towards the bottom of the configuration item form once these steps are complete.
Configure Incident CMDB Jump Macros
BeyondTrust Jump technology can be used for unattended access to devices through the B Series Appliance.
- Select Incident or the desired task type.
- Click Open to see a list of open tasks.
- Select an incident by clicking the Incident Number.
- Populate the Configuration Item field by clicking the magnifying glass icon, and then selecting an item in the list.
- Once the Configuration Item is populated, click the Update button on the title bar. This takes you back to the list.
- Click the name of the task you just updated.
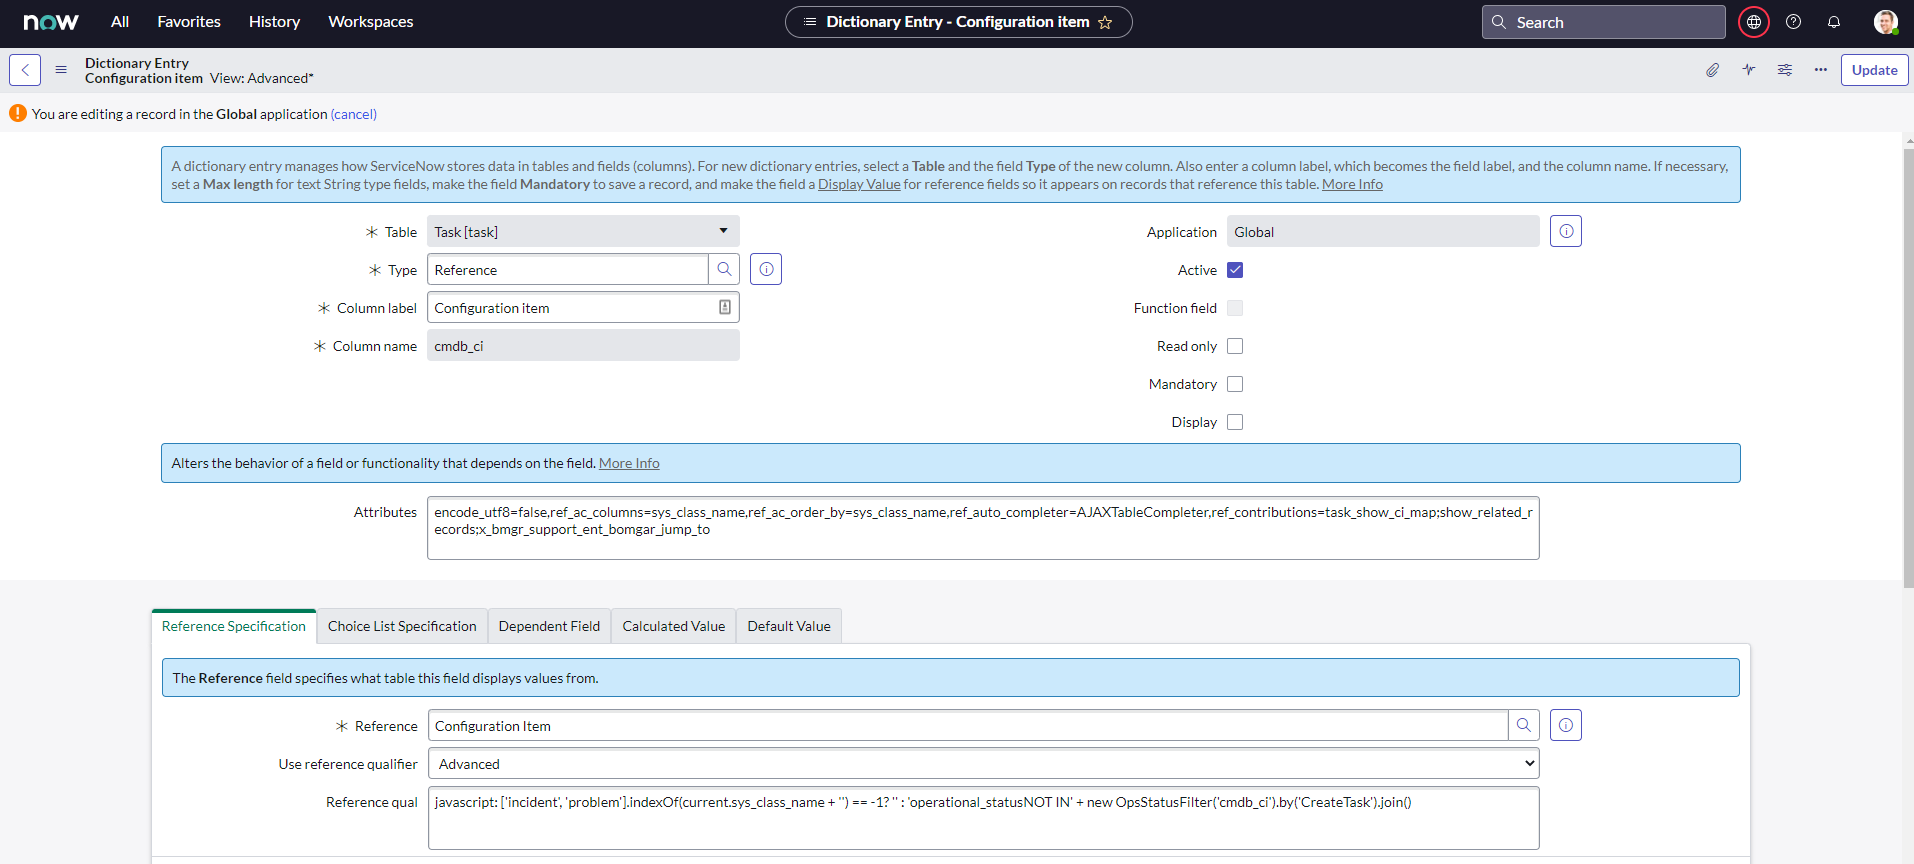
- Right-click the Configuration Item Label, and then click Configure Dictionary.
- Locate the Attributes field and take note of the part of the value that reads ref_contributions=task_show_ci_map;show_related_records.
- Add the Jump To value of x_bmgr_bomgar_pam_bomgar_pam_jump_to or x_bmgr_bomgar_pam_bomgar_pam_jump_to_web as a semicolon-separated item in ref_contributions (e.g., ref_contributions=x_bmgr_bomgar_pam_bomgar_pam_jump_to;task_show_ci;show_related_records).
- Click Update to save your changes.
Configure BeyondTrust Username and Authentication
- Log into your BeyondTrust /login interface with the same credentials as a ServiceNow user who is expected to be using Privileged Remote Access.
- Download and install a BeyondTrust access console from the /login > My Account tab.
Troubleshoot Login Failure
- Make sure that BeyondTrust and ServiceNow are checking credentials against the same LDAP server(s), if appropriate. Check the LDAP server in the BeyondTrust interface under /login > Users & Security > Security Providers.
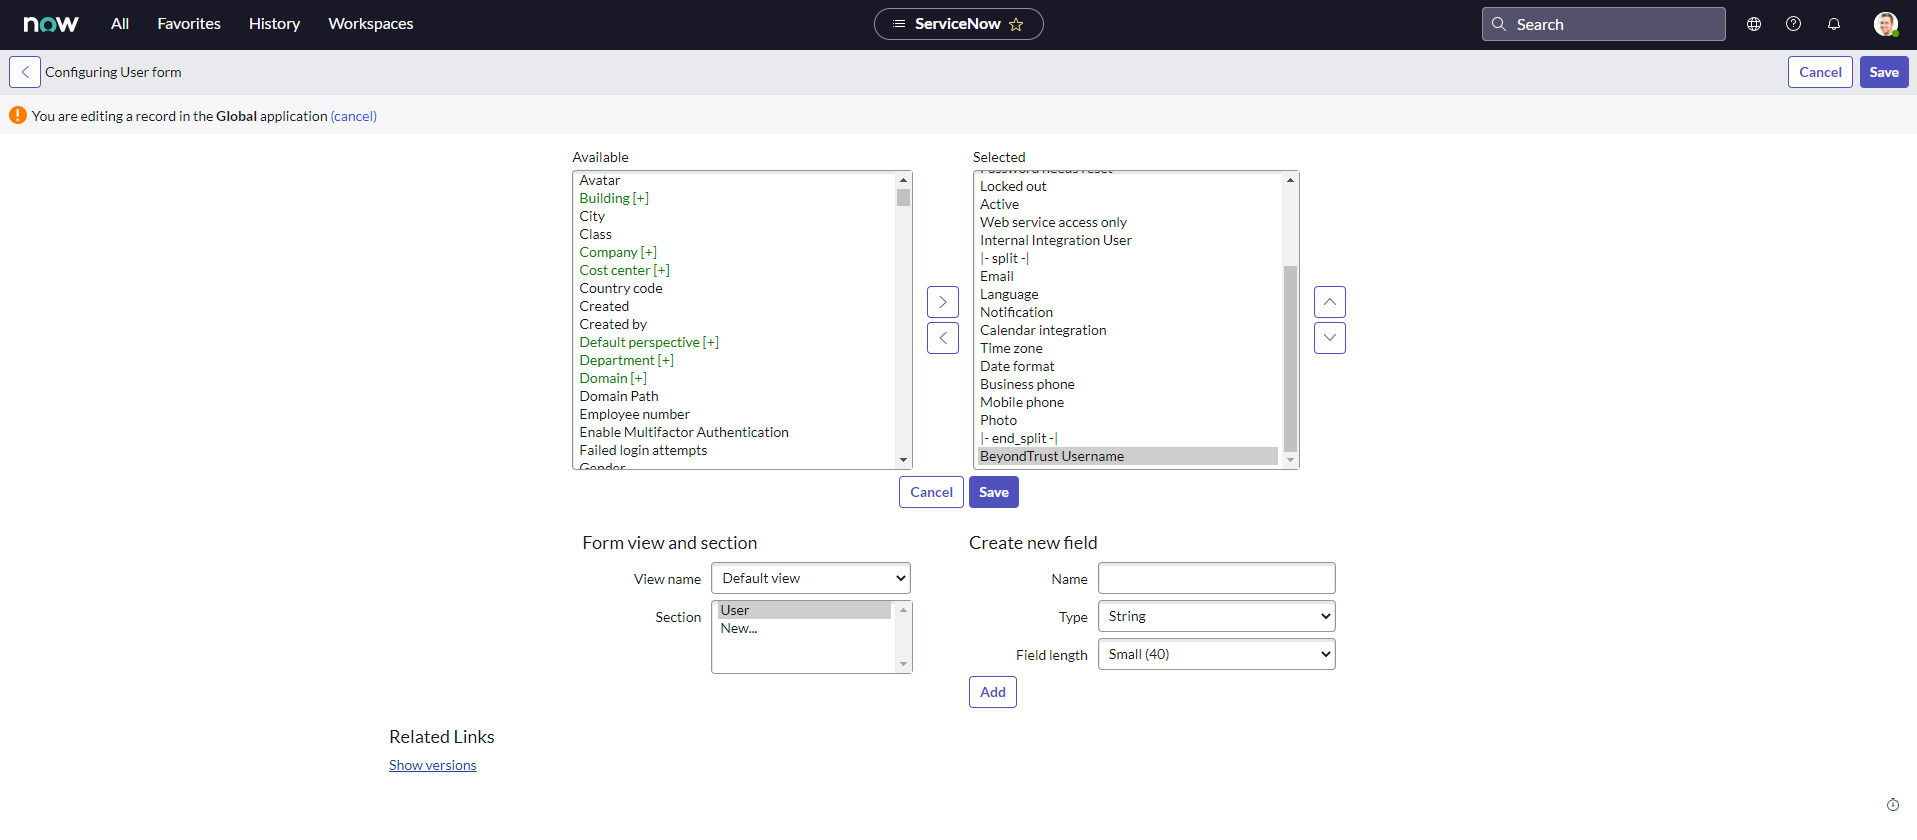
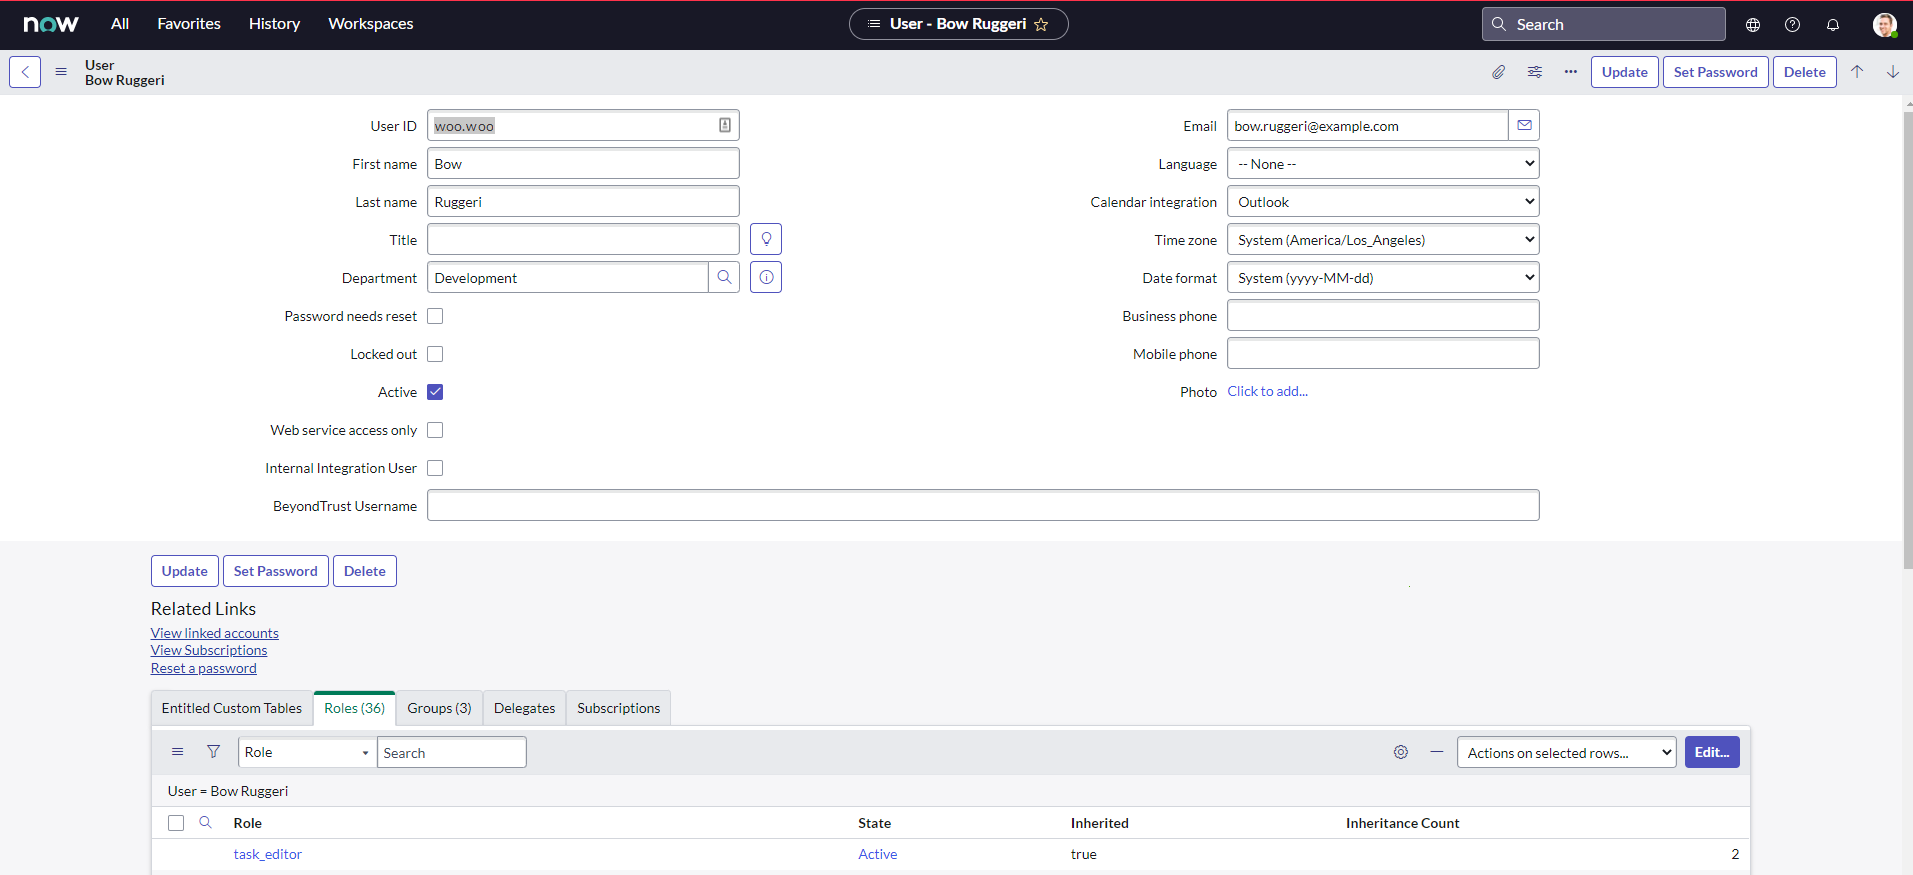
- If LDAP authentication is not being used, log in to ServiceNow. Select User Administration > Users, and then select the user to be used for testing and focus on the BeyondTrust Username field.
- If this field does not exist while viewing a user, hover over the icon next to User on the title bar, and then select Configure > Form Layout and move the BeyondTrust Username field from the Available list to the Selected list. Once done, enter the name of a known-working BeyondTrust user account in this field and save.
For more information on how to check the LDAP server for ServiceNow, please see LDAP Integration.
Assign Users Appropriate Roles
Give the appropriate roles to ITIL users who provide technical support using this integration, those who need to review session information, and those who will manage the app's configuration.
You must elevate the admin's role in order to make the following change.
- Select User Administration > Users.
- Select a user.
- Find the Roles tab and click the Edit button.
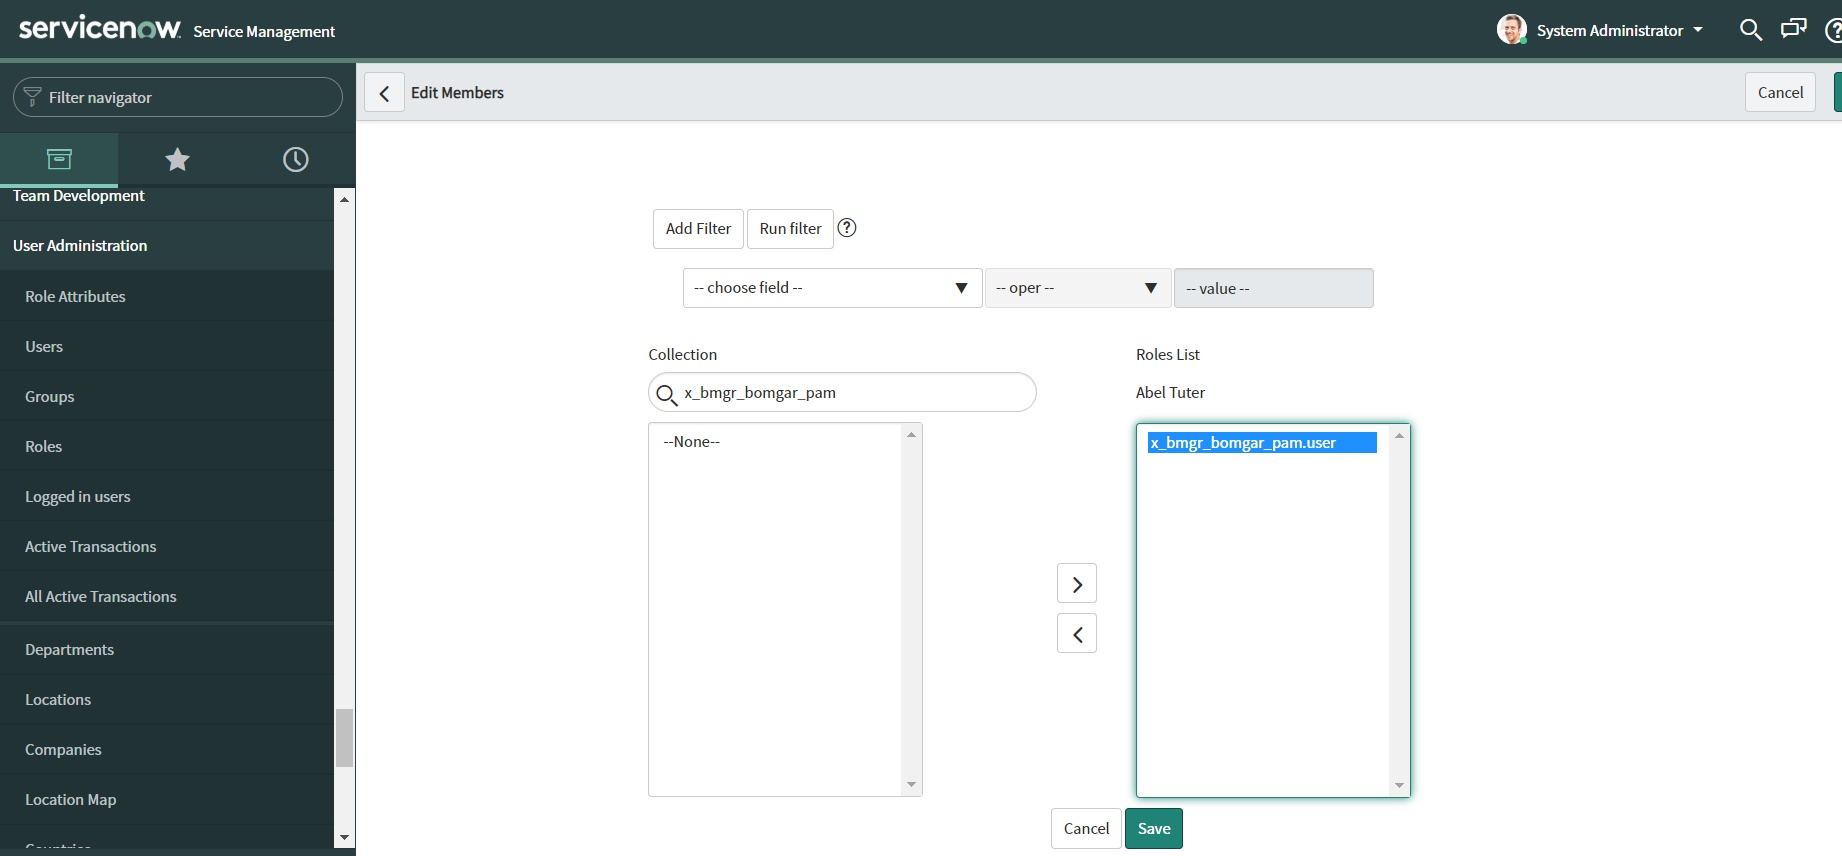
- Add the appropriate role or roles from the Collection list to the Roles list. The available roles are:
- x_bmgr_bomgar_pam.app_admin: Users assigned this role can view and manage the application's configuration.
- x_bmgr_bomgar_pam.data_viewer: Users assigned this role can view data created by the application (i.e., Access sessions and their ancillary records).
- x_bmgr_bomgar_pam.jump_user: Users assigned this role can leverage the application's UI actions and macros to initiate a BeyondTrust Privileged Remote Access session to an existing Jump Item either from a ticket with a Configuration Item or directly from the CMDB record.
- Click Save.
Deprecated User Role
The existing user role x_bmgr_bomgar_pam.user is deprecated and will be removed in a later version. Users with only this role are able to use the application and view data as before, but they are no longer able manage its configuration.
If you can no longer see and edit the app configuration, please assign the user role new x_bmgr_bomgar_pam.app_admin to users who require this access.
Transition all users to the new roles based on the access they require. There is no hierarchy to these roles. For example, a user with the role x_bmgr_bomgar_pam.app_admin can only manage configuration and cannot use the application's Jump To functionality or view session data without being assigned one of the other roles as well.
Use the ServiceNow MID Server Option
It is possible to avoid direct connection between ServiceNow and Privileged Remote Access by using a MID server for internal Privileged Remote Access deployments.
To configure the integration to use a MID server for API requests to a Privileged Remote Access site, specify the MID server to use on the individual outbound REST messages:
- In ServiceNow, navigate to System Web Services > Outbound > REST Message.
- Filter to show only messages for the BeyondTrust application being configured.
- Click the Name of one of the messages to edit its properties.
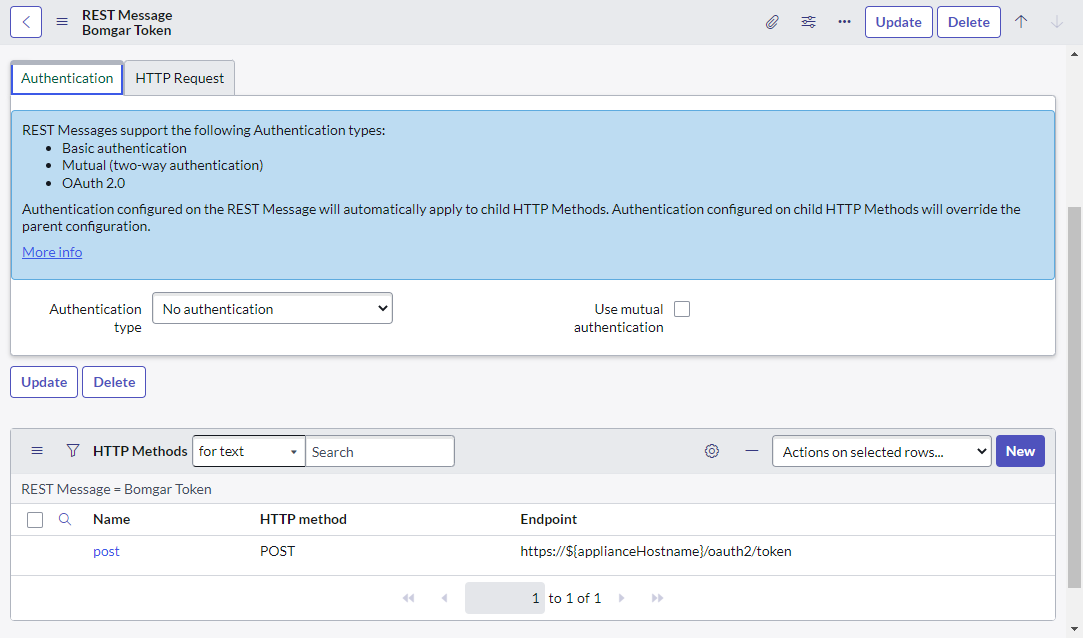
- In the HTTP Methods related list at the bottom, select the Name of the method (typically post).
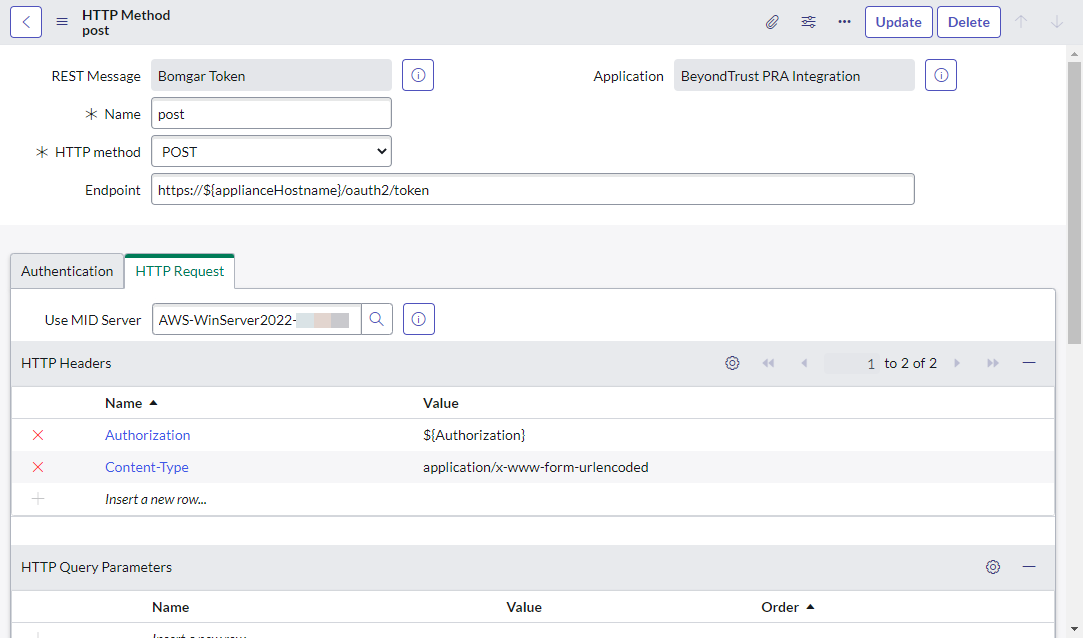
- On the resulting form, select the HTTP Request tab and select your MID server in the Use MID Server field.
- Click Update to save the changes.
Repeat these steps for each outbound REST message that is a part of the application.
For more information on MID Servers, please see ServiceNow MID Server.
Set Up Change Management Workflow
BeyondTrust change management workflow works out of the box with a default Servicenow configuration. The configuration can be customized, if necessary.
The Default Approval Processing list includes the checks that are made when a ticket approval request is processed in ServiceNow.
- Find the Ticket (aka Task): Searches for the task based on task number. If not found by number, searches by task sys_id. If the task is not found, a failure response is sent back to BeyondTrust.
- Match the Rep: Checks to make sure the rep username matches the task assigned_to field user's user_name (User Id) or BeyondTrust PRA username field. If the reps do not match, a failure response is sent back to BeyondTrust.
- Match the Computer Name: Ensures the task's cmdb_ci name matches the computer name being Jumped to in BeyondTrust. If the computer names do not match, a failure response is sent back to BeyondTrust.
- Ensure Task Approval: Ensures the task's approval field is approved. If the task is not approved, a failure response is sent back to BeyondTrust.
- Ensure Field State: Ensures the task's state field is not closed, cancelled, or resolved (value is less than 3). If the state is not less than 3, a failure response is sent back to BeyondTrust.
Override Change Management
Change Management Override allows you to change the Change Management Workflow type. For most applications, this should be changed to Change Request.
- Go to the Appliance screen and check the Override Change Management option.
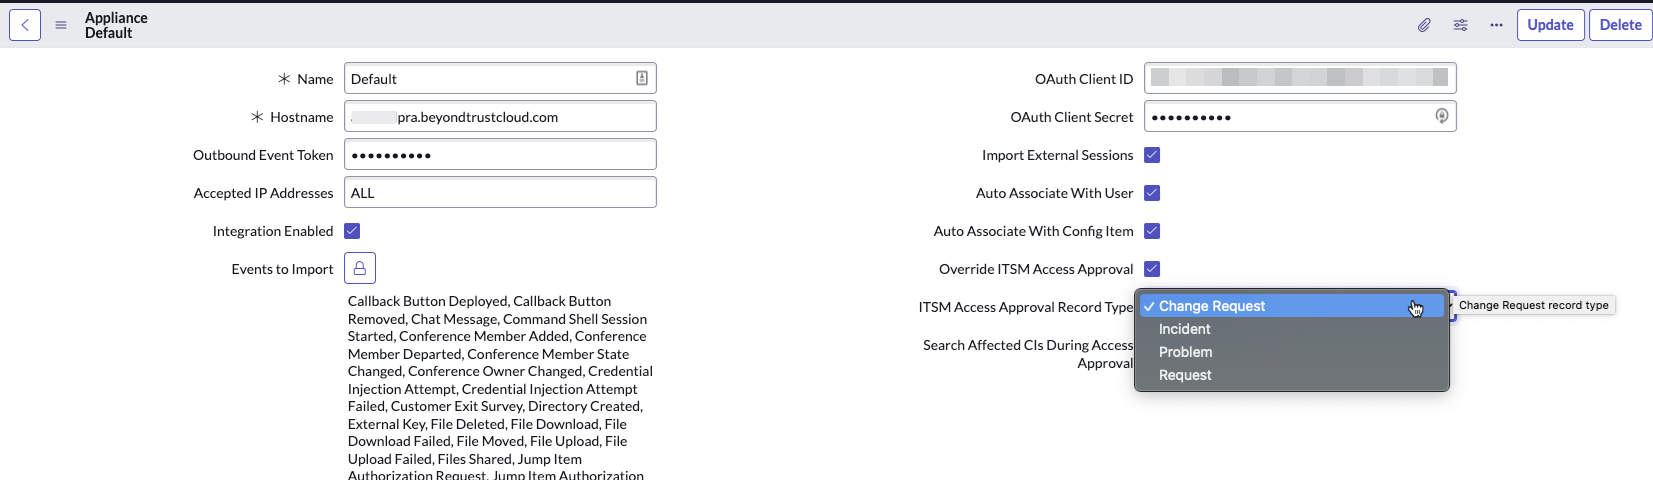
- For ITSM Access Approval Record Type, select Change Request.
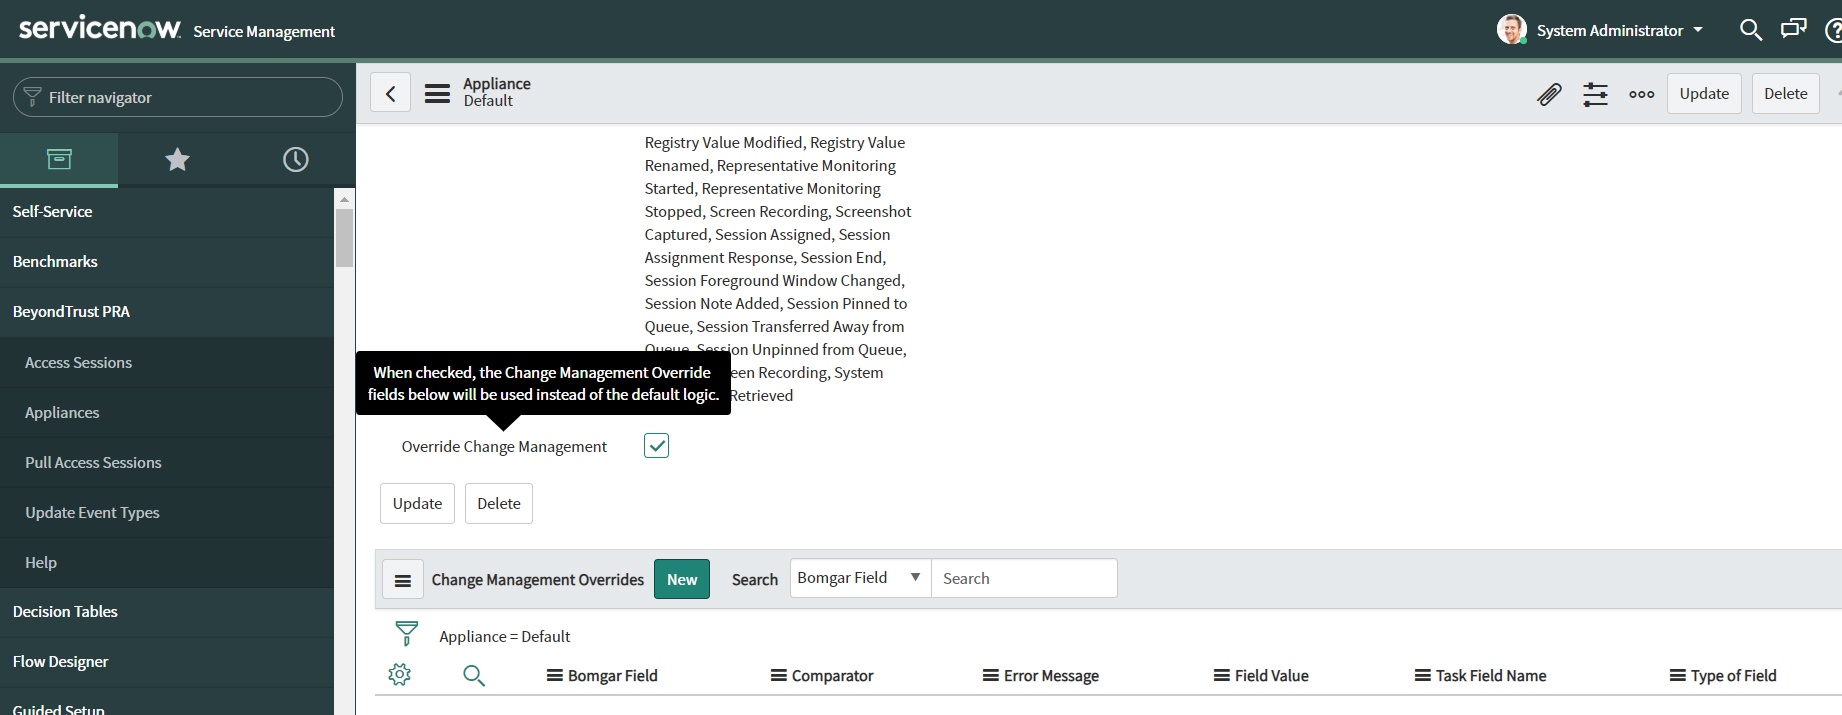
Privileged Remote Access Change Management Override provides an administrator a way to customize the Approval Process without the burden of manual coding.
- Go to the Appliance screen and check the Override Change Management option.
- Click on the New button next to the Change Management Overrides Table.
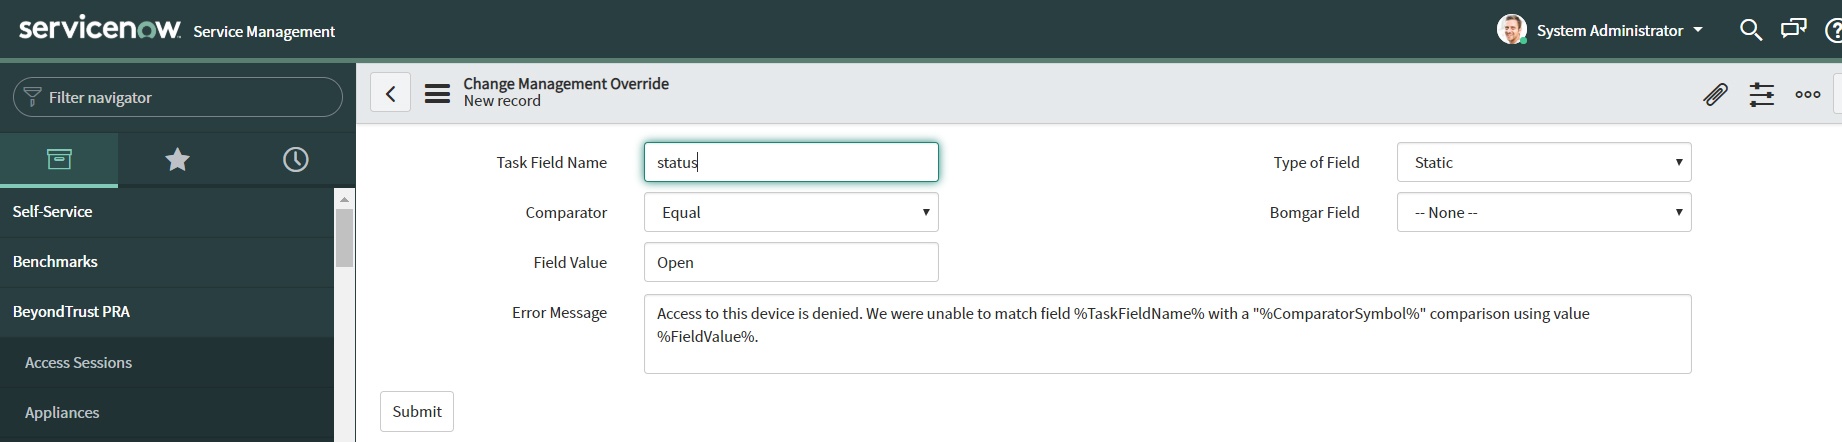
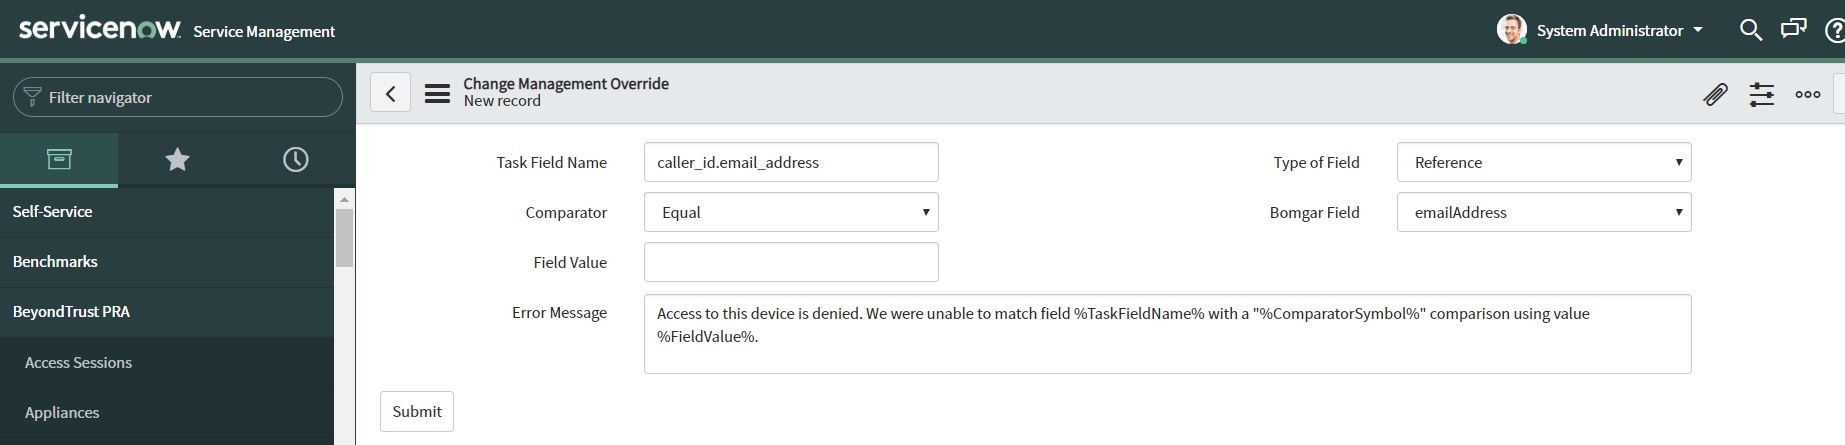
- The goal of this record is to compare a Task field value with data provided by the B Series Appliance or a value defined by the user. Here is brief description of all the information:
- Task Field Name: This is the name of the Field inside the ServiceNow Task Table. A comprehensive list of the important Task table fields can be found at Important Task Table Fields.
- Comparator: The kind of evaluation performed. It can be an Equal, Lesser than or Greater than comparison.
- Type of Field: If the Static option is selected, whatever value entered by the user in the Field Value is used. On the other hand, if the Reference option is marked, the value selected in the Bomgar Field dropdown is selected.
- Field Value: A hard-coded value entered by the user.
- Bomgar Field : A list of all the information sent by the B Series Appliance that the user can select.
- Error Message: In case that the comparison between the ServiceNow Task Field Value and the Field value, or Bomgar Field selected by the user is negative, the Error Message value is returned to the B Series Appliance along with a deny access to the Jump. There are 3 reserved words that can be used inside the Error Message that leverage the outcome result:
- %TaskFieldName%: The actual value returned by ServiceNow of the Task Field Name chosen.
- %ComparatorSymbol%: The symbol related to the option selected in the Comparator. Possible results are >, =, or <.
- %FieldValue%: The value used in the conditional logic, regardless of the option selected.