Configure BeyondTrust PRA for the ServiceNow Integration
You must purchase this integration separately from your BeyondTrust Privileged Remote Access solution. For more information, contact BeyondTrust's Sales team.
All the steps in this section take place in the BeyondTrust /login administrative interface. Access your BeyondTrust interface by going to the hostname of your B Series Appliance followed by /login (e.g., https://support.example.com/login).
Verify the API is Enabled
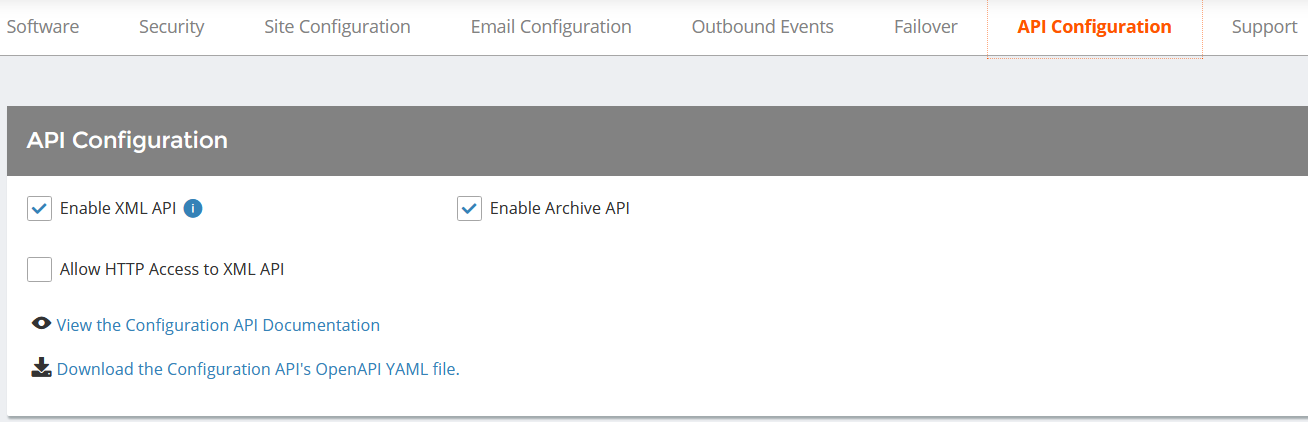
The BeyondTrust integration requires the BeyondTrust XML API to be enabled. This feature is used from within the integrating software to communicate with the BeyondTrust APIs.
In /login, navigate to Management > API Configuration and verify that Enable XML API is checked.
Create an OAuth API Account
The Delinea API account is used from within Delinea to make Remote Support Command API calls to Remote Support.
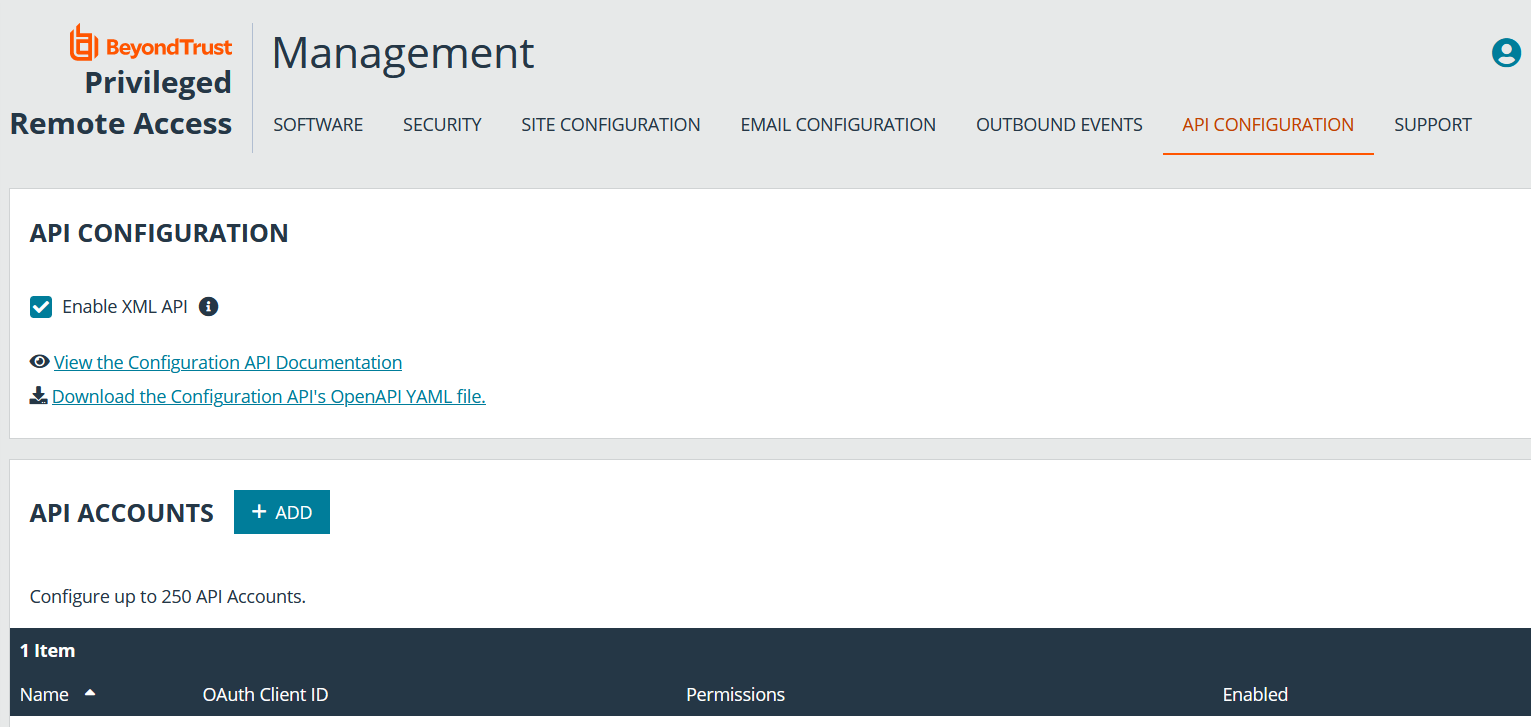
- In /login, navigate to Management > API Configuration.
- Click Add.

- Check Enabled.
- Enter a name for the account.
- OAuth Client ID and OAuth Client Secret is used during the OAuth configuration step in Delinea.
- Under Permissions, check the following:
- Command API: Full Access.
- Reporting API: Allow Access to Access Session Reports and Recordings, and Allow Access to License Usage Reportsee.
- Click Save at the top of the page to create the account.
Add Outbound Events
Outbound events are used to notify ServiceNow that a BeyondTrust Session has finished and is ready to be imported into ServiceNow.
- In /login, navigate to Management > Outbound Events.
- Click Add.
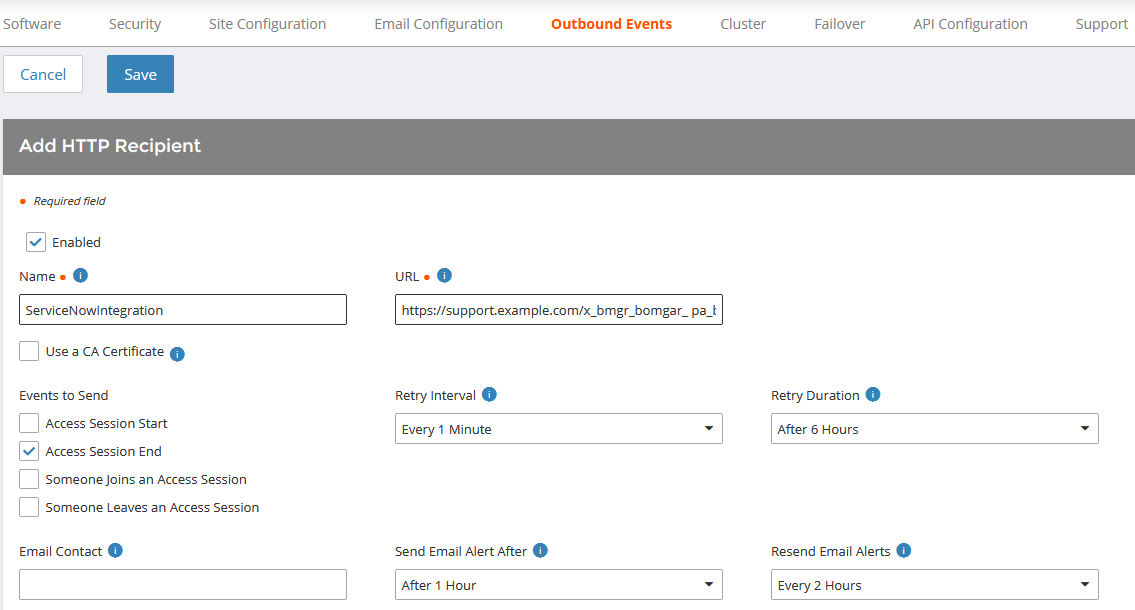
- Provide a name of ServiceNow Integration or something similar, depending on your ServiceNow instance.
- Set the URL to https://example.service-now.com/api/x_bmgr_bomgar_pam/outbound_event/session_end, where example.service-now.com is the ServiceNow instance name.
- If using an outbound event token for added security, append outbound_event_token=YOUR-TOKEN to the end of the URL, so that the entire URL resembles https://example.service-now.com/api/x_bmgr_bomgar_pam/outbound_event/session_end?outbound_event_token=YOUR-TOKEN. You must also store this token with the appliance configuration record in ServiceNow.
- For Events to Send, check Access Session End.
- Click Save.
Create Custom Fields
BeyondTrust custom fields are used to map ServiceNow Tasks (incidents, change requests, problem records, and service catalog requests) and Configuration Items to BeyondTrust access sessions.
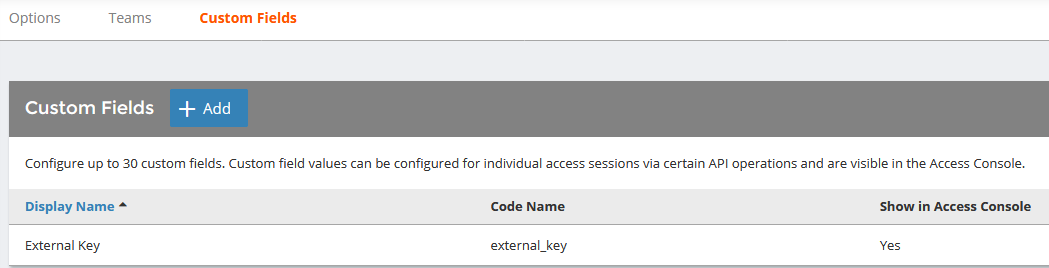
- In /login, navigate to Configuration > Custom Fields.
- Click Add.
- Enter the following values:
- Display Name: ServiceNow Task ID
- Code Name: snow_task_id
- Check the Show in Access Console option.
- Click Save to save the new field.
- Repeat the steps above for the following custom field values:
- Display Name: ServiceNow Configuration Item ID
- Code Name: snow_cmdb_ci_id
- Show in Access Console: checked
Set Up the Custom Link
BeyondTrust custom links can be configured to allow users to quickly access the ServiceNow incident that is associated with the session.
- In /login, navigate to Access Console > Custom Links.
- Click Add.
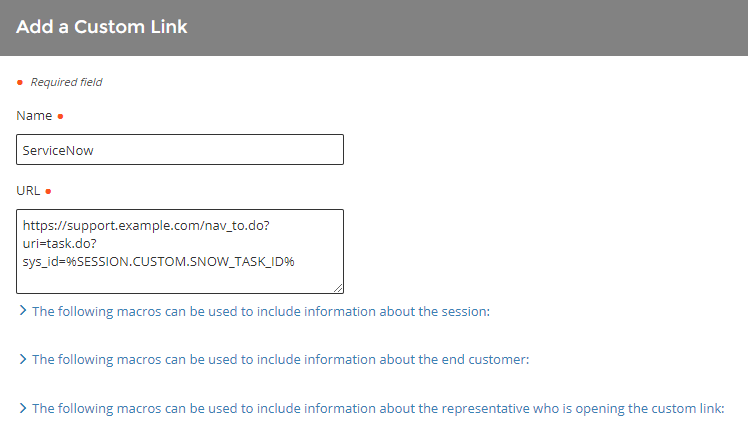
- Enter a name for the link, and then set the URL to https://example.service-now.com/nav_to.do?uri=task.do?sys_id=%SESSION.CUSTOM.SNOW_TASK_ID% where https://example.service-now.com is the ServiceNow instance name. If needed, you can use any of the available macros to customize the link according to your specifications.
- Click Save to save the new link.
Set Up Change Management Workflow
BeyondTrust change management workflow can be configured to require approval through an ITSM system before allowing access to BeyondTrust Jump Clients.
- In /login, navigate to Jump > Jump Policies.

- Under Ticket System, enter an appropriate Ticket System URL similar to https://example.service-now.com/api/x_bmgr_bomgar_pam/endpoint_approval.
- Upload the CA certificate from the ServiceNow instance.
- Enter the desired User Prompt. For example, with a change request workflow, enter ServiceNow ChangeID Required.
- Click Save.

- Next, under the Jump Policies section, click Add, or click Edit next to an existing Jump Policy.
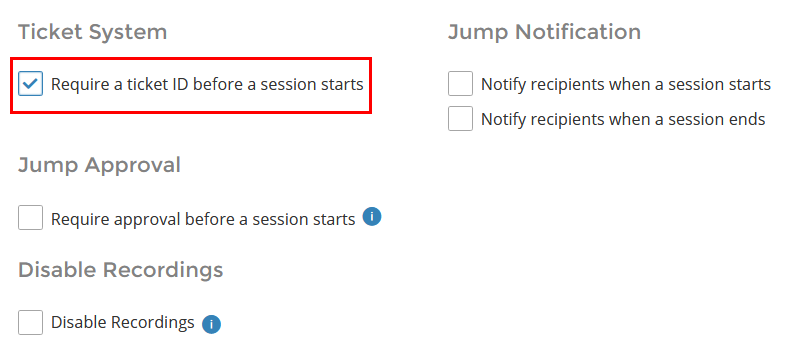
- Under Ticket System, check Require a ticket ID before a session starts.