Use a Protocol Tunnel Jump to Make a TCP Connection to a Remote System
Using a Protocol Tunnel Jump, make a connection from your system to an endpoint on a remote network. Because the connection occurs through a Jumpoint, the administrator can control which users have access, when they have access, and if the sessions are recorded.
Create a Protocol Tunnel Jump Shortcut
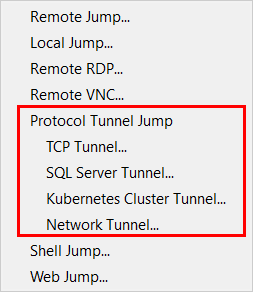
To create a Protocol Tunnel Jump Shortcut, click the Create button in the Jump interface. From the dropdown, under Protocol Tunnel Jump, select the desired type of Protocol Tunnel Jump:
- TCP Tunnel
- SQL Server Tunnel: This tunnel uses the Microsoft SQL Server Protocol as a database proxy, enabling credential injection for users and improved auditing. Authentication is supported using Windows authentication and SQL login.
- Kubernetes Cluster Tunnel: This tunnel uses the open source Kubernetes system, also known as K8s, to manage connections. To use this tunnel, the Jumpoint must be hosted on a Linux system. The necessary configuration file is created in a local cache, and deleted when the session is closed. Users are able to natively use the kubectl command line tool over this tunnel and have all commands and traffic fully proxied, logged, and auditable.
- Network Tunnel: This network layer tunnel enables port tunneling of any TCP and non-TCP protocol (e.g. UDP) traffic to a network. See Create Network Tunnel for conditions and restrictions.
Protocol Tunnel Jump shortcuts appear in the Jump interface along with Jump Clients and other types of Jump Item shortcuts.
Create TCP Tunnel

Enter a Name for the Jump Item. This name identifies the item in the session tabs. This string has a maximum of 128 characters.
From the Jumpoint dropdown, select the network that hosts the computer you wish to access. The access console remembers your Jumpoint choice the next time you create this type of Jump Item.
Enter the Hostname / IP of the system you wish to access.
Specify a Local Address. The default address is 127.0.0.1. If you need to connect to multiple systems on the same remote port at the same time, you can enable that connection by changing each Protocol Tunnel Jump Shortcut's address to a different address within the 127.x.x.x subrange.
In Local Port, specify the port that will listen on the user's local system. If you leave this as automatic, the access console allocates a free port.
In Remote Port, specify the port to connect to on the remote system. This is dictated by the type of server you are connecting to.
You can define multiple pairs of TCP Tunnels as necessary for your setup. Added tunnels can be removed but not edited.
Move Jump Items from one Jump Group to another using the Jump Group dropdown. The ability to move Jump Items to or from different Jump Groups depends upon your account permissions.
Further organize Jump Items by entering the name of a new or existing Tag. Even though the selected Jump Items are grouped together under the tag, they are still listed under the Jump Group in which each Jump Item is pinned. To move a Jump Item back into its top-level Jump Group, leave this field blank.
Jump Items include a Comments field for a name or description, which makes sorting, searching, and identifying Jump Items faster and easier.
To set when users are allowed to access this Jump Item, if a notification of access should be sent, or if permission or a ticket ID from your external ticketing system is required to use this Jump Item, choose a Jump Policy. These policies are configured by your administrator in the /login interface.
Choose a Session Policy to assign to this Jump Item. The session policy assigned to this Jump Item has the highest priority when setting session permissions. The ability to set a session policy depends on your account permissions.
Create SQL Server Tunnel
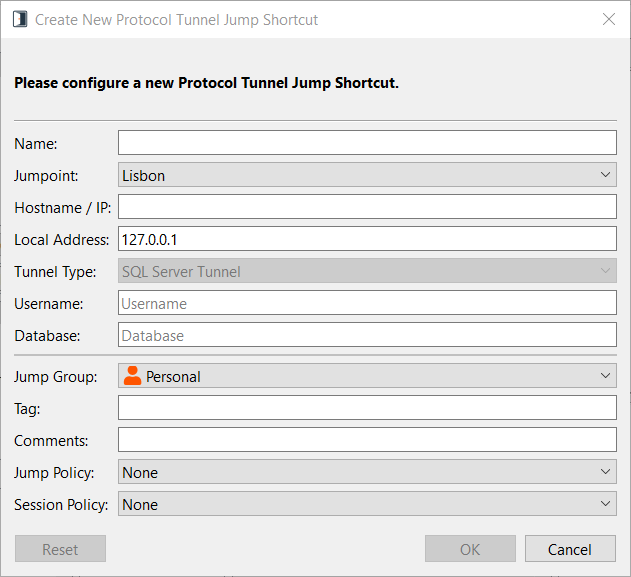
Enter a Name for the Jump Item. This name identifies the item in the session tabs. This string has a maximum of 128 characters.
From the Jumpoint dropdown, select the network that hosts the computer you wish to access. The access console remembers your Jumpoint choice the next time you create this type of Jump Item.
Enter the Hostname / IP of the system you wish to access.
Specify a Local Address. The default address is 127.0.0.1. If you need to connect to multiple systems on the same remote port at the same time, you can enable that connection by changing each Protocol Tunnel Jump Shortcut's address to a different address within the 127.x.x.x subrange.
Enter the applicable Username and Database.
Move Jump Items from one Jump Group to another using the Jump Group dropdown. The ability to move Jump Items to or from different Jump Groups depends upon your account permissions.
Further organize Jump Items by entering the name of a new or existing Tag. Even though the selected Jump Items are grouped together under the tag, they are still listed under the Jump Group in which each Jump Item is pinned. To move a Jump Item back into its top-level Jump Group, leave this field blank.
Jump Items include a Comments field for a name or description, which makes sorting, searching, and identifying Jump Items faster and easier.
To set when users are allowed to access this Jump Item, if a notification of access should be sent, or if permission or a ticket ID from your external ticketing system is required to use this Jump Item, choose a Jump Policy. These policies are configured by your administrator in the /login interface.
Choose a Session Policy to assign to this Jump Item. The session policy assigned to this Jump Item has the highest priority when setting session permissions. The ability to set a session policy depends on your account permissions.
Create Kubernetes Cluster Tunnel
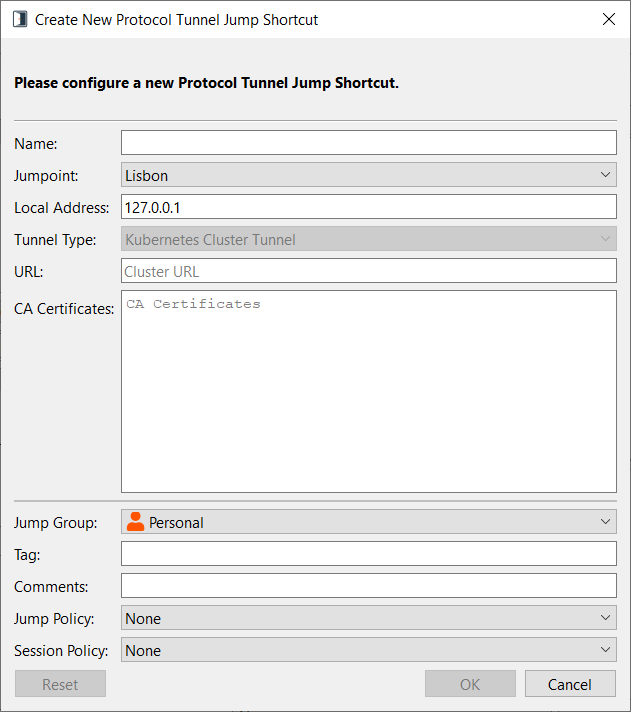
Enter a Name for the Jump Item. This name identifies the item in the session tabs. This string has a maximum of 128 characters.
From the Jumpoint dropdown, select the network that hosts the computer you wish to access. The access console remembers your Jumpoint choice the next time you create this type of Jump Item.
Specify a Local Address. The default address is 127.0.0.1. If you need to connect to multiple systems on the same remote port at the same time, you can enable that connection by changing each Protocol Tunnel Jump Shortcut's address to a different address within the 127.x.x.x subrange.
Enter the base URL for the Kubernetes cluster, beginning with https://
For the CA Certificates, copy and paste a PEM-formatted certificate or chain of certificates used to validate the cluster URL. When using a chain of certificates, the typical order is domain, intermediate, and root.
You may be able to obtain your certificate with the following command: kubectl get configmap kube-root-ca.crt -o jsonpath="{['data']['ca\.crt']}"
Move Jump Items from one Jump Group to another using the Jump Group dropdown. The ability to move Jump Items to or from different Jump Groups depends upon your account permissions.
Further organize Jump Items by entering the name of a new or existing Tag. Even though the selected Jump Items are grouped together under the tag, they are still listed under the Jump Group in which each Jump Item is pinned. To move a Jump Item back into its top-level Jump Group, leave this field blank.
Jump Items include a Comments field for a name or description, which makes sorting, searching, and identifying Jump Items faster and easier.
To set when users are allowed to access this Jump Item, if a notification of access should be sent, or if permission or a ticket ID from your external ticketing system is required to use this Jump Item, choose a Jump Policy. These policies are configured by your administrator in the /login interface.
Choose a Session Policy to assign to this Jump Item. The session policy assigned to this Jump Item has the highest priority when setting session permissions. The ability to set a session policy depends on your account permissions.
Create Network Tunnel
Accessing a Network Tunnel Jump Item with Privileged Remote Access requires the Access Console Network Tunneling Service to be installed on the user's machine. It can be installed via a software deployment tool or manually from the /login > Consoles & Downloads > Drivers page.
To use this tunnel, both the Privileged Remote Accessaccess console and Jumpoint must be running on Windows systems.
DHCP must be enabled on the endpoint network.
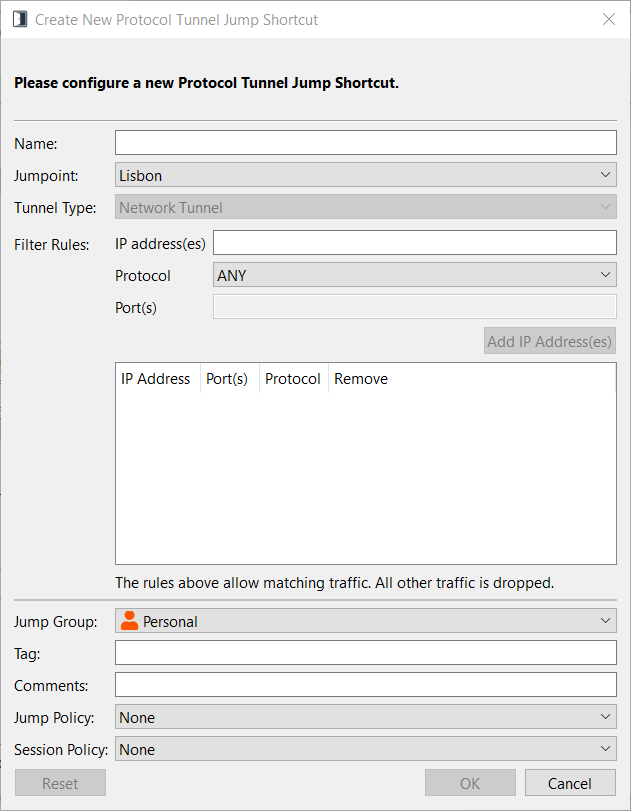
Enter a Name for the Jump Item. This name identifies the item in the session tabs. This string has a maximum of 128 characters.
From the Jumpoint dropdown, select the network that hosts the computer you wish to access. The access console remembers your Jumpoint choice the next time you create this type of Jump Item.
Create a filter using the Filter Rules. You must create at least one filter, and the filter must specify at least one IP address.
- IP Address: Enter an IP address, a list of addresses separated by commas, or a range of addresses separate by a dash. You cannot enter a list and a range. CIDR notation can be used. Only IPv4 is supported.
- If desired, select a Protocol. Most commonly used protocols are listed first, in alphabetical order, followed by a full list of protocols in alphabetical order.
For information on protocols, see IANA Protocol Numbers.
- If desired, and if applicable to a selected protocol, enter a port, a list of ports separated by a comma, or a range of ports.
You can define multiple filters. From the list of added filters, filters can be removed but not edited.
Move Jump Items from one Jump Group to another using the Jump Group dropdown. The ability to move Jump Items to or from different Jump Groups depends upon your account permissions.
Further organize Jump Items by entering the name of a new or existing Tag. Even though the selected Jump Items are grouped together under the tag, they are still listed under the Jump Group in which each Jump Item is pinned. To move a Jump Item back into its top-level Jump Group, leave this field blank.
Jump Items include a Comments field for a name or description, which makes sorting, searching, and identifying Jump Items faster and easier.
To set when users are allowed to access this Jump Item, if a notification of access should be sent, or if permission or a ticket ID from your external ticketing system is required to use this Jump Item, choose a Jump Policy. These policies are configured by your administrator in the /login interface.
Choose a Session Policy to assign to this Jump Item. The session policy assigned to this Jump Item has the highest priority when setting session permissions. The ability to set a session policy depends on your account permissions.
Use Network Tunnels with TCP/UDP Protocol Filters
If configuring Network Tunnels specifically for filtering TCP traffic, you must account for the ephemeral port that TCP establishes during the connection process in the Network Tunnel filters you create. The TCP ephemeral port range is configurable at the operating system level, but its default varies by operating system. The recommended approach is to not configure any port range filters in combination with TCP protocol filters. As an alternative, you can specify a range of ports that the ephemeral port will most likely be established on (e.g. 1024-65535), in addition to the target TCP port.
If configuring Network Tunnels specifically for filtering UDP traffic, we also recommend not configuring any port range filters in combination unless absolutely necessary and the port ranges known. Some processes do not bind to specific UDP source ports, leaving this up to the operating system, making it difficult to predict which port ranges will be necessary to enable in the filter to allow UDP traffic as expected.
Use a Protocol Tunnel Jump Shortcut
To use a Protocol Tunnel Jump shortcut to start a session, simply select the shortcut from the Jump interface and click the Jump button.

A session appears in your access console. Click the Protocol Tunneling button to establish the connection.
If screen recording is enabled, a prompt appears, informing you that your desktop will be recorded. Click OK to continue. If you click Cancel, the Protocol Tunnel will not be created.
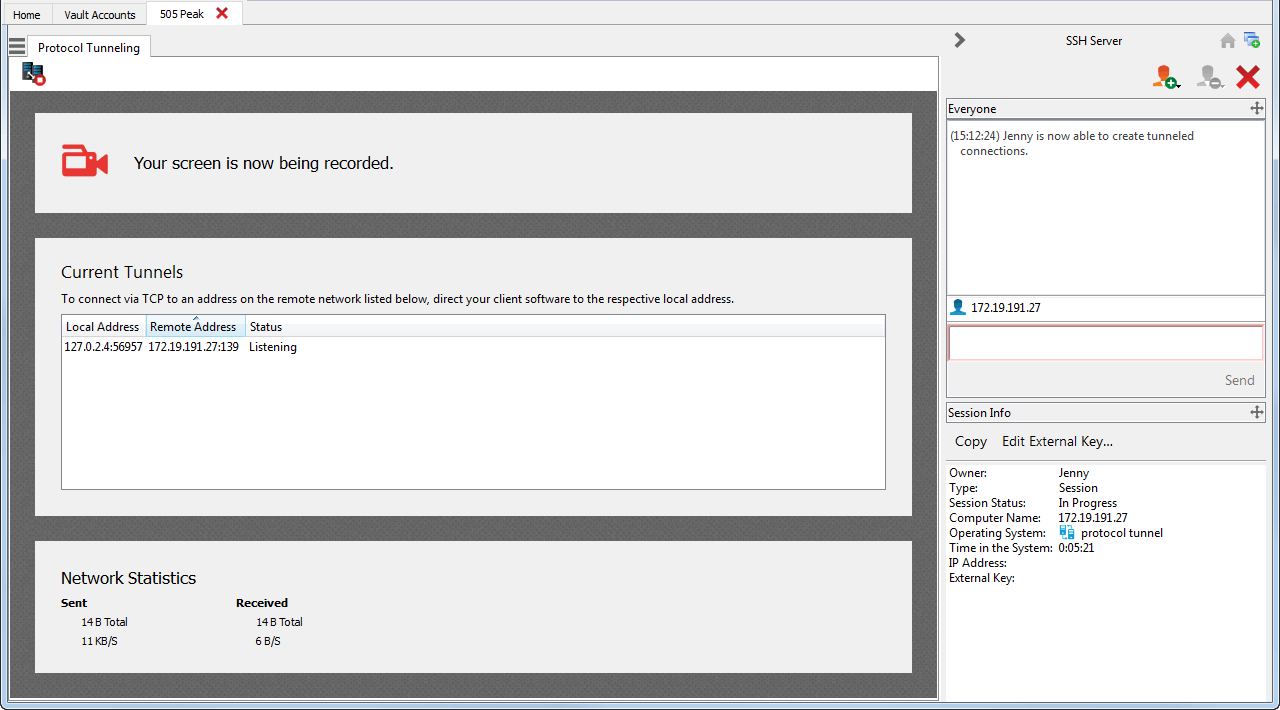
If screen recording is enabled, an indicator appears at the top of your session screen.
The Current Tunnels section displays current connections and their statuses. You also can view brief Network Statistics.
You can now open a third-party client to perform tasks on the remote system. Use the ports indicated to connect through the Jumpoint.
Stipulations to Correct Functioning
The Protocol Tunneling feature tunnels network traffic in a way that places some restrictions on how communication must occur between the user's system and the endpoint.
TCP and SQL Server Tunnel Restricitons
- All traffic must be TCP.
- No more than 256 simultaneous connections can be handled.
- All TCP connections must originate from the endpoint and must be accepted by the listening user's system. The application's protocol cannot require that the user's system make a separate connection back to the endpoint.
- Any TCP connections that the endpoint is to make back to the user's system must be made over tunnels already defined within the Protocol Tunnel Jump Item properties.
- Operating systems typically disallow non-elevated processes from listening on ports less than 1024. Therefore, the local port must generally be greater than 1024. The endpoint software connects to the server by connecting to the local port on which the access console (a non-elevated process) is listening.
- The endpoint software cannot make connections to any system on the remote network other than the one specified in the Protocol Tunnel Jump Item properties.
- The protocol must be agnostic toward the hostname that the endpoint used to connect to the server. Otherwise, other means must be made to satisfy the protocol's requirements, such as mapping a hostname to 127.0.0.1 in the hosts file or applying special configuration to the endpoint client.
- If the tunnel definition has a local port that is different than the remote port (namely, when the local port must be greater than 1024 because the server's port is less than 1024), the protocol must be agnostic toward the port that the endpoint client used to connect to the server.
- Any protocol which goes beyond the case of making a single TCP connection from the endpoint client to the user's system requires the administrator's understanding their specific protocol and the stipulations listed above.
Kubernetes Tunnel Restrictions
- No more than 256 simultaneous connections can be handled.
- All connections must originate from the endpoint and must be accepted by the listening user's system. The application's protocol cannot require that the user's system make a separate connection back to the endpoint.