Post Installation or Upgrade Steps
After the web application and web service are installed, there may be additional steps to take depending on the options enabled or desired. Additional actions may be required for the following scenarios:
- Use of Integrated Windows Authentication for web application access
- Required use of SSL
- Use of IIS redirects
- Use of user certificates, required for web application access
- Use of File Store
CORS Support
If the web service and web app have different host systems, and if the systems are accessed through different URLs (specifically the protocol, server name, or port), your web browser will block access to the web service, causing processes to malfunction.
To resolve this, enable cross-origin resource sharing (CORS). After installing the web service, open its web.config file (typically found at C:\Program Files (x86)\Lieberman\Roulette\ERPMWebService\web.config), and set EnableCORS to true.
CORSDomain is used to control the source domain allowed for CORS support. The initial value is set to an asterisk (*), which means the web service will allow references from any web server. To limit communication to a particular domain, change * to domain.name. For example:
<add key="CORSDomain" value="lsds.int" />
The above example will set Access-Control-Allow-Origin to lsds.int, and requests from servers in other domains will not be allowed.
Only one CORSDomain value can be specified at a time.
Additional configurations may be required in your specific browser and may not work in all configurations (non-Microsoft browsers especially).
About CORS
CORS is defined in RFC6454. This specification defines that a resource is considered to have the same origin if it uses the same scheme (protocol), host, and port.
If your web application and web service are installed on the same host, both accessed by HTTPS, and both running on the same default port (443), then they are considered to be of the same origin, so your browser will not block communication to either component. If any of those elements are different, the browser will by default block communication to the web service via the web application, which will prevent many operations from working, such as password retrieval through the web application. Controls for browser behavior surrounding CORS vary by browser.
For more information, please see your browser's specific documentation on enabling CORS support.
SSL
When installing to a virtual directory (or upgrading an existing installation), the virtual directory will inherit the settings of the parent web site. That means if the parent web site has certain settings, the virtual directory will automatically inherit those settings. Thus, if the parent web site is not configured to require SSL, then your virtual directory will not be configured to require SSL.
To require SSL on your virtual directory, assuming your parent web site already has a proper SSL certificate and binding, follow these steps:
- On the host server, open Internet Information Services (IIS) Manager.
- Expand your server node, then Sites, and then your web site.
- Select your virtual directory. The default for the web app is PWCWeb, and the default for the web service is ERPMWebService.
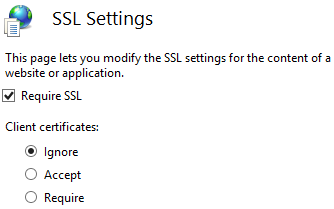
- From the center pane, open SSL Settings.
- Check the Require SSL box,
- Click Apply.
User Certificates
When installing to a virtual directory (or upgrading an existing installation), the virtual directory inherits the settings of the parent web site. That means if the parent web site has certain settings, the virtual directory automatically inherits those settings. Thus, if the parent web site is not configured to require user certificates, then your virtual directory will not be configured to require user certificates.
To require user certificates on your virtual directory, assuming your parent web site already has a proper SSL certificate and binding and user certificates are properly configured, follow these steps:
- On the host server, open Internet Information Services (IIS) Manager.
- Expand your server node, then Sites, and then your web site.
- Select your virtual directory. The default for the web app is PWCWeb, and the default for the web service is ERPMWebService.
- From the center pane, open SSL Settings.
- Check the Require SSL box,
- Under Client Certificates, select one of the following options:
- Accept: Allows users to pass a user certificate but will also allow users who do not have a user certificate. Select this option if some users will require certificates but you are unsure if ALL users will be using certificates.
- Require: All users accessing this site must supply a valid user certificate.
- Click Apply.
URL Redirects
URL redirects are not configured by default in IIS. In fact, they are not even available in a default installation of IIS and must be enabled. URL redirects are typically used so that when a user connects to a particular address, such as a root web site using HTTP, they may be redirected to the proper virtual directory with HTTPS.
When installing to a virtual directory (or upgrading an existing installation), the virtual directory inherits the settings of the parent web site. That means if the parent web site has certain settings, the virtual directory automatically inherits those settings. Thus, if the parent web site is configured with a redirect, the virtual directory is configured with a redirect. In this particular case, this can cause a redirect loop which causes the user to never be able to connect to the web application or web service. In short, the redirect needs to be removed from the virtual directory.
Integrated Windows Authentication
When installing to a virtual directory or upgrading an existing installation, the virtual directory inherits the settings of the parent web site. That means if the parent web site has certain settings, the virtual directory automatically inherits those settings. Thus, if the parent web site is not configured to use Integrated Windows Authentication, or is mis-configured by also enabling another form of authentication, your virtual directory inherits the same incorrect settings.
To require Integrated Windows Authentication on your virtual directory, assuming the IIS module for Integrated Windows Authentication is already installed, follow these steps:
- On the host server, open Internet Information Services (IIS) Manager.
- Expand your server node, then Sites, and then your web site.
- Select your virtual directory. The default for the web app is PWCWeb, and the default for the web service is ERPMWebService.
- From the center pane, select Authentication.
- Right-click on Windows Authentication and select Enable (note that the status column changes to Enabled).
- If any other forms of authentication are enabled, right-click on those methods and disable them.
Next, your browsers may require additional configuration.
Internet Explorer
For Internet Explorer (IE) to willingly use Integrated Windows Authentication, the URL connected to must be seen as being part of the local intranet rather than the internet or trusted network. IE will only automatically treat locations entered with their short name (as opposed to a fully qualified domain name (FQDN)) as being in the intranet zone. If you access the web application and web service using their short names, you should be able to connect without error, SSL certificates permitting. If you access the web application and web service using an FQDN, IE will not treat these URLS as intranet zone items, and Integrated Windows Authentication will fail.
To rectify this when using FQDNs, you may either have every user add the web application and web service FQDN into the intranet zone in IE, or you may use group policy to push the proper settings. To configure group policy, configure the following group policy to add the FQDN (wildcards allowed) as a trusted site:
- For Kerberos authentication: network.negotiate-auth.trusted-uris
- Define if Kerberos ticket passing is required: network.negotiate.auth.delegation-uris
- Define if NTLM authentication is allowed: network.automatic-ntlm-auth.trusted-uris
In each policy, define the domain name. If your domain name were example.int, you would enter .example.int for the Kerberos exchange (notice the leading dot).
Firefox may not function properly when working with cross-origin requests (CORS), in which the web service is located on a machine separate from the web application and called by a different URL when using Integrated Windows Authentication. These settings have also been noted to be lost between Firefox upgrades.
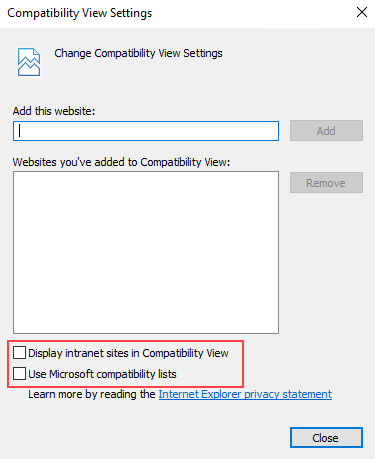
If the login page fails to display, open Compatibility View Settings in IE and uncheck both check boxes.
Chrome
Recent versions of Chrome will support Integrated Windows Authentication when run from a Windows host without further configuration required.
Chrome may still not work properly when working with cross-origin requests (CORS) where the web service is located on a machine separate from the web application and called by a different URL when using Integrated Windows Authentication.
For more information on additional settings, please consult your Google Chrome documentation.