Use Smart Rules to Assign Policy
After you add and upload a policy to BeyondInsight from the Policy Editor (if you are using the MMC Policy Editor), log in to your BeyondInsight instance to create Smart Rules to assign policies for assets and users.
If BeyondInsight and Endpoint Privilege Management
Create a Smart Rule to Assign Policy to Assets
- From the left menu in your BeyondInsight instance, click Smart Rules.
- Click Create Smart Rule.

- From the Category dropdown, select Assets and Devices.
- Type a name and description for the Smart Rule.
- In the Selection Criteria section, design a query to create a list of assets you want to assign policy to.
For this example, we can narrow down the results of our query to locate our test system, NN-1K12RBR. Choose to match ALL criteria and select Asset fields > Asset Name > contains > NN-1K12RBR.
- From the Actions dropdown, select Deploy Endpoint Privilege Management Policy.
- Click Select Policies for Deployment.
- The Endpoint Endpoint Privilege Management policies you uploaded from Endpoint Privilege Management
- Click Create Smart Rule.
For more information about creating and organizing Smart Rules, see Use Smart Rules to Organize Assets in the BeyondInsight User Guide.
Create a Smart Rule to Assign Policy to Users
- From the left menu in your BeyondInsight instance, click Smart Rules.
- Select Policy User from the dropdown.
- Click Create Smart Rule +.
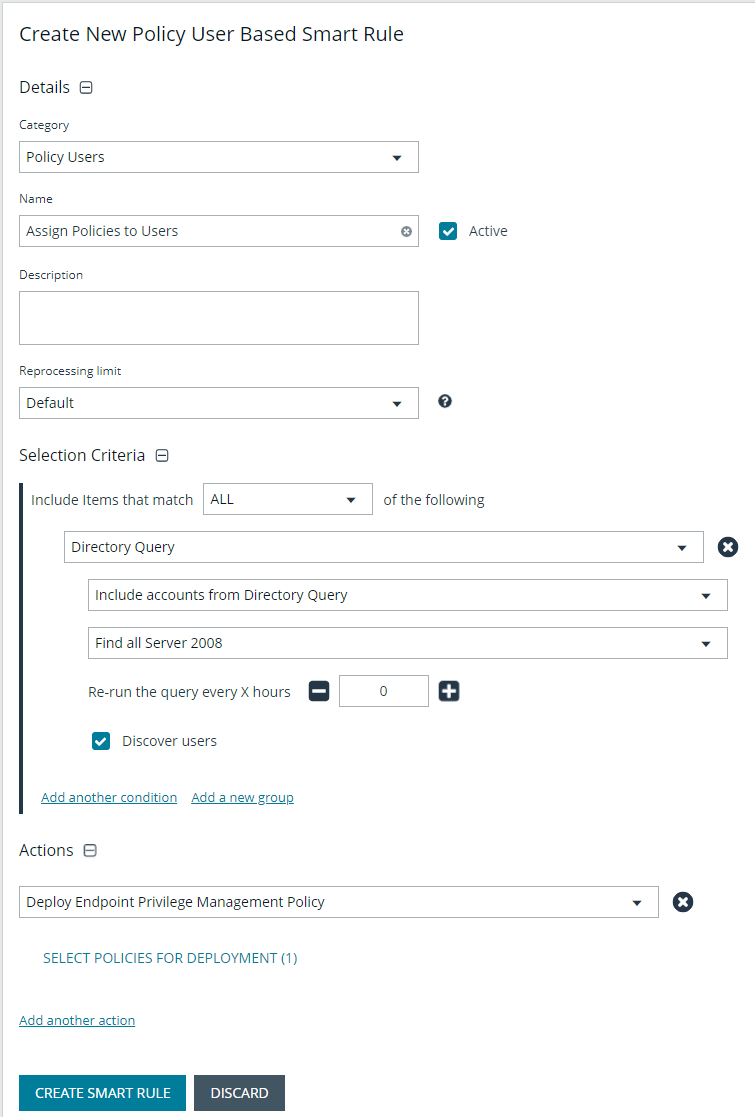
- From the Category dropdown, select Policy Users.
- Type a name and description for the Smart Rule.
- In the Selection Criteria section, design a directory query to create a list of users you want to assign policy to.
- From the Actions dropdown, select Deploy Endpoint Privilege Management Policy.
- Click Select Policies for Deployments.
- The Endpoint Endpoint Privilege Management policies you uploaded from Endpoint Privilege Management
- Click Create Smart Rule.
For more information about managing policies for EPM, see Manage EndPoint Endpoint Privilege Management Policies in the BeyondInsight User Guide.
Grant Users Permissions to Log in to the Policy Editor
If you want to grant additional users access to log in to the Policy Editor, read and write access must be included on the Endpoint Privilege Management
- From the homepage in your BeyondInsight instance, click Configuration.
- Under Role Based Access, select User Management.
- Locate the group you want to edit and click the menu to the far right.
- Select View Group Details.
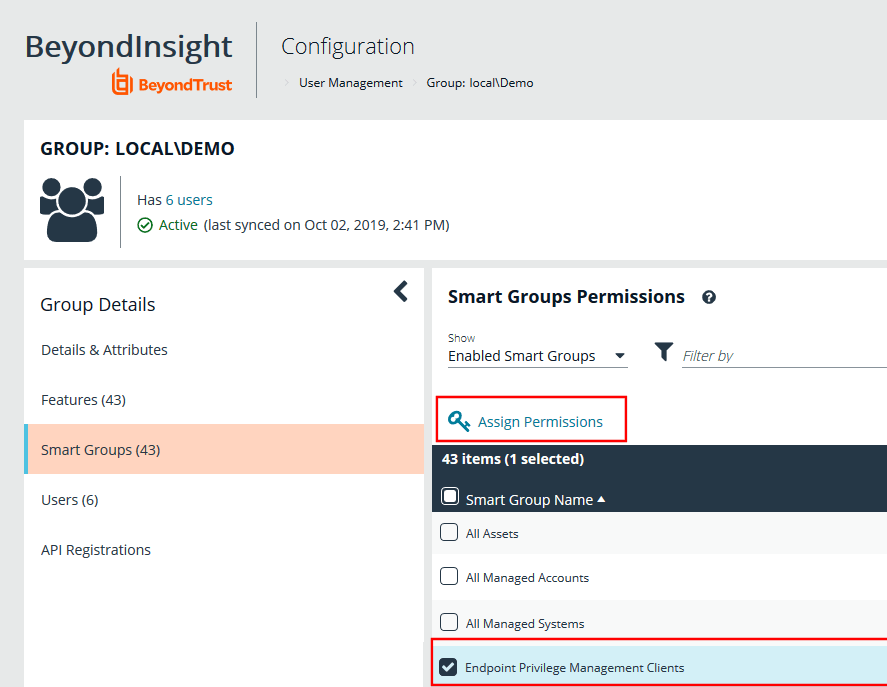
- In the Group Details pane, click Smart Groups.
- In the Smart Groups Permissions pane, select the appropriate Smart Group.
- Click Assign Permissions above the grid.
- Select Assign Permissions Full Control.