Configure ServiceNow Scan Target Collector
To configure the ServiceNow Scan Target Collector, you must do the following:
- Create a connection to your ServiceNow instance.
- Create a Smart Group with parameters configured to include the assets (host and IP address) to import from ServiceNow. After the Smart Rule is created, the data in the rule is refreshed and exported based on the Smart Rule Action expiration period, which is every hour by default.
BeyondInsight supports only ServiceNow Cloud Solutions.
Create ServiceNow Scan Target Collector
After the connector is tested and saved, each scheduled run retrieves ServiceNow data from the defined table that has an entry in one of the defined fields (valid IP address or DNS defined).
There might be a large number of records to import from ServiceNow. You can change the default value in the RemManagerSvc.ece.config file. For more information, please see Change the Batch Size Limit for Import File.
After the data is retrieved, the data is stored in the BeyondInsight database.
- In BeyondInsight, go to Configuration > General > Connectors.
- From the Connectors pane, click Create New Connector.
- Enter a name for the connector.
- Select ServiceNow Scan Target Collector from the Connector Type dropdown list.
- Click Create Connector.
- Select the applicable Organization from the dropdown list.
- Leave Active enabled. Asset data is imported from ServiceNow only when the connector is active.
- Enter a ServiceNow Username and Password. The credentials for the ServiceNow system must provide access to the web service and be able to create requests.
- Enter the ServiceNow instance URL.
- Enter the Source Table. The default value is cmdb_ci_computer.
- Enter the information from the ServiceNow table that you want to import to BeyondInsight. The default values are ip_address and fqdn.
- Set the scheduling options to synchronize ServiceNow with the BeyondInsight database. Time period options change depending on the Frequency.
- Enter the Start date and time for synchronization to begin.
- Click Test Connector to ensure the connection to the ServiceNow instance is working.
- Enable Run immediately After Save if desired.
- Click Create Connector.
Create a Smart Group
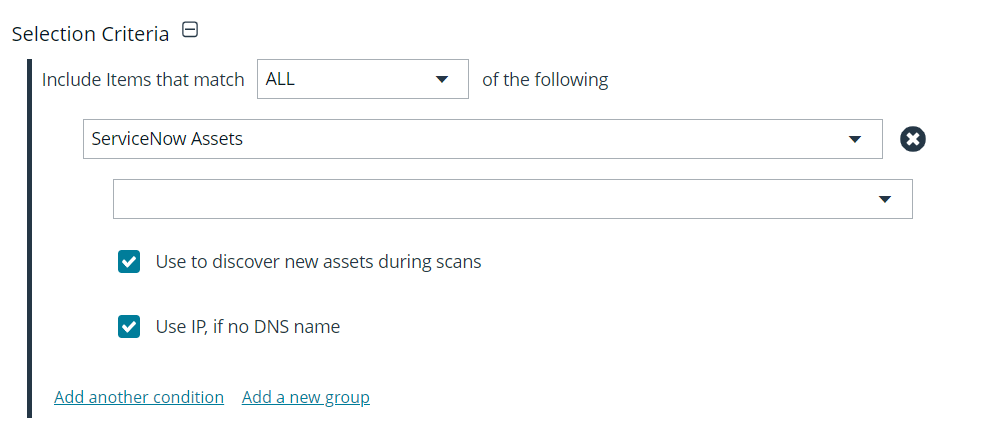
Once the data is in the BeyondInsight database, you can create a smart group based on the ServiceNow assets. When creating the smart group, ensure you select ServiceNow Assets from the dropdown in the Selection Criteria.
When the Smart Group processes, the DNS name is always used when it exists. The IP address is used to determine assets in the Smart Group when that option is enabled.
Change the Batch Size Limit for Import File
Depending on the environment, there may be a large number of records to import. You can set the importBatchLimit value in the RemManagerSvc.exe.config file, located in the BeyondInsight installation directory. The default limit set in the file is 5000. You cannot enter a value greater than 10000.
<!-- ServiceNow Imports -->
<Process name="servicenowimportshandler" assembly="" order="17" active="true" accessType="internal">
<Handlers>
<Handler name="ServiceNowImportsHandler" handlerType="1" runFrequency="3"frequencyType="m" referenceTime="1:00" namespace="" order="0" active="true" importBatchLimit="5000"></Handler>
</Handlers>
</Process>