Configure Ping Identity SAML Authentication for BeyondInsight and Password Safe
Configuring BeyondInsight and Password Safe to use Ping Identity SAML authentication involves configuring the SAML application with BeyondInsight SAML information in the Ping Identity admin portal and then configuring the SAML identity provider settings for Ping Identity in the BeyondInsight console. The configuration for each of these is detailed the below sections.
Configure SAML Application in Ping Identity
To configure a new SAML application for BeyondInsight and Password Safe in Ping Identity, follow the below steps.
- Log in to the Ping Identity admin portal.
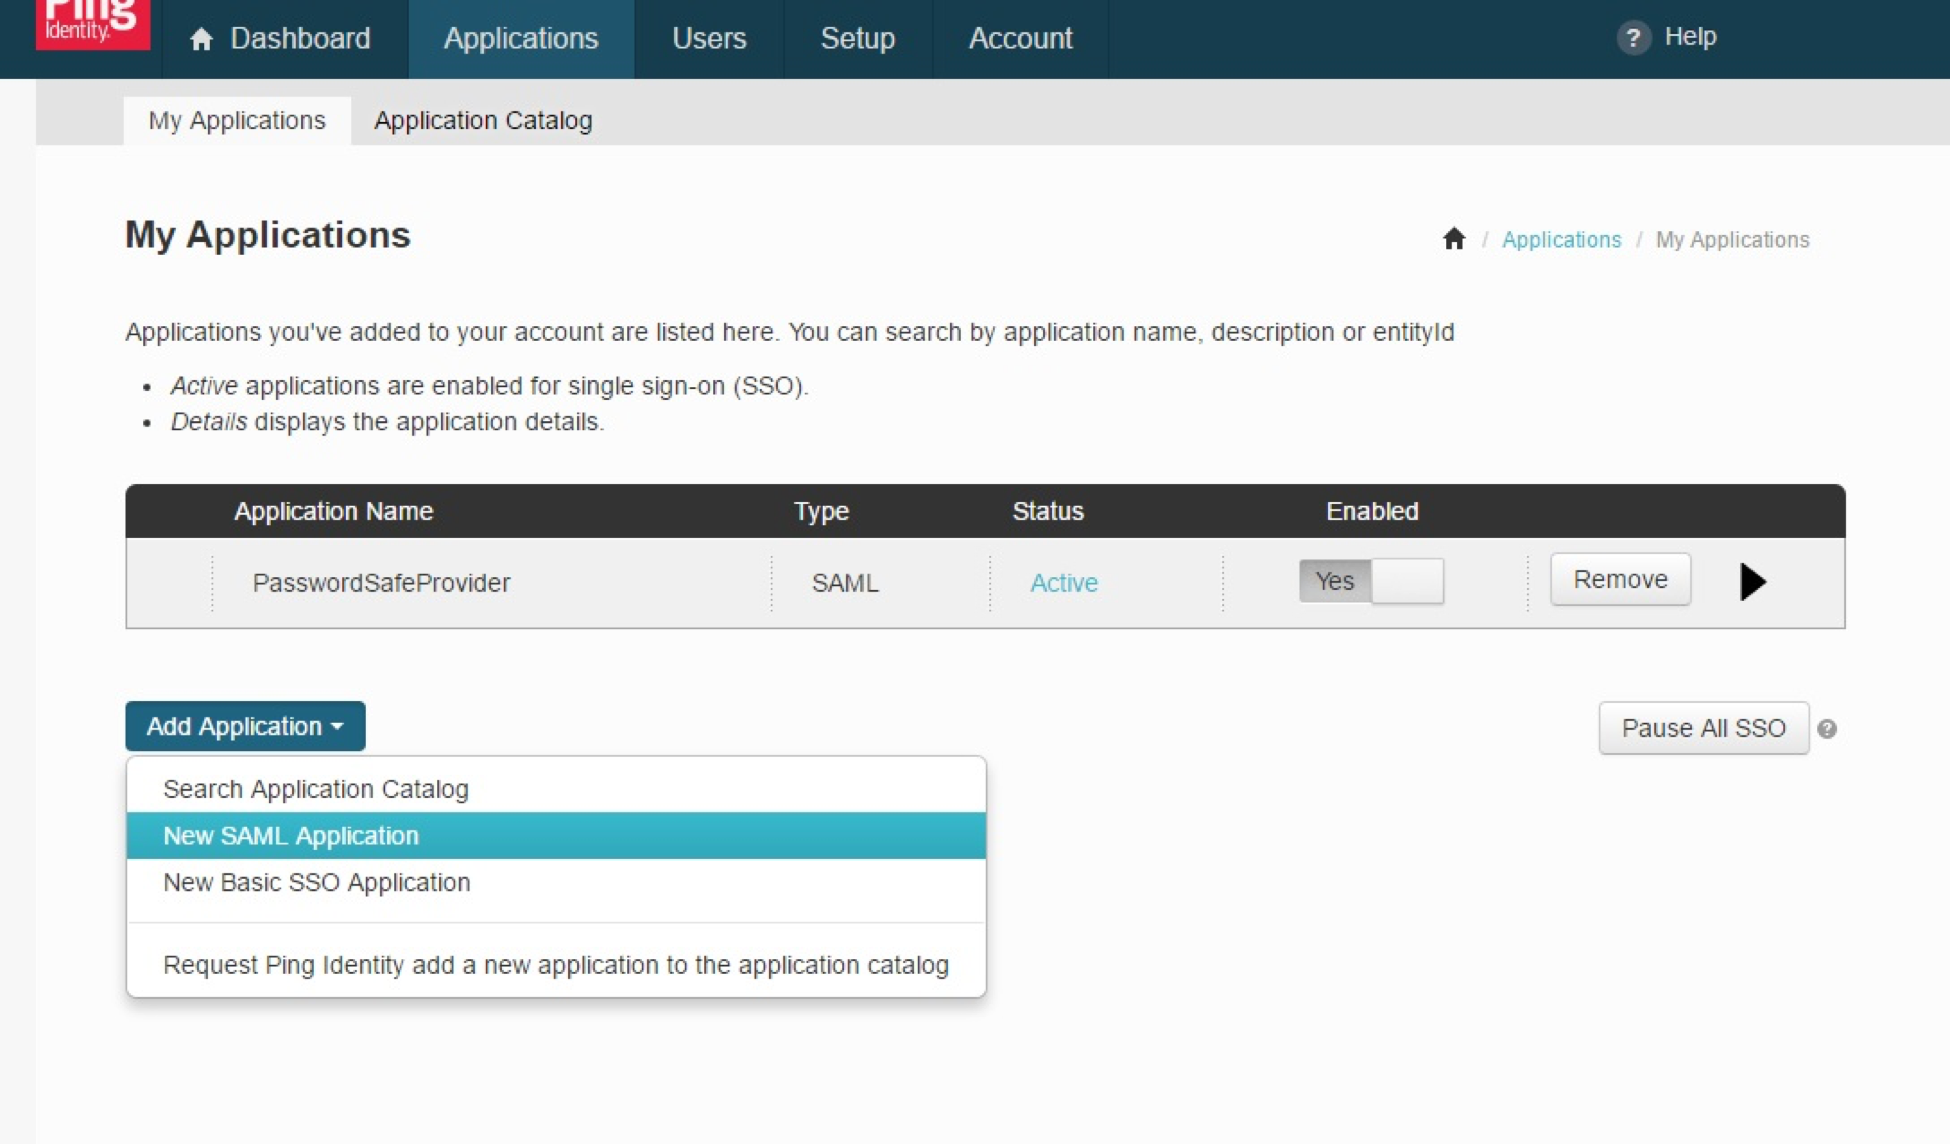
- Click the Add Application button, and then select New SAML Application from the menu.
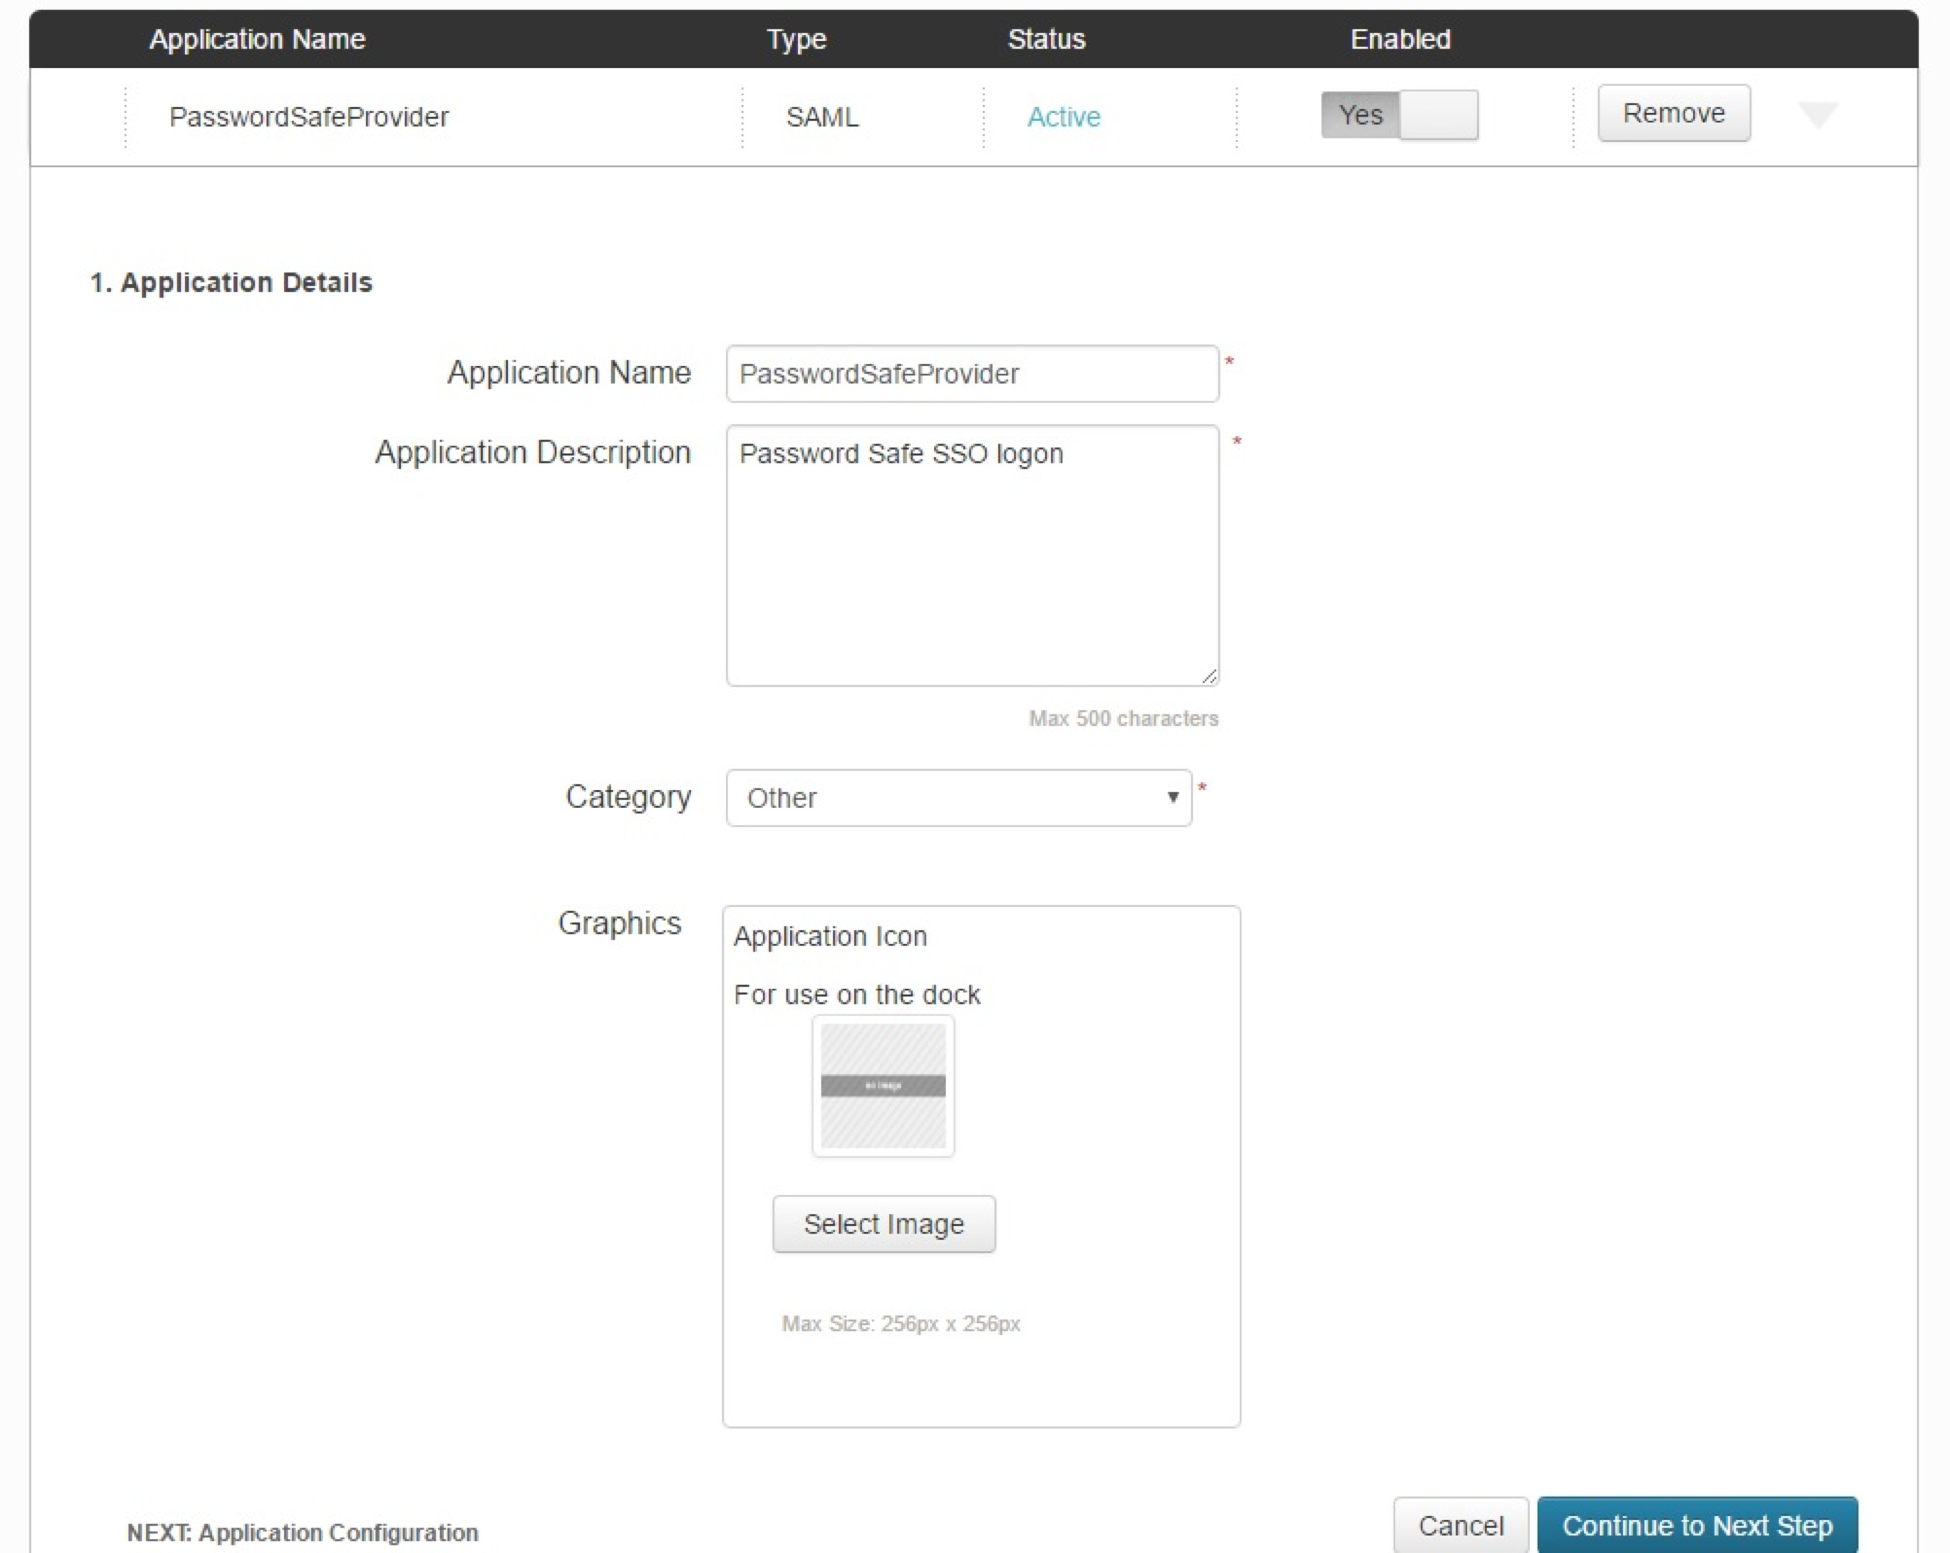
- Fill in Application Name and Description.
- Set Category to Other, and then click Continue to Next Step.

- Set the following:
- Set Assertion Consumer Service (ACS) to:
https://<ServerURL>/eEye.RetinaCSSAML/saml/AssertionConsumerService.aspx
- Set Entity ID to:
https://<ServerURL>/eEye.RetinaCSSAML/
- Set Single Logout Binding Type to Redirect.
- Upload Primary Verification Certificate (use SP Public Certificate.cer from \WebSiteSAML\Certificates). The certificate is automatically generated when the BI SAML configuration is saved.
- Click Continue to Next Step.
- Set Assertion Consumer Service (ACS) to:
After setting up SAML configuration in the BeyondInsight console, you must download the certificate from the configured SAML identity provider in BeyondInsight. The steps are detailed in the next section.
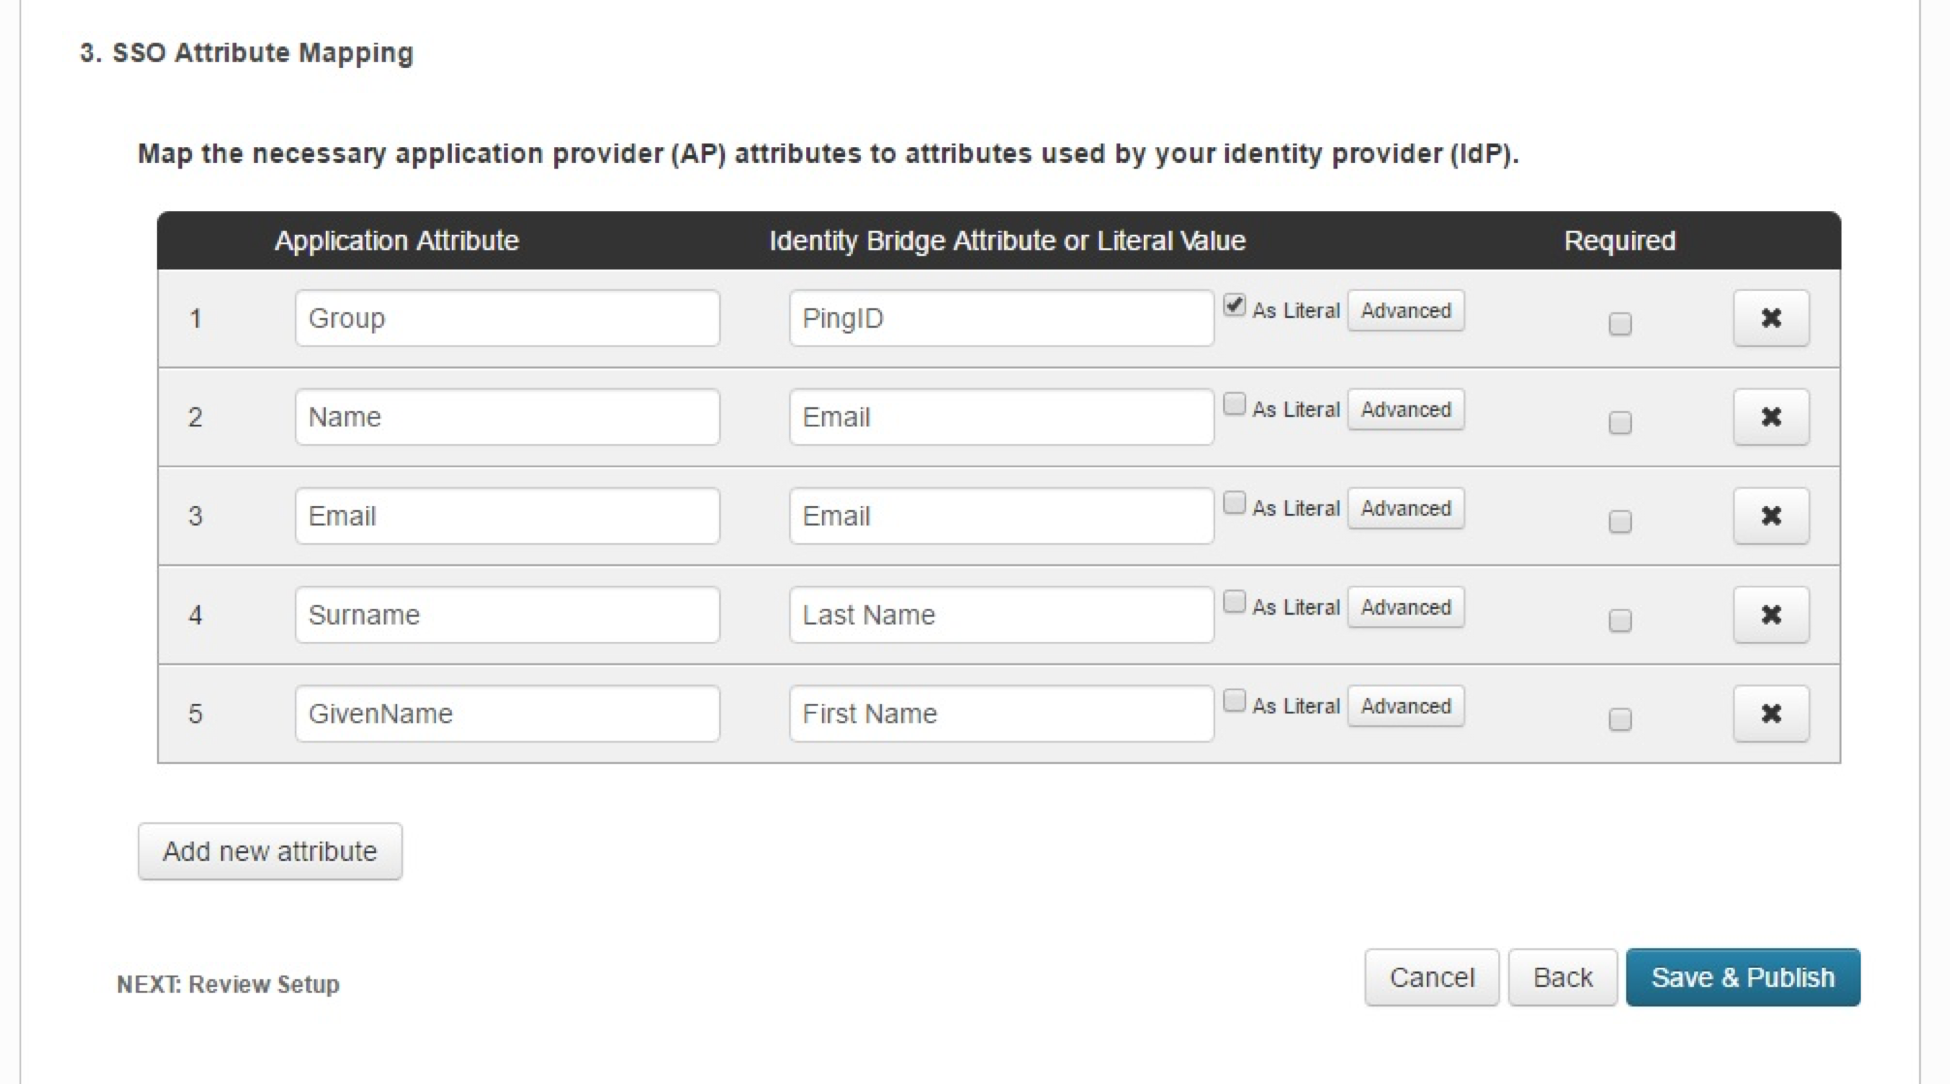
- Add the following attributes, and then click Save & Publish:
- Group: Check the As Literal box. This must match the group created in BeyondInsight.
- Name (required).
- Email (optional).
- Surname (optional).
- GivenName (optional).
To create an application that goes to Password Safe when IdP-initiated login is used, add a new attribute called Website. When the value of Website is set to Password Safe, the user is logged in to Password Safe. If the attribute is not present or is set to anything other than Password Safe, the user will be directed to BeyondInsight.
- Download the Signing Certificate.
- Download SAML Metadata.
- Click Finish.
Configure SAML Identity Provider in BeyondInsight
To configure a new SAML for Ping Identity in BeyondInsight, follow the below steps.
- Navigate to Configuration > Authentication Management > SAML Configuration.

- From the SAML Identity Providers pane, click Create New SAML Identity Provider.
- Provide a name for the new SAML identity provider (IdP).
- Complete the Identity Provider Settings as follows:
- Check the Default Identity Provider option if you have more than one IdP for the same service provider (SP), and would like this IdP to be used as default for SP initiated logins. This is useful in the case where a user accesses the SAML site access URL without providing an IdP. Also, when a user clicks the Use SAML Authentication link from the BeyondInsight login page, they are redirected to the default IdP's site for authentication.
- Identifier: Enter the Ping Identity value Identity Provider Issuer.
- Single Sign-on Service URL: Enter the Ping Identity value Identity Provider Single Sign-On URL.
- SSO URL Protocol Binding: Select HTTP Post as the type.
- Single Logout Service URL: Enter the Ping Identity value Identity Provider Single Logout URL.
- SLO URL Protocol Binding: Select HTTP Post as the type.
- Encryption and Signing Configuration: Check applicable boxes to enable options, based on your Ping Identity settings. A typical configuration is shown; however, depending on your Ping Identity settings, some configuration selections may be different.
- Signature Method: Select the method, as is required by Ping Identity.
- Current Identity Provider Certificate: Upload the Ping X.509 certificate.
- User Mapping: Select the type of user account from the dropdown. This indicates how user claims from the SAML provider are mapped in the BeyondInsight User database.
- None: This is the legacy type of mapping, which is not based on type of user.
- Local: Select this option for local user account claims. BeyondInsight maps the user and group name.
- Microsoft Entra ID: Select this option for Entra ID user account claims. When selected, BeyondInsight maps the ObjectID attribute to the AppUser and UserGroup attributes for the user.
- Active Directory: Select this option for Active Directory user account claims. If the claims are configured to pass the SID of the user and group, BeyondInsight maps the SID for the user and group, which is preferred over mapping domain name and group name attributes.
- The following Service Provider Settings are auto-generated by BeyondInsight:
- Entity ID: This is the fully qualified domain name, followed by the file name: https://<serverURL>/eEye.RetinaCSSAML/. This is used for audience restriction.
- Assertion Consumer Service URL: The HTTPS endpoint on the service provider where the identity provider redirects to with its authentication response. .
- Click Create SAML Identity Provider.
Disable Forms Login
In environments where SAML, smart card, or claims-aware is configured, we recommend enabling the Disable Forms Login authentication option to disallow users from using the standard login form in BeyondInsight.
To disable forms login for existing users, enable this option directly on a user account as follows:
- Click the vertical ellipsis for the user account, and then click Edit User Details.
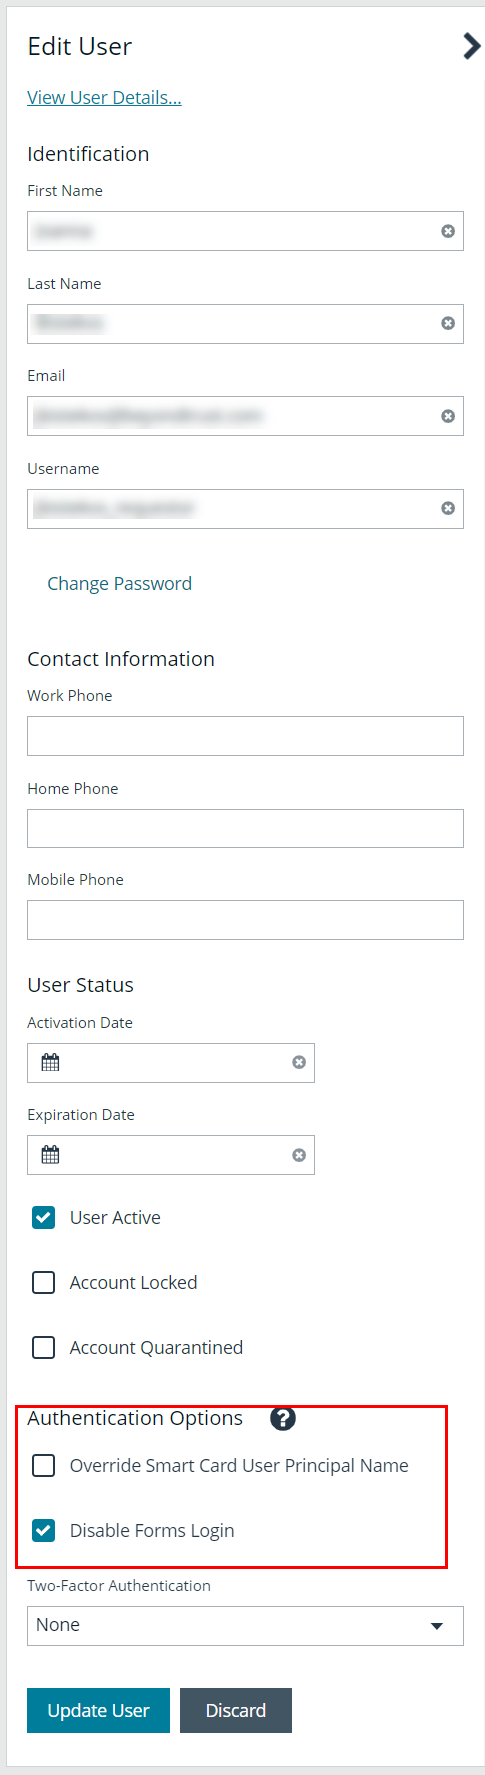
- Under Authentication Options, check Disable Forms Login to enable the option.
Please contact BeyondTrust Support for assistance if you need to bulk-apply this setting to existing accounts.
To disable forms login globally for newly created directory accounts:
- Navigate to Configuration > Authentication Management > Authentication Options.
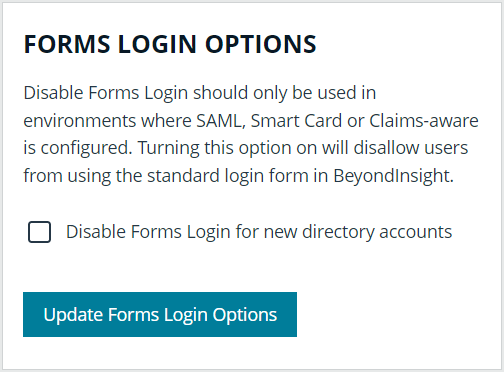
- Under Forms Login Options, check the Disable Forms Login for new directory accounts option to enable it.