Add an Active Directory Group
Active Directory (AD) group members can log in to the management console and perform tasks based on the permissions assigned to the group. The group can authenticate against either a domain or domain controller. Upon logging into BeyondInsight, users can select a domain from the Log in to list on the Login page.
The Log in to list is only displayed on the Login page when there are either AD or LDAP user groups created in the BeyondInsight console. The Log in to list is displayed by default, but may be disabled / enabled by an admin user by toggling the Show list of domains/LDAP servers on login page setting from Configuration > System > Site Options page.
AD users must log in to the management console at least once to receive email notifications.
Create an Active Directory Group in BeyondInsight, as follows:
- Navigate to Configuration > Role Based Access > User Management.
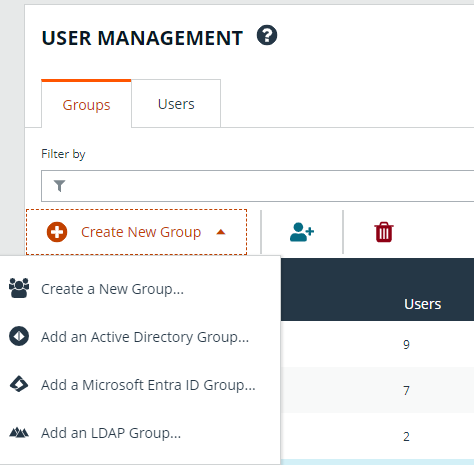
- From the Groups tab, click + Create New Group.
- Select Add an Active Directory Group.
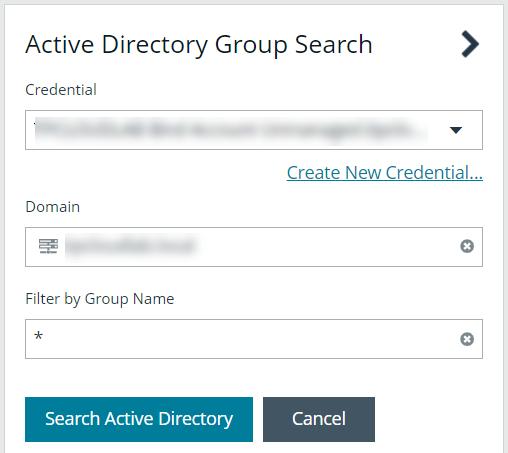
- Select a credential from the list.
If you require a new credential, click Create New Credential to create one. The new credential is added to the list of available credentials.
- If the Domain field is not automatically populated, enter the name of a domain or domain controller.
- After you enter the domain or domain controller credential information, click Search Active Directory. A list of security groups in the selected domain is displayed.
The default filter is an asterisk (*), which is a wild card filter that returns all groups. For performance reasons, a maximum of 250 groups from Active Directory is retrieved.
- Set a filter on the groups to refine the list, and then click Search Active Directory.
- a* returns all group names that start with "a"
- *d returns all group names that end with "d"
- *sql* returns all groups that contain "sql" in the name
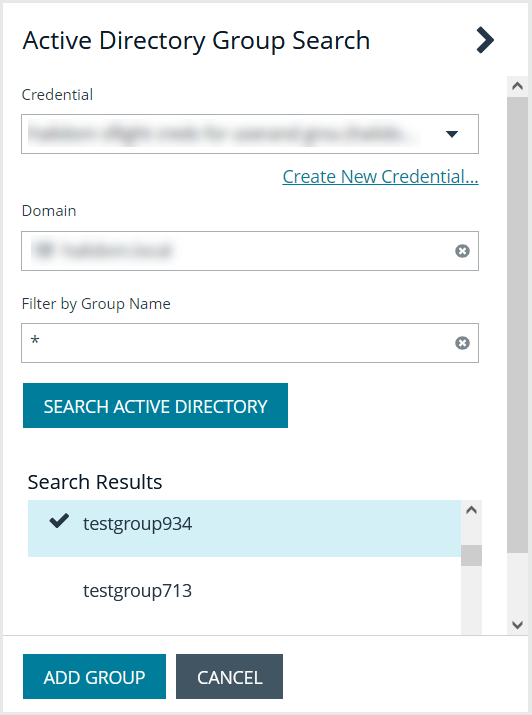
- Select a group, and then click Add Group.
- The group is added and set to Active but not provisioned or synchronized with AD. Synchronization with AD to retrieve users begins immediately.
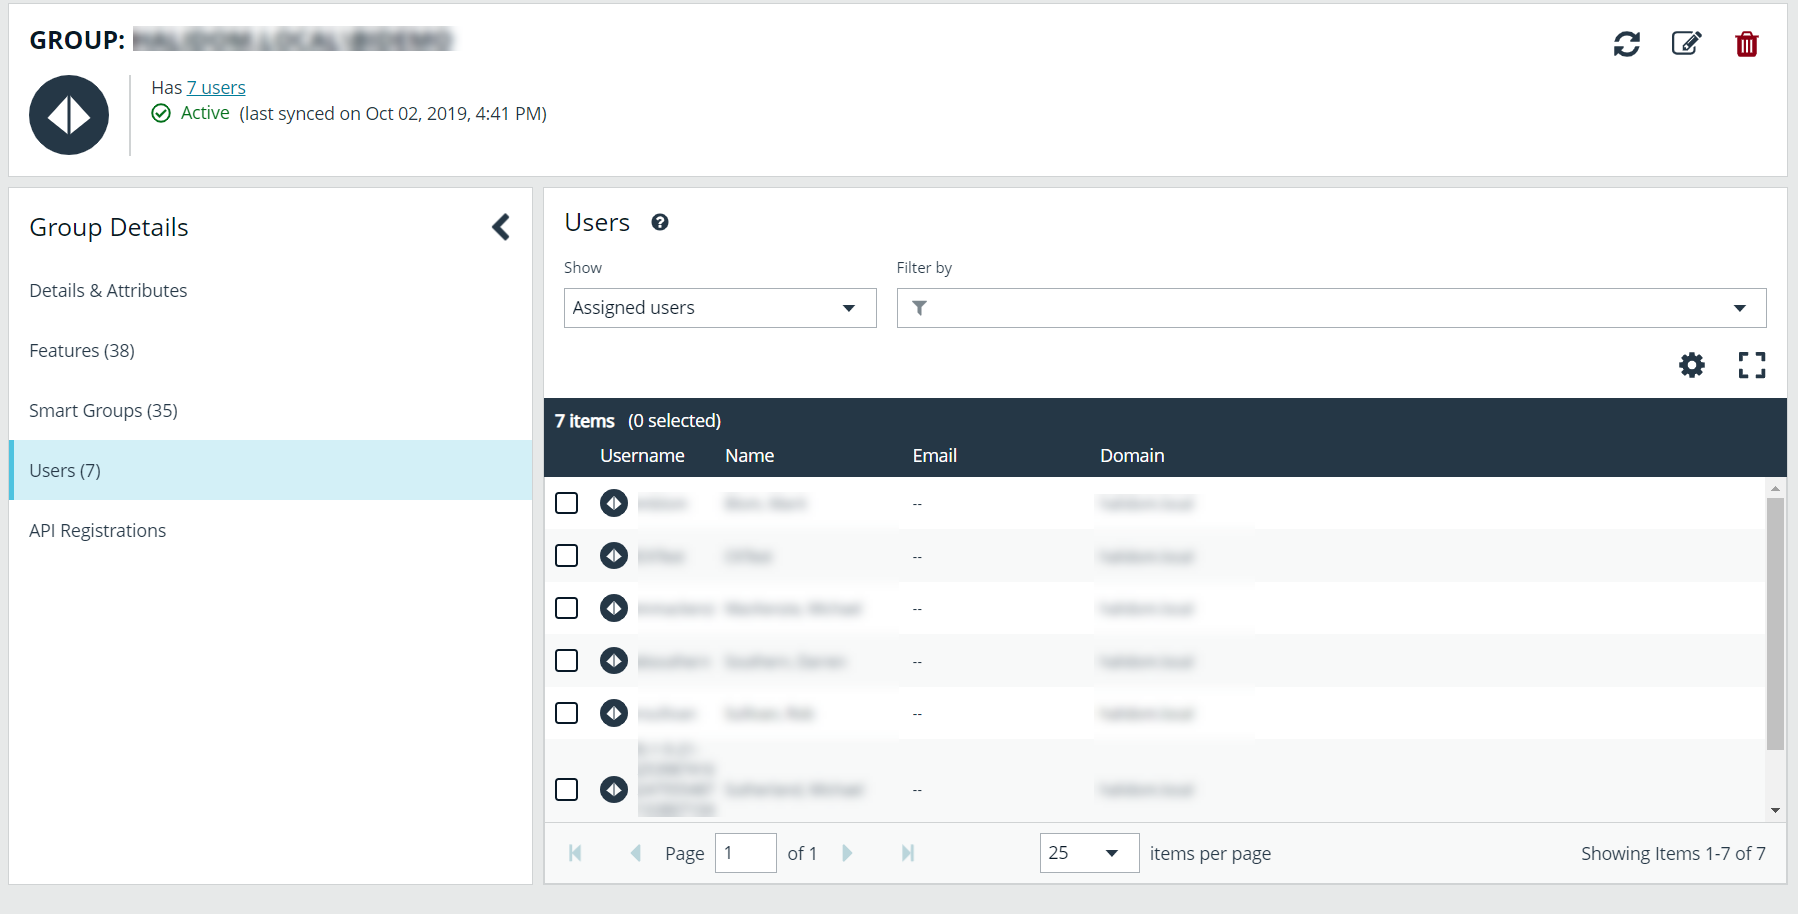
- Once the group has been synced with AD, you can view the users assigned to the group by selecting Users from the Group Details pane.
Use the filters above the grid to narrow down the list of users displayed in the grid by Type, Username, Name, Email, or Domain, or to show users not assigned to the group.
By default, new groups are not assigned any permissions. You must assign permissions on features and Smart Groups after creating a new group. For more information on permissions and how to assign them, please see Assign Permissions to Groups in BeyondInsight.
For more information on creating and editing directory credentials, please see Create and Edit Directory Credentials.
Propagate Domain Changes to Group Members

Domain changes can be propagated to all users in a group by enabling the Propagate this change to all group members option for the group. By default, this is set to OFF. When enabled, changes to the preferred domain controller at the group level are applied to all group members.
When creating a new group, we advise turning this setting on by editing the new group details. This ensures that all users in the new group get a preferred domain controller from the initial setup of the group.