Configure the BeyondTrust UVMSQL Appliance
- To access your UVMSQL the first time, open a browser on a device on the same network subnet as the UVMSQL. Enter the UVMSQL's factory IP address as displayed on the LCD screen, preceded by https://, for example, https://10.10.123.456. You can find this IP address using the LCD display of the UVMSQL.
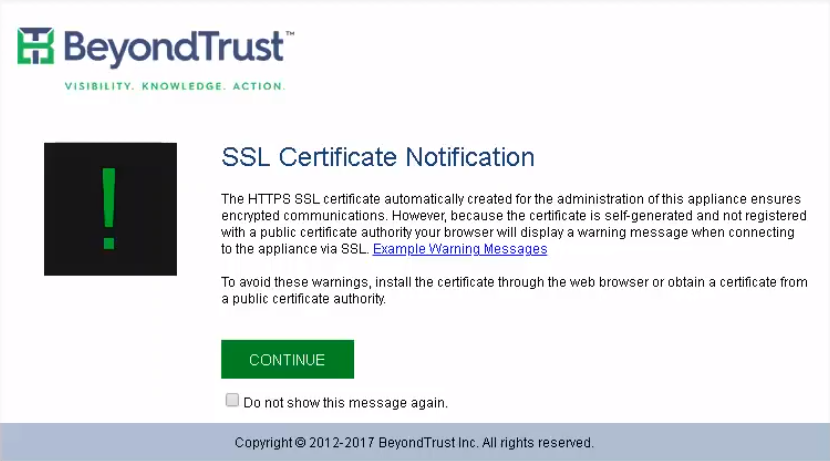
- An SSL certificate notification displays. Click Continue. You will replace the default certificate with a signed certificate later during the configuration process.

- On the welcome page, create a name for the UVMSQL Appliance.
Once you have named your
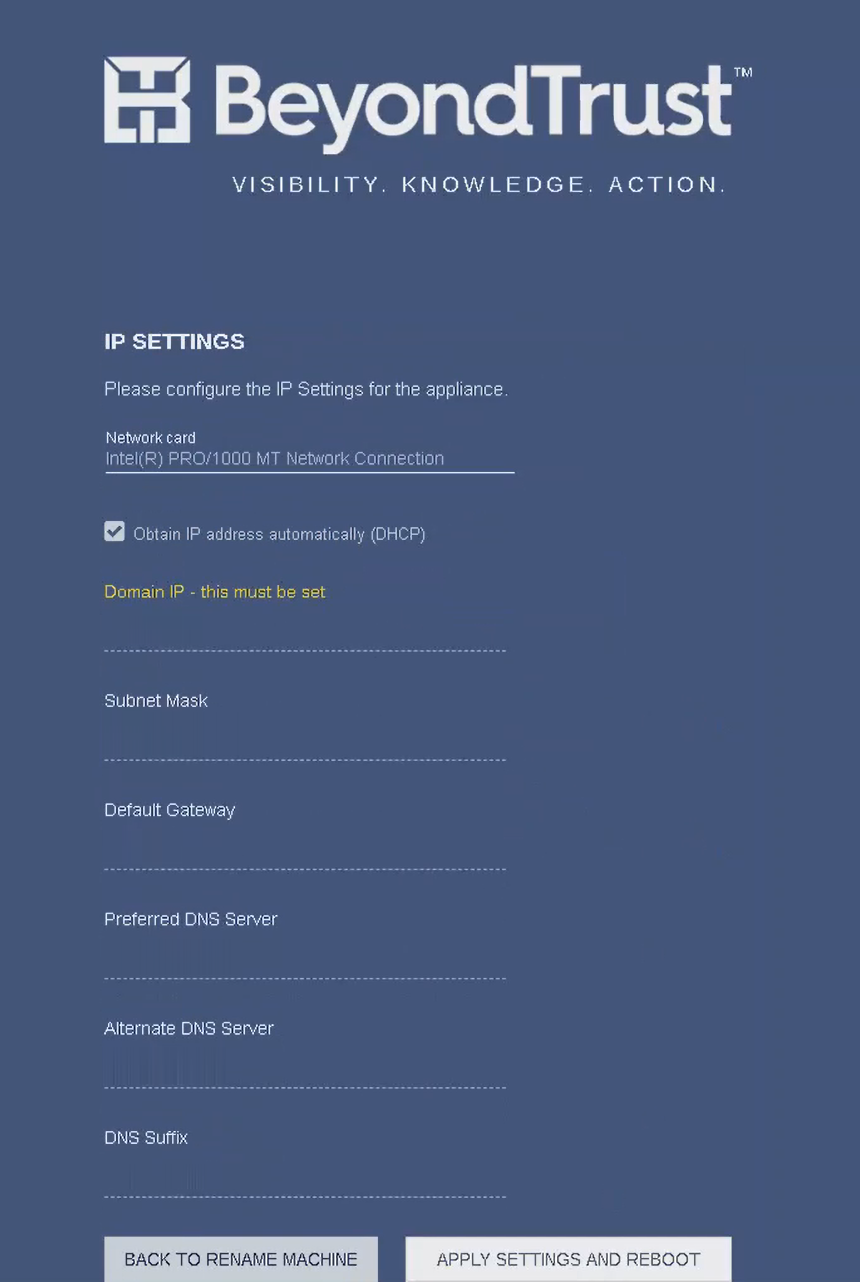
- On the IP Settings page, select the network card to use. The dropdown list shows only connected network ports. If you select Obtain IP address automatically, the remaining fields fill automatically. Otherwise, enter the IP and DNS information.
The domain IP must be a static IPv4 address. Use quad-dotted notation for the subnet mask. For example, 255.255.255.0.
- If you are satisfied with the settings, click Apply Settings and Reboot. If you need to rename your UVMSQL Appliance, click Back to Rename Machine.
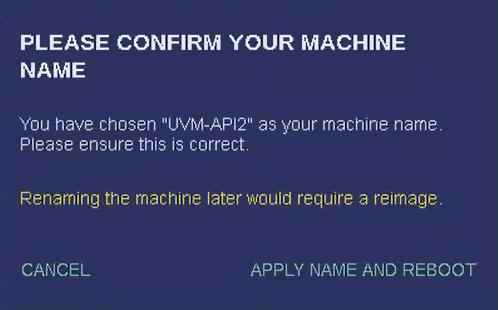
- You are prompted to confirm your UVMSQL Appliance name.

- Click Cancel to go back, or click Apply Name and Reboot to continue.
- The UVMSQL Appliance reboots to apply its name and IP address settings.
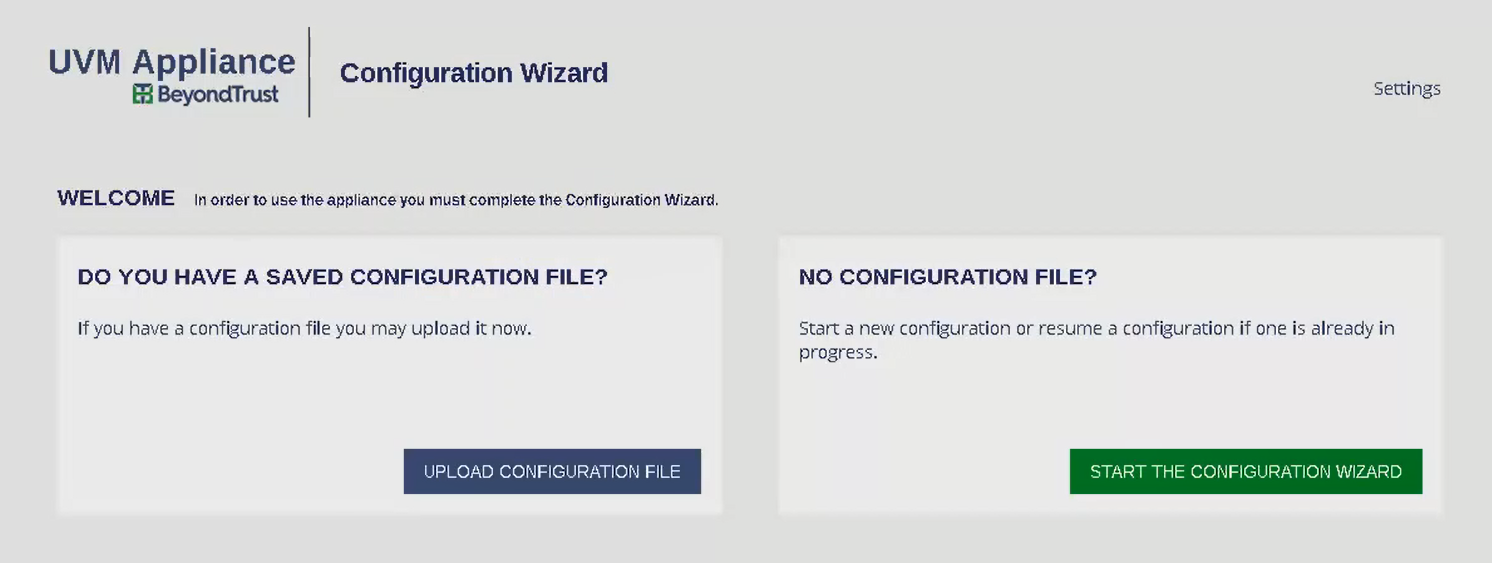
- Once the reboot completes, you are prompted to upload a saved configuration file or to start the Configuration Wizard.
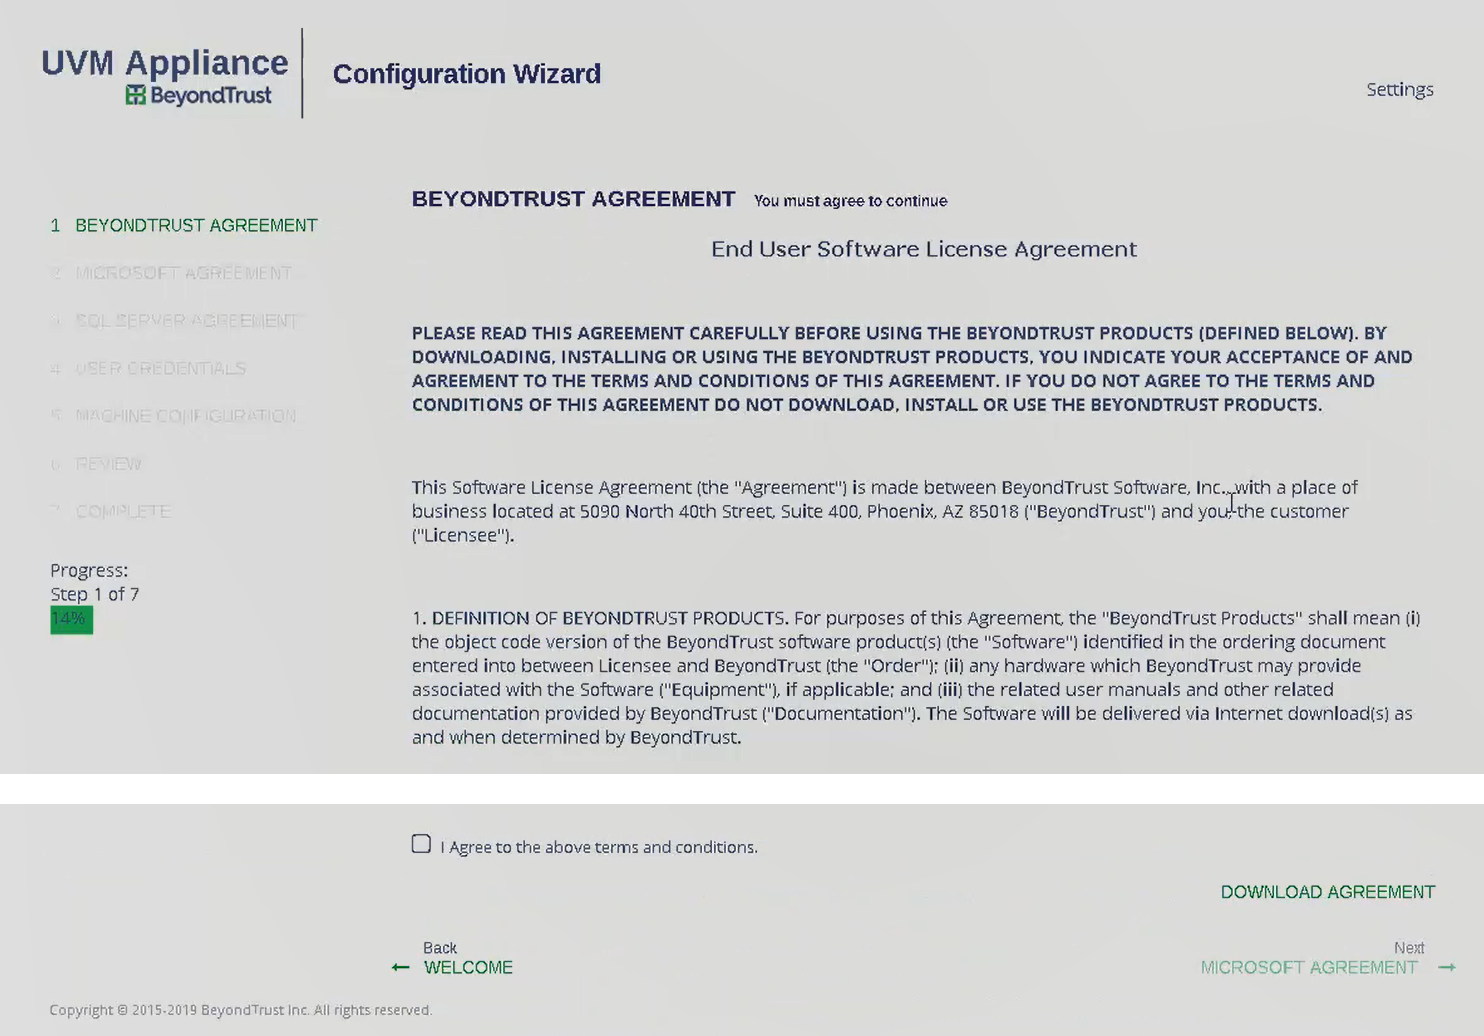
- The Configuration Wizard starts with the BeyondTrust license agreement. After reading the terms, click I Agree to the above terms and conditions. Then click Next: Microsoft Agreement.
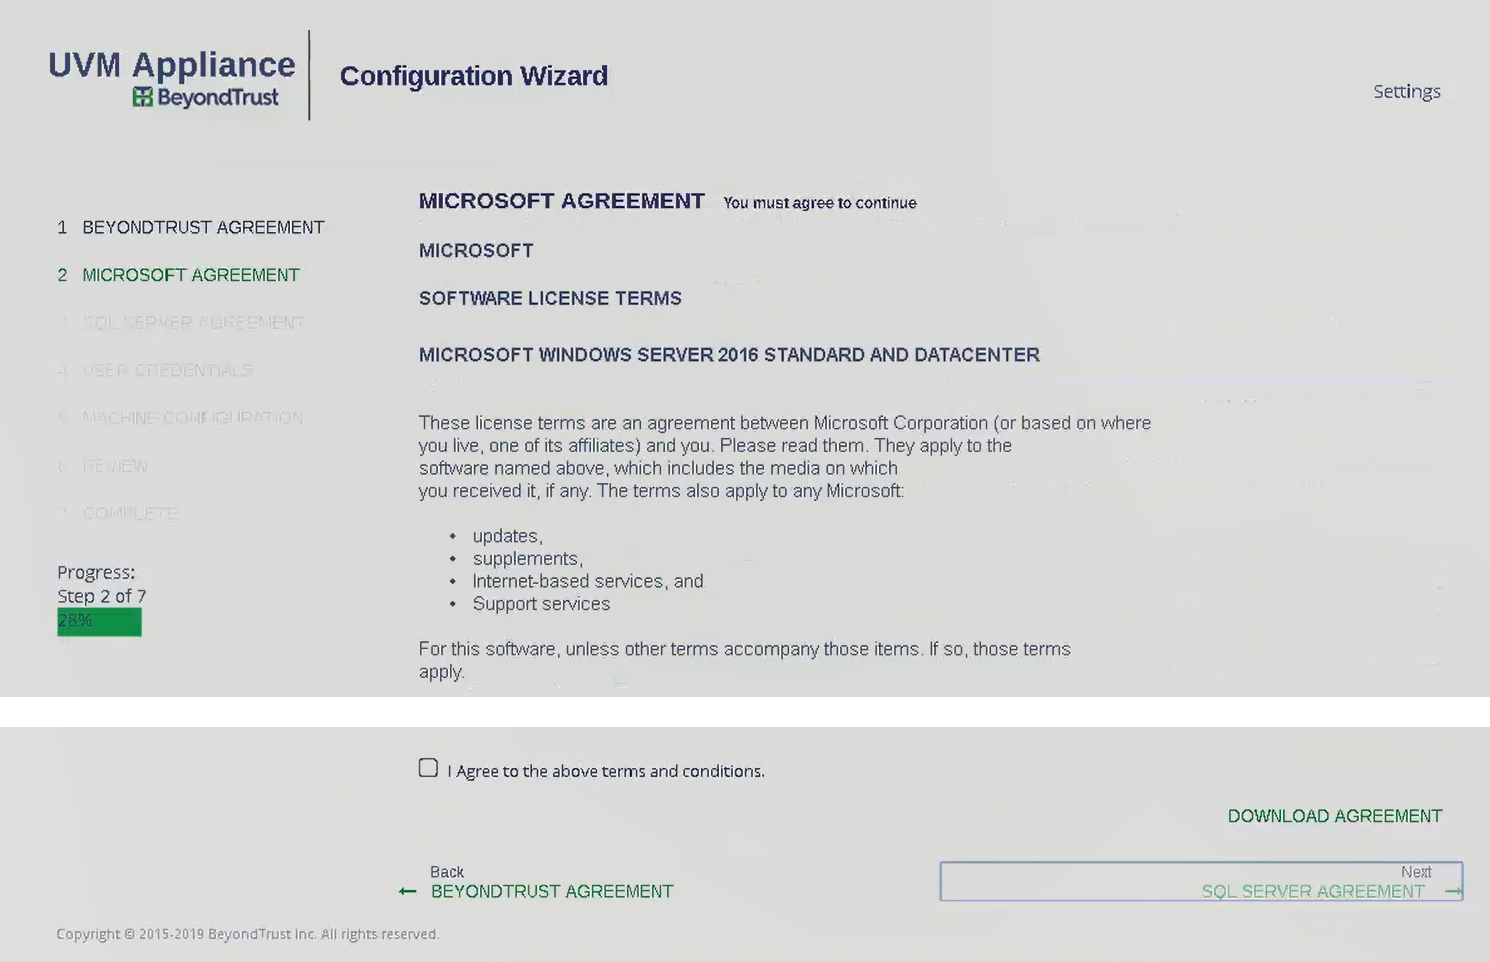
- After reading the Microsoft agreement, click I Agree to the above terms and conditions. Then click Next: SQL Server Agreement.
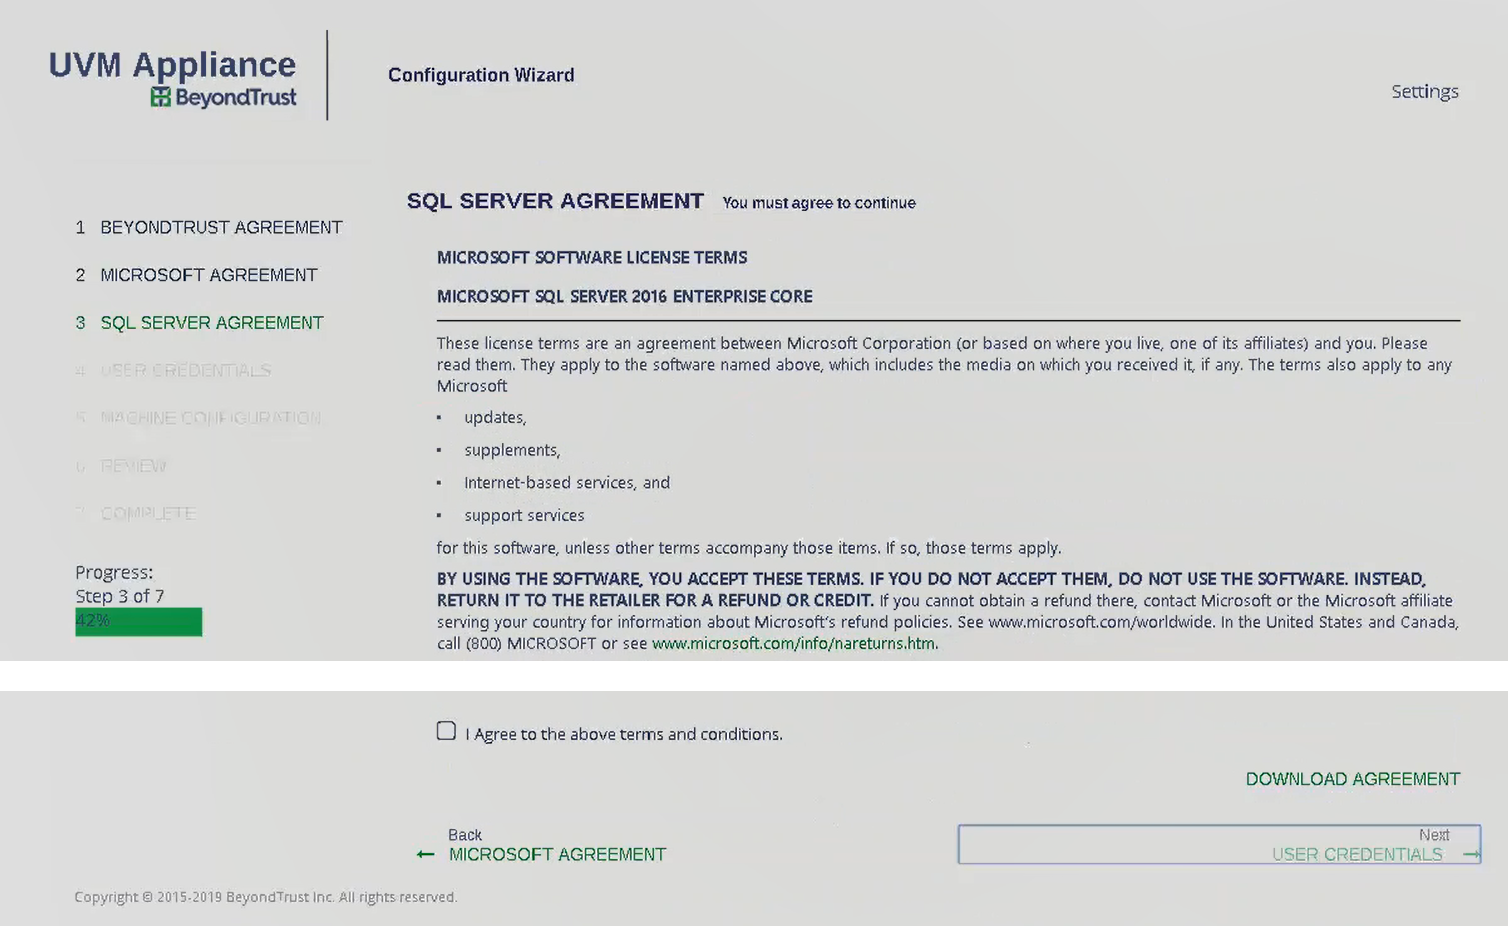
- After reading the SQL Server agreement, click I Agree to the above terms and conditions. Then click Next: User Credentials.
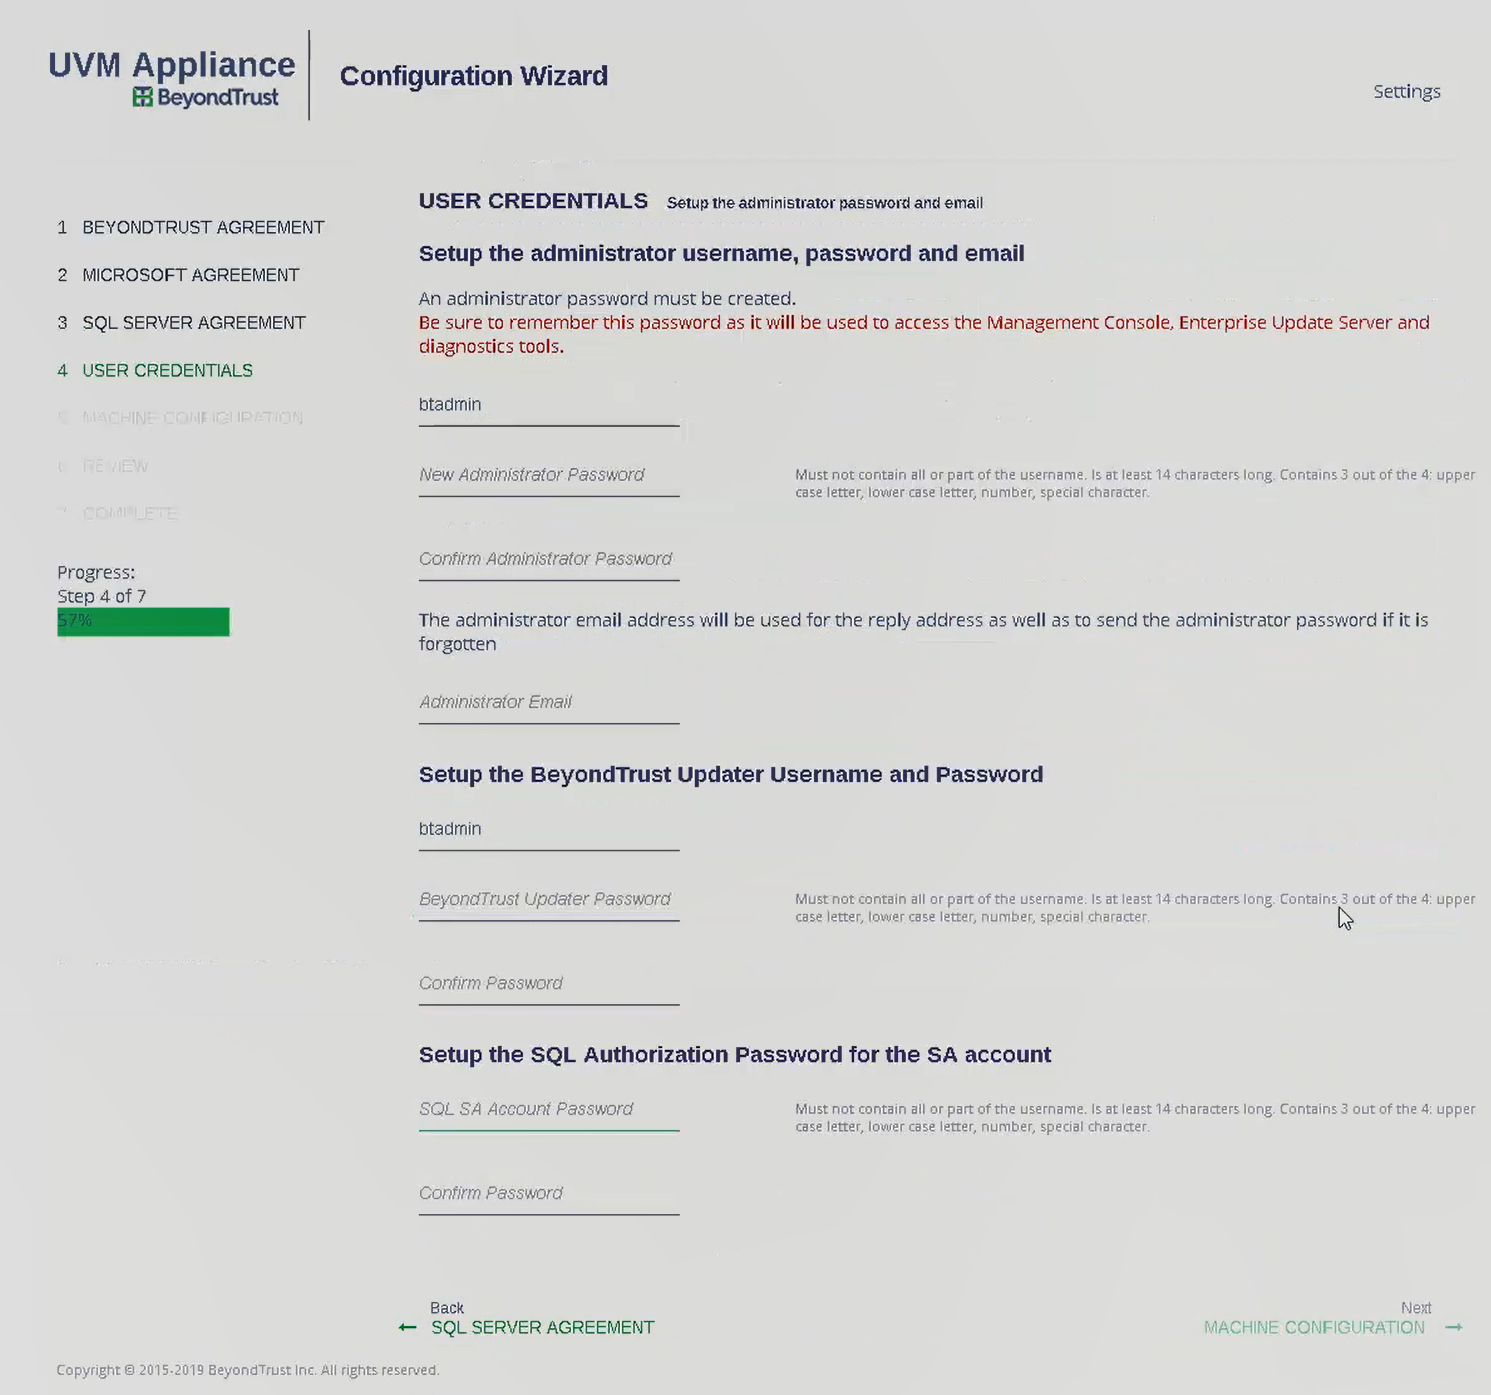
While it is possible to rename administrator accounts later, we recommended choosing account names carefully during deployment and configuration to avoid renaming them later.
- On the User Credentials page, set up an administrator username, password, and email address for the BeyondTrust software. On this page, also set up a username and password for the BeyondTrust Updater tool, as well as a password for the SQL Server Administration account. Then click Next: Machine Configuration.
The email address is used as a reply address, as well as if the administrator password is forgotten.
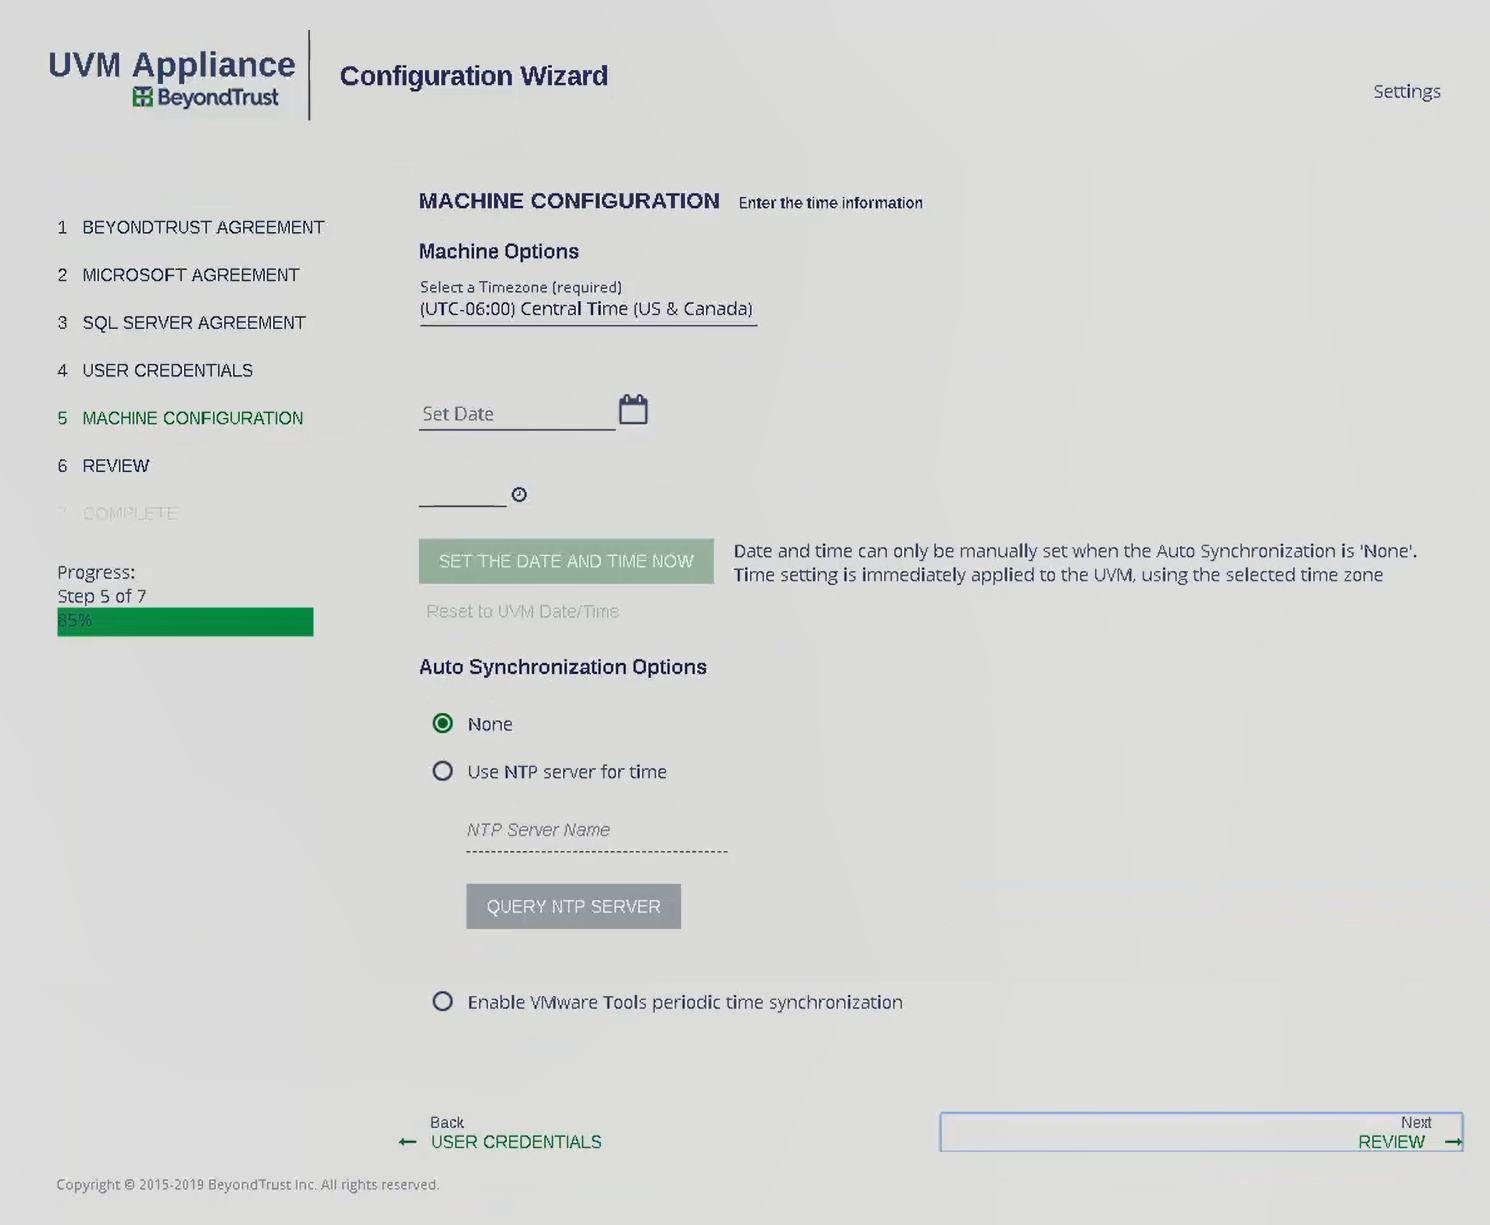
- Under Machine Options, select a time zone. You can configure the date and time manually, or you can synchronize the time using an NTP server or VMware Tools. Click Next: Review.
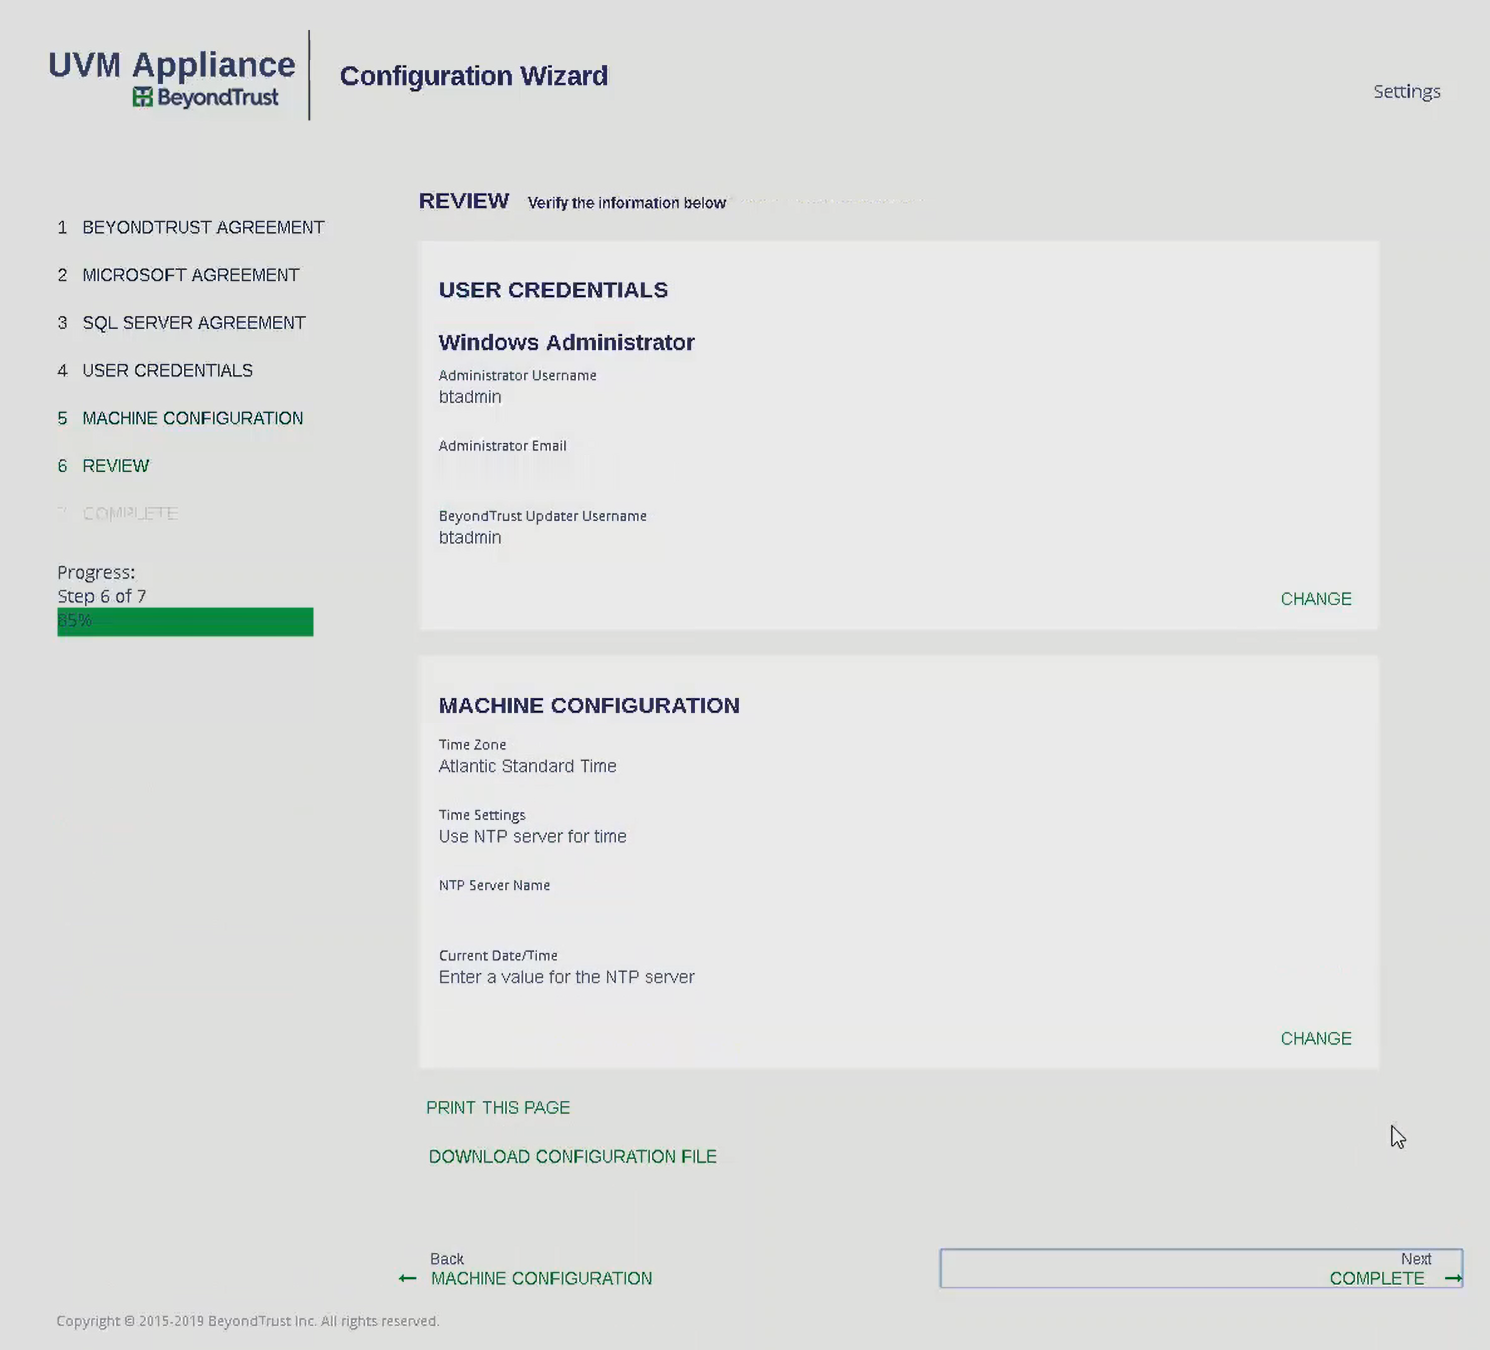
- On the Review page, confirm that the settings are correct. You can go back and make changes as needed. You can also download the configuration file for backup or to use on another system. Click Next: Complete.

- The Configuration Wizard applies the settings to the UVMSQL Appliance. Once the configuration is complete, click Proceed to Diagnostics.

- Enter your BeyondTrust administrator username and password to log in.

- From the home page, open the menu and select Maintenance.

- The maintenance page loads your UVMSQL Appliance software versions. Once this information has loaded, open the menu and select API Key Maintenance.
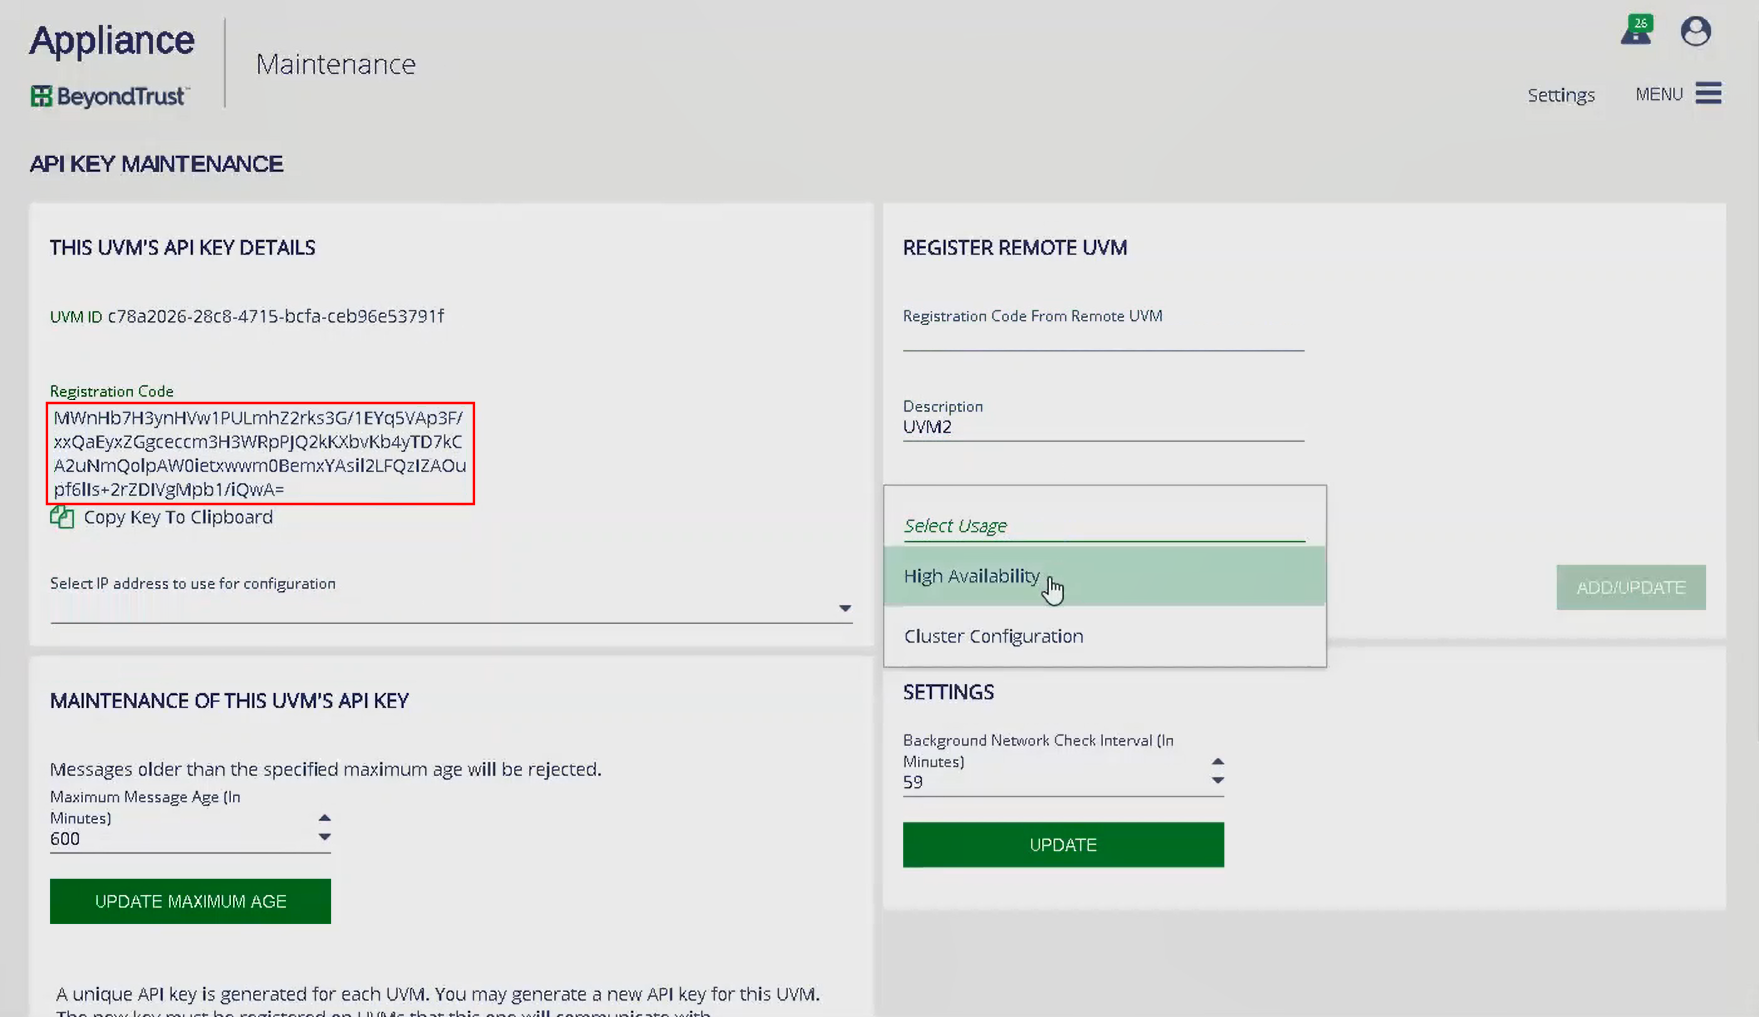
- Under This UVM's API Key Details, copy the registration code to your clipboard.
Each API key is generated for a specific UVMSQL Appliance. The key itself cannot be viewed. The registration code encrypts the key along with additional metadata, such as the UVMSQL Appliance ID and the IP address.
- To pair two UVMSQL Appliances, switch to the configuration page for the second UVMSQL Appliance.
- Open the menu and click API Key Maintenance.
- From Select IP address to use for configuration, select the appropriate IP address.
- Under Register Remote UVM, paste the copied code into Registration Code from Remote UVM.
- Enter a Description to identify this UVMSQL.
- From Select Usage, choose Cluster Configuration.
- Click Add/Update.
- A prompt displays that the key has been registered. Click OK.
- Copy the registration key from this UVMSQL Appliance's details.
Registering a key from another UVMSQL Appliance allows this UVMSQL Appliance to accept calls from the other UVMSQL Appliance.
- Switch to the first UVMSQL Appliance's configuration page.
- From Select IP address to use for configuration, select the appropriate IP address.
- Under Register Remote UVM, paste the copied code into Registration Code from Remote UVM.
- Enter a Description to identify this UVMSQL.
- From Select Usage, choose Cluster Configuration.
- Click Add/Update.
- A prompt displays that the key has been registered. Click OK.
You can regenerate an API key if needed. However, doing so also regenerates the registration code, breaking the link between this UVMSQL Appliance and another. You must copy the new registration code and re-enter it on the other UVMSQL Appliance to re-establish the connection.
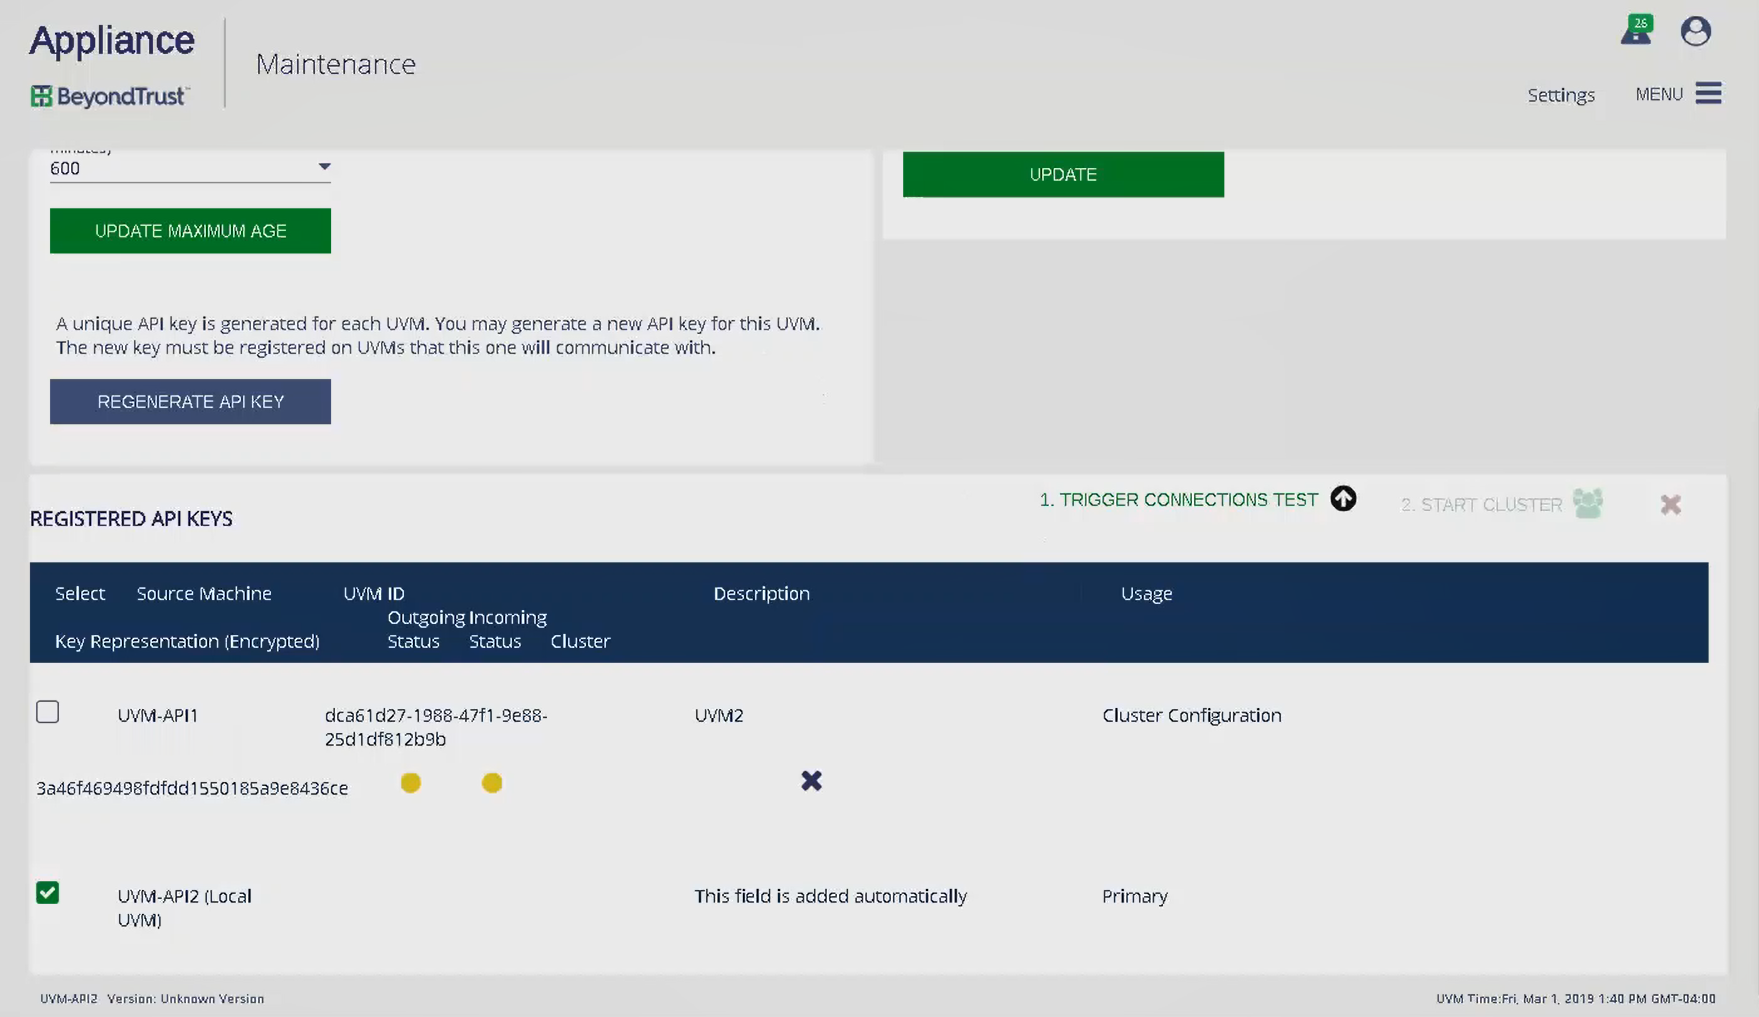
- Scroll down to view the registered API keys.
- Click Trigger Connections Test.

- You are notified that the test has started. Click OK.

- When the test completes, the page displays the results.
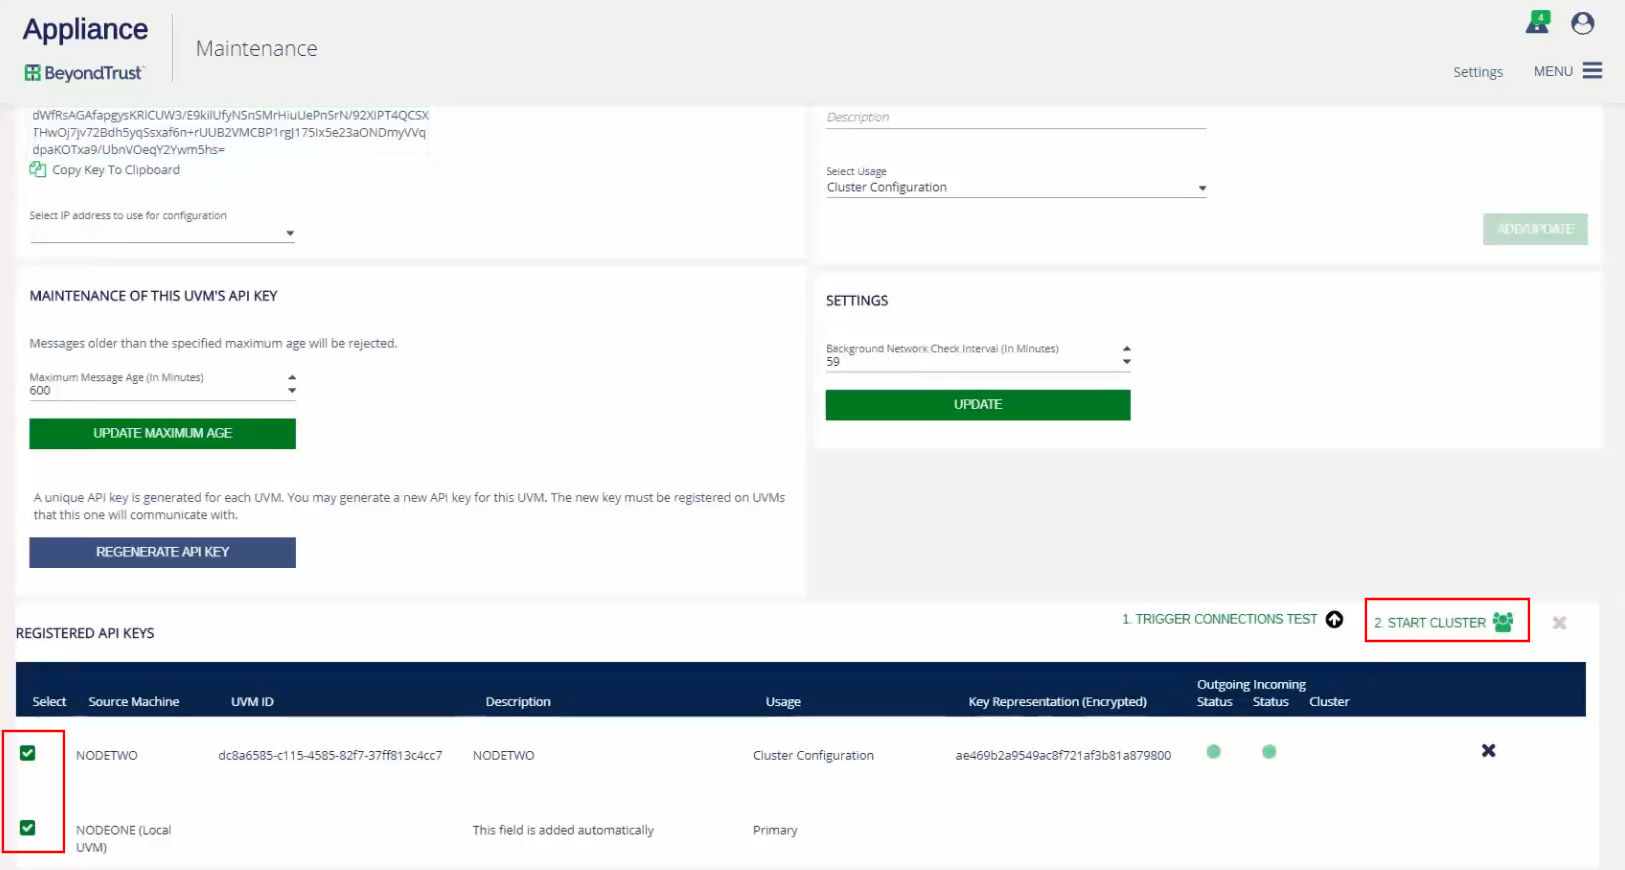
- To group UVMSQL Appliances into a cluster, select the UVMSQL Appliances, and then click Start Cluster.
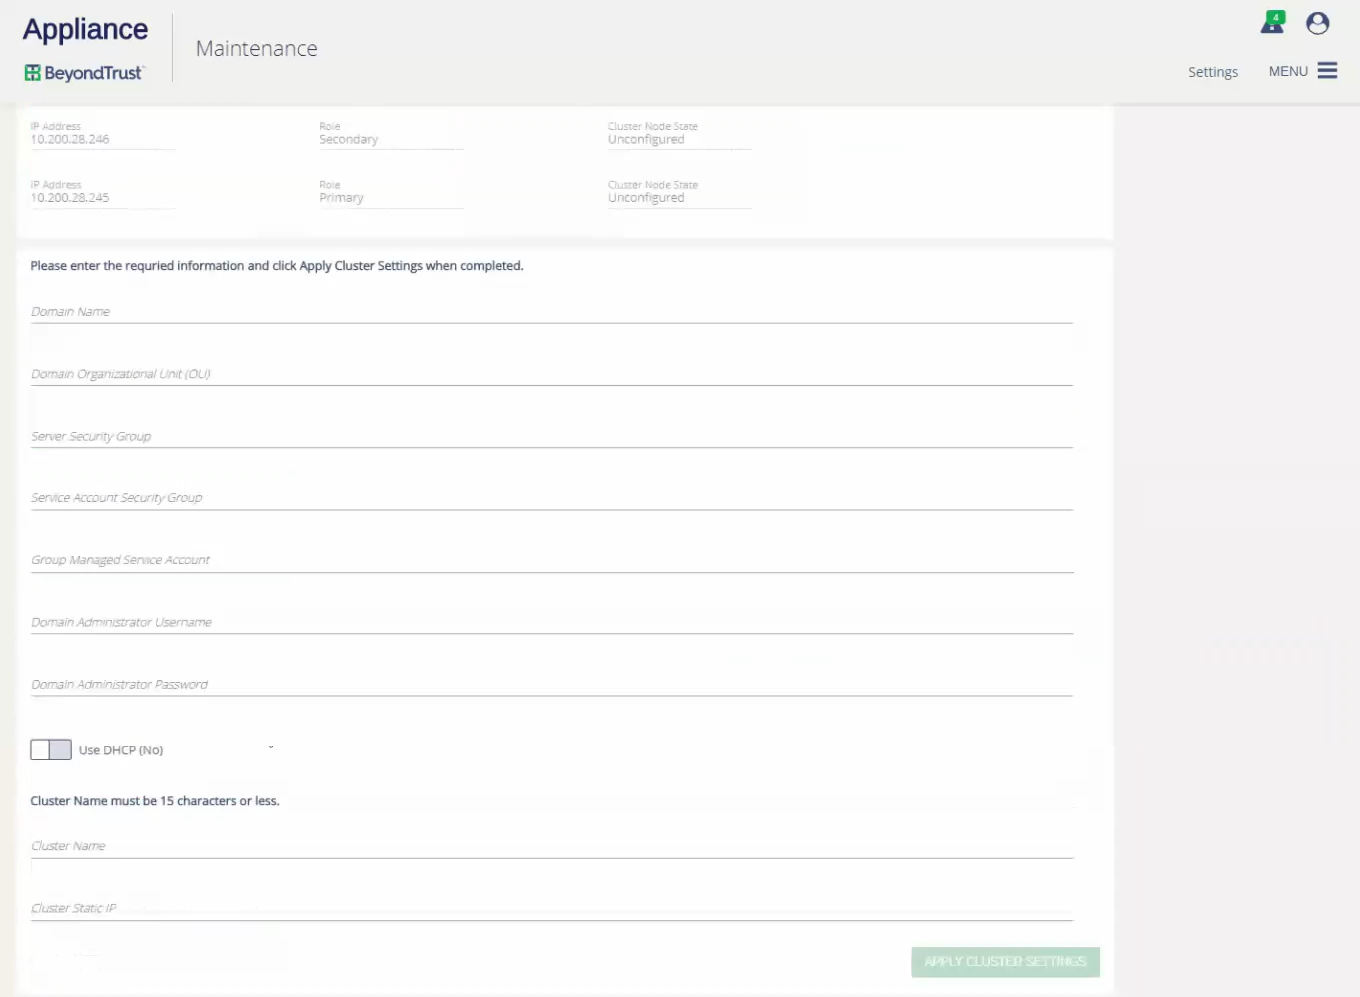
- In the top section, you can view the IP addresses, cluster roles, and cluster node status of the selected UVMSQL Appliances.
- Enter the domain name, organizational unit, security groups, service account, and domain administrator account.
- Choose if the cluster should use DHCP.
- Create a name for the cluster.
- If the cluster is not using DHCP, enter a dedicated static IP address for the cluster.
- Click Apply Cluster Settings.

- The SQL Cluster Wizard runs, showing status messages of its progress.

- When the wizard completes, the UVMSQL Appliance appears as part of the cluster. Click on the cluster database icon.
Before the availability group can be created, the database must exist on the UVMSQL Appliance you plan to make the primary replica. There are a few ways to do this; choose the method most appropriate for your situation.
- During the Configuration Wizard on a SQL Free UVMSQL Appliance, at the SQL Server Agreement step, create a database on the primary replica using the option to create a remote database.
- From a configured UVMSQL Appliance or SQL Free UVMSQL Appliance, go to the Database Utilities page of the Maintenance application and use the Create a Remote BeyondInsight Database feature to create a database on the primary replica.
- Restore a BeyondInsight database backup on the primary replica on the SQL cluster using SQL Server Management Studio.

- In the top section, you can view the IP addresses, cluster roles, and cluster node status of the clustered UVMSQL Appliances.
- Select a SQL database.
- Enter a database listener name, IP address, and subnet mask.
- Provide a domain name, domain administrator account, and service account.
- Click Apply Listener.

- The SQL Database Wizard runs, showing status messages of its progress.
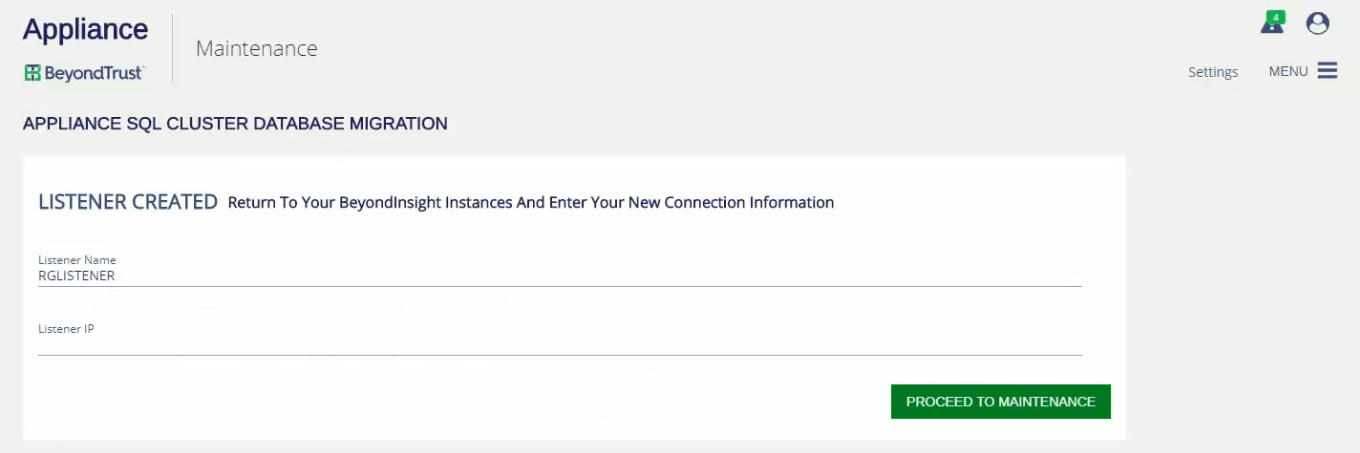
- When the wizard completes, the listener name and IP address are displayed.