Migrate the U-Series Appliance
Follow the below steps to migrate your Windows 2012 R2 or 2016 U-Series Appliance to Windows 2022.
Verify Software on the Source
Product versions on the source appliance must be at least U-Series version 3.3.1 or higher and a supported version of BeyondInsight.
Turn off automatic updates to ensure updates are not occurring during this process.
Back Up Data on the Source
You must back up your necessary data and then restore it on the newly created target appliance. Use the below steps to create and save a backup of your data on the source machine.
Time estimate: 15 minutes or longer depending on database size
- From the source appliance's management console Business Continuity > Backup and Restore page, create a backup and record the password. You'll need the password to restore the backup on the target appliance.
- If the backup is saved locally, use RDP to connect to the U-Series Appliance to retrieve the backup from C:\LocalBackups (or the appropriate folder if another local backup location is specified).
- Transfer the backup and any additional backups you want to migrate to either removable media or a network location accessible by the target U-Series Appliance.
Collect Additional Details and Settings
Gather and save the following details and settings from the source, as they are not included in the import process:
- Licensing: Gather BeyondTrust product license numbers from the Software and Licensing > Product Licensing page on the source appliance.
- High Availability Pairing Settings: From the source appliance, write down what you need to replicate on the target appliance or take a screenshot from the Appliance API Keys page on the source appliance.
- Backup Schedule: Write down what you need to replicate on the target U-Series Appliance or take screenshots of the schedules and locations from the Business Continuity > Backup and Restore page on the source appliance.
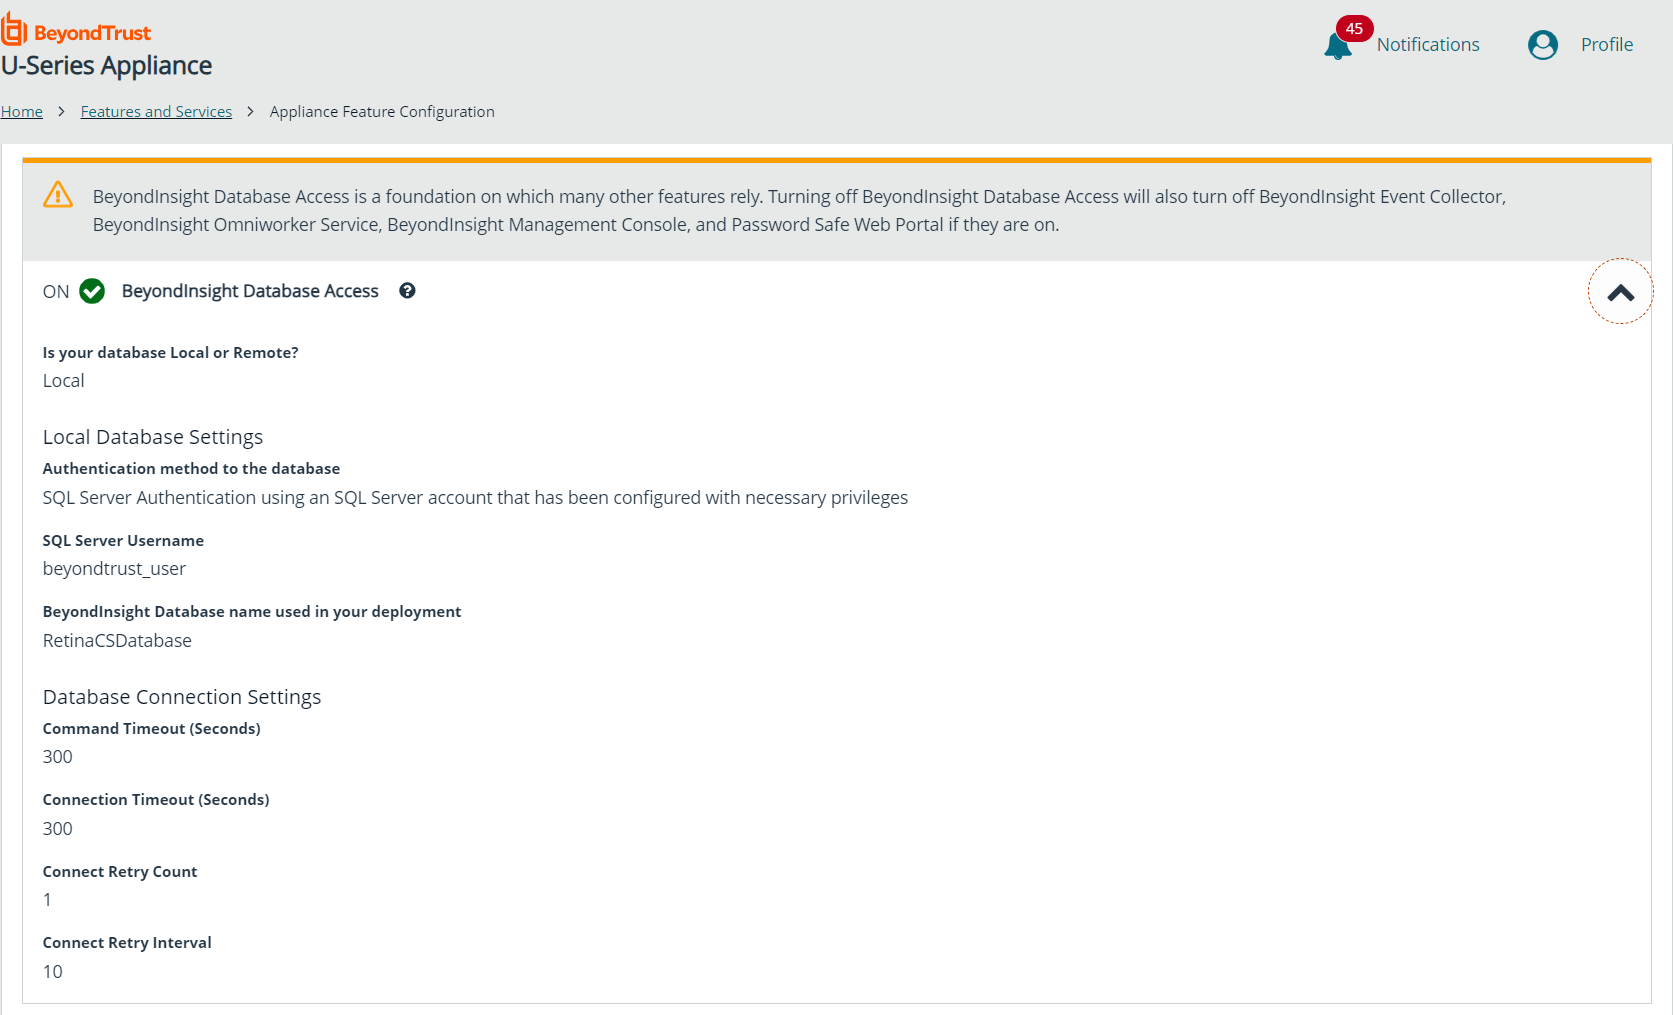
- Feature Configuration: From the Features and Services > Appliance Feature Configuration page on the source appliance, note the settings on the BeyondInsight Database Access feature. This must match what is on the target appliance after the restore.
If you are migrating from 2012 R2 OS, WSUS is not migrated, because it is not supported on 2022 OS.
Deploy or Import the Target Machine
Because there is no conversion method to upgrade your existing appliance to Windows 2022, you must deploy or import the appliance image package as a new machine into your environment. Refer to the VMware vSphere Client product documentation for deploying an OVF template and to the Hyper-V product documentation for importing a virtual machine.
Restore and Import Data from the Source Appliance
Once the target appliance has been deployed and configured for use in your environment, you must restore the backup of the source appliance on the target appliance.
Time estimate: 10 minutes (assuming 600MB U-Series Appliance backup file)
- Log in to the U-Series Appliance and navigate to Business Continuity > Backup and Restore.
- Copy the U-Series Appliance backup file created from the source to C:\LocalBackups on the target, or create a backup location that points to where the backup file exists.
RDP must be enabled to access C:\LocalBackups.
- Start a restore from the premigration backup.
- Wait until the restore completes.
Perform Postmigration Configuration and Verification
Once the restore is complete on the target appliance, you can create a backup schedule, configure BeyondInsight Analytics & Reporting, and set up high availability. We also recommend you verify the appliance settings, and that the BeyondInsight and Password Safe applications are set up and functioning the same as they were prior to migration.
Time estimate: 3 minutes
We recommend that you verify and configure, where necessary, the following items to confirm functionality of your newly migrated U-Series Appliance:
U-Series Appliance Settings
- Navigate to Business Continuity > Backup and Restore and schedule a new backup and confirm that it runs.
- From the Appliance Feature Configuration page:
- Verify the configured features match the feature configuration of the source appliance. Specifically, the BeyondInsight Database Access feature settings must match what was configured on the source appliance, as indicated above when collecting additional information from the source .
- Toggle specific features on or off as necessary and verify the changes are applied successfully.
BeyondInsight and Password Safe
- Confirm the database upgraded successfully:
- Run C:\Program Files (x86)\BeyondTrust\BeyondInsight\REMEMconfig.exe as administrator to open the BeyondInsight Configuration tool.
- Click the Test Connection link.
- If the Verify Database schema version field indicates that an upgrade to the database is required, click OK.
- Click the Upgrade Database link.
- When the database upgrade completes, close the BeyondInsight Configuration tool.
- Log in to BeyondInsight and confirm the following:
- Verify all assets are listed as expected on the Assets page and that the migrated U-Series Appliance is listed as a discovery scanner.
- Run a discovery scan to verify database writes.
- Confirm Analytics & Reporting is configured by clicking Analytics & Reporting from the left menu.
- If you are prompted with a warning stating Updates are available for server reporting components, navigate to Configuration > Analytics & Reporting > Configuration and follow the wizard to completion.
- Verify you can access your saved credentials from Configuration > Discovery Management > Credentials.
- From the left menu, click Password Safe and ensure you can access your archived sessions and that you can record new admin sessions.
- Use the BeyondTrust Discovery Tool commands to help verify that the BeyondTrust Discovery Agent (BDA) is able to communicate with BeyondInsight after the migration, as follows:
- On the server running BDA, open PowerShell as administrator.
- Type: cd 'C:\Program Files\BeyondTrust\Discovery\', and then press Enter.
- Type: .\btdiscovery.cmd <command> , where command is replaced with the command you wish to run.
- To list the commands available type: .\btdiscovery help.
Examples
Test Event Client Settings: btdiscovery teste
Test Central Policy Options: btdiscovery testc
Successful teste and testc command output: OK
- To list the commands available type: .\btdiscovery help.